Marvelous Designer - Some Questions
 BlueIrene
Posts: 1,318
BlueIrene
Posts: 1,318
Earlier today I downloaded the Marvelous Designer trial. The full version isn't in the budget for the forseeable, but I figured that after the thirty days are up I'd hopefully at least have learned something that might come in useful in the future and maybe even have got some new 3D clothes out of it too. I like the program a lot - it makes so much sense to me because I was a dressmaker for almost a decade and am impressed by the way a flat sheet of polygons can turn into a three-dimensional item of clothing in the same way that a flat sheet of fabric would. The dressmaking experience is a definite advantage in many ways, but it's a disadvantage in others. I can see as plain as day where something's gone wrong but am immediately whacked round the head with frustrating reality - it's not fabric after all and I haven't got the first clue how to fix it :)
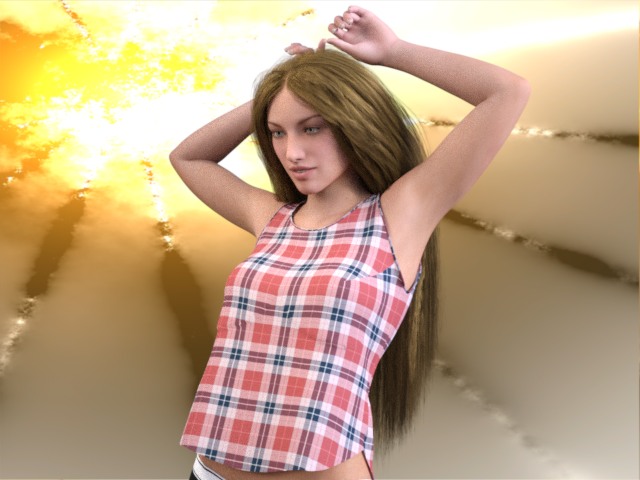
Anyway, here's tonight's effort. I started off with something simple so that I wouldn't encounter every difficulty at once. This one leaves me with two questions which I'm hoping the more experienced users on the forum might be able to answer. Firstly, nowhere does the garment actually touch the figure. It's not noticeable from a distance, but close up you can really see where the straps of the vest stand proud of the shoulders a bit. I was wondering if anyone knows how to fix this. The second thing is maybe more of a Daz issue than an MD one and something that I probably ought to know how to fix by now :) I'm talking shrink-wrapped boobage - you can see the fabric trying to disappear under Gen3's bust-line and the problem is even more pronounced with other poses.
Also, I wouldn't mind some newbie company if anyone else feels like downloading the trial for a bit of experimenting :)
Daz 3D is part of 
Connect
DAZ Productions, Inc.
7533 S Center View Ct #4664
West Jordan, UT 84084
Licensing Agreement | Terms of Service | Privacy Policy | EULA
© 2026 Daz Productions Inc. All Rights Reserved.
Comments
The patterns in MD are set to have an offset from the avatar of, I think, 3mm. If you click on the avatar and look in the property editor window you will see something called "skin offset". you can simply click it to set it down below 3mm but I think you may run into problems if you set it too low. Experiment!
You'll probably need to smooth the weight mapping around the breasts.. first change the texture on the shirt to all white or light grey so you can see what you're doing. Select the chest lower (probably) bone on the shirt, use the weight map tool, open the tool tab, click on general weights. You'll see that area of the shirt turn red-blue. Change the tool to smoothing in the top right corner of the tool tab. Change the strength of it to somthing lower like 25 so it's harder to mess up. Paint around the breasts the smooth out the gradient between blue and red. You >can< do it while it's posed so you can see what it's doing. You can also undo if you need to.
Try changing the particle distance of the material to 15 or even 10. This will make simulation slower but will give more wrinkles. Also you can choose a softer fabric preset which will also make the cloth drape better. These can all be found in the Property Editor Window.
Just remember that the lower the particle distance, the more geometry that is created. If you are going to retopo, it's not so bad, but if you're going to leave as is (for use in Studio), it could be problematic. If you have good topology, you can make more with less geometry. MD isn't concerned with good topology, just draping.
Adding SubD in DazStudio (or any 3D app) also helps bring out the wrinkles in the exported MD mesh, in my experience. It seems to restore a lot of the detail you see in your MD viewport but somehow goes lacking in your 3D app.
Hi Astracadia (and all...):
Coincidentally I just installed the Marvelous Designer 5 trial on my Mac yesterday. I have been hearing about it for a long time, and I finally decided to give it a good try. So I am definitely a noob, but happy to hook up with others so we can learn together.
I was able to export G3F (I put her in an A pose first) from DAZ Studio, and import her into MD. Now I am trying to figure out how to load in (or create from scratch if needed) Arrangement Points and Bounding Volume. I don't really understand these yet... Are they necessary, or just "nice to have?" Has anyone created them for G3F? Can I load a set made for G2? I found this tutorial, which looks helpful, but haven't figured it out yet: http://www.versluis.com/2015/03/how-to-import-daz-characters-into-marvelous-designer/
Any help would be greatly appreciated!
~ Russ
https://www.youtube.com/playlist?list=PLPrr1jMNJl6Lp5eoxqoc5CDh2SZzwYqKA
This is the best free MD tutorials I ever found.
She has a tutorial on bounding volumes and arrangement points, as well as making different clothes items.
Thanks
Just wanted to say thanks for the advice. I've been putting it into practice and things are looking a lot better. I'm still on the case here, with a bunch of clothes in various stages of completion (and accidental destruction!). I'll get so far and then realise I need to know something else, so I find a video and watch it, then get distracted by other MD videos, then I'll get inspired by them and get back to it, then I'll need to know something else and so go and find a video... I can't remember the last time I watched this much YouTube! It's an incredible program though. I keep discovering that it can do stuff I automatically assumed it couldn't possibly be capable of, so now every time I find myself wishing it had a particular feature I just find out where it is and how to use it. Which naturally means watching another video! I'm lucky that so many have taken the trouble to make them and that there are some really good ones out there. How are the other experimenters doing?
Has it become easier to get items from MD into DS? I seem to remember some old forum posts about some difficulties.
export obj.. import obj..
Still learning loads here (mostly why so many PAs are fond of 'short and clingy' variants :) ). Anyway, this morning I made myself a checkered fabric texture in Photoshop and life with Marvelous Designer has been a lot easier since. It's not pretty, but it's not meant to be. The squares are 1 inch by 1 inch, which makes it easy to eyeball measurements in the 2D window and just as simple to see in the 3D window where things are straining or sagging. The rows of different colours are helpful in determining where what's going on in one window relates to what's going on in the other. I generally use the texture just as it is, but for more complicated stuff I make more than one material, using the same texture but giving each a different diffuse colour so that things look less chaotic and it's easier to see what I'm doing. The final materials go on when I'm done. I expect the old hands have figured this out already and are using something similar, but the texture is below if anyone else wants it.
I have figured out the Bounding Volume and Arrangement Point stuff, and now I have a nice set made up for G3F. I think there is a way to save these out as a set, so if anyone wants to see what I've done, let me know.
I like your idea of using the checkerboard pattern, Astracadia! I will give that a go, thank you!
~ Russ
There is a Strain tab on the first row in the 3D window that will highlight all strain points for you.
Thanks, Wendy. I use the 'strain' tab quite a bit too, but I find that the fabric texture helps me pinpoint issues and translate what's going on in the 3D window to what needs doing in the 2D window more easily. It's also a bit less dazzling! I'm not coming up with the greatest of buttons at the moment and I think I need to adjust the placement points on my G3F because positioning sleeves that end up where I want them after simulation is a bit of a nightmare, but the MD people seem to have thought of everything and most of it is quite quick and easy once you've spent some time to find out how it works. I use Metasequoia 3D for modelling props, bits of environment etc, and have had a project on the go for months with that - an Austrian blind for a window, but I couldn't get it looking like anything I'd ever be remotely happy with. I started and finished that blind using Marvelous Designer in about ten minutes flat yesterday and it just looked so real. I can't rate the program highly enough.