Render Studio Iray - Overview Video...

Hi All

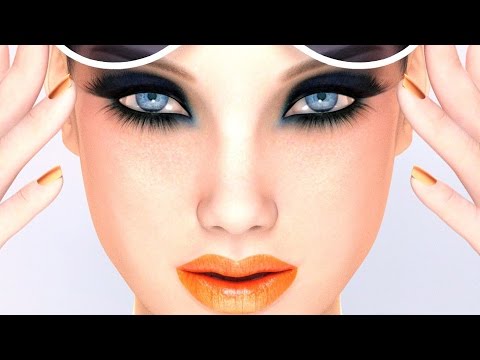
I have been asked by many to provide a video tutorial for Render Studio Iray. Well here it is..!  Just click the image to view.

It will be the first of many as I have created a new YouTube Channel specifically for tutorials, 3D/2D tips, content creation insights and more. So make sure you subscribe to be informed when there is new content uploaded.

You can also check out my Facebook page where I have been posting news, tips and more.  https://www.facebook.com/colmjackson3d/

Cheers..:-)

http://www.daz3d.com/render-studio-iray

http://www.daz3d.com/render-studio-iray-scenes

Comments

  • ThatGuyThatGuy Posts: 797

    Very nice.  I've been using Render Studio (Poser and DAZ Studio) products without a problem, but it's always nice to see the tutorial for tips/tricks that might be helpful.    I love your Render Studio products.  Please keep 'em coming :-)

  • Serene NightSerene Night Posts: 17,704

    This is an excellent product. In my opinion it makes most other light sets obsolete. Love it. So very useful!

  • KnittingmommyKnittingmommy Posts: 8,191

    I really learned a lot from watching the video.  Thanks for doing it!  I have used Render Studio a couple of times since I bought it, but couldn't figure out how to use a couple of things in the package.  This video answered the questions I had.  I wish I had seen this before uploading my latest render yesterday! I might changed the lighting somewhat.  I'll hopefully be playing with lighting a little more effectively now!  Looking forward to more tutorials! 

  • ThatGuyThatGuy Posts: 797
    edited April 2016

    stupid question here....how do you auto render in the auxiliary veiwport? I can't for the life of me seem to get it to do so.blush

    edited:  N/M.  I figured it out cool

    Post edited by ThatGuy on
  • KnittingmommyKnittingmommy Posts: 8,191
    ThatGuy said:

    stupid question here....how do you auto render in the auxiliary veiwport? I can't for the life of me seem to get it to do so.blush

    edited:  N/M.  I figured it out cool

    How about sharing? I can't figure out how to get the iray mode to even be an option!

  • ThatGuyThatGuy Posts: 797
    edited April 2016
    ThatGuy said:

    stupid question here....how do you auto render in the auxiliary veiwport? I can't for the life of me seem to get it to do so.blush

    edited:  N/M.  I figured it out cool

    How about sharing? I can't figure out how to get the iray mode to even be an option!

    Not sure what you mean....but if you click on Window>Pane Tabs>Aux Viewport, you will get a new screen tab, which is the auxiliary viewport.   In that screen, place your pointer anywhere on top to bring out the view style thingy magingy and choose "Nvidia Iray" and that's it.  It will basically "render" (I think progressively) your scene as you update it.  See the attached image for the info. You can do the same exact thing on your viewport screen too if you don't want the aux viewport.


    2016-04-30_2-57-19.jpg
    303 x 441 - 42K
    Post edited by ThatGuy on
  • ThatGuy said:

    Very nice.  I've been using Render Studio (Poser and DAZ Studio) products without a problem, but it's always nice to see the tutorial for tips/tricks that might be helpful.    I love your Render Studio products.  Please keep 'em coming :-)

    Thanks so much. I'm really glad that you like the products. I have lots of plans for new ones. Like the Poser versions, the Render Studio Iray products will be stand-alone and modular and they will be an ongoing series. Glad you liked the tutorial too. There are plenty more of them in the pipeline :-)

  • This is an excellent product. In my opinion it makes most other light sets obsolete. Love it. So very useful!

    Wow thanks. That's an amazing comment. I'm glad you like it :-)

  • I really learned a lot from watching the video.  Thanks for doing it!  I have used Render Studio a couple of times since I bought it, but couldn't figure out how to use a couple of things in the package.  This video answered the questions I had.  I wish I had seen this before uploading my latest render yesterday! I might changed the lighting somewhat.  I'll hopefully be playing with lighting a little more effectively now!  Looking forward to more tutorials! 

    Im glad you learned from watching it and that it answered some questions  I will be doing some shorter follow up videos focusing on specific aspects very soon. :-)


  • ThatGuy said:
    ThatGuy said:

    stupid question here....how do you auto render in the auxiliary veiwport? I can't for the life of me seem to get it to do so.blush

    edited:  N/M.  I figured it out cool

    How about sharing? I can't figure out how to get the iray mode to even be an option!

    Not sure what you mean....but if you click on Window>Pane Tabs>Aux Viewport, you will get a new screen tab, which is the auxiliary viewport.   In that screen, place your pointer anywhere on top to bring out the view style thingy magingy and choose "Nvidia Iray" and that's it.  It will basically "render" (I think progressively) your scene as you update it.  See the attached image for the info. You can do the same exact thing on your viewport screen too if you don't want the aux viewport.


    Thanks so much for posting this. It's a great way to really see what you are doing, especially with lights. :-)

  • fastbike1fastbike1 Posts: 4,078

    Let me add my thanks for the tutorial. I feel pretty comfortable with Iray, but the tutorial gave me some additional hints, tips and ideas. I'm always interested in hearing the creator talk about a product.

  • fastbike1 said:

    Let me add my thanks for the tutorial. I feel pretty comfortable with Iray, but the tutorial gave me some additional hints, tips and ideas. I'm always interested in hearing the creator talk about a product.

    Glad you found it useful. I am very pleased that it also helps seasoned users. :-)

  • ThatGuyThatGuy Posts: 797
    edited May 2016

    Out of curiousity, can you come up with something that will selectively render parts of the scene in BW and the rest in color?  Like, let's say leave the red lipstick color, but everything else in BW?

    Post edited by ThatGuy on
  • KnittingmommyKnittingmommy Posts: 8,191
    ThatGuy said:
    ThatGuy said:

    stupid question here....how do you auto render in the auxiliary veiwport? I can't for the life of me seem to get it to do so.blush

    edited:  N/M.  I figured it out cool

    How about sharing? I can't figure out how to get the iray mode to even be an option!

    Not sure what you mean....but if you click on Window>Pane Tabs>Aux Viewport, you will get a new screen tab, which is the auxiliary viewport.   In that screen, place your pointer anywhere on top to bring out the view style thingy magingy and choose "Nvidia Iray" and that's it.  It will basically "render" (I think progressively) your scene as you update it.  See the attached image for the info. You can do the same exact thing on your viewport screen too if you don't want the aux viewport.


    For some reason, none of that ever showed as an option for me in 4.8 and I only had the IPR thing.  I hadn't tried it since updating to 4.9, but it appears I now have those options and didn't realize it.  Thanks for the screen shot!

  • Jan19Jan19 Posts: 1,109
    edited May 2016

    Thank you for the tutorial. :-)  It fills in some gaps, and we get a new free scene.

    I needed that, and I sure need the specular eyelight tutorial that's upcoming.

    I like your DS Layout, so I copied it.

    Render Studio is proving to be a good investment.


    Post edited by Jan19 on
  • ThatGuy said:

    Out of curiousity, can you come up with something that will selectively render parts of the scene in BW and the rest in color?  Like, let's say leave the red lipstick color, but everything else in BW?

    I'm not really sure that is possible with my skills. A scripter might be able to do it. I think it would require something like tapping into the separate color channels. However. Keep the idea of black and white in mind :-)


  • Jan19 said:

    Thank you for the tutorial. :-)  It fills in some gaps, and we get a new free scene.

    I needed that, and I sure need the specular eyelight tutorial that's upcoming.

    I like your DS Layout, so I copied it.

    Render Studio is proving to be a good investment.


    I am really glad that it all helps. I will be hoping to get the specular eye light tutorial done this week :-)

  • Muon QuarkMuon Quark Posts: 567

    On a somewhat related note (I hope), I am on an iMac and was wondering what the ideal settings are for optimal performance.  I know I don't have the extra boost that you get from Windows nVidia but I want to make sure I have the preferences set up correctly for iRay even though it might take my iMac a little longer to render.

    I've been watching the video today and even with just the backdrop light and hard key light I'm getting great results even thought it's taking awhile to render.

    Thanks.

  • Colm JacksonColm Jackson Posts: 43
    edited May 2016

    On a somewhat related note (I hope), I am on an iMac and was wondering what the ideal settings are for optimal performance.  I know I don't have the extra boost that you get from Windows nVidia but I want to make sure I have the preferences set up correctly for iRay even though it might take my iMac a little longer to render.

    I've been watching the video today and even with just the backdrop light and hard key light I'm getting great results even thought it's taking awhile to render.

    Thanks.

    I'm not on a Mac so I couldn't possibly give you a Mac related answer. However when I use my PC laptop the graphics card is not great even thought it is Nvidia. The CPU takes most of the load when rendering and it is certainly very usable. Render time is much longer at high quality so unless I am rendering promos I always work at the lowest possible render settings and render high quality while I am doing other things. 

    I have a Titan X in my desktop so rendering is extremely fast at high quality. 

    Post edited by Colm Jackson on
  • SPACECHIMPSPACECHIMP Posts: 212

    Thank you so much for this tutorial I learned a lot ,been trying the Render studio but I was a bit lost,now it is all clear to me cant wait to try all the information out!

  • Thank you so much for this tutorial I learned a lot ,been trying the Render studio but I was a bit lost,now it is all clear to me cant wait to try all the information out!

    That's great Spacechimp. I'm very happy that it helped :-)


  • Hi All just wanted to let you know that I have a follow up tutorial video up on my YouTube channel showing how to set up the specular light for great highlights in the eyes. You can also download the light preset too. All I ask is if you download the files please consider subscribing to my channel. Oh yeah and please don't redistribute the files.:-) If someone needs them just send them to my channel to get them.

    The video also shows you how to set up an Auxiliary viewport for Nvidia Real Time Rendering.

    Here is the link:

    :-)

  • SiennaBlueSiennaBlue Posts: 224

    Thank you, so much, Colm, for the video tutorial.  It really helped me out.  I've just been working on a character preset using the light setup from the tutorial.  As you can see, there is a kind of "bullseye" on the character's head from the rim light.  Can you tell me what I may have done to cause this?  Thank you.  smiley

    Rim Light Question.jpg
    989 x 902 - 555K
  • Thank you, so much, Colm, for the video tutorial.  It really helped me out.  I've just been working on a character preset using the light setup from the tutorial.  As you can see, there is a kind of "bullseye" on the character's head from the rim light.  Can you tell me what I may have done to cause this?  Thank you.  smiley

    I have to say I have never encountered that and haven't got a clue what it is caused by. The only thing I can suggest is that the light is reacting in some way with something in the skin shader. Try changing the shader and see if it still happens. If it does I would say it could be something for the Daz Studio technical team. Sorry I can't be of more help :-)

  • SiennaBlueSiennaBlue Posts: 224

    Thank you, so much, Colm, for the video tutorial.  It really helped me out.  I've just been working on a character preset using the light setup from the tutorial.  As you can see, there is a kind of "bullseye" on the character's head from the rim light.  Can you tell me what I may have done to cause this?  Thank you.  smiley

    I have to say I have never encountered that and haven't got a clue what it is caused by. The only thing I can suggest is that the light is reacting in some way with something in the skin shader. Try changing the shader and see if it still happens. If it does I would say it could be something for the Daz Studio technical team. Sorry I can't be of more help :-)

    You were a HUGE help!  lol  I reapplied the skin shader from Gianni 6 and then used the "Iray Optimized Genesis 2 Male MAT" and it looks fine.  I bet I just forgot to apply the Iray mat.  Feel dumb, now.  blush  Thank you, very much, for the help.  I love this product!

    Rim Light Question2.jpg
    989 x 902 - 506K
  • Thank you, so much, Colm, for the video tutorial.  It really helped me out.  I've just been working on a character preset using the light setup from the tutorial.  As you can see, there is a kind of "bullseye" on the character's head from the rim light.  Can you tell me what I may have done to cause this?  Thank you.  smiley

    I have to say I have never encountered that and haven't got a clue what it is caused by. The only thing I can suggest is that the light is reacting in some way with something in the skin shader. Try changing the shader and see if it still happens. If it does I would say it could be something for the Daz Studio technical team. Sorry I can't be of more help :-)

    You were a HUGE help!  lol  I reapplied the skin shader from Gianni 6 and then used the "Iray Optimized Genesis 2 Male MAT" and it looks fine.  I bet I just forgot to apply the Iray mat.  Feel dumb, now.  blush  Thank you, very much, for the help.  I love this product!

    You are very welcome. I'm glad we got it sorted out :-)

  • KnittingmommyKnittingmommy Posts: 8,191

    Thank you, so much, Colm, for the video tutorial.  It really helped me out.  I've just been working on a character preset using the light setup from the tutorial.  As you can see, there is a kind of "bullseye" on the character's head from the rim light.  Can you tell me what I may have done to cause this?  Thank you.  smiley

    I have to say I have never encountered that and haven't got a clue what it is caused by. The only thing I can suggest is that the light is reacting in some way with something in the skin shader. Try changing the shader and see if it still happens. If it does I would say it could be something for the Daz Studio technical team. Sorry I can't be of more help :-)

    You were a HUGE help!  lol  I reapplied the skin shader from Gianni 6 and then used the "Iray Optimized Genesis 2 Male MAT" and it looks fine.  I bet I just forgot to apply the Iray mat.  Feel dumb, now.  blush  Thank you, very much, for the help.  I love this product!

    It happens to all of us at one time or another!

  • SiennaBlueSiennaBlue Posts: 224

    Thank you, so much, Colm, for the video tutorial.  It really helped me out.  I've just been working on a character preset using the light setup from the tutorial.  As you can see, there is a kind of "bullseye" on the character's head from the rim light.  Can you tell me what I may have done to cause this?  Thank you.  smiley

    I have to say I have never encountered that and haven't got a clue what it is caused by. The only thing I can suggest is that the light is reacting in some way with something in the skin shader. Try changing the shader and see if it still happens. If it does I would say it could be something for the Daz Studio technical team. Sorry I can't be of more help :-)

    You were a HUGE help!  lol  I reapplied the skin shader from Gianni 6 and then used the "Iray Optimized Genesis 2 Male MAT" and it looks fine.  I bet I just forgot to apply the Iray mat.  Feel dumb, now.  blush  Thank you, very much, for the help.  I love this product!

    It happens to all of us at one time or another!

    lol I know, but I seem to live in the "dumb zone" too often anymore.  I'm workin' on it, though.  I appreciate the comment.  smiley

Sign In or Register to comment.