-
-
-
-
$29.95
Optional License Add-Ons:
$1.99*Unless otherwise specified, no discounts or offers will apply to License Add‑Ons.
Optional License Add-Ons:
$1.99*Unless otherwise specified, no discounts or offers will apply to License Add‑Ons.
-
This product is in this bundle
-
Details
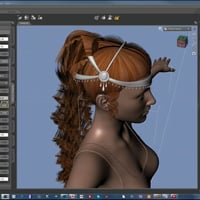
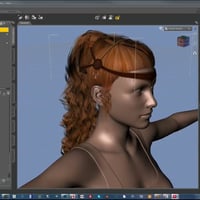
Have you wanted to create attractive hair for DAZ Studio, but got stuck on knowing where to start and how to handle a project such as this?
Arki (Kim Schneider) breaks down this project in detail, simplifies the approach and takes you through the steps in this three part tutorial (this is Part 3). This was originally broadcast as a series of live webinars to a class that followed along with her techniques and created their own hair sets.
Requirements: Familiarity with Hexagon and basic modelling techniques
Video length: 2 hours
Tutorial video includes indexing so you can click and jump to different topics with ease.
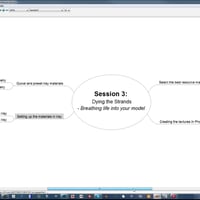
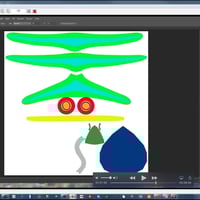
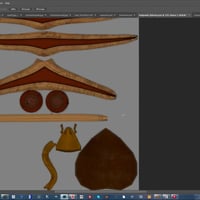
Part 3 : Dying the Strands - Breathing life into your hair model
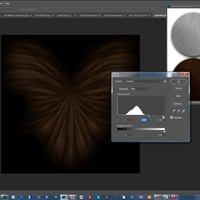
1 - How to select the appropriate texture photos for skullcap and hair strips
* The different texture maps needed for the skull cap and the hair strands - and how to find them
2 - Texturing in Photoshop
* Working with the base photo reference material to create the hair texture
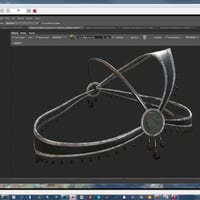
3 - Base material setup in DAZ Studio
* A very quick walk-through how to create Iray hair materialsAbout the Presenter : Kim Schneider (Arki)
Kim attended the University of Applied Sciences in Münster, North Rhine-Westphalia where she received a Bachelor of Arts degree in Media Design and Illustration.
Over the years Kim has done work in the role-playing game industry applying her illustration skills for RPG games such as Engel for Feder & Schwert, Redaktion Phantastik, and the Pegasus Spiele game—Call of Cthulhu.
Her journey into 3D Digital Art began in 2000 with Poser (yes fourteen years of Poser experience!), then Poser Pro and started vending Poser content in 2006. She's since been now hard at work at creating content for Daz Studio.
She delves into other packages occasionally including Photoshop, Quixel, ZBrush, Hexagon, UV Mapper Pro and UV Layout in her workflow.
What's Included and Features
- Detailed Tutorial Contents:
- 00:00:00 Intro
- 00:01:17 Example of Final Product
- 00:01:45 Review of the Process
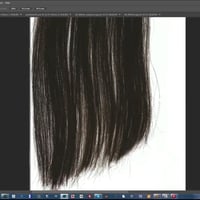
- 00:05:20 References for texturing hair
- 00:09:16 In Photoshop (PS) Scan of hair extensions
- 00:11:16 Slideshow of creating transparency maps for the hair in PS
- 00:18:17 1st Q&A
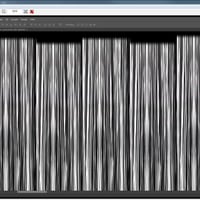
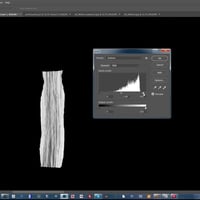
- 00:21:38 Demo in PS of how to create the transparency Maps
- 00:22:26 Choosing a Transparency Base in Photoshop
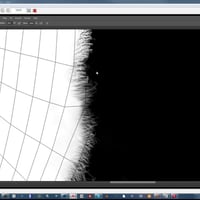
- 00:24:56 Need the Hair strands white on black background
- 00:25:15 Desaturating the color
- 00:25:31 Inverting the Color
- 00:25:40 Adjusting the Levels
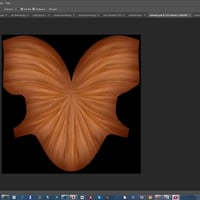
- 00:26:32 Placing and Covering the Template with the Sample
- 00:27:53 Duplicating and Blending the transition
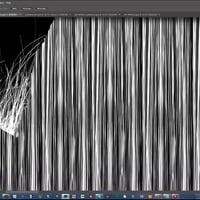
- 00:29:42 Filling the Template with the Strand
- 00:31:49 The Template Filled with the Strands
- 00:32:15 Fixing the Top of the Template which represents the "hair parting"
- 00:37:07 2nd Q&A
- 00:43:13 Creating the hair line for the Skull Cap
- 00:50:02 3rd Q&A
- 00:52:28 How to create a Transparency Map that is Denser
- 00:54:13 Reducing Density in a Transparency Map
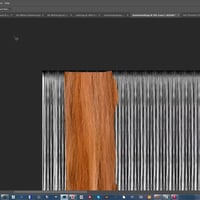
- 00:56:03 Creating the Diffuse Maps
- 00:56:13 Transparency Map dictates the Diffuse Map Scale
- 00:59:26 Final Diffuse Map
- 01:00:53 Trick with darkening part of the Diffuse Color Map
- 01:01:37 Adding a Blur Filter and Multiply on the Darker Area
- 01:02:39 Darkening the Root Areas of the Skull Cap
- 01:03:27 Skull Cap Diffuse Texture Map
- 01:05:35 4th Q&A
- 01:07:59 Range of Colors for Diffuse Maps
- 01:15:25 5th Q&A
- 01:17:00 Quixel Slideshow
- 01:18:43 Quixel Can't Read Materials from the Mesh
- 01:19:10 Creating an Index or Blockout Map to use with Quixel
- 01:20:11 The Index Map used in Conjunction with the Mesh in Quixel
- 01:21:42 Material Library in Quixel
- 01:22:47 Changing Diffuse Colors in Photoshop from Quixel Generated Maps
- 01:23:54 Quixel Curvature Map
- 01:25:50 6th Q&A
- 01:28:03 In Daz Studio, setting up shaders
- 01:26:16 Basic Walkthrough of Creating a Shader
- 01:31:30 Creating a Bump Map
- 01:32:25 Creating a Specularity Map
- 01:34:08 Setting up the different density maps in DS
- 01:35:04 Demo of a more advanced shader setup
- 01:38:47 Final Q&A
- 01:42:29 Shader Presets that ship with DS
- 01:44:20 Final Q&A
- 01:54:08 End Credits and Links
Notes
- This product includes:
- 1 General Installer
- Detailed Tutorial Contents:

Daz 3D is part of 
Connect
DAZ Productions, Inc.
7533 S Center View Ct #4664
West Jordan, UT 84084
Licensing Agreement | Terms of Service | Privacy Policy | EULA
© 2026 Daz Productions Inc. All Rights Reserved.