-
-
-
-
$69.99
Optional License Add-Ons:
$1.99*Unless otherwise specified, no discounts or offers will apply to License Add‑Ons.
Optional License Add-Ons:
$1.99*Unless otherwise specified, no discounts or offers will apply to License Add‑Ons.
-
Details
Are you a DAZ Studio artist or content creator? Do you often find yourself wondering about the capabilities that lie beneath the interface of your favorite 3D software? Whether you’re a published artist seeking efficiency or the ability to make new types of products, or just curious about the ‘magic’ behind the scenes, this video tutorial set was designed specifically for you!
This video course is about empowering you to take full control of DAZ Studio, optimize your workflow by automating repetitive tasks, and tap into the unseen potentials of the DAZ Studio platform using scripting.
Here’s why this course can help get you scripting:
Foundational and Advanced Knowledge: Whether you’ve always wanted to delve deeper into DAZ Studio’s mechanics, desire specific control over characters or scenes, or you’re just caught up in a maze of repetitive tasks; this course has got you covered. Dream of being a PA or crafting script products? This will provide a great knowledge foundation for that goal!
A Clear Roadmap: The thought of scripting can be daunting, especially if you’ve never dabbled in it or any other programming language. But worry not! This course starts from the absolute basics, ensuring you’re never left overwhelmed or lost. Mike D is here to illuminate the path, step by step. He takes you through building four different scripts and most essentially teaches you how to traverse and manipulate any given set of nodes in a scene.
Unrivaled Expertise: Learn from the best in the business! Mike D, your course instructor, boasts 6 years of scripting experience. Having crafted hundreds of successful scripts for DAZ Studio, his solutions have been game-changers for countless artists and PAs. Mike’s unique insights and practical know-how ensure that you’re learning from a seasoned expert.
Dive in and revolutionise the way you see and use DAZ Studio!
Total running time : 6 hours and 28 minutes
Video format : MP4 video files with HD 1920 x 1080. Searchable version included with subtitles.
Scripts Included
Product Includes Scripts Built in the course and includes a super useful "Widgets Demonstration for Dialogs" script, having UI control examples and an initializing code for each widget, including a link to the DAZ documentation for each control.
Part 1 : Foundation – A First Look
- - Advantages and Disadvantages of Scripting
- - What is DAZ Scripting?
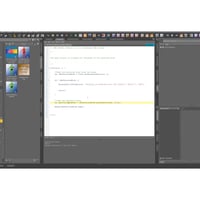
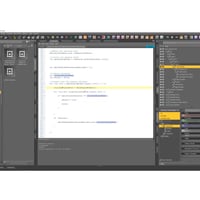
- - Which application to work with (DAZ Scripting IDE)
- - Object Oriented hierarchy
- - Building an example “Partially lock a figure's hierarchy for posing”
- - Variables
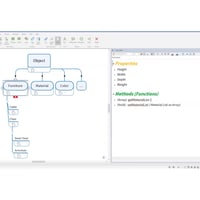
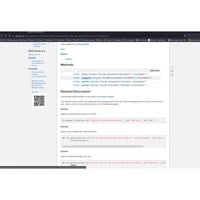
- - DAZ Objects documentation
- Constructors
- Properties
- Methods
- Signals
- - Using DAZ objects syntax
- - Global Objects
- - Comments in script code
- - Arrays How to a dd more elements.
- - Accessing an array’s elements
- - Loops – Documentation
- - The “for” loop
- - Functions
- Arguments
- Returned object
- - Breaking the script Debugging and messaging
- Debug, Print and Message
- - Conditional forms
- The if statement
- - Create a second script Altering the above example to “Unlock a figure’s hierarchy”
- - Using Object hierarchy
- Using the skeleton of a bone
Part 2 : Going deeper
- - Modifying the lock/unlock script to “Lock everything else but the selected node’s
- children:
- Loop in loop (nested loops)
- Array's functions-Focus on “Filter” an array
- - Making a script to make visible/invisible every scene light but the selected current light’s influence on the scene.
- - Use the scene object
- - Check if the current node is a light using inheritance
- - Using functions
- - Using the “Data Item”
- A deeper look at “Simple Element Data”
- Using settings: Set some values and Get a specific value
- - Using the Element’s ID as a unique identifier
- - Take only the “root” node for each item in the scene having a “shape”
- Using the DzObject and the DzShape
- - Take the materials (surfaces) of an item
- - Use a material property
- Find the property
- Get the property’s value
- Set the property’s value
- - Use the Color object
Part 3: Building a User Interface
- - User Interface Dialogs
- - Building a script to show a color’s hex name and vice versa
- - Using a DAZ Sample
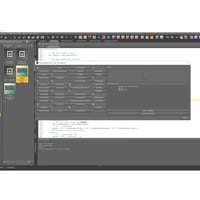
- - Basic Dialog
- - DAZ Objects used in dialogs – widgets
- - Adding some elements to the dialog
- Horizontal and Vertical Groups
- Line Edit
- Push Button
- Color Widget
- - Slots and Signals How to make our buttons active
- Code for the line edit s button to show the color
- Code for the color widget's button to show the color’s name
- - Accept and Cancel buttons
- Code the Accept button to copy the color's name to the clipboard
- Code the Cancel button to exit the script
Sample video
About Mike D
Mike lives in Greece. He studied Chemistry/Biochemistry at the University of Ioannina. At the same time, he joined the Students Photographic Club of the university. After graduation, he worked as a Chemistry and Biology teacher at high schools. As time passed by, he realized that the students preferred watching a visual representation of a topic rather than reading about it from an endless text. In order to meet their needs, he started learning about 3D and animation.
It was October of 2016 when he decided to design and program a website containing all the visual work he had done so far. So, www.mikededes.com was born. It contains a lot of photos, timelapses, and 3D projects.
At the same time, after watching a lot of webinars, mostly from Digital Art Live, various tutorials, and reading about advanced 3D techniques, he managed to create his own 3D commercial items. After a few months, he became a PA in DAZ 3D. In the next couple of years, he gradually reduced his teaching hours in order to devote himself to working as a full-time content creator for DAZ 3D. He has released a lot of products ever since.
Now, his main arsenal includes 3D Max, ZBrush, UVLayout Pro, Substance Designer, Substance Painter, Photoshop, and Marvelous Designer. He likes to create Props, Clothes, and Environments, but mostly Scripts. “There is one or more scripts in almost every one of my products, to maximize the user experience, even if the user doesn’t even know about their existence!”, as he says.
In his spare time, he likes watching movies and playing a good PC game with his girlfriend. Photography remains his hobby today.
What's Included and Features
- Beginners Guide to Scripting in DAZ Studio
- Part 1a : 35 minutes (.MP4)
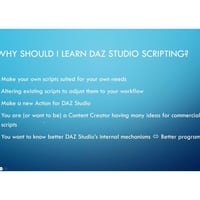
- Studio scripting enables custom script creation to cater to individual needs and streamline workflows.
- Scripting allows modification of existing scripts to fit personal workflows and understand the underlying code.
- New functionalities, not present in the studio, can be introduced through scripting.
- Scripting benefits content creators aiming for commercial script development or enhancing their understanding of the studio's internal mechanisms.
- Being a proficient programmer in the studio improves user experience and vice-versa.
- Object-oriented scripting in the studio organizes software design around data and objects, inheriting properties from parent to child classes.
- Objects are theoretical constructs with properties, methods, and signals.
- Documentation on various objects for DAZ Studio
- Bones in the studio inherit properties from nodes, with DzBone inheriting from DzNode.
- Scripting in the studio requires declaring variables with specific naming conventions, including scope considerations.
- Arrays can be constructed in multiple ways and are collections of items; they start with index 0.
- The provided example script will allow locking of specific bones for posing purposes.
- Part 1b : 1 hour 13 minutes (.MP4)
- The video covers building a script for selecting nodes and their children in a scene.
- The goal is to select any node, such as a shoulder, and lock its children to apply poses without affecting locked parts.
- Going through the manual steps of this to demonstrate time-saving.
- The importance of comments in the script for readability and maintenance.
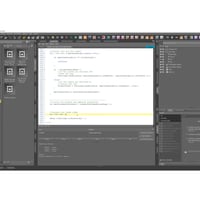
- Debugging is essential, using the print method.
- The code examines the condition of an object in a scene.
- About exclamation marks for inverting a Boolean value.
- The "message method" (message box) for communicating with the user
- The script checks if the selected node is a bone. If true, it retrieves the skeleton. If not, it sends a message indicating that the selection isn't valid.
- The push method adds elements to an array, and in this script, it's used to include the primary selection with its children nodes for further operations.
- Video demonstrates how to handle arrays, elements, and indices in coding.
- Explains the use of loops, iterating through elements in an array.
- Demonstrates how to lock rotation for x, y, and z axis by writing a subroutine.
- Explains error handling, showing what happens when syntax is incorrect, such as missing brackets.
- Part 2a : 1 hour 27 minutes (.MP4)
- The video dives deeper into object-oriented programming, reviewing variables, subjects, and inheritance.
- It reviews the previous script, explaining why certain things were done.
- The video explains making the script "prettier" by adding more methods and commands.
- There's a discussion about using loops.
The tutorial looks at turning lights off in a script, understanding if statements, and the hierarchical nature of objects in the studio. - The script unlocks all child nodes of a figure.
- It checks if the selected node inherits from a bone.
- The script gathers all child nodes from the selected node, allowing unlocking from the root item.
- An undo action is provided to revert any changes made.
- The script can also lock all parts of a figure except the selected ones.
- Nested loops are introduced to compare and filter which nodes should be locked or unlocked.
- The script checks whether a given node exists within a specific area. If it does not find the node, it adds it to a new array for further action.
- A flag named "be found" is used to track the status of the search.The flag is reset before each new iteration to ensure accurate tracking.
- The script introduces the concept of "nested loops" and demonstrates a more efficient method to filter nodes using the "filter function". This avoids the complexity of the nested loops and streamlines the process.
- The tutorial covers the creation of a script to control light visibility in a scene. The script automates the process of turning off all lights except the selected one.
- There's a suggestion to further improve the script by adding a toggle function, which would enable users to switch between turning all lights off except the selected one and turning them all on.
- Part 2b : 1 hour 22 minutes (.MP4)
- Mike introduces a script that can toggle the visibility of all lights except the selected one.
- The script checks if any other light apart from the selected is visible; if one is visible, all lights are turned off, if none are visible, all lights are turned on.
- Mike uses the "isVisible" method to check the light visibility.
- He considers a more complex scenario where the user might want certain lights to always remain off.
- Data items can be thought of as folders with information attached to nodes, and Mike shows how to retrieve or create these data items.
- The user is demonstrating how to manage data items within a software studio.
- Data items can be added to nodes using the add data item method.
- The function checks if data items with a specific name exist. If not, it creates one.
- Data items are used to save the status of lights (on/off) in the scene.
- Users can retrieve or save data to these items using methods such as set boolean value.
- Using names or labels for lights is unreliable due to potential duplicates or renames by users.
- The element ID is a unique and persistent identifier for each object in a scene, making it safer for tracking lights.
- The script toggles visibility of lights based on their current state and saves their state using their element IDs.
- The script can also handle emissive surfaces from objects, not just lights, by checking their colors.
- To fetch the material for a scene item, one must first retrieve its shape, which can differ from the object's mesh.
- The video describes how to create a function to identify the shape of a given item in a 3D scene.
- All items in the scene are considered nodes, with some being cameras, lights, etc. The function checks if an item has an object and if that object has a shape.
- A separate function is introduced to filter and return an array of all items in the scene that have a shape, excluding bones, cameras, and lights.
- After collecting items with shapes, the tutorial then explains how to retrieve the materials or surfaces associated with those shapes.
- Mike demonstrates how to iterate through various materials, extract properties, and find specific attributes like the "emission color" using methods like "find property."
- About switching emission colors on or off, checking for black color and saving or retrieving the color value from the settings.
- The script's functionality is tested in real-time, demonstrating how it changes material colors in the program's viewport and surfaces tab.
- Part 3 : 1 hour 51 minutes (.MP4)
- Demonstrates how to use a script, including its commercial application and selling it on a store.
- It explains how to add widgets and items to dialogues, discusses signals and slots to make dialogues more responsive.
- The primary goal is to identify a color hex code or find a color using its hex code.
- There's a function to copy the hex code directly to the clipboard.
- The video references an external URL from Adobe that allows users to paste a color code and get related colors.
- The video provides an overview of creating and modifying a user interface dialogue in DAZ Studio, using examples and sample code.
- The video teaches how to use the "add widget" method to incorporate an existing widget into a dialogue, focusing mainly on the primary argument which is the child's name.
- There is an emphasis on the widget's hierarchy, indicating that only widgets directly parented to the main dialogue need to be added.
- The video provides steps to design and modify the user interface, such as adjusting widget heights, changing button text, enabling or disabling buttons, and hiding unnecessary buttons.
- The latter part focuses on making the script interactive, demonstrating the use of signals and slots to connect buttons with specific functions, ensuring user interaction results in the desired outcome.
- The user explores different signals for a button and emphasizes the importance of the 'clicked' signal, which they integrate into their studio.
- A slot function is created to be triggered when the button is clicked, named 'hex button is clicked'. Another function for a second button, 'color button is clicked', is also set up.
- Functions retrieve and display the hex code of a chosen color. If the 'find hex code' button is pressed, the 'accept button' is enabled.
- The program checks if a color hex code is entered. If not, the 'accept button' is disabled, and the user is alerted.
- Comments are made throughout the script for clarity, with mentions of potential improvements and corrections.
- The code verifies the validity of a hex color code; if not valid, it disables the "copy to clipboard" button and notifies the user.
The system checks whether the entered hex color starts with a hash ("#") sign. If not, it adds one.
There's an added functionality to ensure the color entered exists. If it's not a valid color, it prompts the user and prevents further actions.
Adjustments are made to the display, including widening the "copy hex code" button for better readability.
The "accept" button, when pressed, selects all text in the line editor and copies it to the clipboard. - The speaker demonstrates picking a new color, finding its hex code, and then copying it to a notepad application.
- There's a discussion on the difference between setting overlay color versus base color in a tool called DOES studio. The speaker highlights the utility of the diffuse overlay weight channel to maintain texture details while changing colors.
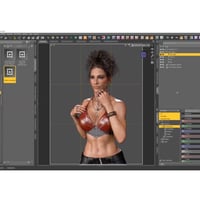
- Mike shifts to scripting and explains how to manage the visibility of nodes and bones in a scene, using the example of an Olympia nine figure. Bones are explained as special nodes within rigged items.
- The video explains the concept of toggling visibility – if an item is currently visible, the script will hide it, and vice versa.
- Mike finally lays down a challenge to create a new script combining features from previous webinars, with a user interface with buttons to run the other scripts in the course.
- ScriptingForBeginnersSearchableVersion.pdf (.PDF)
- Link for searchable version of tutorial set.
- MikeD-Scripts-Made-In-This-Course
- Scripts made in the course
- Includes a super useful "Widgets Demonstration for Dialogs" script, having UI control examples and an initializing code for each widget, including a link to the DAZ documentation for each control.
Notes
- This product includes:
- 2 General Installer


Daz 3D is part of 
Connect
DAZ Productions, Inc.
7533 S Center View Ct #4664
West Jordan, UT 84084
Licensing Agreement | Terms of Service | Privacy Policy | EULA
© 2026 Daz Productions Inc. All Rights Reserved.