-
help with identifying models
The one with the Dragon Fly is Victoria 7.
Imperfection morphs for G3 F/MA morph to do face asymetries would be good. For beautiful realistic people you could vary a few % and for ugly people you could have greater % to create weirdness and deformities. e,g Left face Victoria 6 = 78%, Ella = 23%, Right face Victoria 6 = 74%, Ella = 30%
Getting hair to fit LY CayenneThe hair is for Victoria 4, you are using it on Genesis 3 Female. Are you using AutoFit to convert it (with an add-on for Victoria 4 compatibility, or by going from Victoria 4 to Genesis to Genesis 2 Female to Genesis 3 Female)? That will remove any special bones for posing the tail. A better approach is often not to fit the hair but to use its transforums to line it up with the head (or slightly clipping into the head), then parent it to the head - that way you still have the bones, if any, in the tail and can pose it to fit. If you set the hair so it fits or is slightly inside the head then select the hair use Edit>Figure>Geometry>Apply Smooting Modifier, then under mesh Smoothing in the editor tab of the parameters pane set the Collision target to Genesis 3 Female - that should pop any bits thata re digging in back out.
oh yes, Richard is correct (of course). The hair needs to be parented in place to be able to use all the built in morphs.
Babes on a BudgetI made a new character that I'm enjoying a lot. I think she's really lovely and I'm having fun doing some pinup renders of her (just fun and light stuff to take my mind off of the crazy things happening). :)
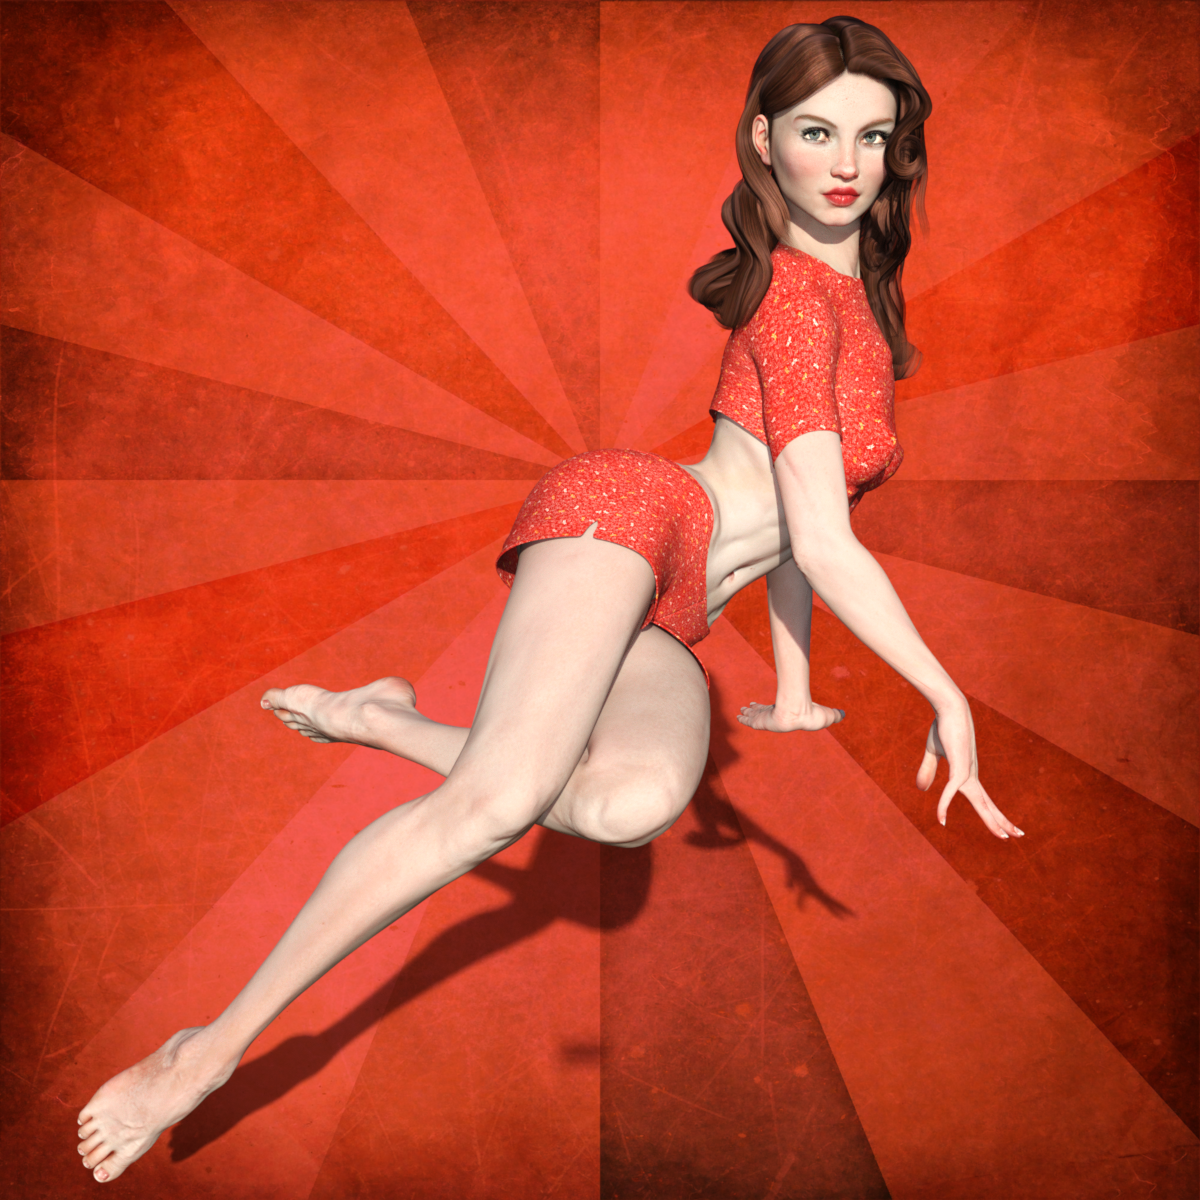
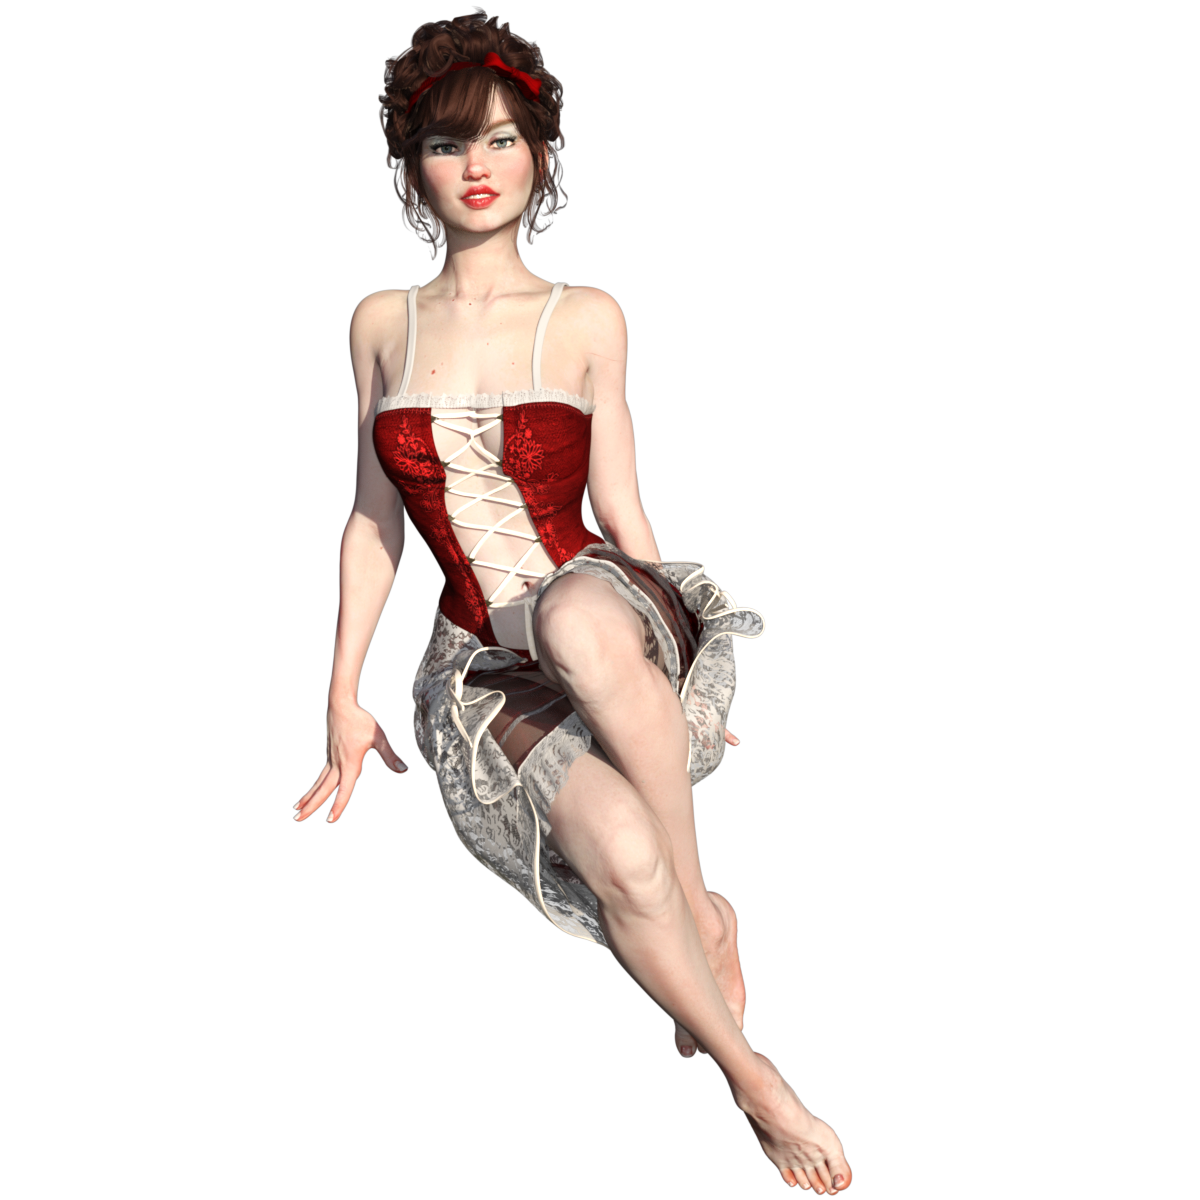
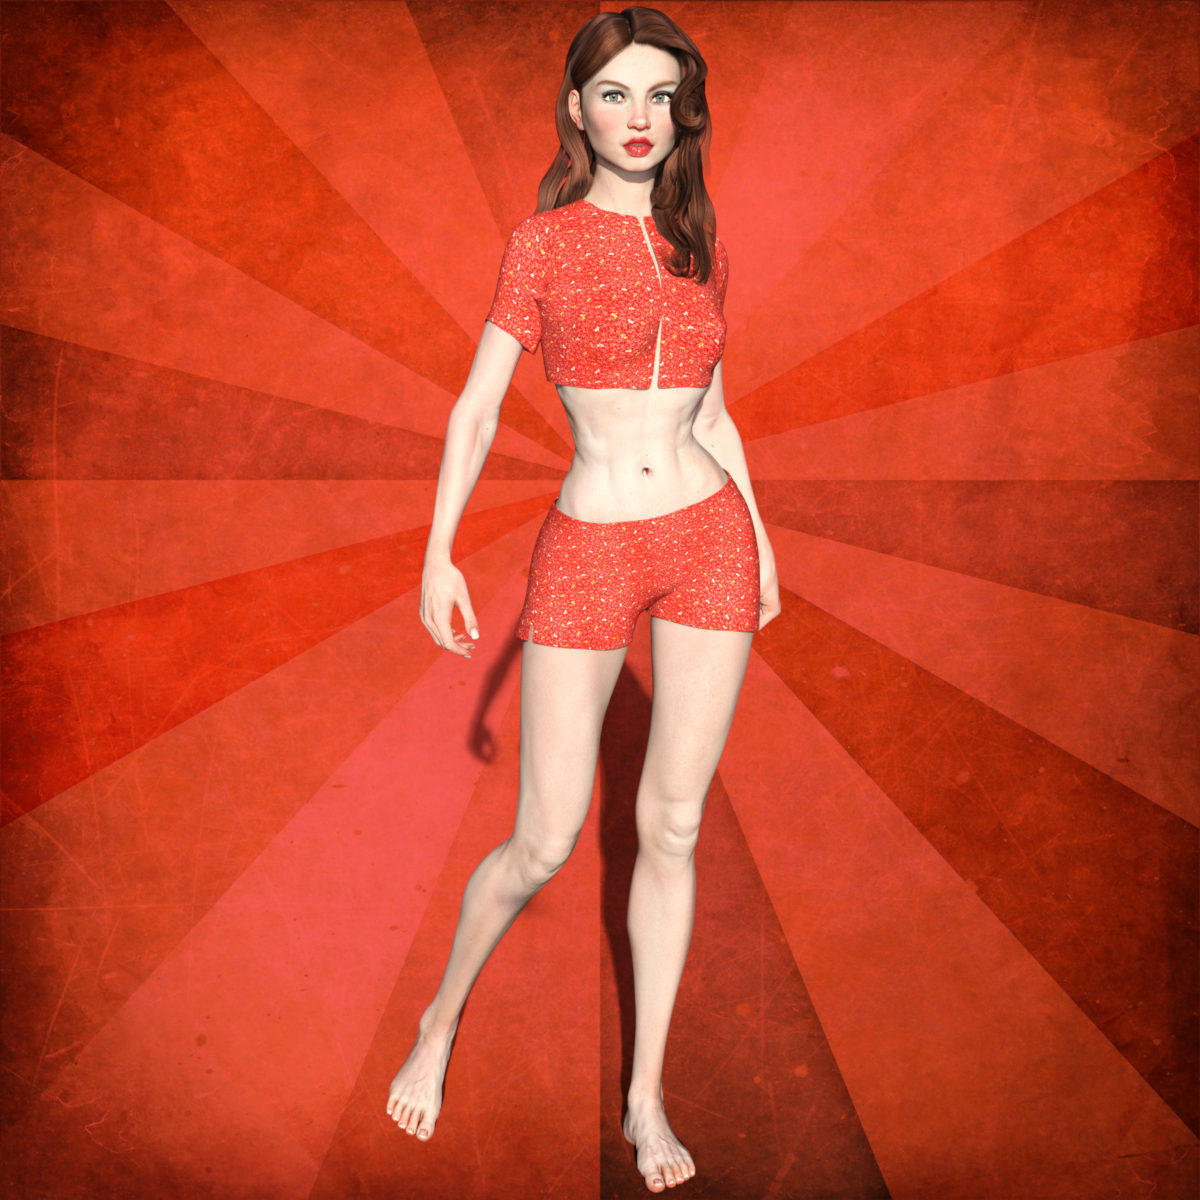
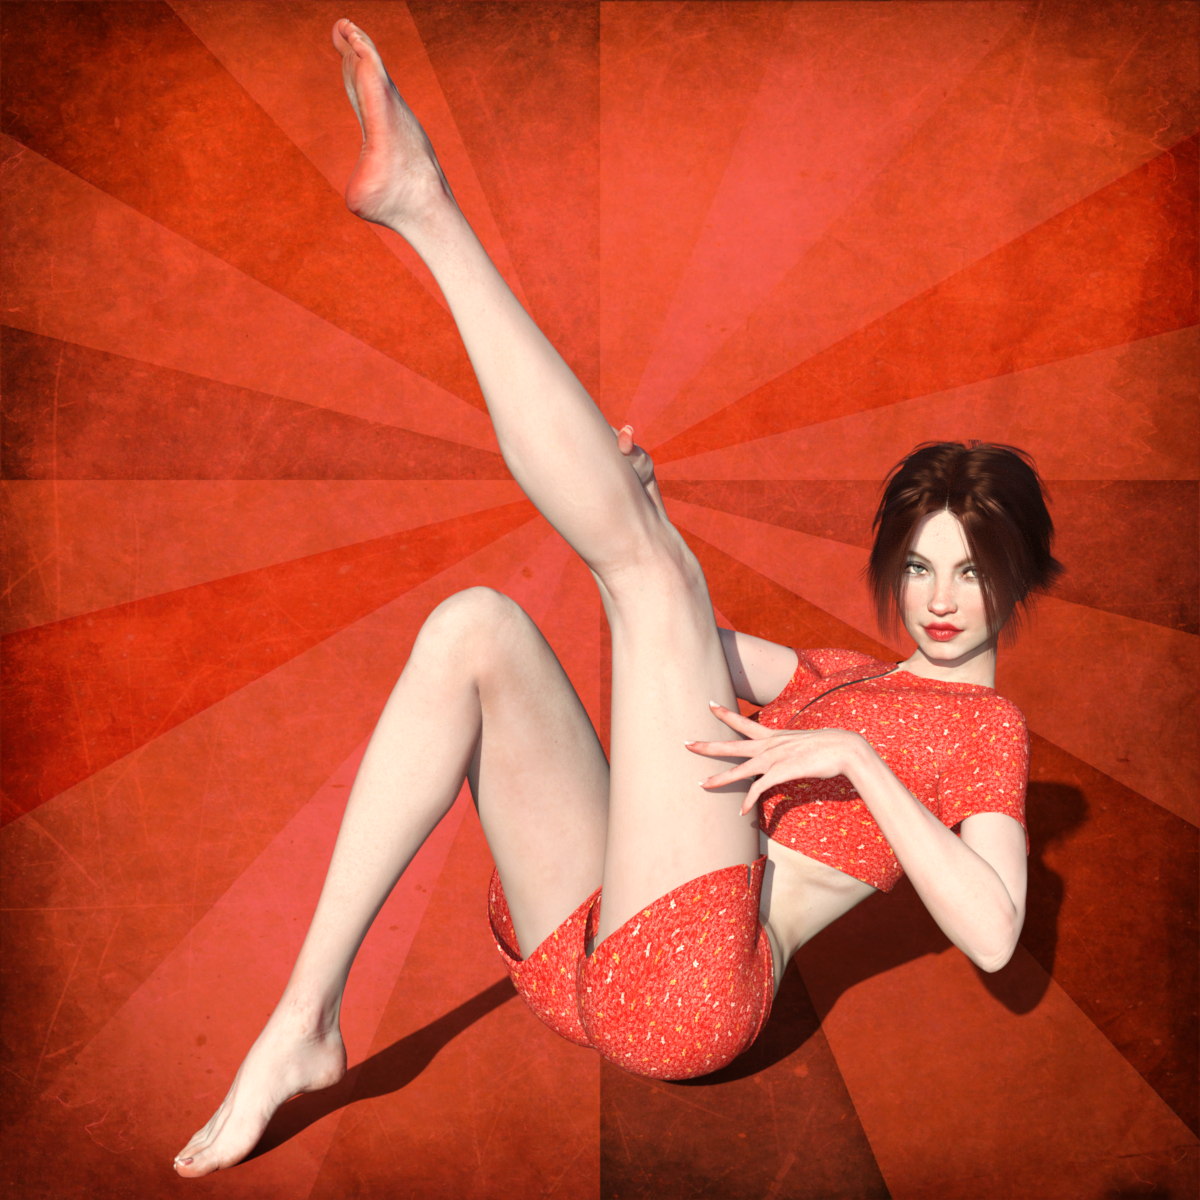
She's a mixture of Gwennili, Valoria, and Alieta. I kind of made her by accident. Just adding a little of this, a little of that - then I'm like, oh cool! She looks cute! lol I'm not sure what to name her though. Any suggestions? :)
My favorite character is still Athyn, but I'm definitely going to need a name for this new character. I can see that I'll be rendering her a lot as I think she's lovely! I really like ending my character names with "yn". I have Valyn and Athyn. Many of you guys are pretty creative. Any suggestions? :)
Knittingmommy's LaboratoryI was installing some new stuff. While DS was busy, I decided to take my Victoria 7 render into Gimp 2.9 and try a little bit of postwork. It is amazing what a little bit of postwork can do to an image. The more I learn to do postwork, the more I like it. :)
What a difference! Skin looks fantastic, and the glossiness/bumps on her lips looks particularly good.
Be sure to trap your process to make sure you can reliably duplicate it in the future!
- Greg
Knittingmommy's LaboratoryI was installing some new stuff. While DS was busy, I decided to take my Victoria 7 render into Gimp 2.9 and try a little bit of postwork. It is amazing what a little bit of postwork can do to an image. The more I learn to do postwork, the more I like it. :)
January 2017 - Daz 3D New User Challenge - CompositionI loaded up Victoria 7 and tried to see if I could replicate that lip problems. I could even though my lights were a little different than yours. The specular noise was a little bit different and changing the lights only made the noise on the lips move position so that wasn't any help. I did a little experimentation with some surface settings. The first image (VictoriaLips01) is what I was getting with the default surface settings. The second (VictoriaLip04) saw a little bit of improvement. What I did was select just the lips in the Surface Tab. I changed the Refraction Index to 2 and the Glossy Reflectivity to 0. I think the Glossy Reflectivity had more of an impact than the Refraction Index did. Finally, I played with the Crushed Blacks and the Burn Highlights in the Tone Mapping under the Render Settings Tab. I'm a big proponent for playing with Tone Mapping. It can really make a huge difference in the final image. I upped the Burn Highlights to .35 and the Crush Blacks to .30. I think if I played with it more I might have been able to get rid of it completely. You'll have to play with those settings and see if they help you out at all.
Frankly, I'm not that crazy about Victoria 7's skin enough to go further. If it was me, I would change the skin completely for some other characters skin. Most of them are pretty interchangeable within the same generation. So, that's what I did in the third image (Victoria705). I just changed skins and all of the lighting and tone mapping is the same as the second image. The noise is still there but different and looks more blended in and natural. I don't know if anyone else will have any further suggestions. My best advice is to just play with it.
I can link you to this great post of Sickleyield's on her DA page which has a breakdown of the Iray settings and what each of them does. I refer to it all of the time when I'm not sure what a particular setting in Iray does.
@Shortcut I posted my pictures along with a link to your pictures here on my laboratory thread. This is the advice that I got for you from one of the vendors, @DarwinsMishap.
The "noise" is reflection from the gloss and top coat from the lighting- if you copy the facial materials in the surface tab and paste it to the lips you'll have the same gloss/reflections from the skin to the lips. You can lower it further if you need by incriments using the Top Coat which is usually higher on the lips than anywhere else. Sometimes Top Coat and Gloss are both higher than the rest of the surfaces (barring eyes, teeth and mouth) to give that "She's just put on some lip gloss" look.So, give that a try and see how it goes. DarwinsMishap does amazing figure creation and texturing so I would highly recommend following DM's advice. Good luck.
edit: I forgot to put the link to the post in my laboratory thread. Added that now.
Thank you for all those suggestions! I'm definitely going to check out your laboratory thread.
Attached below in order are outcomes of the different things I tried:
- The original with noisy specular highlights
- Glossy Reflectivity reduced
- Summer skin applied
- Replaced ‘lip’ material in surfaces tab with ‘face’ material
- Detail of ear comparing two different skin materials
- Whole image - new WIP
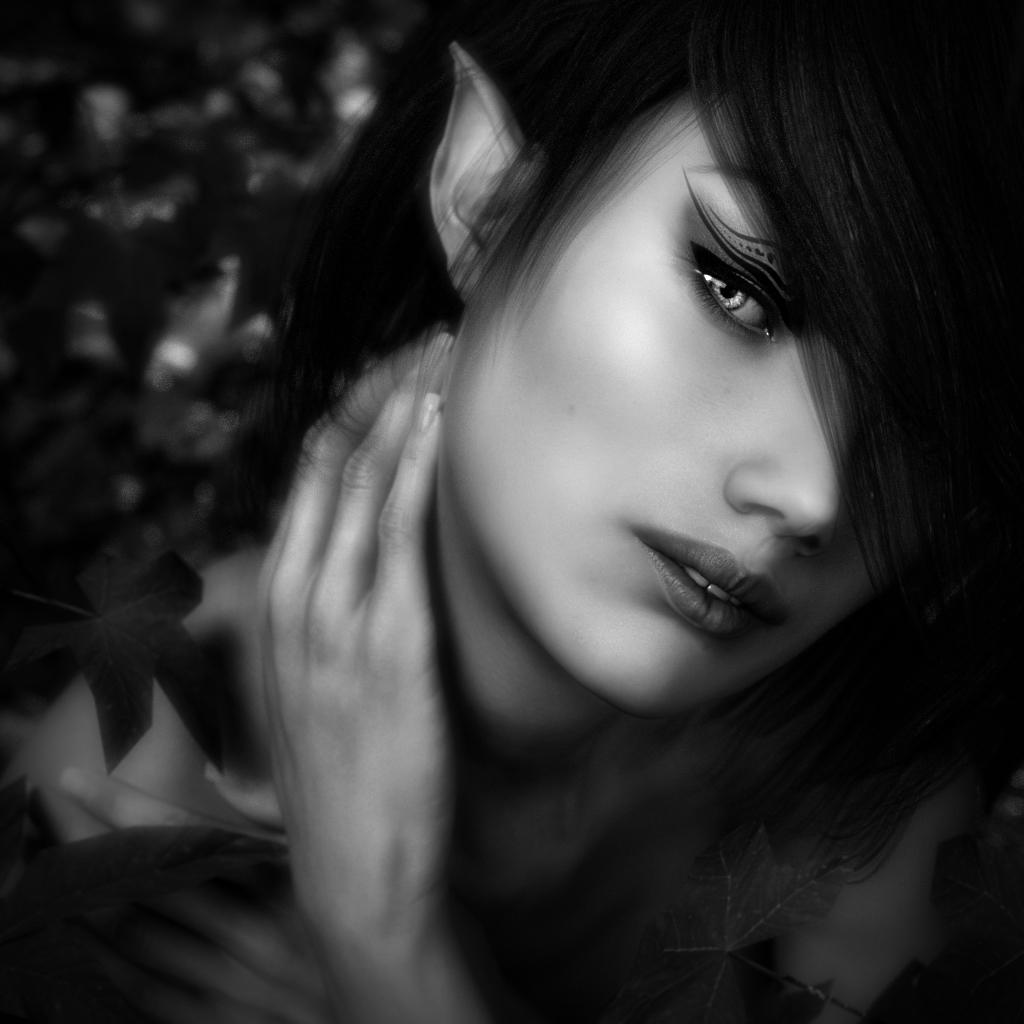
Playing with the surfaces settings (glossy reflectivity, refraction index etc) managed to reduce the noisy effect but it was a bit hit and miss with all the different settings without knowing exactly what they do. Thanks for the link to sickleyield, there’s some interesting and very useful information there. I think if I had experimented more I could have better reduced the effect but I wasn’t satisfied with the progress I was making. The good thing about this approach was that it was localised to the specific body part where the problem was occurring.
Then I applied Summer for Vic7 skin materials, which eliminated the problem entirely, but also changed the look of the image somewhat because it was applied to the whole figure/face. The skin was paler in the render, less flawed, but also introduced some other aspects which I didn’t like. It’s completely subjective and neither version is more ‘correct’ than the other, but as I started with the Victoria 7 skin on this figure I’ve become accustomed to its look. In using the Summer skin a lot of definition in the ear and the hand was lost, and some strange roughness was introduced on the neck which was noticeable in the final image. I simply used the out of the box settings and as I am discovering, each time I try something there are many ways to tweak and change things. My goal here though was to eliminate those noisy highlights in the lips, which it did perfectly.
The last tip suggested swapping the surface properties on the lips from another part of the face. This was a great tip and produced a very noticeable result, mostly eliminating the distracting noisiness from the lips, so thank you to @DarwinsMishap for that.
I’ve posted the new WIP image, including postwork as previously, from this render. An additional change includes placement of a leaf in the bottom left corner to bring down the brightness in that area and help keep the eye from wandering out of the frame.
Great progress on this! It is looking nice!
January 2017 - Daz 3D New User Challenge - CompositionI loaded up Victoria 7 and tried to see if I could replicate that lip problems. I could even though my lights were a little different than yours. The specular noise was a little bit different and changing the lights only made the noise on the lips move position so that wasn't any help. I did a little experimentation with some surface settings. The first image (VictoriaLips01) is what I was getting with the default surface settings. The second (VictoriaLip04) saw a little bit of improvement. What I did was select just the lips in the Surface Tab. I changed the Refraction Index to 2 and the Glossy Reflectivity to 0. I think the Glossy Reflectivity had more of an impact than the Refraction Index did. Finally, I played with the Crushed Blacks and the Burn Highlights in the Tone Mapping under the Render Settings Tab. I'm a big proponent for playing with Tone Mapping. It can really make a huge difference in the final image. I upped the Burn Highlights to .35 and the Crush Blacks to .30. I think if I played with it more I might have been able to get rid of it completely. You'll have to play with those settings and see if they help you out at all.
Frankly, I'm not that crazy about Victoria 7's skin enough to go further. If it was me, I would change the skin completely for some other characters skin. Most of them are pretty interchangeable within the same generation. So, that's what I did in the third image (Victoria705). I just changed skins and all of the lighting and tone mapping is the same as the second image. The noise is still there but different and looks more blended in and natural. I don't know if anyone else will have any further suggestions. My best advice is to just play with it.
I can link you to this great post of Sickleyield's on her DA page which has a breakdown of the Iray settings and what each of them does. I refer to it all of the time when I'm not sure what a particular setting in Iray does.
@Shortcut I posted my pictures along with a link to your pictures here on my laboratory thread. This is the advice that I got for you from one of the vendors, @DarwinsMishap.
The "noise" is reflection from the gloss and top coat from the lighting- if you copy the facial materials in the surface tab and paste it to the lips you'll have the same gloss/reflections from the skin to the lips. You can lower it further if you need by incriments using the Top Coat which is usually higher on the lips than anywhere else. Sometimes Top Coat and Gloss are both higher than the rest of the surfaces (barring eyes, teeth and mouth) to give that "She's just put on some lip gloss" look.So, give that a try and see how it goes. DarwinsMishap does amazing figure creation and texturing so I would highly recommend following DM's advice. Good luck.
edit: I forgot to put the link to the post in my laboratory thread. Added that now.
Thank you for all those suggestions! I'm definitely going to check out your laboratory thread.
Attached below in order are outcomes of the different things I tried:
- The original with noisy specular highlights
- Glossy Reflectivity reduced
- Summer skin applied
- Replaced ‘lip’ material in surfaces tab with ‘face’ material
- Detail of ear comparing two different skin materials
- Whole image - new WIP
Playing with the surfaces settings (glossy reflectivity, refraction index etc) managed to reduce the noisy effect but it was a bit hit and miss with all the different settings without knowing exactly what they do. Thanks for the link to sickleyield, there’s some interesting and very useful information there. I think if I had experimented more I could have better reduced the effect but I wasn’t satisfied with the progress I was making. The good thing about this approach was that it was localised to the specific body part where the problem was occurring.
Then I applied Summer for Vic7 skin materials, which eliminated the problem entirely, but also changed the look of the image somewhat because it was applied to the whole figure/face. The skin was paler in the render, less flawed, but also introduced some other aspects which I didn’t like. It’s completely subjective and neither version is more ‘correct’ than the other, but as I started with the Victoria 7 skin on this figure I’ve become accustomed to its look. In using the Summer skin a lot of definition in the ear and the hand was lost, and some strange roughness was introduced on the neck which was noticeable in the final image. I simply used the out of the box settings and as I am discovering, each time I try something there are many ways to tweak and change things. My goal here though was to eliminate those noisy highlights in the lips, which it did perfectly.
The last tip suggested swapping the surface properties on the lips from another part of the face. This was a great tip and produced a very noticeable result, mostly eliminating the distracting noisiness from the lips, so thank you to @DarwinsMishap for that.
I’ve posted the new WIP image, including postwork as previously, from this render. An additional change includes placement of a leaf in the bottom left corner to bring down the brightness in that area and help keep the eye from wandering out of the frame.
That looks SO much better. I'm glad you found some of the tips useful. I'll have to let DarwinsMishap know that the last tip helped you out.
If you happen on my thread, be sure to check out the list of tutorials that have others and myself have posted to it to see if there is anything that would be of help to you. I'm trying to keep them organized with an index on the first page about the 3rd post down. We're adding more all of the time.
Daz 4.9.3 iray issue when compared to Daz 4.9.2I seem to have an issue when rendering one of my old scenes. The resulting image from Daz 4.9.3 seems to be much more grainy than the image in Daz 4.9.2. I have attached a few images of the shoulder of the character which seems to be particulary grainy. The glove of my character also appears to have strange marks on it. One cause for the glove problem is that some materials have opacity to 0. I can solve this issue by delete the unused geometry in the glove; however, I figured I would post as the problems may be correlated.
The Daz 4.9.3 images was rendered for 8 hours while the Daz 4.9.2 images was rendered in 2 hours, so I do not believe, this is a quality problem. In the Daz 4.9.3 the environment appears to be reflecting more light while the character seems to be reflecting less. So, I tried increasing the lighting by 10x. The scene was much brighter but the shoulder was still grainy. Because the character, glove, and environment noticeably changed, I believe the issue may be related to the surface materials. Therefore, I rendered a few tests of the different skin materials of Natsuko (which is the skin of my character), Genesis 3, and Victoria 7. The Natsuko skin looks more grainy especially around the neck/jaw area.
Does anyone know what change could have occured with the new Iray that would cause this graininess and how to fix it?
January 2017 - Daz 3D New User Challenge - CompositionPlaying Off the Rails
[...]
snip
I'm using Victoria 7 Iray materials. No conversion from 3DL. No makeup anywhere except eyes. Rendered with saturation at 0.0 (i.e no colour). Lighting used 2 spots, one from high above left to light the side of the figure's face, a softer fill from the front and slightly to the right, another spot from behind. I doubt the spot from behind has anything to do with it as it wouldn't be lighting the face. I might try a render for each light on its own to see if that identifies a possible culprit.
I also used 'Translucency Medium' on the Victoria 7 Iray skin, but I don't know what that actually does or how it affects the final render. It was an option to click on so I clicked, without knowing, which is a bit daft, but sometimes I try renders with some things on or off to see the change in effect. I can't recall if I've tried that with this option. If anyone could explain it that would be great :-)
I loaded up Victoria 7 and tried to see if I could replicate that lip problems. I could even though my lights were a little different than yours. The specular noise was a little bit different and changing the lights only made the noise on the lips move position so that wasn't any help. I did a little experimentation with some surface settings. The first image (VictoriaLips01) is what I was getting with the default surface settings. The second (VictoriaLip04) saw a little bit of improvement. What I did was select just the lips in the Surface Tab. I changed the Refraction Index to 2 and the Glossy Reflectivity to 0. I think the Glossy Reflectivity had more of an impact than the Refraction Index did. Finally, I played with the Crushed Blacks and the Burn Highlights in the Tone Mapping under the Render Settings Tab. I'm a big proponent for playing with Tone Mapping. It can really make a huge difference in the final image. I upped the Burn Highlights to .35 and the Crush Blacks to .30. I think if I played with it more I might have been able to get rid of it completely. You'll have to play with those settings and see if they help you out at all.
Frankly, I'm not that crazy about Victoria 7's skin enough to go further. If it was me, I would change the skin completely for some other characters skin. Most of them are pretty interchangeable within the same generation. So, that's what I did in the third image (Victoria705). I just changed skins and all of the lighting and tone mapping is the same as the second image. The noise is still there but different and looks more blended in and natural. I don't know if anyone else will have any further suggestions. My best advice is to just play with it.
I can link you to this great post of Sickleyield's on her DA page which has a breakdown of the Iray settings and what each of them does. I refer to it all of the time when I'm not sure what a particular setting in Iray does.
@Shortcut I posted my pictures along with a link to your pictures here on my laboratory thread. This is the advice that I got for you from one of the vendors, @DarwinsMishap.
The "noise" is reflection from the gloss and top coat from the lighting- if you copy the facial materials in the surface tab and paste it to the lips you'll have the same gloss/reflections from the skin to the lips. You can lower it further if you need by incriments using the Top Coat which is usually higher on the lips than anywhere else. Sometimes Top Coat and Gloss are both higher than the rest of the surfaces (barring eyes, teeth and mouth) to give that "She's just put on some lip gloss" look.So, give that a try and see how it goes. DarwinsMishap does amazing figure creation and texturing so I would highly recommend following DM's advice. Good luck.
edit: I forgot to put the link to the post in my laboratory thread. Added that now.
Muscle Maps for Victoria 7?Try this plugin mantioned by riftwitch
http://posercontent.com/3d-models-for-poser-and-daz-studio/legacy-uvs-for-genesis-3-v4
I am not tried it but according to description that is what u need
Similar scripts but for G2F
http://posercontent.com/human-textures-skins-and-maps-for-daz-studio/v4-skins-auto-converter-for-genesis-2-females
http://posercontent.com/3d-models-for-poser-and-daz-studio/v4-skins-batch-converter-to-genesis-2-femalesI have the autoconverter but they only work for G2F (who have a V4 UV).
As Solarview talked about Victoria 7, I see only "texture converter"or "legacy uvs for G3 V4" as solutions.
- texture converter needs a cr2 files so you must, in Poser, apply the pose save a cr2 files
- legacy uv needs a duf file created in DS4
Solar, if you don't have Poser, legacy uv is the solution today.
Knittingmommy's LaboratoryI was trying to help someone in the new user contest and events thread figure out how to get rid of some specular noise on the lips in his/her render. @Shortcut has an amazing render happening. Here is the link to his/her post about the problem. I set up a render with the same model, Victoria 7, which I think is the first time I've rendered the new Vicky with just the defaults instead of characters based on her mesh. I was able to give some suggestions but I wasn't able to completely solve his/her problem. Hopefully, he/she will be able to play with it and get it solved.
However, I really liked my render which I think is different enough from Shortcut's that I decided to continue working on it. Shorcut's version is way better mine but I like how mine turned out. I ended up changing the skin to something different so Vicky doesn't have a default everything. I just couldn't completely get rid of the noise to my satisfaction. Admittedly, there is still some slight noise in my final image with the other skin but I can live with the end result.
Here is the image with the noise before I did anything. Maybe someone out there has some better suggestions than what I ended up doing to fix the problem.
Original:
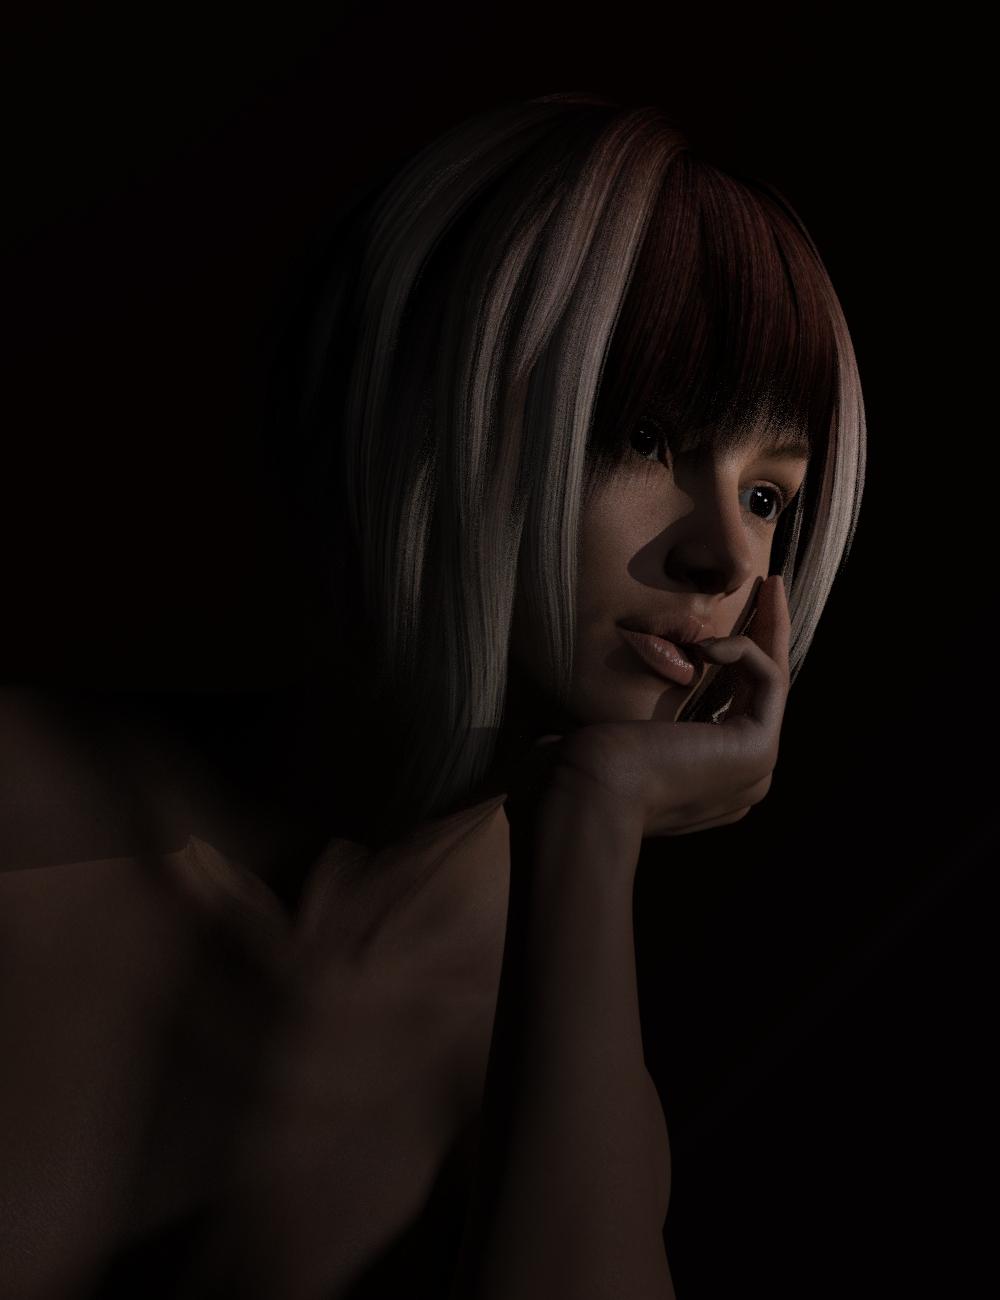
I changed the Refraction Index to 2 and the Glossy Reflectivity to 0. I think the Glossy Reflectivity had more of an impact than the Refraction Index did. Finally, I played with the Crushed Blacks and the Burn Highlights in the Tone Mapping under the Render Settings Tab. I'm a big proponent for playing with Tone Mapping. It can really make a huge difference in the final image. I upped the Burn Highlights to .35 and the Crush Blacks to .30. I ended up with this image which showed some improvement but not really enough.
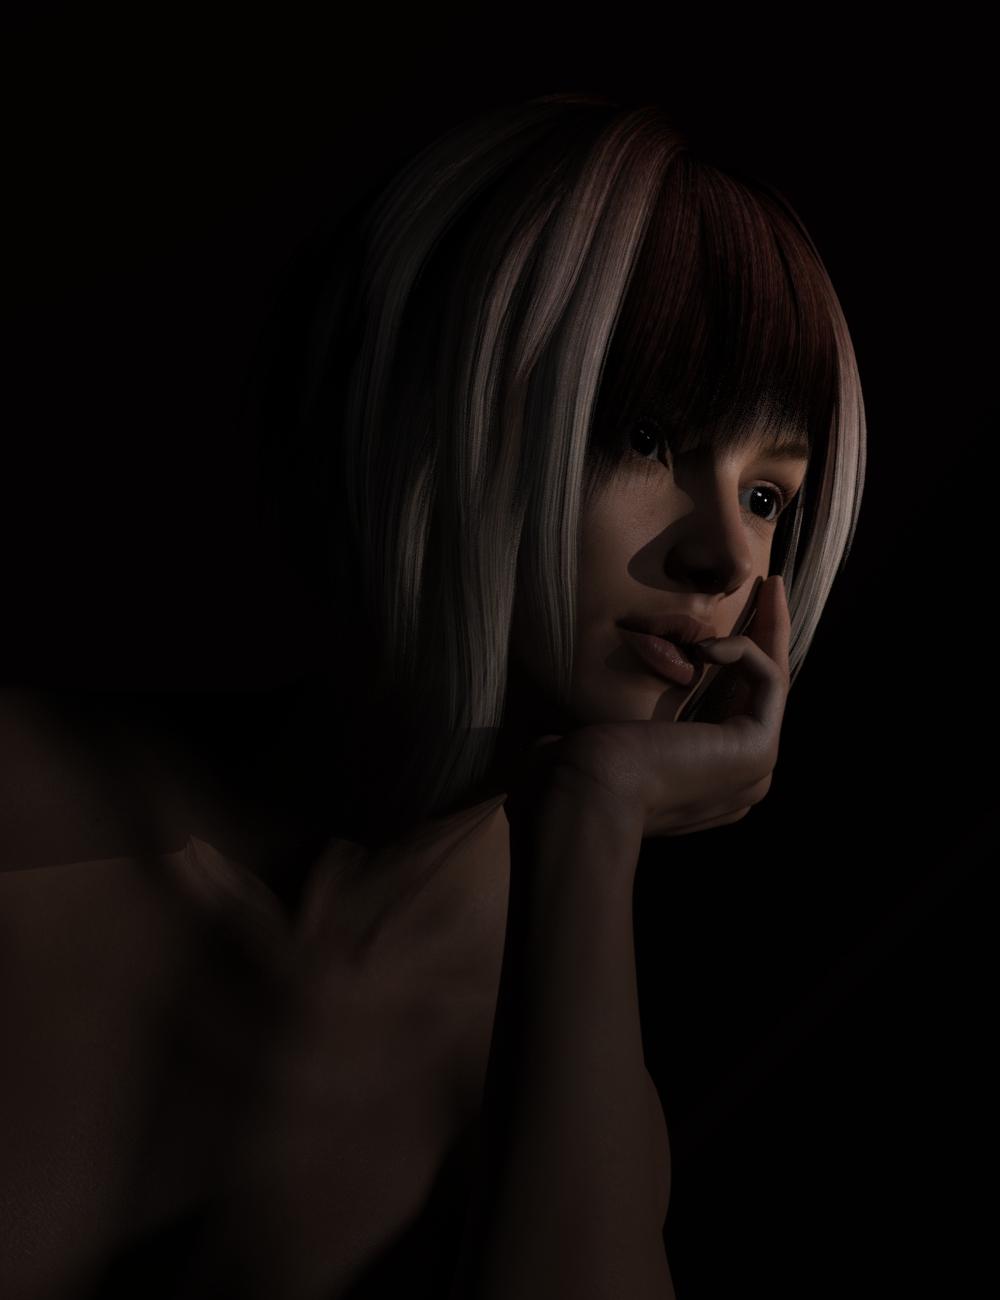
I would love to know if anyone has any better suggestions to get rid of the noise on the lips. If you do either post them here and I'll pass the info along or you can post suggestions directly to the Composition thread for this month's theme. Or at the very least, get it to the point where it blends in nicely. Anyway, I ended up changing the skin for my image and while there is some there in a slightly different place, it blends in a little better.
Here's my final render with the skin change, changes to the hair, and modified lighting:

Gallery Linkedit: added gallery link
Generartion 4 Textures on Genesis 2 & 3 - Opinions wantedYeah, I haven't picked up either the Texture Converer or Cayman's geographs for getting V4 textures onto G3. I'm leaning slightly more towards the texture converter, but under the right circumstances, I could go for either one.
For Genesis 2, I use:
http://www.daz3d.com/victoria-4-for-genesis-2-female
and
http://www.daz3d.com/michael-4-for-genesis-2-maleI'll frequently load Genesis, apply the V4/M4 textures and set up the skin there as I want, then save as .duf to apply to the appropriate G2 figure.
v4 Dial a Face ..?Hi, Blackbird. You're going to have to be a little more specific about what you are trying to do. After all, V4's default face is pretty oval to begin with. There is no oval face shape dial amongst the morphs that you have, perse, but some combination of facial morphs might yield the results that you are looking for, and assistance could be offered if you explained more fully. Screenshots or examples would be good. Also, you should try Die Tryings 182 Morphs for V4, available for free from ShareCG:
http://www.sharecg.com/v/58061/view/11/Poser/182-Morphs-for-Victoria-4
That should increase your options considerably. Remember that recreating a credible copy of a real person's face is not easy, and you must proceed slowly and carefully, making small adjustments as you go - a little of this here, then a little of that there and so on. Avoid the tendency to find that one magic dial that will transform the figure quckly and easily into the character that you want - it probably does not exist.
As I said, the more specific information that you provide, the more likely that you'll receive specific assistance.
January 2017 - Daz 3D New User Challenge - CompositionPlaying Off the Rails
[...]
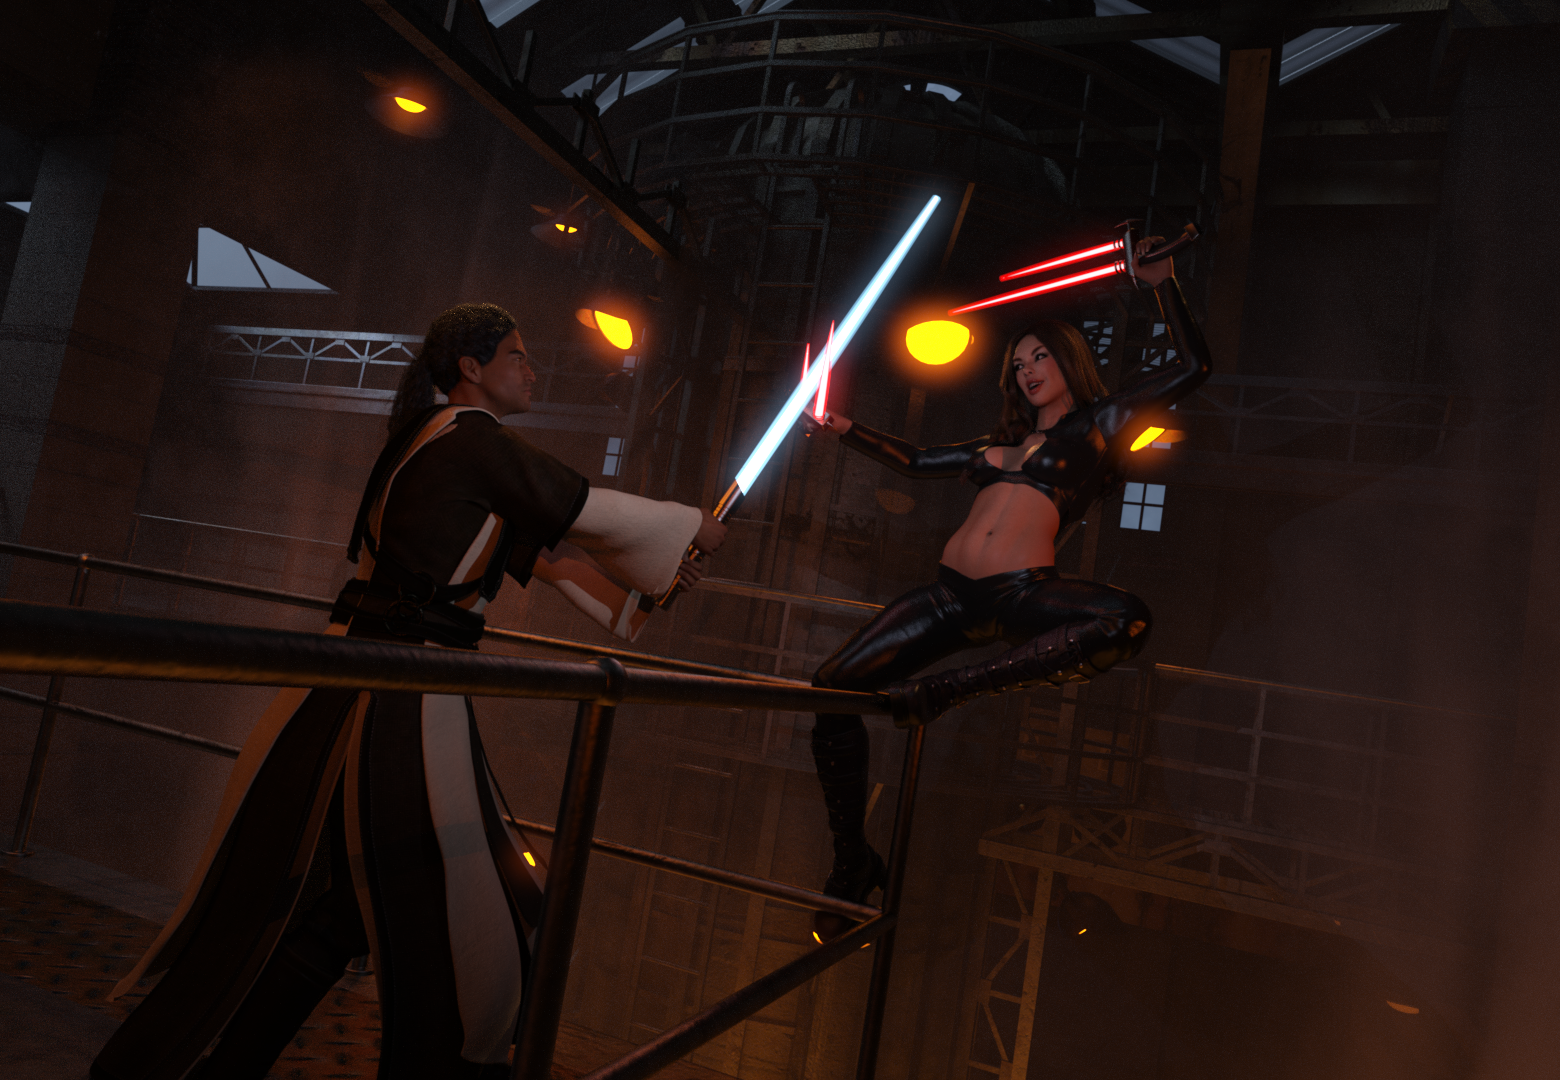
Pretty cool picture this. I particularly like how you did the background! It's there, but unobstrusive or distracting. Which can't be said from the dominant pressence of the light blue light sabre; it sucks in all the attention but I'm not sure that was your intention.
The girl must have some pretty strong muscles in her legs and abs and rather strong magnets in her boots to be able to maintain this position with such a smile on her face! She's seemingly holding it effortlessly ;-)
I'll try to comment on it:
I find it hard to find where I should focus on; what are you trying to make me see? Surely you adhered to the "Rules" but rules are to be broken as well.
In terms of perspective you mention the vanishing points, but way you tilted the camera makes for not one single straight line in the picture – eventhough there's an imaginary straight line on which the characters eyes lie. That makes the picture, imho, "restless" and without a guidance for me on where to focus on.Just to give an example: If you'd like me to focus on the girl, maybe tilting the camera in such a way the girls body is more upright would help me, because then she would appear 'normal' and the 'abnormality' of her surroundings would then lead me to see she's actually falling or almost falling if she hadn't clung her right foot under the railing..
What I'd then be seeing is telling me a story in itself, with a main character, one on which I can focus and relate to.
Maybe a bit more light on her would then help as well.
I hope I'm making sense here!! It's rather difficult to explain I noticed.
But to give you an idea to what I see now is two people – the man appears just focussed on his sabre and her daggers while the girl seems to enjoy the situation she's in greatly – in a light sabre fight but I can't make out where you'd want my sympathy to go to or if the girl's wining or actually about to loose? More helpful expressions on both characters will help, too!Ah, but abs, legs and magnetic boots are insignifant next to the power of the force... :P
Thank you (and everyone) for the feeedback - very helpful. I'll just let the picture talk to it, but at least I'm happier with the results. I've re-framed, re-posed, re-lit, some postwork in GIMP, so... Playing Off the Rails 2.0. Feedback always appreciated.
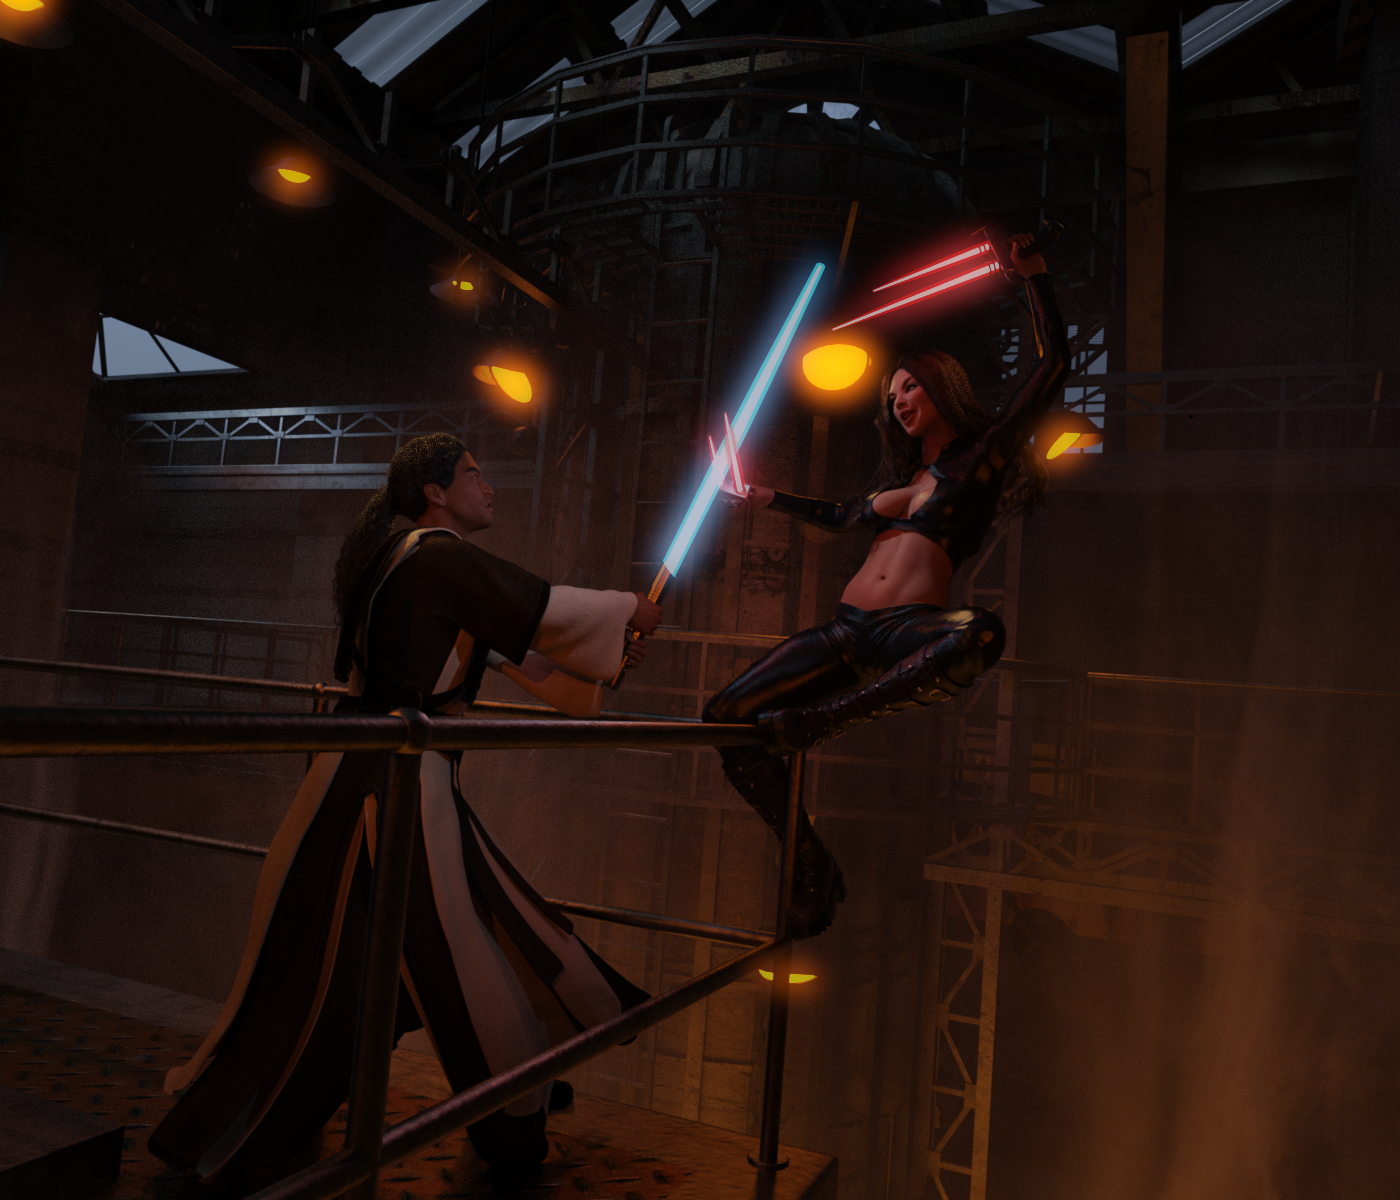
I really like the change in the position of her foot. Looks good. :)
OK, me and Photoshop had a heart to heart, and I think this is improved over the last one. More of the background is visible, and the figure is a bit more vibrant, I think. :D
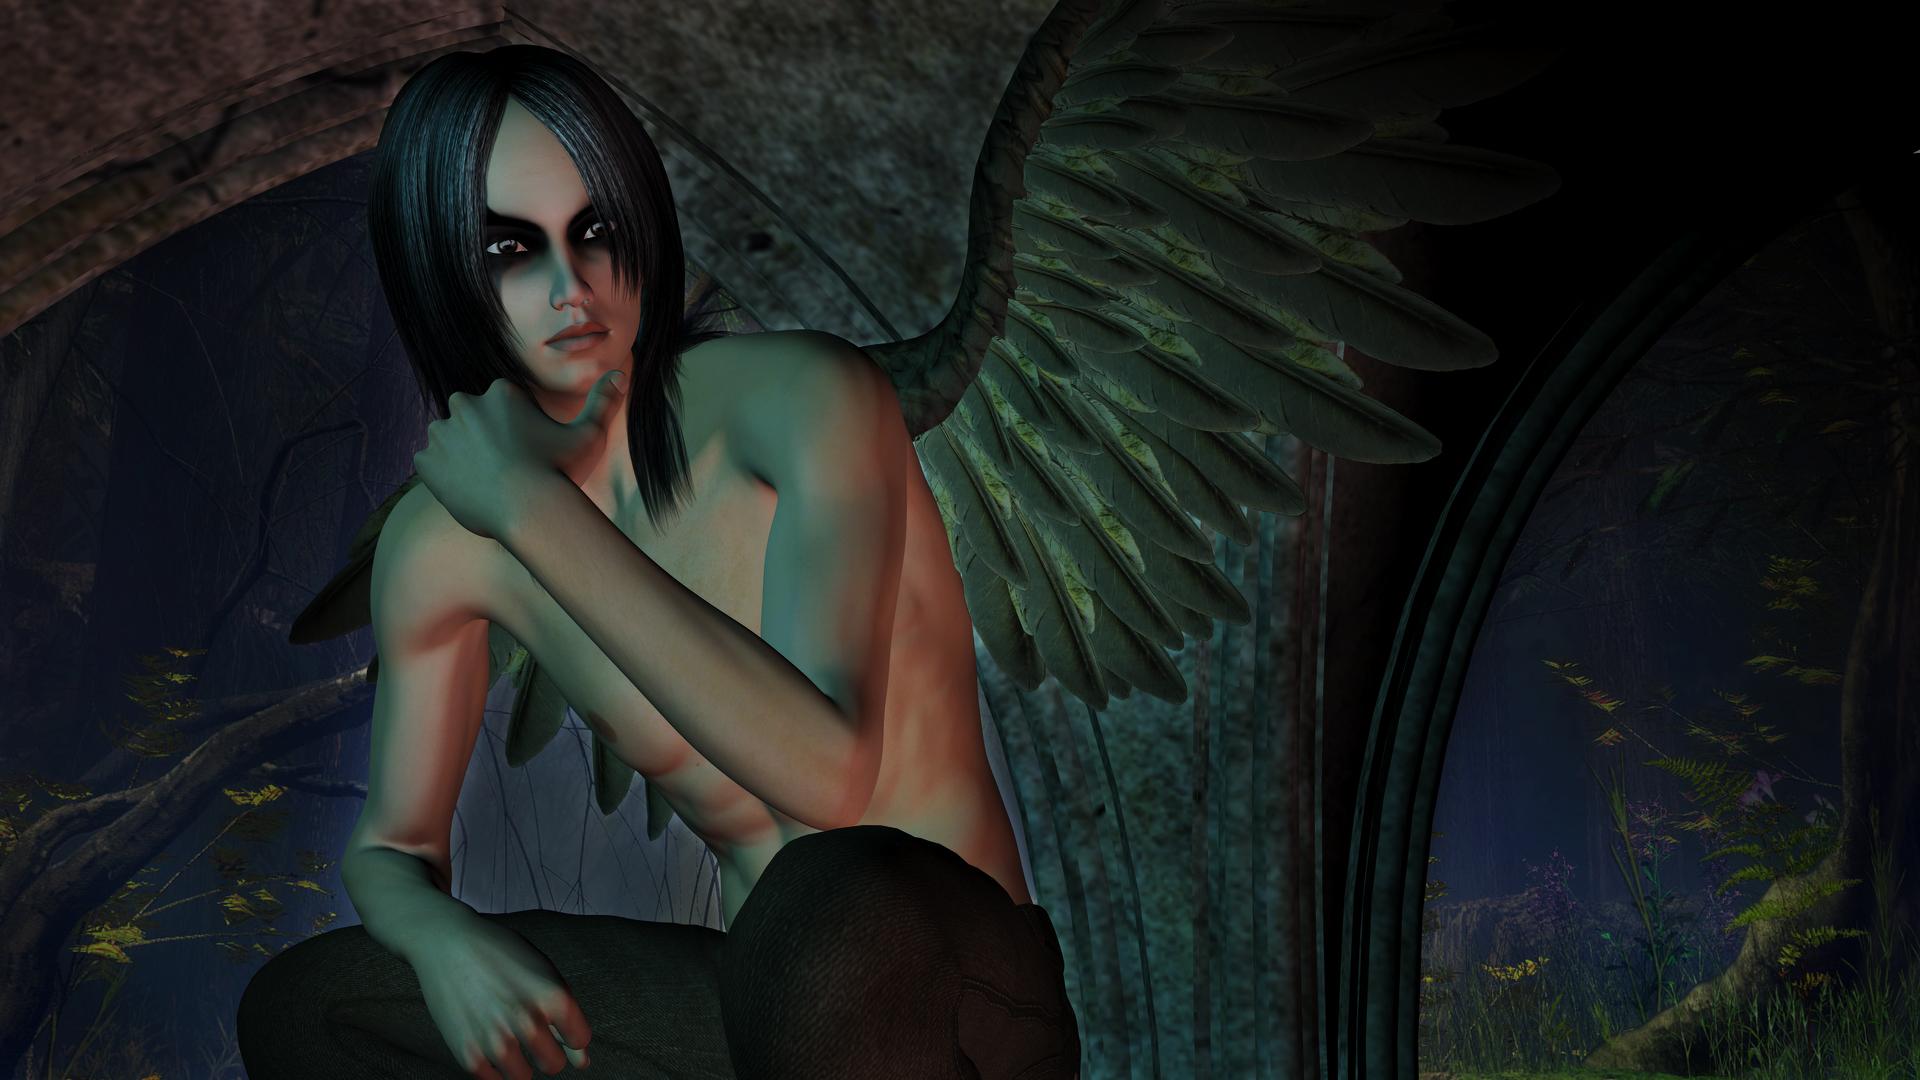
Nice improvement.
I probably enjoy fiddling too much but I'd like to get some tips to try and improve the detail on my figure's mouth. The little specular highlights on the lips are kind of noisy and distracting. I figure they should be a bit smoother and I was wondering if there was a way in the render settings, perhaps in the filter settings, to do this, rather than fixing it in Photoshop? The lower edge of the bottom lip should be in shadow too but it has rendered a bright line underneath. The image was rendered with the Iray engine. Anyone?
My guess is that you might be able to fix that by playing with some surface settings on the figure itself but I'm not positive. Which figure and makeup did you use? Was it with Iray materials or did you use a 3DL to Iray conversion? Also, what lighting setup are you using? Those kind of things can help us give you better answers.
I'm using Victoria 7 Iray materials. No conversion from 3DL. No makeup anywhere except eyes. Rendered with saturation at 0.0 (i.e no colour). Lighting used 2 spots, one from high above left to light the side of the figure's face, a softer fill from the front and slightly to the right, another spot from behind. I doubt the spot from behind has anything to do with it as it wouldn't be lighting the face. I might try a render for each light on its own to see if that identifies a possible culprit.
I also used 'Translucency Medium' on the Victoria 7 Iray skin, but I don't know what that actually does or how it affects the final render. It was an option to click on so I clicked, without knowing, which is a bit daft, but sometimes I try renders with some things on or off to see the change in effect. I can't recall if I've tried that with this option. If anyone could explain it that would be great :-)
I loaded up Victoria 7 and tried to see if I could replicate that lip problems. I could even though my lights were a little different than yours. The specular noise was a little bit different and changing the lights only made the noise on the lips move position so that wasn't any help. I did a little experimentation with some surface settings. The first image (VictoriaLips01) is what I was getting with the default surface settings. The second (VictoriaLip04) saw a little bit of improvement. What I did was select just the lips in the Surface Tab. I changed the Refraction Index to 2 and the Glossy Reflectivity to 0. I think the Glossy Reflectivity had more of an impact than the Refraction Index did. Finally, I played with the Crushed Blacks and the Burn Highlights in the Tone Mapping under the Render Settings Tab. I'm a big proponent for playing with Tone Mapping. It can really make a huge difference in the final image. I upped the Burn Highlights to .35 and the Crush Blacks to .30. I think if I played with it more I might have been able to get rid of it completely. You'll have to play with those settings and see if they help you out at all.
Frankly, I'm not that crazy about Victoria 7's skin enough to go further. If it was me, I would change the skin completely for some other characters skin. Most of them are pretty interchangeable within the same generation. So, that's what I did in the third image (Victoria705). I just changed skins and all of the lighting and tone mapping is the same as the second image. The noise is still there but different and looks more blended in and natural. I don't know if anyone else will have any further suggestions. My best advice is to just play with it.
I can link you to this great post of Sickleyield's on her DA page which has a breakdown of the Iray settings and what each of them does. I refer to it all of the time when I'm not sure what a particular setting in Iray does.
What are your favorite pose packs?Here's a list of the Poses and expressions i use on a regular basis...mostly Genesis 3
http://www.daz3d.com/feel-it-mix-and-match-expressions-for-victoria-7 Love the ability to quickly change the upper and lower facial expressions and hope to see more of these.
http://www.daz3d.com/capsces-vampy-arabella-7-poses-and-expressions Often use these mixing expressions and poses with
http://www.daz3d.com/dynamo-2-poses-for-genesis-2-female-s tops or bottoms, a great set of movement poses and I love that the arms are away from the body and not touching the face.http://www.daz3d.com/i13-ethereon-pose-collection-for-the-genesis-3-female-s These are a great set of go-to full and partials
http://www.daz3d.com/play-your-hand-poses-for-genesis-3-female These have become my go-to for hand poses, great variety to suit every pose.
http://www.daz3d.com/dm-s-all-woman-poses Lovely set of poses, natural looking, elegant and sexy without going over the top.
http://www.daz3d.com/battle-2h-sword-poses Always a great start to setting up an action pose mixing with partials from other sets.
I also swap around Genesis 3 male and female poses to get the look I'm after.
Hope this helps.new aniBlocks not showingI have aniMate2 and I recently purchased "Expression and Face aniBlocks" for Victoria 4: http://www.daz3d.com/expression-and-face-aniblocks
It seemed to install through the Install Manager. I made sure to install the DS version (not the Poser Version).
I'm looking through aniBlocks and I can't seem to find the new aniBlocks anywhere. I also looked in "Content Library" directories and they weren't there with other aniBlocks.
I tried uninstalling and reinstalling product, but still no luck.
Any ideas on what I might be doing wrong and what I can do to access new aniBlocks? Thanks for any help..
What are your favorite pose packs?I don't have many poses but I find myself using often these poses by ilona http://www.daz3d.com/body-expressions-for-genesis-3-female-and-victoria-7.
I also like poses by FeralFey. I like poses that tell a story.
I have this set in my wishlist right now. I was impressed with interpretation of body language.
What are your favorite pose packs?I don't have many poses but I find myself using often these poses by ilona http://www.daz3d.com/body-expressions-for-genesis-3-female-and-victoria-7.
I also like poses by FeralFey. I like poses that tell a story.
January 2017 - Daz 3D New User Challenge - CompositionI probably enjoy fiddling too much but I'd like to get some tips to try and improve the detail on my figure's mouth. The little specular highlights on the lips are kind of noisy and distracting. I figure they should be a bit smoother and I was wondering if there was a way in the render settings, perhaps in the filter settings, to do this, rather than fixing it in Photoshop? The lower edge of the bottom lip should be in shadow too but it has rendered a bright line underneath. The image was rendered with the Iray engine. Anyone?
My guess is that you might be able to fix that by playing with some surface settings on the figure itself but I'm not positive. Which figure and makeup did you use? Was it with Iray materials or did you use a 3DL to Iray conversion? Also, what lighting setup are you using? Those kind of things can help us give you better answers.
I'm using Victoria 7 Iray materials. No conversion from 3DL. No makeup anywhere except eyes. Rendered with saturation at 0.0 (i.e no colour). Lighting used 2 spots, one from high above left to light the side of the figure's face, a softer fill from the front and slightly to the right, another spot from behind. I doubt the spot from behind has anything to do with it as it wouldn't be lighting the face. I might try a render for each light on its own to see if that identifies a possible culprit.
I also used 'Translucency Medium' on the Victoria 7 Iray skin, but I don't know what that actually does or how it affects the final render. It was an option to click on so I clicked, without knowing, which is a bit daft, but sometimes I try renders with some things on or off to see the change in effect. I can't recall if I've tried that with this option. If anyone could explain it that would be great :-)
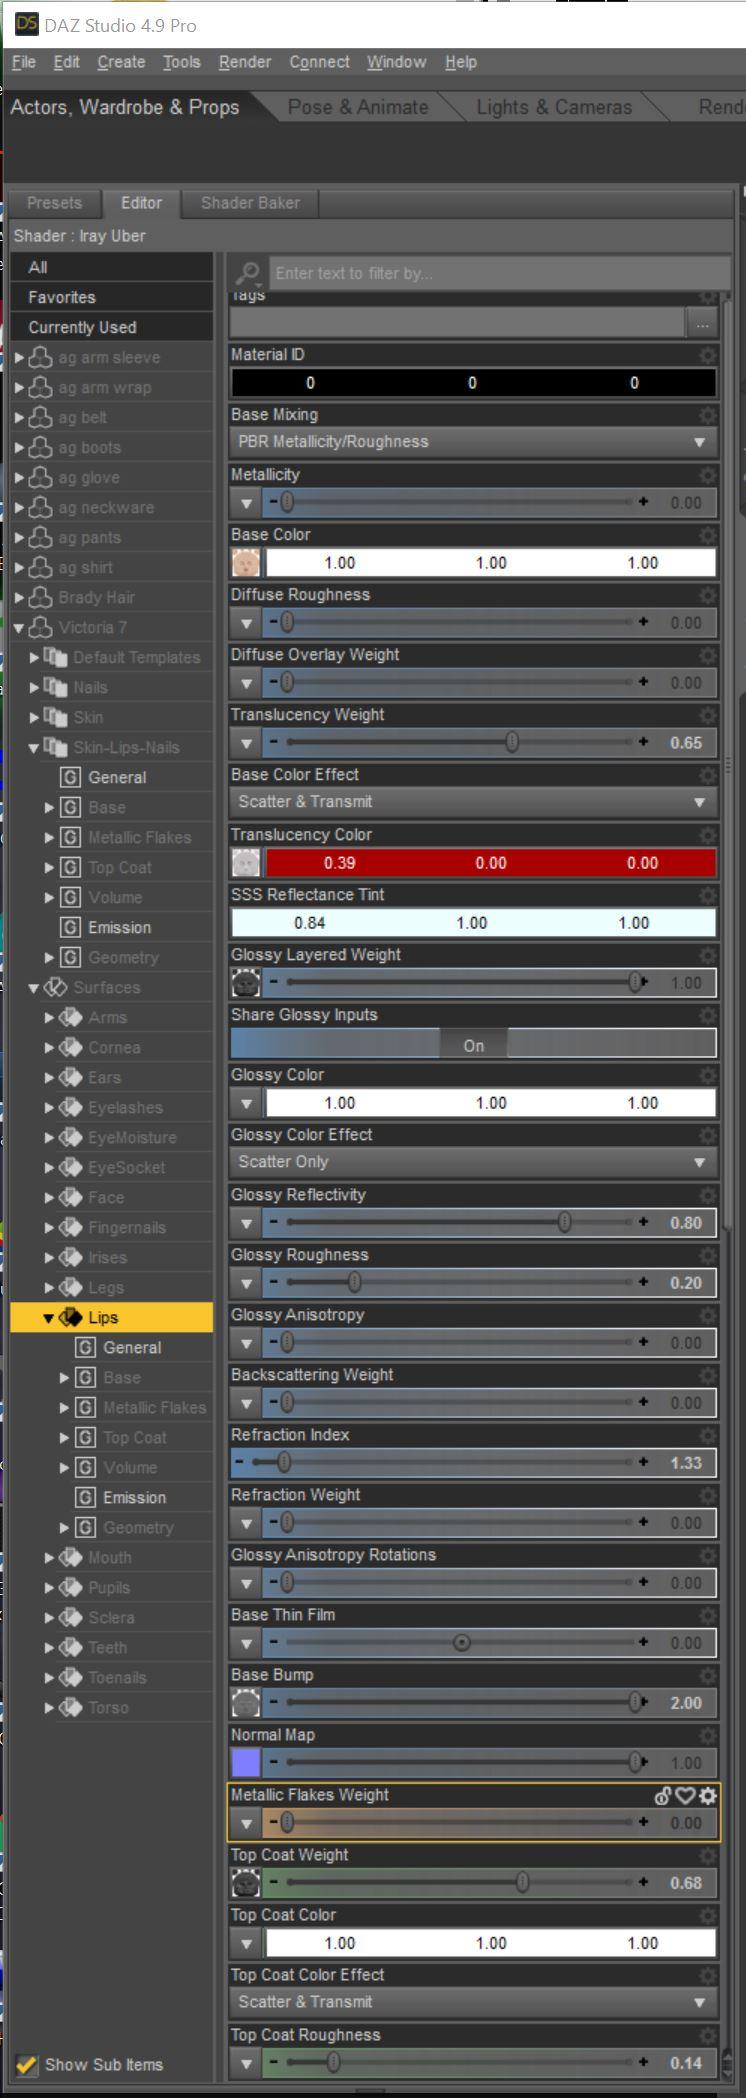
If you go to the "Surfaces (Color)" tab (ignoring the mispelling of "Colour") of the "Actors, Wardrobe and Props" view you'll find "Lips" under "Surfaces" of "Skin-Lips-Nails" for Victoria 7. Lots of things to mess with in there that might help...
Daz 3D is part of

Connect
DAZ Productions, Inc.
7533 S Center View Ct #4664
West Jordan, UT 84084Licensing Agreement | Terms of Service | Privacy Policy | EULA
© 2026 Daz Productions Inc. All Rights Reserved.