-
[SOLVED] {kinda} Eyeball/Inner Mouth Morphs affecting Body Vertices
Edit: After much brainstorming I've discovered that I have nothing to do with it. It's just something Daz Studio does, the same happens for other morph products on the market. So... it's solved as in, it's not solvable, but it causes no problems. If you're struggling with the same problem, just leave it.
In short: custom morphs made for Genesis 9 eyeballs have some effect on the body geometry as well, as discovered after using "Select Morph Vertices". And I can't remove them. Nor do I have any idea how this is possible.
Here's a breakdown of what's happening.
- I zero the eyeballs and change the resolution from High to Base (I do the same with the body as well);
- I export the eyeballs (and eyeballs alone);
- I import them to Blender and move the necessary vertices around;
- I export the Eyeballs, back in Daz Studio I have Genesis 9 Eyes selected in the scene (still zeroed and base res) and I load them through Morph Loader Pro;
- Genesis 9 Eyes still selected I navigate to the new morph (Actor/Head/Face/Eyes/myCustomDirectoryName) in the Parameters tab;
- Now I click on Genesis 9 in the scene, switching to the body geometry itself and still see the same morph in the same directory on this geometry.
- Now I right click on the morph (in Edit Mode of course) and choose "Select Morph Vertices". And it selects some random vertices on the body. I have no idea why or how it's even possible. I know it's not supposed to be happening.
I try the good old "Heart the Morph>Double Click>Morph Editing>Clear Selected Deltas from Favorites", Daz Studio tells me I need to select the geometry on which this morph is located, aka Genesis 9 Eyes, instead of Genesis 9, otherwise it doesn't work. But when I select Genesis 9 Eyes, then the vertices selected on Genesis 9 geometry are not affected at all.
Another interesting fact is that I CAN see this morph while I have Genesis 9 selected, even though it belongs to Genesis 9 Eyes. I can't do the same with the morphs I haven't made myself, like the Head Shapes from Daz itself. As soon as I go to Genesis 9, the morphs for the eyeballs simply disappear from Parameters tab, and I have no idea what causes this difference. Whatever tutorials I learnt creating morphs from, didn't teach me this. Is anyone here who can/is willing to?
Stella HD for G9 - do the foot morphs also work for G8/G8.1?No, a morph is based on the actual geometry, and the geometry between G8 and G9 is very different.
Besides, I am not sure what you are trying to obtain. The reason Bluejaunte includes the foot morph, is to be able to dial the foot morph out, as it can distoft footwear.
Issue with AJC College Times Outfit for Genesis 8 and 8.1 MalesLindsey said:
Try the outfit on one of the supported shapes. Says on the product page "Other Shapes may be supported in Daz Studio by Auto-follow"
Here's the outfit on three of the supported shapes: Michael 8, Owen 8 and Lee 8.
Aha! Thank you! This fixed all the "faceting" issues. His previous shape was primarily Torment 8.1 with some custom character shapes blended in. I approximated the same look with Michael 8.1 and Lithe which are supported, and it looks great now. I've always used auto-follow, I had no idea using the supported shapes made such a difference. Excellent knowledge to have. I attached a new pic of the character so anyone else visiting this thread can see the before and after. EDIT: Oh, the earlier pics were deleted. Well, the new one is currently attached all the same

The remaining issue is the crotch area, unfortunately. It still has that jagged edge problem, I assume because it's not a supported morph? I tried using the Fit Control morphs and it still has the same problem.
Richard Haseltine said:
I don't have the set, but is there a Rigidity map interfering with the morph transfer in the groin?
I'm not entirely sure how to check this. The few google responses I found weren't super helpful. Where would I look for this?
AIUTO...CHI CONOSCE L’ITALIANO? PARTE TREDICIMuscleman said:
Veramente li ha ma sono morphs HD delle figure estese diciamo... V9, M9 etc...
Ragazzone, i morph HD rubano una quantità assurda di risorse. Di fatto il modello non li ha, punto.
 Altrimenti quel prodotto non avrebbe ragione di esistere...
Ora quando si vuole applicare un nuovo morph al seno di un personaggio femminile servono due morph, uno per il corpo e uno per il GeoGraft...
XTransfer Module 1- Genesis 3 to Genesis 8 Morph Converter (Commercial)I've had a lot of issues with doing conversions lately. THIS IS NOT AN ISSUE WITH XTRANSFER. My library for G3 is messy to say the least, and now its just messy and huge for G8. XTRANSFER kept dying no matter what I tried to do with my transfers. (I have an idea about this.. but it takes ages to test and try things.)
I hit on the idea of building another basic library for whatever I'm trying to transfer. I just loaded Genesis 3 and Genesis 8 essentials, and ONLY the required elements for what I wanted to transfer including XTRANSFER. This worked just fine.
1) You need to build you basic library for this by downloading G3 and G8 essentials then manually unzipping them into an 'essentials' library. Make sure you have XTransfer in there as well.
2) You can add the stuff you want to transfer to G8 to the 'essentials' library, but I prefer to use a 'test' library. In that library just manually install all the items and required dependances.
3) Configure Daz to use your 'essentials' library and 'test' library.
4) *I'm not sure if you need to do this, but I did, I cleared the cache, and loaded G3F and G8F so that would speed up loads and ensure there's no confusion with the old cache. I exited and restarted Daz.
5) Run Xtransfer as before, and it will likely just work since there's no cr*p in your library anymore. The run is also faster... I dump the Xtransfer output to the 'test' library, so its easy to find and deal with.
6) In Daz, Swap back your main library, and remove the 'essentials' library. Clear the cache and exit.
7) *Load a G3F and G8F to rebuild the cache. (This wll bring you back to Daz's usual slow painful aweful load speeds.)
8) Load G8F and you now have a viable morph. (In my case I can now just copy the XTransfer files over to my main library.)
This might help all you folks struggling with your transfers. I also posted some other advice for folks struggling with difficult morphs. (Also... not an XTRANSFER issues... this is an issue with bad morphs.)
https://www.daz3d.com/forums/discussion/341526/xtransfer-commercial/p27
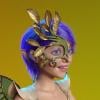
Head gamesPlaying around with Victoria 9 and the Face Morphs Kit for Genesis 9. Started with Victoria 9, dialed her head back to about 75%. Stated adjusting morph dials from the Face Morphs Kit to get the look I wanted. I don't know why it's so satisfying watching a new person emerge as I move dial around, but it is. Very much so!
I'll be honest I was missing the mark of what I was seeing in my head. So I then I added VYK Sydney for Genesis 9 at 15%. That little bit gave me what I was looking for. I just couldn't quite get what I wanted with the morphs dials only. Sometimes, you just have to mix other character heads in and see how they react. In this case, it gave me what I wanted. I rely on morph dials because my morphing skills in other programs are almost nonexistant. I can do small things, but not whole heads or their various parts. I'm looking forward to more morphs showing up in the store.
The skin is the Vitctoria 9 default skin. Eyes are from Natural Eyes 9 for Genesis 9.
 Issue with AJC College Times Outfit for Genesis 8 and 8.1 Males
I don't have the set, but is there a Rigidity map interfering with the morph transfer in the groin?
Anyone figured out how to use Geo-Grafting Navel and Nipples for Genesis 9?Probably you did something wrong.
Although, geografts do not transfer HD morphs including skin detailing. So the body part that is a graft often looks off even if all skin settings are properly transfered. Which is why grafts aren't perfect solution.
morphing a geograft asset in custom posehansolocambo said:
yeah you're right. I'm using morph systems of other 3D apps, but Reverse Deformation, which I should get more accostumed to, is indeed a great option for that too.
You could probably emulate Reverse Deformations, depending on how the application worked - spawn a morph for the posed/shaped version you want to adjust, make the adjustments and spawn a morph, then set the before version to -1 and the after to 1 on a zeroed figure and spawn your final morph from that.
DAZ achieves new lows in customer support (but appears to have ambitions to go lower still)Panzer Emerald said:
nemesis10 said:
Ron Knights said:
criket, have you tried using Crossover?! Crossover allows you to create a "bottle" to run the installer in a simulation of Windows. I used Crossover many times when I had a Mac, and wanted to run old Windows installers.
I forget the price, but it is well worth it. It's certainly easier than what you've endured so far.
Unfortunately, I don't think it works. The installers were designed to work in the era of OS 9 and early Windows. OS X was introduced and the installers ran using Rosetta. Eventually, Rosetta was deprecated. In my experiments, the installers for Windows and OS X wrote to different system folders with appropriate permissions so simply placing the files where they should be isn't enough. You could use Crossover to activate the Windows installer but you can't make it write to the proper OS X system folders.
I should say that this isn't strictly Daz's fault. In this case, they are the broker for a vendor who has passed away. It isn't clear that they have access to the assets that the installers use.
Bolded for emphasis.
Also, it could be a lack of bodies to fill positions in the service (food and retail mainly) industry in general. You see it everywhere, all the people who used to work in that sector left after COVID for numerous reasons, not wanting to be dealing with Karen-esque customers anymore being one of them.
could just be Daz lost a lot of their CS people to other remote or warehouse jobs.
I actually don't think this is this is what is going on. Creators make their products, package them, and Daz3d creates the metadata, and posts them for sale and download. Support can troubleshoot if there is an issue with Daz Studio, errors in a script, morph, or mat than can be seen in a text editor etc. Otherwise, they contact the creator to fix the problem. In this case, the creator has passed away and so can not do support. The company does not have the power or legal right to reverse engineer a creator's product. Exactly like Amazon, the company can accept a return, contact the vendor, and deal with a broken product that way. They can't disassemble a product to update it. This is an unusual situation where technology was rapidly changing and, in this case, the installers were never updated.
Getting on the 9 train, or notDiomede said:
See the blender video at this comment. In general, for posing and animation purposes, an even mesh is inefficient. There needs to be more polygons where there is more bending, and there can be fewer polygons where the body does not bend or express. For example, the middle of the front of the shin does not bend, so the mesh need not have as many polygons there. But the ankles and the knees bend, and the back of the calf muscle contracts and bulges. So the top and bottom and back of the shin bone need more polygons. The top and bottom blend when the ankle and knee joints bend. The calf muscle contracts and bulges when the muscle exercises. It is good to have plenty of polygons near the joints and near muscles, but extra polygons are not needed in the middle of long bones. Genesis 9 has even polygons, so it is inefficient from the perspective of edge loops. Given the total number of polygons used, there are too many in the middle/front of the shin and not enough by the ankle and the knee and back of the calf. That is an oversimplified explanation. There are actually plenty of polygons in the ankle and the knee. But hope it helps get the general idea across. See this video.
See here. Getting on the 9 train, or not - Page 30 - Daz 3D Forums
The reply is that an even grid is better for sculpting. (1) The even gridmakes it easier to completely reshape the base figure. (2) For posing and animating, if the creator is going to rely on morph fixes instead of good edge flow, then the even grid gives maximum freedom to the sculpting brush.
Trade-offs.
OK, even grid is more versatile and specialised grid is more efficient. I think I get that, but
Padone said:
Hylas said:
To be fair, SubD 3 for G9 is the equivalent of SubD 4 for G8, right?
It is rather the opposite.
In terms of geometry, a G9 at subD 3 will take up (very roughly) as much space while renderng as a G8 at subD 2?
How? I thought G9 had denser mesh (= more geometry?) than G8.SF-Design - Easy Feet for Gen 9SF-Design just released the teeth morph set and a home run! Hoping soon for the easy-feet for Gen 9. I can do all of this in Zbrush myself, but those morphs make it much quicker. Here are some of my morphs with toe lengths I have done in Zbrush plus nail morphs etc.
Getting on the 9 train, or notHylas said:
Padone said:
Hylas said:
wurger said:
Ugh. My G9 train just derailed. Can't render two G9s at subdiv 3 without dropping to CPU with an RTX 2070 Super. Not sure I want to spend $400+ for a 3060 just so I can render a pair of G9 figures.
Good info to have. To be fair, SubD 3 for G9 is the equivalent of SubD 4 for G8, right?
It is rather the opposite. Since G3-G8 have a detailed topology you can use a lower subdivision. With G9 you have a higher density but no topology, this means the mesh density is not "where it counts" if we speak of human figures. Indeed the main reason for a good topology is to optimize the figure adding details where they're needed. As for the hardware resources, again, G9 is HD based so needs a more powerful hardware this is expected.
Ok, I didn't understand that... can you (or sombody) explain this further, or phrase it differently?
My understanding so far had been:
G8 geometry has a certain amount of polygons, which at base resolution (subD 0) uses N amount of space on your GPU while rendering.
Increase subD to 1, now the geometry uses 4 x N amount of space on your GPU. Increase subD to 2 and it uses 16 x N amount of space. Geometry quadruples with each subD increase.
G9 has twice the mesh density of G8, so quadruple the amount of polygons (roughly). At base resolution (subD 0) G9 already uses 4 x N amount of space on your GPU (roughly).
G9 at subD 3 is the equivalent of G8 at subD 4, regarding the amount of space its geometry uses on the GPU (roughly).
Everybody, please do correct me because my understanding of these things is iffy and I want to learn if I got it wrong.
See the blender video I will link. In general, for posing and animation purposes, an even mesh is inefficient. There needs to be more polygons where there is more bending, and there can be fewer polygons where the body does not bend or express. For example, the middle of the front of the shin does not bend, so the mesh need not have as many polygons there. But the ankles and the knees bend, and the back of the calf muscle contracts and bulges. So the top and bottom and back of the shin bone need more polygons. The top and bottom blend when the ankle and knee joints bend. The calf muscle contracts and bulges when the muscle exercises. It is good to have plenty of polygons near the joints and near muscles, but extra polygons are not needed in the middle of long bones. Genesis 9 has even polygons, so it is inefficient from the perspective of edge loops. Given the total number of polygons used, there are too many in the middle/front of the shin and not enough by the ankle and the knee and back of the calf. That is an oversimplified explanation. There are actually plenty of polygons in the ankle and the knee but their edges do not match the typical peaks and valleys of healthy human adults. But hope it helps get the general idea across. See this video.
See here. Getting on the 9 train, or not - Page 30 - Daz 3D Forums
The reply is that an even grid is better for sculpting. (1) The even grid makes it easier to completely reshape the base figure. (2) For posing and animating, if the creator is going to rely on morph fixes instead of good edge flow, then the even grid gives maximum freedom to the sculpting brush.
Trade-offs.
EDIT: Given that the square grid does not line up the edges of the grid with the natural peaks and valleys of human muscles and bones, the sculpting solution is to make the grid smaller so that there are points everywhere. Increase subdivision to increase the density of scuplting points (make grid smaller). Summary. Subdivision is a strain on computer resouces, subdivision would not be necessary if the edge loops lined up better, the square grid is inefficient.
Toonish for G9 (Free full Character)Aged Body Morph for Feminine, and works with masculine but not purpose built for it is available.
Also through in some bonus morphs.
MDBridge for Daz3DHere is a project I have been working on and it will be released shortly is now available.
This is a port of Fverbaas MDBridge to Daz Studio. The script will allow Daz Studio to send poses and receive clothing from Marvelous Designer.
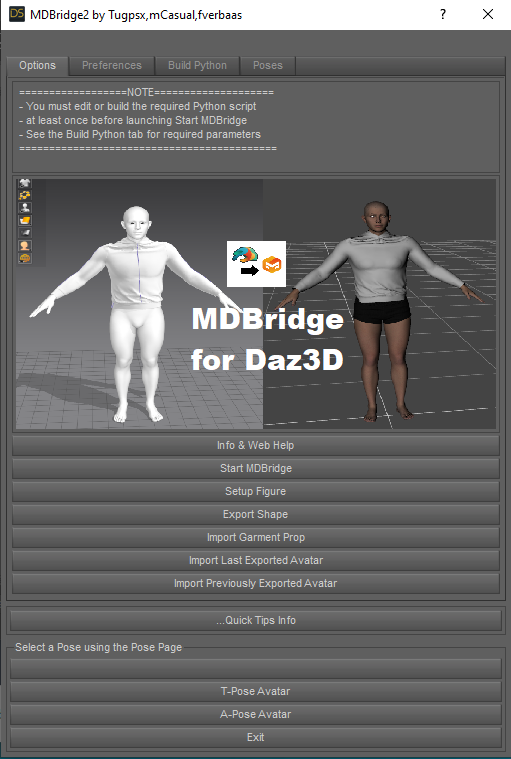

Here is a quick YouTube video of MDBridge for Daz Studio.

A typical session will always start with “Start MDBridge”, usually followed by “Setup Figure”. You can then change attention to MD to load the avatar in an A-pose and morph to T-Pose and Posed Avatar for testing prior to creating or fitting a garment to your avatar. Once the garment is fitted to the A-pose you can use the “Morph to” option to test the garment on your Daz posed figure. If you would like to change the avatar’s pose in Marvelous Designer, you can simply select the “Start/Stop AutoUpdate” option in MD and send a new pose from Daz Studio with the “Export Shape” option. When done you can export the garment from MD, back to Daz Studio using the “Export Thin Garment” option and the “Import Garment Prop” option in Daz Studio to get the result in your Daz scene. For more complete info consult the main manual
• Start MDBridge: Starts your session. It launches Marvelous Designer with the bridge functions running. The first time you use the bridge Daz Studio will ask you to select the location of the Marvelous Designer executable file. The information will be stored so you not need to do this again. You will likely find the executable in the default install path: C:/Program Files/Marvelous Designer 9 personal/MarvelousDesigner9_Personal_x64.exe ◦ If you want to change this later you can use the preference page options to select the folder location.
• Setup Figure: This is an automated option that will send your figure’s current pose as well as a compatible A-pose and T-pose to Marvelous designer as the essential avatars. The data is stored on your hard disk in a temporary folder that can be chosen on the preference tab. The data will normally remain available between sessions unless you or the operating system do a clean-up.
• Export Shape lets you export the current posed shape of the selected figure in your scene.
• Import Garment Prop lets you import the geometry that MD made of the garment fitted to the posed figure. The name of the garment prop is forDaz3D. ◦ If there is already a prop with the name 'forDaz3D’ in the scene, another prop will be added with the new import. If you want to keep the current 'forDaz3D' prop rename it in your scene.
DOWNLOAD HERE if not working below
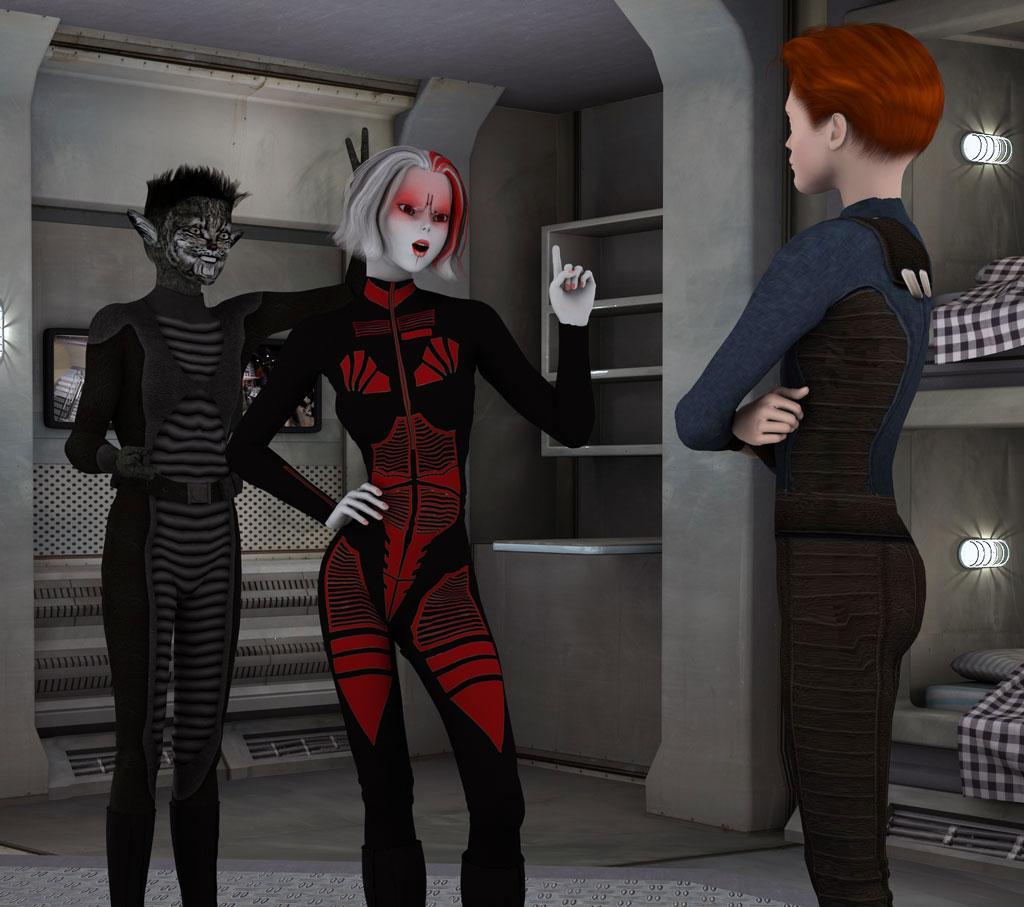
SereneNight’s Sci-Fi Fun Thread 3Serene Night said:
Very true, my mistake. M9 has no nipples in morph. Usually, there is an option to click them on.
The morph I use are the ones that come with the masculine base.
Edit: I see. The Nipple Depth morph makes them super spikey. Good to know. Don't use that one!
Well, well. HerYun has made sure that the guys will not have to be Mr Wee Torpedos of 1950. Kind of surprised that it's in this store, but at least someone has made it possible for the guys to look properly cold!
(I do wish Daz would spell check the promo images with text before they go into the store, though. I mean ... "Femine"?)
*Released!* Natural Eyes 9 For Genesis 9 {Commercial}I love, love, LOVE the eyes. Probably the best eyes I've ever rendered. These S1Green2. I only have the lacrimal morph dialed in at about 75% and the lacrimal fleshy dialed in at about 65%. I love the difference it makes when you blow the picture up to full size. I might have to adjust my settings in DS though. I think it could have rendered longer. I'll have to play with it more.
Knittingmommy's LaboratoryPlaying around with a couple of new things. Used Victoria 9's skin, but the eyes textures are from Natural Eyes 9 for Genesis 9 which I'm in love with. Seriously good textures. The figure is one I created using Face Morphs Kit for Genesis 9. I had a lot of fun with that. I started with Victoria 9 and dialed her back to 75% and added in a little bit of VYK Sydney for Genesis 9 at 15% and then adjusted the nose, cheeks, mouth, and brow until I got something I liked.
Male Chest Breath MorphsFor chest breathing, the morph is very easy to do with Blender, regardless of the 3D character.
Just import the character's OBJ file and use the Lattice modifier to deform very slightly the rib cage.
There are many tutorials for the Lattice modifier. In a few minutes you will be able to do this job.Generation 3 Aiko and Hiro Appreciation Threadvrba79 said:
Coulda sworn she came out in 2002. I've slept since then though. Maybe I'm thinking of the original Aiko model.
Yup, you're probably thinking of this one:
She (and her male morph "Maiko", unofficially named by PA Xena) was a morph of the first Stephanie, who herself was created from Mike2's mesh.
Fun times.
Daz 3D is part of

Connect
DAZ Productions, Inc.
7533 S Center View Ct #4664
West Jordan, UT 84084Licensing Agreement | Terms of Service | Privacy Policy | EULA
© 2026 Daz Productions Inc. All Rights Reserved.