-
(Just Released) My first characters for Genesis 8 Female (Commercial)
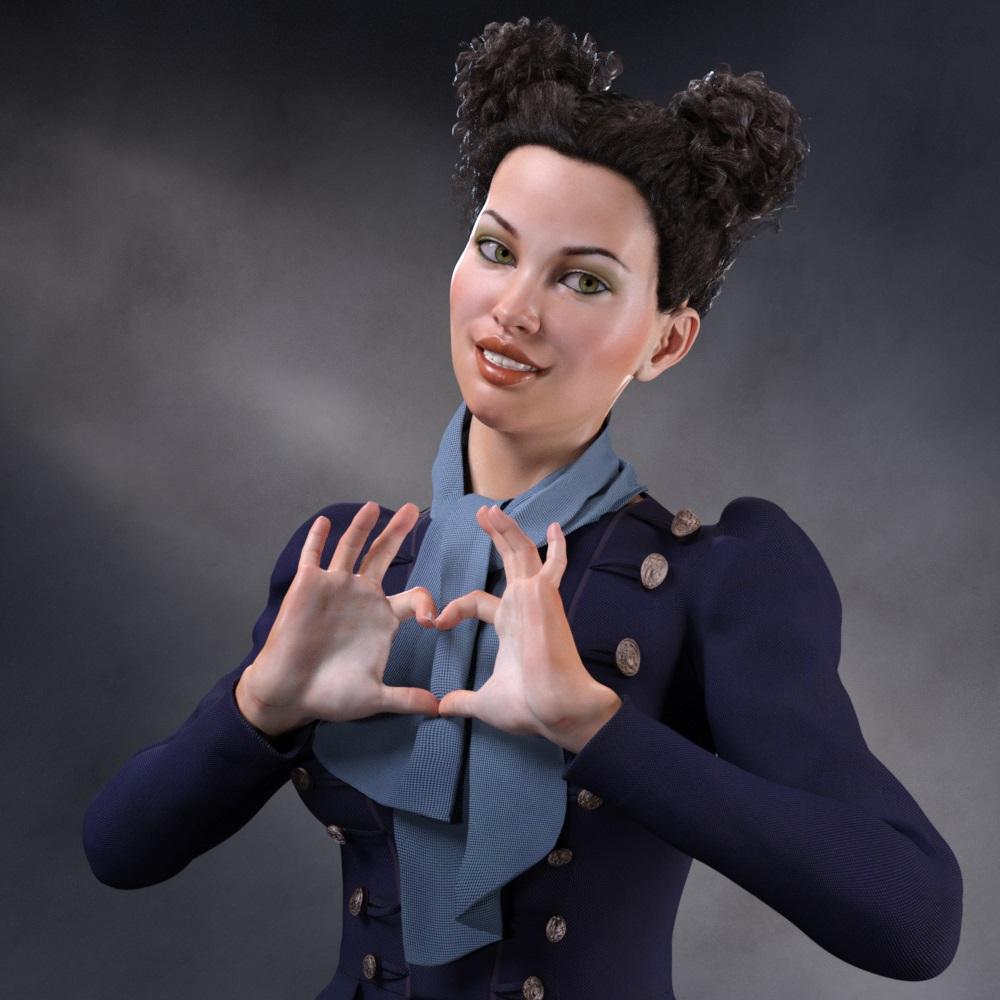
Skin applied to one of the characters for Victoria 8 by Alive She Cried.
 GENESIS 3 Iray Smart Converter And Advanced Managers (Commercial)
@V3Digitimes, this might seem an odd question, but do any of your iray converters work in Victoria 3 skins? Were the V4 skins so much different to V3, or can I use the Iray Converter for Generation 4 on a V3 skin?
Legacy UVs for Genesis 3 [Commercial]I am ecstatic!!!! I picked up the one that applies V3 skins to G3F and I can FINALLY use all my whacky samildinach skins again! I'm still playing with iray conversion - this one I used the Anagenessis 2 (using the Genesis settings cos I'm not sure if it's Victoria 3 compatible???????). Does v3digitimes have an iray converter for V3 skins? (Unsure).
anyway, this is a really really quick test render (default iray render settings) just to test samildinach's V3 Ainenna skin on Olympia 7. So happy! LOL. (she's wearing a top as it's pretty much just pasties on the breasts so covering up for the forum)
One quick question - I don't want to use the V3 eyes, I want to keep the G3 eyes......is there a way of turning off or not applying the V3 settings?
ENOUGH Sexy Bikini WomenAh, the dead horse rises from its grave again, lol. I'm going to comment once, and then I'm not coming back to this thread because it will be the same people as always yelling at me for not doing the thing that they want.
Clothes with wrinkles take longer to make. Time is money. This has some realistic folds, took nearly a month to make with getting all the morphs and JCMs done, and has so far sold 278 copies and my cut has been about $1600. $1600 in a month (before taxes) will not cover my mortgage and car payment, let alone internet, phone, gas, food, etc. Fortunately for me I had something else out in that same time period, and Daz put some things on sale that boosted my catalog sales. I did all right, but I can't afford to do that often unless I bust my butt to also get a smaller product out in the same timeframe. And I don't even have kids to support, just a whiny cat.
If I made a whole suit, with multiple pieces and enough morphs for me to consider it finished, and it's possible that I may, it will probably cost $30 because it could easily take two to three months to get made and through QA. This is not an exaggeration.
And then I will be competing with Daz Originals that cost less than $10, go on sale all the time, and have limited folds and wrinkles (because the artist had to get them done super fast, not because they're not talented). Then thousands of people buy the cheaper one and complain instead of the more expensive one that took longer. And I have no incentive to ever make any larger clothing set because it takes too long. The entire reason I did loincloths and not a suit to begin with is that rigging sleeves/pants is harder and takes longer, and people will buy the skimpy thing.
This is why I mostly don't make clothes any more. I need a product out every 1-2 weeks.
This got me really thinking. I mean, I liked the promo pics, and I check Daz pretty much every day, and still I couldn't even remember that product. Then I thought why I didn't buy it, and finally it hit me. Here's couple of top picks from what's hot list for clothing items, and those probably tell more than my ramblings: https://www.daz3d.com/devil-may-deluxe-hair-for-genesis-2-3-8-female-s , https://www.daz3d.com/angels-secrets-lingerie-and-poses-for-genesis-3-and-8-female-s , https://www.daz3d.com/school-sports-outfits-for-genesis-3-female-s and https://www.daz3d.com/pretty-base-next-generation-bundle . All of those support Genesis 3 Females, while your product is G8 only. I understand that it's extra work to make G3 support, and your time is valuable, but so is your customers. I don't know for others, but I will never pay premium price for a product, that does not support the generation I use. Maybe when it's 60% off I'll take my chance, but not before that. Well, in most cases only way for a customer to get his message through is to vote with his wallet, and maybe that's the case here...
If you have read forums lately, there's been quite a lot of talk about new Victoria and G8 in general. Some don't like the appearance of new Vicky, and therefore haven't upgraded. Then there's those, who have spent thousands of dollars in their library, and are not willing to start from scratch knowing that new G8 does not really offer anything ground breaking. Also some people are waiting for Zev0 products to arrive, and some just wait for Genesis 8 Male before they are willing to upgrade. In any case, a quite big group of your customers have not upgraded yet, and they are probably not willing to buy G8 only product.
Well, what can you do? I assume hard part is already done, since rigging, materials and meshes are done, so maybe you could return to that product, and give it a G3F support. Then release it again as a G3F product, and throw in a bundle option also. I believe for PAs it's more than just use autofit or whatever, since DAZ probably expects support for all major G3F Daz figures, but how long that would take. A day, 3 days, 5 days or more? I don't know, but if you have already spent a month on this, maybe it's worth trying. If nothing else, at least you know how big portion of your customer base is still using G3, and you can use that information in your future products.
BOSS Pro Light Set for Portraits & Promos [commercial]Really great light setup. Here is the render of another Victoria 8 based character with skin from:
https://www.daz3d.com/julia-and-juliana-for-genesis-8-female
Rendering Time: 30 minutes 34.46 seconds
GeForce GTX 1080: 4936 iterations, 20.977s init, 1804.221s render
Hmmm, 30 minutes does seem a little long for 5,000 iterations. I have two 1080 Ti's, and a portrait like that usually only takes a couple minutes for me.
I wonder if the opacity/tranlucency of the clothing may be a factor here.... Maybe.... try a render without the top and see if that makes a difference?
-P
BOSS Pro Light Set for Portraits & Promos [commercial]Really great light setup. Here is the render of another Victoria 8 based character with skin from:
https://www.daz3d.com/julia-and-juliana-for-genesis-8-female
Rendering Time: 30 minutes 34.46 seconds
GeForce GTX 1080: 4936 iterations, 20.977s init, 1804.221s render
 Victoria 8 eyebrows
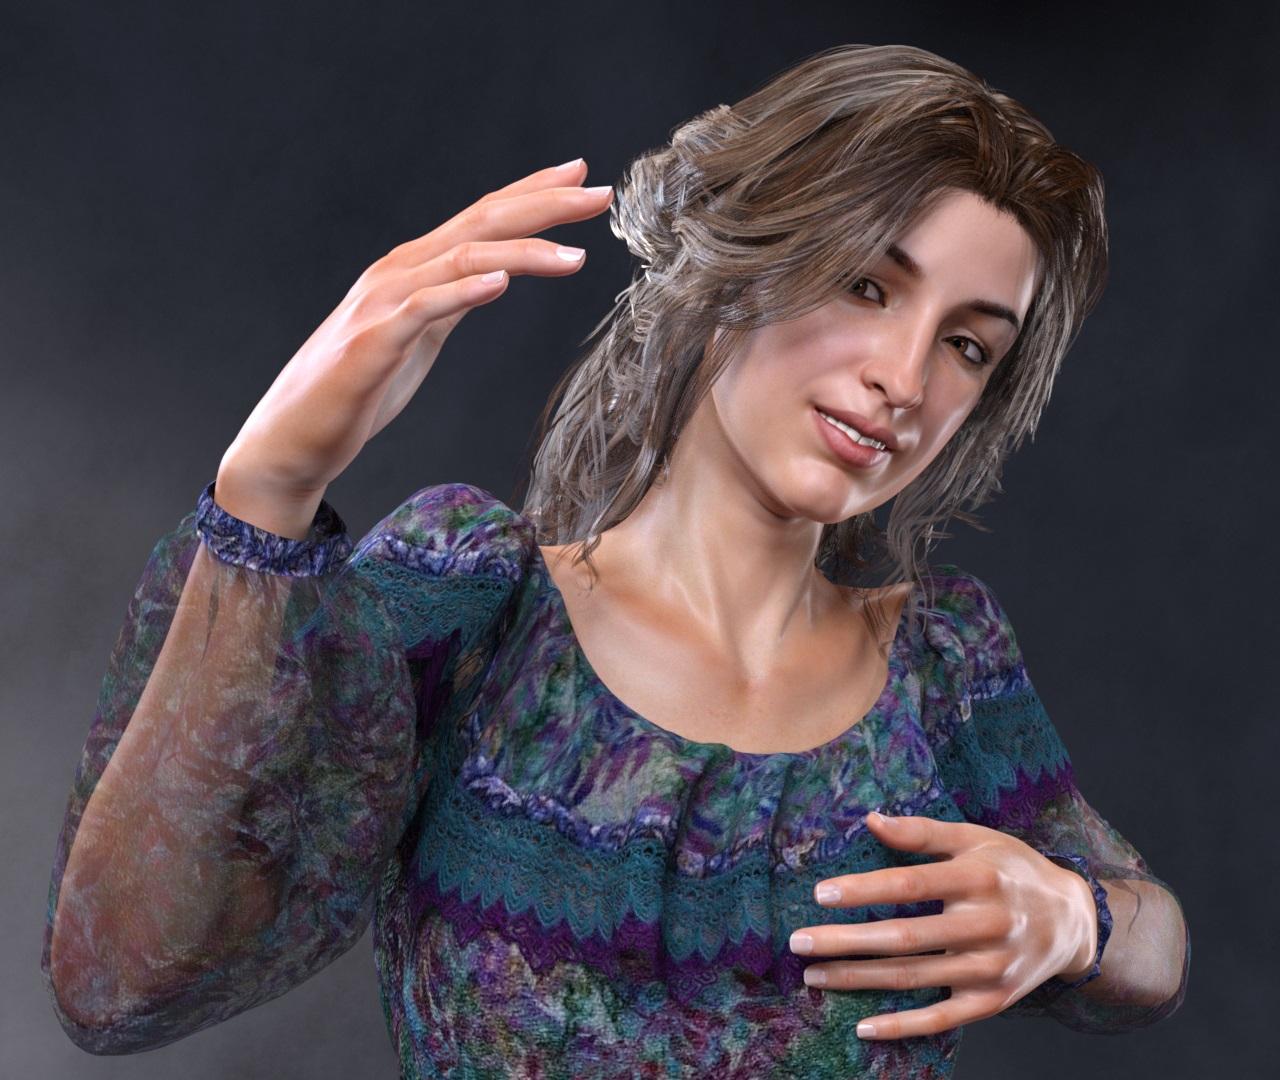
Since Victoria 8 is delivered with an eyebrow prop, I would expect all characters ' ... for Victoria 8' to have at least a no-brow-option.
Novica & Forum Members Tips & Product Reviews Pt 9I mean, I'm glad it's not a real problem, but now I've said something... so embarrassing...

Not a problem. What is embarrassing is that it took me forever the past hour, just to find where hair for Victoria 4 was located, then the materials. I knew it was in the Poser section (Content Library) but I kept looking at V4, Victoria 4, etc. (It's Hair>Daz Victoria 4 and then Materials>Daz Victoria 4)
And that is why I install and organise by hand...
Of course, it could always be in Pose, or Prop or even Figure AND the materials might be in the Daz Content Library side of things while the actual hair is in the Poser side of things (seriously, I have some like that). That's one of the reasons I have stubbornly held onto 4.8 on my laptop, its invaluable to be able to follow those blue bars to the new stuff, although, as you know, it doesn't work for non Daz stuff. I just follow the folder structure when I load non Daz items, when I first load them, but I categorize everything as soon as I get it. I am looking at buying the content organizer thing when it goes on sale though, as it would be nice to be able to have everything even more organized lol.
Novica & Forum Members Tips & Product Reviews Pt 9I mean, I'm glad it's not a real problem, but now I've said something... so embarrassing...
Not a problem. What is embarrassing is that it took me forever the past hour, just to find where hair for Victoria 4 was located, then the materials. I knew it was in the Poser section (Content Library) but I kept looking at V4, Victoria 4, etc. (It's Hair>Daz Victoria 4 and then Materials>Daz Victoria 4)
And that is why I install and organise by hand...
Even if I had started doing that five years ago, I wouldn't have continued to do it for very long with the amount of products I bought in each order. Prices were lower, deals were fantastic, and even when we told them about glitches, they didn't fix many of them. The good old days. And nowadays there's more ReadMes which tell you exactly where to look, so I use those for the later generations. It's the pesky Generation 4 that I never use which is giving me fits due to packaging the Rendo stuff, because I want to put a few Daz products in the mix to showcase. But I definitely can see why organizing it would be a HUGE benefit!
I think organising by hand kept me in check a bit - "No new stuff until I've installed everything I already bought". All the Poser stuff is in separate Runtimes: Clothing, Characters, Hair split per generation and gender, Props, Places, Transport (everything from skateboards to spaceships), etc. Studio is in one place, but subdivided along similar lines.
I'd not recommend my personal system's logic to anyone else, but when half of the buildings are props and the others environments, or when an item of clothing and its textures each have their own vendor's vanity folder, logic is out the window anyway.
Novica & Forum Members Tips & Product Reviews Pt 9I mean, I'm glad it's not a real problem, but now I've said something... so embarrassing...
Not a problem. What is embarrassing is that it took me forever the past hour, just to find where hair for Victoria 4 was located, then the materials. I knew it was in the Poser section (Content Library) but I kept looking at V4, Victoria 4, etc. (It's Hair>Daz Victoria 4 and then Materials>Daz Victoria 4)
And that is why I install and organise by hand...
Even if I had started doing that five years ago, I wouldn't have continued to do it for very long with the amount of products I bought in each order. Prices were lower, deals were fantastic, and even when we told them about glitches, they didn't fix many of them. The good old days. And nowadays there's more ReadMes which tell you exactly where to look, so I use those for the later generations. It's the pesky Generation 4 that I never use which is giving me fits due to packaging the Rendo stuff, because I want to put a few Daz products in the mix to showcase. But I definitely can see why organizing it would be a HUGE benefit!
Not to mention files intimidated me when I was a newbie, I was so afraid of messing things up. (And probably would have.) You were much braver than I was from the get-go!
Novica & Forum Members Tips & Product Reviews Pt 9I mean, I'm glad it's not a real problem, but now I've said something... so embarrassing...
Not a problem. What is embarrassing is that it took me forever the past hour, just to find where hair for Victoria 4 was located, then the materials. I knew it was in the Poser section (Content Library) but I kept looking at V4, Victoria 4, etc. (It's Hair>Daz Victoria 4 and then Materials>Daz Victoria 4)
And that is why I install and organise by hand...
Novica & Forum Members Tips & Product Reviews Pt 9I mean, I'm glad it's not a real problem, but now I've said something... so embarrassing...
Not a problem. What is embarrassing is that it took me forever the past hour, just to find where hair for Victoria 4 was located, then the materials. I knew it was in the Poser section (Content Library) but I kept looking at V4, Victoria 4, etc. (It's Hair>Daz Victoria 4 and then Materials>Daz Victoria 4)
[Tutorial] From Map Transfer to Material PresetsNow that you have completed the tutorial, I think you will agree with me that the Transfer Map utility is quite simple and easy to use. And creating Material Presets is pretty easy, too. The bulk of the work comes when you have to apply the new images to the material settings on your figure. Also easy, but repetitive, boring, and tedious!
But the thing about repetition, boring or not, is you retain what you've learned. I suspect you can now convert another "7" figure to use with G8F with little or no need to refer back to the tutorial.
Bookmark this thread anyway. If you don't use the Map Transfer utility for several months, you may want to skim the tutorial to refresh your memory. And when you meet someone in the community who could benefit from the information here, I hope you will share the link.
Thank you for hanging out with me, putting up with my oddball sense of humor, and sticking it out for the entire tutorial!
And here's a closeup of G8F wearing my new Victoria materials. She's also sporting V7's shape.
 [Tutorial] From Map Transfer to Material Presets
Saving Character Option Presets
Victoria 7 Iray presets include six makeup options, four eye color options, three eyelash options, two Translucency level options, as well as Normal Map On/Off, and Teeth SSS On/Off presets.
One of each is default, except for the eyelashes, but we created a default anyway.
Each of these presets will have identical settings in the Material(s) Preset Save Options dialog as their default counterparts. The changes are in the actual materials and/or settings on the figure.
At this point, we are combining what you learned in Part Two with what you've already learned in Part Three. One by one, you'll apply the Victoria 7 preset, replace the original images with your converted images, and then create the option preset.
First, to make it a lot easier on you, locate the Victoria 7 folder under the Surfaces->Presets. For Iray, that's Default->Iray->Feminine->Victoria 7. There are two columns, the folder structure on the left and the preset icons on the right. In the middle, there is a very small triangle pointing toward the left. Click on that to expand the right column. With only the icons showing, this column won't change when you go back to the Surfaces->Editor.

Second, open the folder with your converted images and copy the location. You'll need the path in several of the steps that follow.
Special Presets
Let's start with the easiest, the Victoria 7 Normal Maps Off preset, as it only removes the Normal Map from the Skin and Nail surfaces.
- Apply the Victoria 7 Normal Maps Off preset. Verify the normal maps have been removed, in the Surfaces->Editor, if you'd like.
- Prepare your Victoria 7 Normal Maps Off preset and Uncheck All. Select the Normal Map->Image for each Skin and Nail surface—Torso, Toenails, Lips, Legs, Fingernails, Face, EyeSocket, Ears and Arms:
- Expand the surface
- Expand Base
- Expand Bump
- Expand Normal Map
- Select Image
- Verify settings and Accept.
- Here's another easy one: Apply the Victoria 7 Translucency High preset.
- Prepare your Victoria 7 Translucency High preset and Uncheck All. Select the Translucency Weight->Value for each Skin surface—Torso, Lips, Legs, Face, Ears and Arms:
- Expand the surface
- Expand Base
- Expand Diffuse
- Expand Translucency
- Expand Translucency Weight
- Select Value
- Verify settings and Accept.
- Now apply the Victoria 7 SSS Teeth On preset. This preset uses only two images, the texture and bump map, and will still be in the list of images in use.
- In the editor, select Teeth. First one and than the other, click on the image icons for Base Color and Translucency Color, locate and select your V7_G8_MouthMapD_1005.jpg for both of these setting. Now scroll down to the Base Bump, click on the image icon, and then locate and select your V7_G8_MouthMapB_1005.jpg image.
- Prepare your Victoria 7 SSS Teeth On, Uncheck All, select Teeth, and Accept.
Eyelashes
- Now let's move on to the Eyelashes, which only have one image to change. First, in Surfaces->Editor, select Eyelashes->Geometry->Cutout Opacity. Go to the Surfaces->Presets tab and apply Victoria 7 Eyelashes 01 MAT.
- In the Editor, select Cutout Opacity. Click on the image icon, select Browse, paste the path to your folder of converted images into the location bar and hit Enter. Double-click on your eyelashes image that corresponds with the original you are replacing.
- Prepare your Victoria 7 Eyelashes 01 MAT, Uncheck All, select Eyelashes, and Accept.
Repeat the above steps using first Victoria 7 Eyelashes 02 MAT and then Victoria 7 Eyelashes 03 MAT.
Eyes
- The eyes use only two images, a texture and a bump map. But instead of applying the Victoria 7 Eye presets, we're going to work with these as is. It won't matter if you chose to modify the default settings or not. All you need to do is replace the texture map wherever it's used.
- In the editor, select Cornea, Irises, Pupils and Sclera. Click on the image icon for Base Color and select Browse. You will now be in the folder with your converted images. (The last time around, highlight and copy the location for use with the Face/Makeup instructions, below.) Double-click on your V7_G8_EyeMapD02_1007.jpg image. Now click on the image icon for Translucency Color. Select V7_G8_EyeMapD02_1007.jpg from the list of images in use.
- If you modified the default eyes, click on Sclera, then on the image icon and select V7_G8_EyeMapD02_1007.jpg from the list of images in use. Skip this step if you did not modify the default eyes.
- Prepare your Victoria 7 Eyes 02 MAT, Uncheck All, select Cornea, Irises, Pupils and Sclera. Click on Accept.
Repeat the above three steps for Victoria 7 Eyes 03 MAT and Victoria 7 Eyes 04 MAT.
Face/Makeup
- Apply Victoria 7 Face 02 MAT.
- In the editor, select Ears, EyeSocket, Face, and Lips. Start at the bottom and work your way up. The images for all but Base Color and Translucency Color are already in your list of images in use. Restore V7_G8_FaceS_1001.jpg to Top Coat Weight; Restore V7_G8_Face_NM_1001.png to Normal Map; Restore V7_G8_FaceB_1001.jpg to Base Bump; Restore V7_G8_FaceS_1001.jpg to Glossy Layered Weight.
- Hover over the image icon for Translucency Color and make a mental note of the image name. They aren't necessarily the same as the preset number. Then click on the icon, select Browse, paste the path to your folder of converted images into the location bar and hit Enter. Double-click on the SSS image that corresponds to the image it is replacing.
- Click on the image icon for Base Color, select Browse, paste the path to your folder of converted images into the location bar and hit Enter. Double-click on the FaceD image that corresponds to the preset number. (i.e. V7_G8_Face02D_1001.jpg)
- Prepare your Victoria 7 Face 02 MAT, Uncheck All, select Ears, EyeSocket, Face, and Lips. Click on Accept.
Repeat the above five steps for Victoria 7 Face 03 MAT, Victoria 7 Face 04 MAT, Victoria 7 Face 04 MAT, Victoria 7 Face 05 MAT and Victoria 7 Face 06 MAT presets.
And now, believe it or not, you have finished the tutorial! (Feel free to celebrate. You've put in a lot of work to get here.)
[Tutorial] From Map Transfer to Material PresetsPart Three: From Model to Presets
Saving Presets And, Yes, More Tedious Stuff
Welcome back, again. This is the last chapter of the tutorial. (Go ahead. Breathe a sigh of relief. I did.)
By the end of Part Two, you had G3F loaded in Daz Studio with Victoria 7's All Mat preset settings and your converted image maps, with Base Female for the UV Set. Have you decided where to save your presets? If not, do that now. (You can move these later, if you change how you want to organize things.) I put mine under Presets->People->Female->Genesis 8->Victoria 7 in My Library. (C:\Users\ladair\Documents\DAZ 3D\Studio\My Library\Presets\People\Female\Genesis 8\Victoria 7)
Normally this is the point where you create your first preset. However...
As I mentioned in the last Intermission, there are some decisions to be made about the material settings for the Sclera. Do you go with the settings from the Victoria 7 presets? Or do you make changes to compensate for the change in the Eye mesh? If you'd rather stay with the V7 settings, skip to Saving Your Main Preset, below. If you want to modify the settings, keep reading.
Modifying The Eye Settings
What I propose is you create modified materials as your presets, with two additional presets. The first additional preset will change the Cornea to the same settings as the default Genesis 8 base uses. The second additional preset will change the Sclera settings to give you back the high reflectivity in the original Sclera settings.
- The first thing you need to do is create the alternate Sclera preset, as everything is already set up. Material presets are easy to create. Select your G3F, of course, then go the top menu and click on File->Save As->Material(s) Preset…
- Browse to the location where you've decided to save your presets. Enter a filename for your preset. I used "Victoria 7 Eyes Legacy Sclera." Click on Save.
- In the Material(s) Preset Save Options dialog, click on the Menu icon in the upper right hand corner. In the resulting menu, select Uncheck->Uncheck All. (You're going to be doing that a lot, by the way.)

- Now expand Sclera->Base->Glossy->Reflection to find Glossy Layered Weight, Glossy Reflectivity, and Glossy Roughness. Expand each in turn and select Value, by clicking in the box. Scroll down to and expand Top Coat->General-Top Coat Color and select Image. Click on Accept.

- Now open the Surfaces->Editor and select, you guessed it, Sclera. Expand Sclera and you'll see the same breakdown as the save options. Select Sclera->Base->Glossy->Reflection and the left column will show only the Reflection parameters. Set Glossy Layered Weight and Glossy Reflectivity both to .25 and Glossy Roughness to .40. Now select Sclera->Top Coat->Top Coat Color, click on the image icon and select the current eye image from the list. (For me, that would be V7_G8_EyeMapD01_1007.jpg)
- Now create your Victoria 7 Eyes 01 MAT preset. With G3F selected, click on File->Save As->Material(s) Preset… Daz Studio will remember where you saved your last preset, so you should already be at your folder. Name your preset: Victoria 7 Eyes 01 MAT. Click on Save.
- In the Material(s) Preset Save Options dialog, click on the Menu icon in the upper right hand corner. In the resulting menu, select Uncheck->Uncheck All. Select Cornea, Iris, Pupils and Sclera by clicking in the box. With the four surfaces selected, click on Accept.
- Open the Surfaces->Editor again and select Cornea.
- Remove the image map from Base Color.
- Set Translucency Weight to 0
- Set Share Glossy Inputs to Off
- Set Glossy Color to light gray, (228, 228, 228)
- Set Glossy Reflectivity to 0.296703
- Set Glossy Roughness to 0.263736
- Set Refraction Color to white (255, 255, 255)
- Create your custom Cornea preset: click on File->Save As->Material(s) Preset… Name your preset. I used "Victoria 7 Eyes Cornea Clear."
- In the Material(s) Preset Save Options dialog, click on the Menu icon in the upper right hand corner. In the resulting menu, select Uncheck->Uncheck All. Select Cornea by clicking in the box. Click on Accept.
To restore the your modified default eye settings, apply your new Victoria 7 Eyes 01 MAT preset. Now you're ready for...
Saving Your Main Preset
- The main preset applies materials and settings to every surface of the compatible figure. This makes it the easiest preset to save: Select your G3F, of course, then go the top menu and click on File->Save As->Material(s) Preset…
- Browse to the location where you've decided to save your presets. If you created the alternate Eye presets, you should already be at your folder. Enter a filename for your preset: Victoria 7 All MAT. Click on Save.
- In the popup dialog, Material(s) Preset Save Options, notice all the surfaces have a check mark in the box, all the same color, indicating they are all selected. Click on Accept.
Saving Other Default Presets
Now we are going to create presets that use the default settings, but are only applied to part of the figure: Victoria 7 Eyes 01 MAT, Victoria 7 Face 01 MAT, Victoria 7 Eyelashes 00 MAT, (we're adding this one,) Victoria 7 Translucency Medium, Victoria 7 Teeth SSS OFF, and Victoria 7 Normal Maps On.
Creating any Material Preset starts the same way:
- Select your figure,
- Click on File->Save As->Material(s) Preset…,
- Browse to your preset folder,
- Name your preset and hit Enter to...
- Open the dialog window for Material(s) Preset Save Options.
For the rest of the presets in this tutorial, you will always click on the Menu icon in the upper right hand corner and select Uncheck->Uncheck All.
For brevity, I will say, "Prepare your [filename] preset, Uncheck All, and..." followed by the specific settings for that preset. Believe me, after a couple of these, you'll have it down like a pro.
Ready?
The first preset is the default Eye 01. Skip to the second preset, if you've already saved Victoria 7 Eyes 01 MAT in Modifying The Eye Settings, above.
- Prepare your Victoria 7 Eyes 01 MAT preset, Uncheck All, and then select Cornea, Iris, Pupils and Sclera by clicking in the box. You should see a check mark in each surface selected. Now click on Accept.
- Prepare your Victoria 7 Face 01 MAT preset, Uncheck All, and then select Ears, EyeSocket, Face and Lips. Click on Accept.
- Prepare your Victoria 7 Teeth SSS OFF preset, Uncheck All, and then select Teeth. Click on Accept.
- Prepare your Victoria 7 Eyelashes 00 MAT preset, Uncheck All, and then select EyeLashes and EyeMoisture, (to use on the G8F Eyelashes anatomy addon.) Click on Accept.
The next presets are a bit more work. - Prepare your Victoria 7 Translucency Medium preset and Uncheck All. Select the Translucency Weight->Value for each Skin surface—Torso, Lips, Legs, Face, Ears and Arms:
- Expand the surface, (click on the arrow, or double-click.)
- Expand Base
- Expand Diffuse
- Expand Translucency
- Expand Translucency Weight
- Select Value, by clicking in the box
- Do not collapse the tree between surfaces. Before accepting your selections, double-check each surface has the Translucency Weight->Value checked, and that no other properties are selected. Click on Accept.
- Prepare your Victoria 7 Normal Maps On preset and Uncheck All. Select the Normal Map->Image for each Skin and Nail surface—Torso, Toenails, Lips, Legs, Fingernails, Face, EyeSocket, Ears and Arms:
- Expand the surface
- Expand Base
- Expand Bump
- Expand Normal Map
- Select Image
- Do not collapse the tree between surfaces. Verify you selections are correct. Click on Accept.
That takes care of all the presets based on the default character materials and settings. Now let's tackle the variations.
[Tutorial] From Map Transfer to Material PresetsIntermission
In Part Three, we're going to save our material presets. However, there is an issue with G3F eye materials on G8F eyes I'd like to address first. The UVs are the same, but the geometry (mesh) is not.
On G3F, the EyeMoisture consists of two separate meshes, which were the "tear" and "EyeReflection" surfaces in Genesis 2. The second EyeMoisture mesh covers the Cornea and the rest of the eye. The Cornea and the Sclera are one mesh, with the Pupil and Iris both being separate meshes.
Much has changed on the G8F eye. For one, the EyeMoisture "tear" mesh is now part of the Eyelashes anatomy addon. The rest of the eye now consists of two meshes, one on top the other and fully enclosed. On the top, or outside, is the new EyeMoisture/Cornea mesh, and underneath, or inside, is the new Sclera/Irises/Pupils mesh. But more than that, the ridge in the mesh around the iris is different. On the G3F eye, the ridge had the outer edges of the eye color. On the G8F eye, the ridge is completely outside of the eye color.
With the Eye meshes so different, even using the same UVs and Surfaces, there are bound to be times when the G3F eye materials don't work right with the G8F eye. This is the case with the eyes for Victoria 7. Based on the numerous comments in The Commons about the "white ring" around the iris when G3F materials are used on Genesis 8, I suspect the problematic material presets for Victoria 7 are common throughout Genesis 3.
I believe I've figured out the source of the "white ring." The Sclera settings for Victoria 7 are too "shiny" for the new mesh: too much Glossy, too much Reflectivity and too much Top Coat Reflectivity. Victoria 7 sets both Glossy Layered Weight and Glossy Reflectivity at 1.0 and Glossy Roughness at a mere 0.010! It also uses Top Coat to add even more Reflectivity, at the maximum settings.
On the other hand, the Base G8F doesn't even use Top Coat, sets both Glossy Layered Weight and Glossy Reflectivity at .25, and Glossy Roughness at .40.
How you want to proceed where the Scleras are concerned will be the first order of business when you return from intermission. Don't worry. It's no more difficult than anything you've already done following along with me here.
Throughout this tutorial, we've been using the G3F figure instead of G8F. That's not going to change. As you already know, Daz has turned the G8F eyelashes into an anatomy addon. An assumption I've seen in the forums is you need a separate preset for the addon. But it isn't necessary.
► I've found applying the full/all mat preset to the addon will apply the correct settings and materials. That means you can select both the G8F figure and the G8F eyelashes and apply your G3F preset. In order to keep the Eyelashes with the full/all preset, we need to create those presets with the G3F figure. (The G8F preset that comes with the Starter Essential will apply settings to the eyelashes with only the figure selected, but I don't know how to do that, or if we even have the tools to do it that way, not being PAs.)
► And here's a tip for saving your new presets: Save your presets with the same names as the originals. This will allow you to copy the icon/tip images into your preset folder, delete the [filename].duf.png images and have great looking icons for your presets with minimal work.
That's it for intermission. Don't forget to get up and walk around a bit, take a few deep breaths and oxygenate your blood, look at something besides a monitor to give your eyes a rest. The usual stuff.
[Tutorial] From Map Transfer to Material PresetsPart Two: From Maps to Model, (Cont'd.)
Preparation, Organization, Application and Other Tedious Stuff
Using Your New Maps On The Figure.
In order to create Material Presets with the new images, we have to tell Daz Studio to use our image maps instead of the images provided by the vendor for the character; in this case, DAZ and Victoria 7.
You'll want to copy and paste the location of your new maps frequently, so open a window to your Victoria 7 textures folder.
1. In Daz Studio, load the base Genesis 3 Female and with G3F selected, apply the Victoria 7 All MAT option. It doesn't matter if you use Iray or 3Delight, the process is the same. (You may want to do both.) I'm going to use the Iray materials for this tutorial.
2. With the G3F figure still selected, in the Surfaces->Editor, select "Surfaces" in the left column, (this will select all the surfaces.) Scroll down to UV Set in the parameters column, on the right, and change the UVs from Victoria 7 to Base Female.
3. Save the file as a scene, somewhere easy to find. If Daz Studio crashes, you won't have to start over.Now comes the tedious part. In the Surfaces->Editor, you need to replace all of the images in all of the Surfaces.
4. For every image in every Surface, you need to:
- Click on the image icon
- Browse to the new materials' location in the resulting window
- Find the replacement image and
- Double-click on the image to select and close the window.
As you may recall from setting up templates in the Map Transfer utility, some of the maps are used for more than one surface. That means, in most cases, you can load the image for each parameter in all the related surfaces at once.
Surfaces that do not share maps are: Eyelashes, EyeMoisture, and Torso.
Maps that work for multiple surfaces are:
- Face: Ears, EyeSocket, Face, and Lips.
- Arms: Arms and Fingernails.
- Legs: Legs and Toenails.
- Eyes: Cornea, Irises, Pupils and Sclera.
- Mouth: Mouth and Teeth.
5. Select the EyeMoisture surface in the left column. Scroll down the parameters in the right column, looking for images. (As we are currently working with the Iray materials, there shouldn't be any images.)
6. Select EyeLashes. Scroll down to the Cutout Opacity parameter. Click on the image icon, scroll to the top and click on Browse. Paste the path of the window you opened in step one in the location bar of this window and hit Enter. Find the V7_G8_EyelashesMapT01_1006.jpg image and double-click to select. If you want to verify the image has changed, hover over the image icon and the popup will include the full path and filename of the image.
7. Select Torso. Beginning with Base Color in the right column, change the images for every parameter that has one: Click on the image icon, click on Browse, paste the path into the location and hit enter, double-click on the corresponding image from your converted maps.Okay, by now you are an expert on changing images! Only "a few more" to go.
8. Select Mouth and Teeth, (click on one, ctrl+click on the other.) These two surfaces use the same image in both Base Color and Translucency Color. Change the image in Base Color, then you can click on the image for Translucency Color and select V7_G8_MouthMapD_1005 from the list of used images. Now scroll down to Base Bump and replace that image.
9. Select Cornea, Irises, Pupils and Sclera. Like the mouth surfaces, these four use the same image, V7_G8_EyeMapD01_1007, in both the Base Color and Translucency Color parameters. Scroll down to Base Bump and replace that image as well. Click on Cornea. Scroll up to Refraction Weight and replace the image.
10. Select Arms and Fingernails. Repeat the same procedure you used for the Torso, scrolling down and replacing images as you go, until you come to Top Coat Weight and Top Coat Color. These two surfaces use the same map here, but not the same parameter. Click on Arms. Change the Top Coat Weight image. As you used the same image for Glossy Layered Weight, find V7_G8_ArmsMapS_1004 in the list of used images. Now do the same for Fingernails in the Top Coat Color parameter.
11. Select Legs and Toenails. Repeat the procedure you used for Arms and Fingernails. When you get to the Top Coat parameters, select first Legs and then Toenails and plug the specular map already in the list, V7_G8_LegsMapS_1003, into the the Top Coat Weight and Top Coat Color parameters, respectively.
12. Select Ears, EyeSocket, Face, and Lips. Scroll down and replace images in each of the parameters. As with the other skin surfaces, Top Coat Weight will use the specular image also used in Glossy Layered Weight.
13. Save your scene.And... you're done! Loading images, that is. For now.
Could you use a break? I know I could. Let's take a short Intermission and meet back here in ten. (Or whenever you're ready to start saving your presets. I'll be waiting here patiently. Virtually, of course.)
[Tutorial] From Map Transfer to Material PresetsPart Two: From Maps to Model
Preparation, Organization, Application and Other Tedious Stuff
Welcome back.
After completing Part One, you should have, at least, all the images of Victoria 7's default maps for the Face_1001, Torso_1002, Legs_1003 and Arms_1004. Hopefully, you went on to convert the rest of the Face maps for the five makeup presets as well.
What you still need for your presets are all of the maps for the Mouth_1005, Eyelashes_1006, Eyes_1007 and EyeMoisture_1008. (Though not all characters include the EyeMoisture map, Victoria 7 does.) When applying images to your figure, you could reference the images in Victoria's texture folder. However, I prefer to keep all the textures together in a single folder, as if my converted character were a product, so that's how these instructions are set up. (I sometimes need/like to make changes to the maps for a specific render, and it's just easier for me to have all the images for a figure in one place.)
I also like to rename all of my maps, to distinguish the converted maps from the originals. Although our new maps will fit G3F, she can wear the original "7" materials without issue. So I'm adding G8 to the filename to tell me these are the images I converted to use with my G8 compatible material presets. For example, the original Victoria 7 images have filenames that begin with V7. I'll change those to start with V7_G8_.
Using Irfanview To Prepare Your Maps.
This section of the tutorial assumes you followed my suggestion and saved your converted maps to PNG format, that your system made the backgrounds transparent and that you downloaded and installed Irfanview during the break.
- Open a window to your Victoria 7 textures folder. Highlight the path text, then copy and paste in step 7 below.
- When you convert your transparent PNG images to JPG with Irfanview, it will fill in the background with the same background color you see when you open the utility. If the background isn't already white, change it in under Options->Properties/Settings->Viewing. Look for Main window color: with a long color field of the current background color. Clicking on either the color or the "change" button will bring up the familiar Windows color picker dialog. Click on the white square and click OK. Click on OK again to save the change and close the Properties/Settings window.

- Open the Batch Conversion window. You can access it via the File menu, but the keyboard access is simply a "b". The right column is where you locate and select the files you want to process. The left column controls what processes Irfanview will perform on the files.
- In the right column, browse to your interim folder. Select everything but the normal maps. Click on the Add button. A list of your selected images will be displayed below the buttons.
- In the left column, select Batch conversion - Rename result files. Select JPG - JPG/JPEG Format from the Output format drop-down. Click on the Options button to the immediate right. Using the slider or the arrows, set JPEG quality to 95 and click on OK at the bottom of the dialog.
- Also in the left column, click on the Options button for the Batch rename settings. Set the Name pattern to $N. In the Replace text (1) field, type V7 and type V7_G8_ in the field to the immediate right, (so the line reads "Replace text (1): V7 with V7_G8_".) Click on OK at the bottom of the dialog.
- In the Output directory for result files: field, paste the path to your Victoria 7 textures folder.
- Take a moment to insure everything is set correctly in this window. When you're ready, click on the Start Batch button. A popup window will display the progress. When it is finished, click on the Exit Batch button.
- Verify the images are now in your Victoria 7 textures folder, as JPGs and with the new name. It may be necessary to refresh the folder.
- Return to Irfanview and repeat the instructions for changing the background color, only this time, choose the light blue square for your normal maps.
- Open the Batch Conversion window. In the right column, select the normal maps and click on Add. In the left column, change the Output format to PNG, (for cleaner images.) Click on the Options button to the immediate right, set the Compression level to 9, and click on OK. The Name pattern should be the same, with $N in the text field. (To verify your changes are still in place, click on the Options button to the immediate right of the text field. Click on OK to save and close the dialog.)
- Verify the Output directory is the same.
- Click on Start Batch.
- Verify the normal maps are now in your Victoria 7 textures folder, as PNGs and with the new name.
- Now you need to copy the maps we didn't convert into your Victoria 7 textures folder. Open the Batch Conversion window again. In the right column, browse to Daz's texture folder for Victoria 7, C:\Users\ladair\Documents\My DAZ 3D Library\Runtime\Textures\DAZ\Characters\Genesis3\Victoria7
- Select all the maps for the mouth, (1005,) eyelashes, (1006,) eyes, 1007) and eyemoisture, (1008). Click on the Add button.
- In the left column, select Batch rename. The Name pattern should still be $N and clicking on Options should show your name changes are still there.
- Verify the output directory is still going to your Victoria 7 textures folder, and click on Start Batch. When the process is complete, your converted textures folder should have all the maps you need for all of the presets.
- Skip to Using Your New Maps On The Figure.
Preparing Your Maps With Another Conversion Utility
I like Irfanview and I've used it for a couple of decades. But if you've been using another program and are happy with it, you should use it. Basically, we are converting PNGs to JPGs, adding a white background color, and changing the name to include the G8 identifier. We are processing the normal maps separately, leaving them in the PNG format but adding a blue background, and adding the G8 identifier to the filename. (If you're not using Irfanview, I am assuming the above information is sufficient.)
[Tutorial] From Map Transfer to Material PresetsIntermission
What? Intermission in a tutorial? Sure. Why not?
We are all prone to make more mistakes when we're tired, and Part Two is definitely going to need your full focus.
Besides, I want to tell you about a small graphics utility that is going to make some of this much easier on you. And it's free. I first discovered this little gem in the late 90s, and I haven't had a computer yet that it wasn't one of the first programs to get installed. What is it?
Irfanview. Irfanview started out as an image converter. Even when I first started using it, the program did much more than that. But it's still small, and it's fast, and it has a great screencapture feature, and for our purposes today, a batch conversion/rename feature.
The batch feature will let you rename the images from your Map Transfer, convert them to jpg with more control over the compression than you'll get from the Map Transfer—or from Photoshop—and move them to their final folder. All in a single operation. Of course, it can do even more than that, but you get to explore the other features on your own. Later. After you finish the tutorial.

So what other secrets should I divulge now?
► PNG is my preferred image format. I use it for renders, I use it for screencaptures, I use it so much, I often forget to convert to jpg to upload images to my Gallery pages! Why? Because JPEG uses "lossy-compression," which in the simplest of terms means compression is attained by throwing away some of the pixel data. The higher the compression, the more data that's lost. But PNG is a "lossless" compression format, so I get the best of both worlds... data intact, and some decent compression.
Most of the image maps you will be converting are in the JPEG format... already compressed, already with lost data to some extent. But some of the Normal Maps are TIF to begin with. So I recommend converting your images to PNG, rather than JPG, to get the cleanest images you can. You can even convert those normal maps back to TIF, with Irfanview. (And that's why I recommended PNG when going through the steps of Part One.)
As an added bonus, using the beta 4.9.4.117 in Windows 10 and the beta 4.9.3.166 in Windows 7 both, my PNG images have transparent backgrounds. That makes it real easy to add a matching color backgound, especially to the Normal Maps.
► You may have noticed the path to my destination folder ended with "Map Transfers/Temp". I use the same folder for all my conversions. When I've finished one figure, I create a folder with her name within the Temp folder, i.e. "Victoria 7", and move all the images into that folder. I then drop the new folder into another subfolder of "Map Transfers", in this case "G3F". To make finding the folder easy, I have a shortcut to it in my top-level Daz folder on that drive. (Along with a few other shortcuts.)
But I don't create my presets from these folders. These are my backup images. I may delete them after I have everything done, but if I mess up something, the renaming/conversion thing, for example, I can just delete my mistakes and start over.
And now that your eyes have glazed over, it's time to get up and walk around; grab a beverage, pet the cat, chase the dog, (how did he get out of the backyard?)
Meet me back here for Part Two in about ten minutes.
[Tutorial] From Map Transfer to Material PresetsPart One: The Map Transfer Utility
Converting Maps from one UV to another using the built-in Map Transfer utility.
While we want to transfer the Victoria 7 materials for use on the Genesis 8 Female, we need to use the Genesis 3 Female as her stand-in for a number of reasons. In Part One, the Map Transfer Utility requires the object have both the source (Victoria 7) and target (Base Female) UVs. We'll also be working with Iray presets. Iray materials often include maps not used with 3Delight. This way, we'll convert all the maps for each template now.
The very first thing you need to do is decide where your images will go for your presets. Once you've created presets for a character, you really won't want to move those images. I've created a folder structure in "My Library" textures folder similar to that of the default My DAZ 3D Library: C:\Users\ladair\Documents\DAZ 3D\Studio\My Library\Runtime\textures\L'Adair\Characters\Base Female\G3F\Victoria 7. The parent "G3F" directory will eventually hold converted textures for all of my "7" female figures.
The second thing you need to decide is if you want to have an interim folder for your converted images and if so, where that temporary folder will be. I highly recommend the interim folder, and you'll see why in Part Two. You can always delete these copies later.
Your destination folder in Step 2, below, is your interim folder if you're using one. Otherwise, it's your texture folder.
Step-By-Step: The Map Transfer Utility
- In Render Settings, change the Render engine to 3Delight. (This may change in the future, but testing this in Iray in three versions of Daz Studio on both Windows 7 Pro and Windows 10 Pro computers showed me 3Delight still produces the most consistent results.)
- Open a window to the destination folder for your converted textures. Create a new folder if necessary. For example, C:\Users\ladair\Documents\DAZ 3D\Studio\My Library\People\Genesis 8 Female\MapTransfer\Temp. Highlight the path text, then copy and paste in step 9 below.
- Load Genesis 3 Female in Daz Studio.
- Apply the Victoria 7 All Mat preset for Iray.
- Open the Surfaces Tab. (It doesn't matter if you're in Presets or Editor.)
- Click on the Menu icon and select Map Transfer from the popup menu.

- In the Map Transfer dialog window, select all items in the Surfaces column and verify/set the Target UV Map to Base Female.
- Right-Click in the Templates column and select New Template. Repeat 3 times for a total of 4 Templates.
- Select all 4 Templates and set Template Options as follows:
- Copy the path of the destination folder you opened in Step 2.
- Back in the Map Transfer dialog, click on the small button with the "…" (ellipsis) for a label. This will open a window to select the folder.
- Paste the path of your destination folder in the location bar. Hit the Enter key on your keyboard. The window should now display the destination folder. Once your folder name is displayed in the field at the bottom of the window, click on Select Folder.
- Choose your file type. Click anywhere on the drop-down widget to change the selection. Maps can be saved in one of four file types: JPG, PNG, TIF or BMP. (I highly recommend PNG.)
- Set your Baking Quality to 10 by moving the slider all the way to the right.
- Skip down to Convert By Matching Properties and deselect the option. (It's on by default.)
Note: I did not see this option in Daz Studio 4.8 on a Windows 7 Pro computer.
- Go back to the Surface column and drag and drop the Surfaces to the Templates as follows, (beginning with the last template and working your way up. It's faster):
- Torso to Template 4
- Legs and Toenails to Template 3
- Arms and Fingernails to Template 2
- Ears, EyeSocket, Face and Lips to Template 1

- Take a deep breath and relax.
- Click on Accept.
Note: The transfer process can take a long time on older/slower computers. The images are optimized, converted and then rendered to file using the 3Delight render engine. If this process is taking a long time on your computer, skip forward to the next chapter for "Intermission" and come back here when the Map Transfer has finished processing. - When the transfer is complete, go to your destination folder.
- Check to see that all the expected maps are there. At this point, you may need to rename your images. Depending on your options and/or operating system, (and apparently the phase of the moon,) your maps may use the Template as part of the image name. The Victoria 7 default loads with the no makeup face maps. This is also the Face 01 preset. There are five additional makeup options. At some point, if not now, you will want/need to tranfer additional maps for these options. Let's do one now.
- Apply the Victoria 7 Face 02 Mat preset to your Genesis 3 Female.
Note: Victoria 7 loads with Normal Maps. So do the makeup presets. As Map Transfer has already created the face Normal Map in Step 12, you can save a bit of time by also applying the Victoria 7 Normal Maps Off preset after you load each makeup option. - The Surfaces tab should still be selected. Click on the Menu icon and select Map Transfer from the popup menu.
- In the Map Transfer dialog window, select Templates 2 through 4. (Template 1 should contain Ears, EyeSocket, Face and Lips.)
- Right-click and select Delete Template(s).
- Select Template 1 and verify your settings have not changed, especially the path to your destination folder.
- Select the surfaces within Template 1 and verify the Target UV Map is still Base Female.
- Assuming nothing has changed in the dialog window, (and it really shouldn't have unless Daz Studio crashed on you,) click on Accept.
Note: I recommend doing all the makeup options at this time. You have the utility set up with all the right options. Just apply the makeup preset to G3F, (apply the Normals Off preset as well,) open the Map Transfer dialog and hit Accept. Compared to setting it all up again later, it's fast and easy.
And now... Time for Intermission.
Daz 3D is part of

Connect
DAZ Productions, Inc.
7533 S Center View Ct #4664
West Jordan, UT 84084Licensing Agreement | Terms of Service | Privacy Policy | EULA
© 2026 Daz Productions Inc. All Rights Reserved.