-
Genesis 1/2/3/8/9 to Genesis 2/3/8/9 Pose Converter (Updated 2025-01-03)
riuken1 said:
WendyLuvsCatz said:
of course I see this after buying Bone Minion generation 4 to G9

but then again most stuff I want to convert is indeed V4 and M4 anyway and give me skanky feet and hands on genesis 1+ and need to be saved as duf for this
still thanks
 I will look into it for everything else since I hate returning stuff
You can try use Richard converter for the Michael and Victoria to G8F/M, and them conver G9.
https://www.renderosity.com/freestuff/items/86848/m4h4f4-pose-transfer-to-g8m
https://www.renderosity.com/freestuff/items/86820/v4a4-to-g8f-pose-transfer
I already felt bad spending so thanks for making me feel worse
 Let's appreciate/discuss today's new releases - ongoing thread
As a sampler platter, here is a look at the Vinme morph full face shapes. https://www.daz3d.com/vinme-morphs-for-genesis-9
There weren't always DAZ equivalents by name, but where there were I included them for reference. Overall I don't know that I would have missed the morphs if I didn't have them, but I like them enough and think they are distinct enough from other morphs I already got to make them useful for me. The morphs labeled "DAZ" are the ones from the main Daz Original shape packs that were available, I figure those are the most common ones for people to have already with similar names.
As a note, I am getting a duplicate formula error now which I'm pretty sure is from this morph set, I'll uninstall to verify and open a ticket if that's the case, but no big deal.
If these are useful to anyone else I will try to do some more while the morph pack is on its introductory sale. If I do that I'll probably start another thread to not take over this one. Sorry not sorry about the human eyes in the doll skin, I didn't realize it would look like that at first and once I saw a render it was too creepy/funny not to leave as it is.
Genesis 1/2/3/8/9 to Genesis 2/3/8/9 Pose Converter (Updated 2025-01-03)WendyLuvsCatz said:
of course I see this after buying Bone Minion generation 4 to G9
but then again most stuff I want to convert is indeed V4 and M4 anyway and give me skanky feet and hands on genesis 1+ and need to be saved as duf for this
still thanks
I will look into it for everything else since I hate returning stuff You can try use Richard converter for the Michael and Victoria to G8F/M, and them conver G9.
https://www.renderosity.com/freestuff/items/86848/m4h4f4-pose-transfer-to-g8m
https://www.renderosity.com/freestuff/items/86820/v4a4-to-g8f-pose-transfer
Genesis 9 clothing questions & answersMada said:
Good news :) The programmers identified the reason templates crash with transfer utility so its should be a lot more stable in future releases of DS.
Yay!
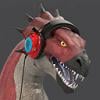
Star Trek Builders Unite 8: THE REBOOTAnd onto the next trial run: a Pahkwa-thanh, using the Raptor morph for Gen 8.1. Experimented a bit with some insectoid eyes from RawArt's Lizardian, but in the end I'll probably ditch those in favor of something more reptilian. And an attempt at updating the Saurian to at least somewhat match Linus from Discovery.
Genesis 9 clothing questions & answersGood news :) The programmers identified the reason templates crash with transfer utility so its should be a lot more stable in future releases of DS.
[Released] RSE Mirror Geometry for Genesis 8 [Commercial]esha said:
Alien Alloy said:
When it is loaded on a defaulted Genesis 8F, it presents no morph as well. But when you start to apply sliders on the G8F model, they also appear on the glove as well, as it follow the shapes and all.On the other hand, for the "mirrored" version, it doesn't. It perfectly fits the basic Female model, but the moment you touch any slider at all, from arm size to body type, etc, it doesn't carry over.
Ok, this is valuable information. It means that this item doesn't have any morphs built in, all morphs are created on the fly via auto-follow.
This should work also for the mirrored item.Could you please check a few things?
1) Is it correctly fitted and parented to the figure?
2) In the Scene tab, go to the Options menu > Assets > Clear Generated Morphs and see if that helps?
3) In the Parameters tab, go to the Options menu > Preferences > make sure Show Hidden Properties is on. Now check if there are any dials visible for the morphs, before and after morphing the figure.
1) Yes, fitted and parented to the figure. I've also tried to unparent and refit it, nothing changes.
2) Tried it, but nothing changes
3) I always work with the hidden properties "un-hidden".
I've attached few screens. As you can see in the 3rd one the actual morph shows up on the glove with the the correct %, expect for example for Upper Arm Size that is missing.
But if you check the second paramters screenshot, from the original, NON mirrored glove, it appears and it works fine.
Does anything of this helps?
Maybe I'm missing something, or perhapse something wrong with my Daz settings?Also I've tested one thing: On the Mirrored one if I crank up the collision Iterations to 10 and the Smoothing to 10, the gloves looks ok, but the morph over mentioned are still missing.
Looking for handbra and breastfeeding poses for G8FOK, I have done 11 different hand bra poses based on base G8F, the G8F Body Morph pack breast sizes 01 to 08 and breasts small. I also did my favourite character who has a very small chest. All have full and partial morphs. The partial poses pose the upper and lower chest, pectorals, arms and hands only.
The thread in the freebie forum is here: https://www.daz3d.com/forums/discussion/608701/g8f-hand-bra-poses
I do hope that they are useful.
Regards,
Richard.
help with D-Forcefelis said:
Bella said:
Saxa -- SD said:
Would check dforce weighting for that tee. You may have to add dF weight map - then you'll see if rigid painted. You may have to reweight to 100% yourself.
Other times clothes can get trapped under breasts depending on moprhs used. Doesn't look like situation here based on pic.
Thank you for your answer, what is a dF weight map ?
Select the item in the scene tab, and then Create > New dForce Modifier Weight Node
Then select the weightnode, enable weight brush, and in tool setting select the weight map. Then the clothing should become red-blue-grey and you can change the weights
But personally I think your problem comes from the projected morph. If using timeline, try at start to dial the character out (at least till the deformation is gone) and then dial the character shape up along the timeline, e.g. at frame 15. You can do that together when posing.
Eidt: reg. weightmaps, try to see this
Thank you for the video, I can try - I never did the timeline process you suggest and I think I didnt understand it
 thank you very much anyway !
  Genesis 9 Question
Clothes can be autofitted to Genesis 9. Beyond that, there are threads on creating your own clone shape to AutoFit Genesis 9 items to earlier versions, and to use various tools to transfer maps and non-HD morphs to Gensis 9 (or, in principle, the reverse).
[Released] RSE Mirror Geometry for Genesis 8 [Commercial]Alien Alloy said:
When it is loaded on a defaulted Genesis 8F, it presents no morph as well. But when you start to apply sliders on the G8F model, they also appear on the glove as well, as it follow the shapes and all.On the other hand, for the "mirrored" version, it doesn't. It perfectly fits the basic Female model, but the moment you touch any slider at all, from arm size to body type, etc, it doesn't carry over.
Ok, this is valuable information. It means that this item doesn't have any morphs built in, all morphs are created on the fly via auto-follow.
This should work also for the mirrored item.Could you please check a few things?
1) Is it correctly fitted and parented to the figure?
2) In the Scene tab, go to the Options menu > Assets > Clear Generated Morphs and see if that helps?
3) In the Parameters tab, go to the Options menu > Preferences > make sure Show Hidden Properties is on. Now check if there are any dials visible for the morphs, before and after morphing the figure.
[Released] RSE Mirror Geometry for Genesis 8 [Commercial]esha said:
Alien Alloy said:
Problem is that the piece of clothing (in my case is a glove), comform to the basic Genesis 8 female, but when you move any slider, nothing happens. They do not get "transfer" to the mirrored part.Tried over and over, with a piece of stocking as well (both the glove and stocking are single piece of clothing).
This is interesting.
I have successfully used the script for rings, so it definitely works for items that conform to the hands/fingers. The question now is, why doesn't it work for your glove?
*scratching head*Which item is it? Is it available here at Daz?
Could it have some special setup, like a geograft or a geoshell?It's a fan made piece of costume for a Street Fighter character called Poison.
As far as I know there is no geoshell at all.
When it is loaded on a defaulted Genesis 8F, it presents no morph as well. But when you start to apply sliders on the G8F model, they also appear on the glove as well, as it follow the shapes and all.
On the other hand, for the "mirrored" version, it doesn't. It perfectly fits the basic Female model, but the moment you touch any slider at all, from arm size to body type, etc, it doesn't carry over.
I've tried different times with different option, including in generating new geometry ID by following closely the PDF included. But nothing.
It does mirror the piece of clothing yes, 100% but ... well as I mentioned, it doesn't follow the morphing when applied.I've attached two quick renders for demostration.
The first one is with G8F defaulted.
The second one is with G8F with arm thickness and body building applied.[Released] RSE Mirror Geometry for Genesis 8 [Commercial]Alien Alloy said:
Problem is that the piece of clothing (in my case is a glove), comform to the basic Genesis 8 female, but when you move any slider, nothing happens. They do not get "transfer" to the mirrored part.Tried over and over, with a piece of stocking as well (both the glove and stocking are single piece of clothing).
This is interesting.
I have successfully used the script for rings, so it definitely works for items that conform to the hands/fingers. The question now is, why doesn't it work for your glove?
*scratching head*Which item is it? Is it available here at Daz?
Could it have some special setup, like a geograft or a geoshell?[Released] Character Converter from Genesis 2 Female to Genesis 8 Female [Commercial]n.jmurov said:
Did not work for me. I tried it on a custom G2F character and got the left eyeball falling out of the socket and a viciously disfigured left breast that can only be fixed in external software. Tried the 2019 and 2020 methods, deleting and re-creating the RSClone file, merging all the morphs on the original G2 into one prior to the conversion, the result was always the same.
I wonder if it missed a morph. When you convert a regular G2F character, it works? Can I see the Daz log from when you converted your custom G2F character?
[Released] Character Converter from Genesis 2 Female to Genesis 8 Female [Commercial]ddbbmodding said:
here is a photo my convert
@ddbbmodding, First, let me apologize. I did not see this post until now. The deformed iris is a known limitation of the CC. You can try deleting the head morph and trying again using one of the other conversion methods in the Options.
[Released] RSE Mirror Geometry for Genesis 8 [Commercial]Alien Alloy said:
I'm having a bit of an issue with the script.
It runs like a charm, I follow the procedure for the manual step and it does create a mirror piece of clothing as intended.
Problem is that the piece of clothing (in my case is a glove), comform to the basic Genesis 8 female, but when you move any slider, nothing happens. They do not get "transfer" to the mirrored part.
Tried over and over, with a piece of stocking as well (both the glove and stocking are single piece of clothing).
The log states the following
17:22:11 GMT+0100 (ora solare Europa occidentale): Adding "Follower/Wardrobe/Unknown" file: C:/DazX/People/Genesis 8 Female/Clothing/!!Cosplay/Default Collar.duf17:22:11 GMT+0100 (ora solare Europa occidentale): Adding "Follower/Wardrobe/Unknown" file: C:/DazX/People/Genesis 8 Female/Clothing/!!Cosplay/Default Left Socks.duf
17:22:11 GMT+0100 (ora solare Europa occidentale): Adding "Follower/Wardrobe/Unknown" file: C:/DazX/People/Genesis 8 Female/Clothing/!!Cosplay/Default Right Glove.duf
17:22:11 GMT+0100 (ora solare Europa occidentale): Adding "Follower/Wardrobe/Unknown" file: C:/DazX/People/Genesis 8 Female/Clothing/!!Cosplay/Default Right Shirt.duf
17:22:11 GMT+0100 (ora solare Europa occidentale): Adding "Follower/Wardrobe/Unknown" file: C:/DazX/People/Genesis 8 Female/Clothing/!!Cosplay/Default Shoes.duf
17:22:11 GMT+0100 (ora solare Europa occidentale): Adding "Follower/Wardrobe/Unknown" file: C:/DazX/People/Genesis 8 Female/Clothing/!!Cosplay/Default Shorts.duf
17:22:34 GMT+0100 (ora solare Europa occidentale): Executing Script
17:22:34 GMT+0100 (ora solare Europa occidentale): Selecting Preset: C:/DazX/People/Genesis 8 Female/Clothing/!!Cosplay/Default Right Glove.duf
17:22:34 GMT+0100 (ora solare Europa occidentale): Converting item from C:/DazX/People/Genesis 8 Female/Clothing/!!Cosplay/Default Right Glove.duf to C:/DazX/People/Genesis 8 Female/Clothing/!!Cosplay/!!Cosplay/Default Right Glove M.duf
17:22:34 GMT+0100 (ora solare Europa occidentale): Default Glove is of type Follower/Wardrobe/Glove/Right
17:22:34 GMT+0100 (ora solare Europa occidentale): Directory does not exist: C:/DazX/People/Genesis 8 Female/Clothing/!!Cosplay/!!Cosplay
17:22:45 GMT+0100 (ora solare Europa occidentale): Copy Icons from C:/DazX/People/Genesis 8 Female/Clothing/!!Cosplay/Default Right Glove.duf to C:/DazX/People/Genesis 8 Female/Clothing/!!Cosplay/!!Cosplay/Default Right Glove M.duf
17:22:45 GMT+0100 (ora solare Europa occidentale): Copy Categories from C:/DazX/People/Genesis 8 Female/Clothing/!!Cosplay/Default Right Glove.duf to C:/DazX/People/Genesis 8 Female/Clothing/!!Cosplay/!!Cosplay/Default Right Glove M.duf
17:22:45 GMT+0100 (ora solare Europa occidentale): Cannot find assets for old preset /People/Genesis 8 Female/Clothing/!!Cosplay/Default Right Glove.duf
17:22:47 GMT+0100 (ora solare Europa occidentale): Execution Complete.
What exacly am I missing, or doing wrong for what matters?
I'm currencly running Daz Studio 4.20 and I install all the files manually.Hmmm. Could you show me the Daz Log (Help->Troubleshooting->View Log File) from the conversion run? That should give me more information.
Getting "import failed" on all attemptsGordig said:
I've actually had great success with the bridges. As is often the case, I'm not sure if I'm less discerning than other users, or if I'm just lucky.
Probably lucky. Except for generic, unrigged props I've had nothing but "I get better results from a Collada export" experiences with it. Most models need their weighting to be addressed, virtually every non-human will have issues with the head/jaw (Recent example, Morphing Python and The Constrictor most of the jaw's weighting is on the Head), anything with spines/spikes WILL NOT function out of the box, and it's a coinflip if clothing will be in a near-usable state. 99% of the time when I export something it says "Import Failed!" and comes in without a Morph Tag regardless of what options I select before. The remaining 1% of the time (DAZ Dragon 3 for example) it'll export SOME of the morphs and then "Empty" morphs for some of the ones that do get exported (Facial expressions mostly). I've even had clothing import without weighting at all a few times.
I tried updating both DS and the Bridge through Install Manager but nothing really changed, other than the program asking me about Joint Orientation when importing.
How to open G9 mouth?I'm just beginning to play with G9, and I saw the separate mouth anatomy in Smart Content and wanted a look. So I tried to open the mouth--and found that without an expression kit, I don't know how!
There doesn't seem to be a Mouth Open morph. There's a Mouth Close one, but it's at 0% and increasing it just smashes the jaw up into the head and makes parts pass through one another...
I can find the jaw in the scene tab and use the Up-Down slider, but that distorts the lips so badly that surely to goodness it's not the right way...
Using the jawbone, I can accomplish my original objective of seeing the mouth anatomy, but now I wanna know how I'd open the mouth for actual use in a scene.
What is the workflow for creating a head morph for the Genesis 9 figure?@Frinkky - the problem with the eyes is caused by auto-generated morphs that don't work that great for (I'd say) most cases. Unhide all your morphs and you will see the auto-generated eye morph in the morph loader for the eyes once you dial in your custom character then pick Genesis 9 Eyes in the scene tab. The way I block this morph is by going into the morphs settings (the sprocket wheel in the right upper corner of the morph dial), select "Use Limits" and set them both (max and min) to 0%. Then I change the modifier type from autogenerated to modifier/shape and uncheck "Autofollow". That totally neutralizes the autogenerated morph.
As for your own, custom eye morph this tutorial will be helpful:
This is an older tutorial so the differences are:
Go into "Edit mode" by right clicking on your eye dial and picking "Edit morph" from the top of the pop up menu. Select your eye morph. Next right click again on it and at the bottom of the menu you will find "Show in Property Hierarchy" - select that. A new, floating window will open. Find your character (not eye!) morph and when you unfold it you will find "Link:" - drag from the Parameters tab you custom morph slider onto the "Link:" in the Property Hierarchy window and the (I think - I am writing this from memory) you need to do the same in Sub-components - click on the arrow next to it and it will unfold. Drag and drop the eye morph slider onto "Stage 2: Multiply/Divide". If it throw out a message that it cannot do it - no worries. Just hooking the eye morph to "Link:" should connect the motion of your custom eye morph to the character dial.
Take this information with a big grain of salt. I learned to do this through trial and error and I am not saying this is the right way to do it or that this description is complete. Still, I hope I answered some of your questions.
AOBB
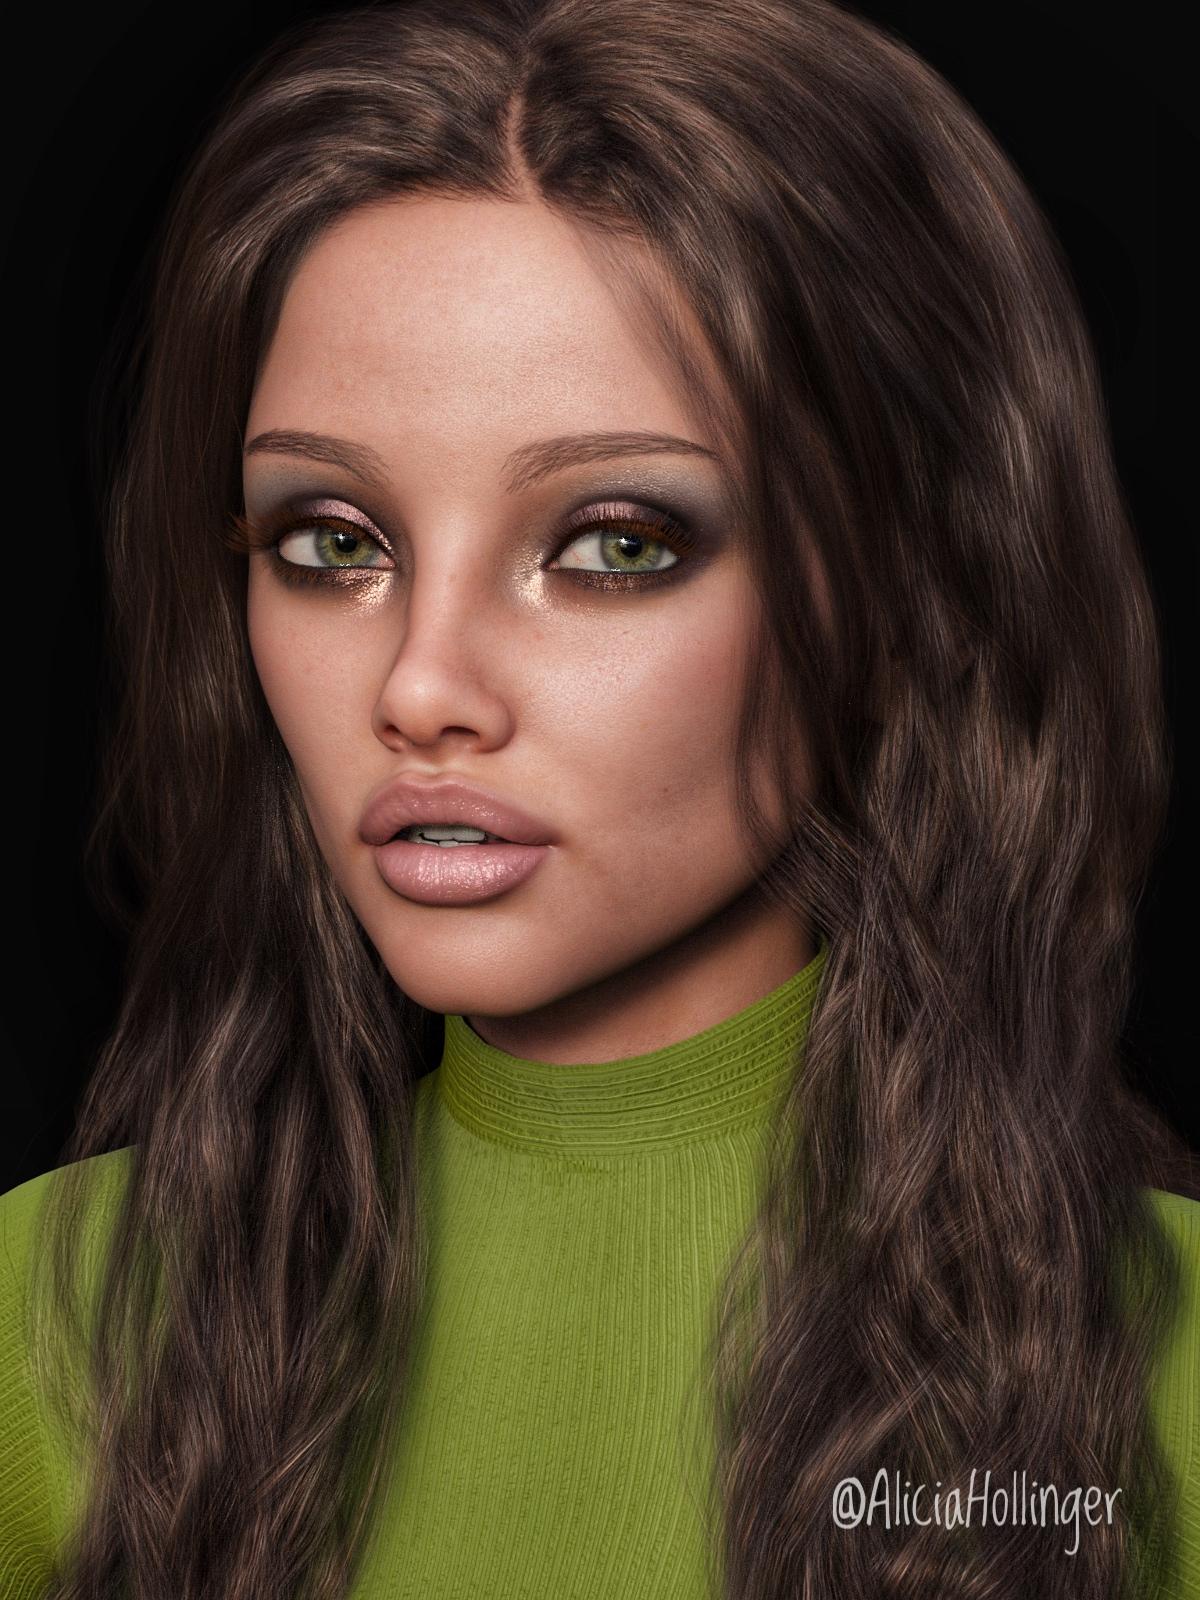
Head gamesHere is one with Josie's skin/makeup and some of her morph mixed with a bunch of others. I think she came out looking like a mix of Mila Kunis and Angelina Jolie...
Daz 3D is part of

Connect
DAZ Productions, Inc.
7533 S Center View Ct #4664
West Jordan, UT 84084Licensing Agreement | Terms of Service | Privacy Policy | EULA
© 2026 Daz Productions Inc. All Rights Reserved.