-
Transfer Utility never works
crosswind said:
The perfect way is always using Base figure + default A pose, and well fit the clothing on it before transfer rigging. Current Shape + Reverse Def. has flaws in term of Base Geometry no matter what templates you use...
That's true. Esha says this in her content creation videos. I dont want to spread disinformation, just thought it might be easier approach for people like the OP who seems to be struggling doing quite simple things
Scroll to morphYeah that's still not ideal. If I just wanna get to where the expressions are, but not use a particular expression for example.
What are these morph dials anyway? DzFloatProperty? DzFloatPropertyWidget? Say a morph is called "morph 1", how would I get to that in script?
Transfer Utility never worksThe perfect way is always using Base figure + default A pose, and well fit the clothing on it before transfer rigging. Current Shape + Reverse Src. has flaws in term of Base Geometry no matter what templates you use...
Scroll to morphYou could add them to favourites (heart icon on the slider), as long as you don't need to use the Geometry Editor to remove vetices from a morph (which relies on favourites for targeting - though as long as you didn't save modified assets but only the morph being edited that wouldn't be too bad). You will need to save a character preset after setting favourites and use that to load the figure in future, if there is a persistent selection you want to have access to in all cases.
Transfer Utility never workspaid said:
Ex- and importing the obj changed not much.
Well the sleeves in your image dont match the figure at all before transfer utility so no wonder it fails. Earlier i said rigging is transferred by distance. Daz Studio is not psychic. It doesnt know where to put bones magically so the garment and figure need to be aligned so that transfer will work correctly, using the distance between the two models, hence why the garment was being posed with bones in the video you showed (which i now acknowledge makes sense in that context)
I think we actually have two options for aligning,either pose the sleeves of the garment to match the figure or pose the figure to match the garment. (And as mentioned much earlier in this thread, if using anything but default pose/shape, you need to click reverse source from target or whatever the option is called).
As your question about posing garments in Blender is a Blender-specific question, i guess it makes more sense to look into blender videos/forums about this aspect for more details if it's confusing.
huge disadvantage of the 4.22 Scene managementRichard Haseltine said:
Are you sure you don't have another content directory with an older copy of the morph, or saved in a different path in their common content directory?
Yes, absolutley sure. Checked it repeatedly.
huge disadvantage of the 4.22 Scene managementAre you sure you don't have another content directory with an older copy of the morph, or saved in a different path in their common content directory?
Transfer Utility never worksThe robe needs to fit on the figure ... Transfer rigging with Transfer Utility then fix pJCMs in Blender and import delta morph back to DS...
Transfer Utility never worksThe clothing has to fit (match) the source before doing transfer rigging.
And your issues with lifting the arm is not the rigging, it is the weightmaps. When doing transfer rigging there might be different templates, that will distribute the weights differently, but sleeves like these, have to be manually modifed afterwards.
Solved: Need help with Genesis 9 eyes issues - behaving wildly and out of syncOK, looks like I might have solved it.
I went in and removed every single morph and parameter one by one. No head morphs did anything.
Shockingly, a body morph from GC Natasha seemed to be the culprit.
I didn't use the head part of that morph, but 10% body was messing up the eyes.
Once I removed it, expressions were working as intended. Weird.
Thanks for tips and suggestions!huge disadvantage of the 4.22 Scene managementCouldn't reproduce the issue no matter updating / saving morph asset with 4.21 or 4.22. Actually if you just dial a 100% on the property and save Morph Asset, there'll be nothing changed in the original dsf file, unless you set a default value there in Parameters Settings.
Transfer Utility never worksOf course I tried to use the Transfer Utility (see my first post) and it did not work. I watched a video of Kelvin Jin (
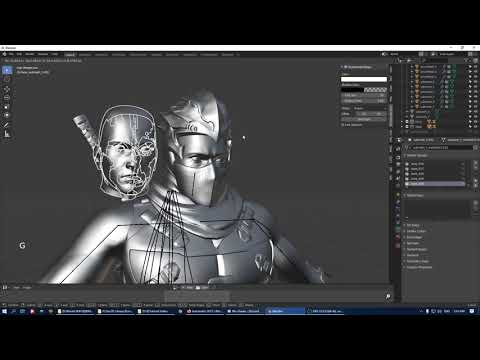 ) as crosswinds suggested and in it he positioned the clothing with bones to the G8 form before exporting it to DAZ - besides meanwhile I got the bones and all as in this video but when I import the obj.file into DAZ I only get boxes ...
I am close to kicking DAZ into the trash can
 huge disadvantage of the 4.22 Scene management
Richard Haseltine said:
I am not sure what you mean here.
... and I just don't know how to describe it any better.
Updated morph asset dsf files do not load in scenes.
For example:
Having a character, with a morph asset stored *.dsf in a data path.
>Saving the scene with this morph dialed in at 100%.
>replacing the morph asset with a reworked *.dsf file with the exact same name in the exact same path.
>Reopening the scene.
DAZ Studio 4.21:
The scene loads with the replaced morph asset dialed in at 100%.
DAZ Studio 4.22
The scene loads with the replaced morph asset dialed in at 0%.Who Is This?Alice - Aeon Souls custom character.
She was sold as a product for maybe Genesis 2, but is as far as I know withdrawn.
They seem to transfer her to each generation.
Transfer Utility never workspaid said:
I watched some yourube tutorials and now know I first have to add bones to the clothing. So I added the first bone but I cannot select the tip of the bone - all I can select is the whole bone! That drives me crazy because in all tutorials I watched no one had a problem selecing just the tip and not the whole bone. What am I doing wrong?
What videos were you watching lol?
Transfer utility can add the bones and the rigging. (It transfers the bones and the weight mapping from a donor figure that already has rigging, i.e., Genesis 9 etc)
transfer utility transfers the rigging based on distance of your clothing to the rigged figure.
the only bones you will need to add to a garment are ones for things that dont correlate to genesis 9. E.g., maybe there is a hanging tassle or a cape or something. But Transfer Utility also has some templates for things like that, or you can buy additional templates sometimes from daz store.
Maybe watch proper videos.
Scroll to morphA way to scroll to a specific morph, basically, or thereabouts. I'm just noticing I'm scrolling to the same places a lot. Say I have G9 selected, scroll to expressions, dial an expression. Select something else, select G9 again. The list is reset and I'm back to scrolling around, navigating to Pose Controls etc., or searching for the specific morph. Just dreaming up some way to get their much faster.
Transfer Utility never workspaid said:
I watched some yourube tutorials and now know I first have to add bones to the clothing. So I added the first bone but I cannot select the tip of the bone - all I can select is the whole bone! That drives me crazy because in all tutorials I watched no one had a problem selecing just the tip and not the whole bone. What am I doing wrong?
I don't understand the purpose of adding Bone(s) to the garment in Blender... You want to bring this garment to Daz, don't you ? If so, you just need to transfer rigging / weight from Genesis figure to the garment in DS by using Transfer Utility...
PreT Girls Fringe HairI don't have it.
Hiding the hairbands, should be fairly easy. I assume they have their own surface, and then by setting cutout-oppacity to 0, they will become invisible. If you want to keep those in the sides, you need to create a mask (white to keep, black to hide) that can be used in the cutout-oppacity channel.
If the hair is rigged, the tassels might have their own bones, and if so they can be hidden in the scene tab (the eye icon), and will be hidden in the scene. But I doubt it is rigged.
If the tassels have their own surface, you can make them invisible by setting cutout oppacity to 0.
But I think the hair would look thin without the tassels.
The best solution, would probably take the hair into a modeller and make a morph, to smoothing the tassels out so they more follow the rest of the hair. How easy/difficult that would be depends on how the hair is modelled. It looks like the tassels is modelled as seperate items, which would make it a little harder to get a smooth transition. But overall it also requires that you are somewhat familiar with a modeller (of choise).
Genesis 9 Skin renders whiteI took the plunge on Genesis 9 as there were a couple of characters that I really liked. Well......the nightmare has begun. I loaded up a base figure and a character morph and every Iray render in the viewport is stark white. Base texture as well as 2 different character textures and have no clue as to why. All textures are visible in Texture Shaded view. I have no other problems with Gen 3, 8, or 8.1.....Does anyone kmow what is wrong here??
Thanks for any help.
Genesis 9 Mouth Figure refusing to auto-followEvieS said:
Thanks for the offer but I found how I did it. LILWEEP was absolutely correct. But on a side-note, your OPTION 2 does not work at all. Auto-follow just doesn't work for the mouth if you're adjusting something like mouth opening that moves the jaw around. Neither of my computers have any success with that. Works on eyes, brows, lashes and clothing and hair - but mouth says no-go. I think you're right about it being a rigging issue since the mouth/teeth have a rigged jaw hinge. Maybe it's locked on purpose to prevent distortion or something. I don't know - but my G9 mouth has always been next to immovable. It will change location and position to adjust for head morphs and body resizing (FBM) but if I try to use an open mouth morph from my figure with auto-follow...it don't work.
1st, nobody said lilweep was wrong. 2nd, you have not seen my workflow, how could you say opt2 does not work at all ? It did not work on you side 'cause you missed an "important step" ....
Option 1 may work if you're doing it for the mouth - but you can't combine mouth and figure into one Pose or preset. The whole idea is to have one morph on the figure that controls morphs on the mouth figure.
Why can't I ? If it cannot make it, what does ERC exist for ? Furthermore, there's a MultiDimensional Controlling method that you even can make them much complex...
Back on point - LILWEEP was right. I reproduced my magic master parameter by simple name collusion. This is what I did:
- I made a master control parameter on the mouth and added the morphs for the mouth that I wanted to turn on to that master via ERC Freeze.
- Then I went to my figure and created an IDENTICALLY NAMED master parameter on the figure and added the one from the mouth to it via ERC Freeze.
- I saved out the figure asset and installed my new morphs to my Genesis 9 base (data .duf) and restarted DS.
It was nice that you make it work in this way but it couldn't have to be that cumbersome... There's a very standard Auto Follow way of making these, even if on a "peculiar G9"... Auto Follow means you don't need to create any property on the target sub-node (mouth). If you manually create one with diff. name, that'll be 1st of all a non-Auto Follow way but a staged controlling way instead, and there's also a very SOP on such a way.
Upon loading G9 now, the singular master parameter on the figure controls the mouth morphs. I'm guessing it's a linking thing - making DS think the two morphs are the same thus it relinks them? I don't know. I was always able to set this up in DS and get it to work, but then I'd save out the figure asset and get my new master morphs and install them and the figure one would have zilch for subs and would do nothing. It's like during the figure asset save, it would lose the ERC frozen data for the mouth...so that the newly exported .duf wouldn't do a darn thing when installed. When I do this now with the identical names - the newly installed parameter seems to retain that ERC information and works. Don't ask me...but it worked. Twice now. Could this be an actual bug in DS? Losing ERC information for non-figure (G9) conforming parts? Should I report it? Clearly the program is capable of making this work - I've done it twice now - but the name thing shouldn't really be needed to fool it into working. If you ERC Freeze a morph to a new parameter and save it out - that parameter should be retaining any data you ERC'd to it, right?
Yes, especially with the latest DS version, an unique urI will be randomly created by DS to avoid any similar conflict, ERC failure or duplicate formulas issues...
Daz 3D is part of

Connect
DAZ Productions, Inc.
7533 S Center View Ct #4664
West Jordan, UT 84084Licensing Agreement | Terms of Service | Privacy Policy | EULA
© 2026 Daz Productions Inc. All Rights Reserved.