-
Successful V 6 Gen 2 users in Poser
Successful V 6 Gen 2 users in Poser
I'd like to hear from those Poser users of V 4 and V 6 please
How do you like V6 in poser How good are the transfer programs
thanks
:)
Trying to seperate different geometry into different groups for face, surface and rigging
Well, I copied a similar gen and fixed the thigh problem but for some reason, the different face groups are not working with the rigging. I was wondering if it was possible to relabel everything under new groups?If you are using the Transfer utility then grouping doesn't matter - if not then how are you setting the figure up? The trouble with auto-rigging is that it works by proximity so if - at a guess - your model lies in the groin area it's very likely to pick up projected weight from the thighs that it doesn't need - the only fix is to use the Geometry Editor tool and Node Weight brush tool to edit the weighting manually (and, depending on what it is that you are making, perhaps use the Joint Editor tool to add extra bones)..
How to save separate head/body morphs?DS weight-mapped figures are all single skin - the mesh (and so the morphs) belong to the figure, not to bones. You can't set a single morph loaded from an OBJ file to one value on one body part, such as the head, and another value on other body part(s) as you could with Victroia 4 etc. If you are creating new morphs from direct mesh manipulation then you need to split them down in the modelling stage and load them separately (then use ERC Freeze to create a master controller if desired).
Trying to seperate different geometry into different groups for face, surface and riggingIf you are using the Transfer utility then grouping doesn't matter - if not then how are you setting the figure up? The trouble with auto-rigging is that it works by proximity so if - at a guess - your model lies in the groin area it's very likely to pick up projected weight from the thighs that it doesn't need - the only fix is to use the Geometry Editor tool and Node Weight brush tool to edit the weighting manually (and, depending on what it is that you are making, perhaps use the Joint Editor tool to add extra bones)..
I'm stuck... how do I load morphs from the Content Library?If the morphs are .dsf files then they almost certainly need to go in the \Data\Creator\Product\Figure\Moprhs\ folder, in a folder for the morph creator and product - I would hope that the zip would be set up to reflect that. Once installed they would load with the figure, they are not meant to appear in the content panes.
Other formats may go in several places and may or may not depend crtically on location - more details are needed.
holy bleep, i forgot that actually happend to me one time.
Some freebie in the early genesis days, i think it's still floating around out there on some freebie site.
good morph, lousy layout. took me forever to figure it out. of course i was fairly new to daz studio and didn't understand all the file formats.
Thank goodness for DUF, makes it massively easier to clean up stuff like that.
sioc's labWelcome Sioc, a lot of very beautiful characters. Love the Star Trek Trill character. :)
Are those characters morph dials or is it modelling work in an external programm?
For some advice on rendering you may take a look at the New Users Contest: http://www.daz3d.com/forums/categories/new-user-contests-and-events
Wether you want to participate or not, the WIP Threads are open for everyone to get some feedback and tipps.
I'm stuck... how do I load morphs from the Content Library?If the morphs are .dsf files then they almost certainly need to go in the \Data\Creator\Product\Figure\Moprhs\ folder, in a folder for the morph creator and product - I would hope that the zip would be set up to reflect that. Once installed they would load with the figure, they are not meant to appear in the content panes.
Other formats may go in several places and may or may not depend crtically on location - more details are needed.
I'm stuck... how do I load morphs from the Content Library?TRy searching the product listings under the content tab (not the smart content one) and see if you see the nameof the product there.
I know exactly where they are and can find them in the content library in the studio, the problem is loading them into the project.
Select the associated figure, V4, G1/2/3 etc, and double click on the icon.
This should apply the particular morphs to the figure.
Be aware that depending on the figure they may already be applied, g1/2/3 load all morph dials installed automatically,
If on the other hand you are working with V4 you may need to run the initialization script to get them applied.
Also some morphs are for poser only and will not work with daz studio.
Novica & Forum Members Tips & Product Reviews Pt 7Two more.
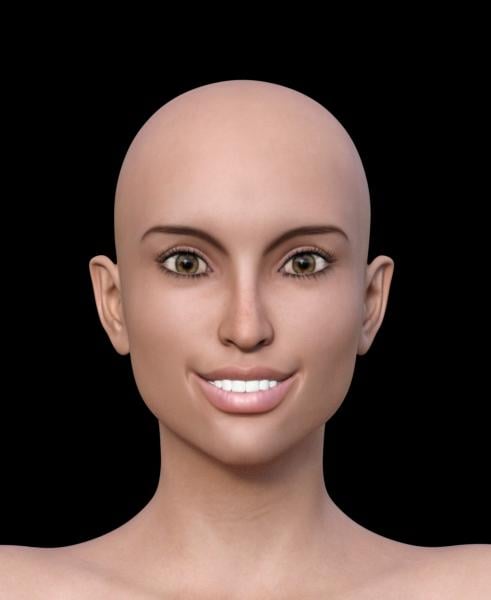
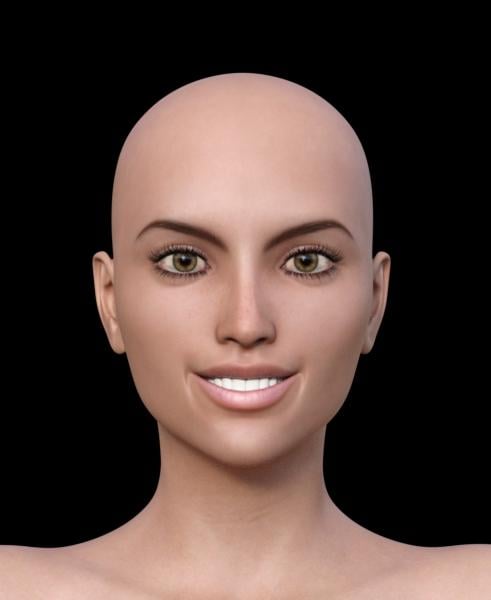
The original Adaline with her morphs, her skin.
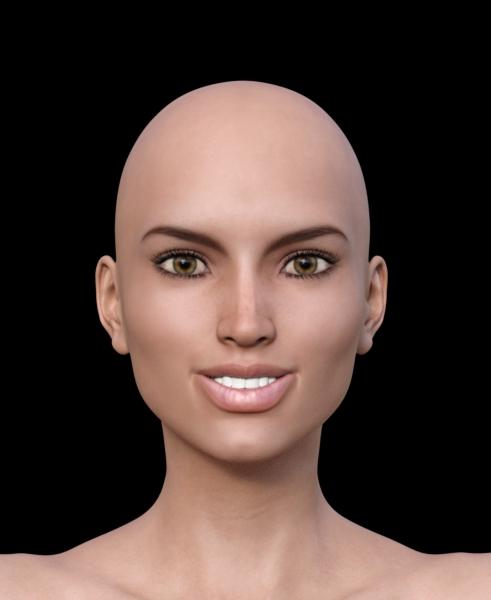
So, we know the same smile won't work with the different head morphs. Let's do head morph #5 from the first post and reduce the smile.
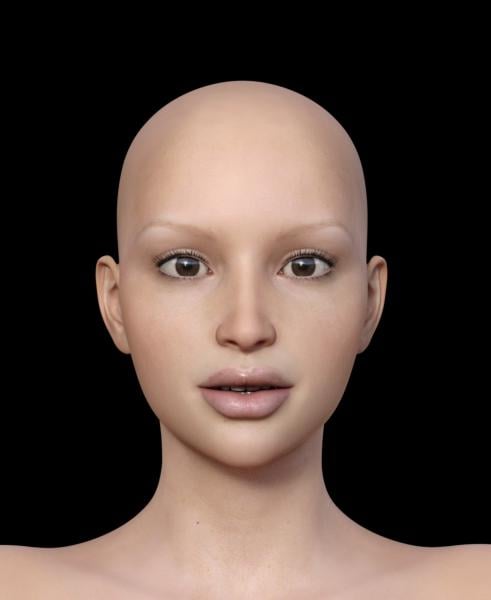
Basically, what I'm seeing so far is using the same smile won't work with the different morphs (no surprise there.) I am surprised, however, that the eyelash length changed on several of these, one very obviously.
This product also has where you can just morph the nose, which I think will come in very handy. All in all, it's fun to play with. However, I am going to test some smiles using Expressions and see what will actually look GOOD with these morphs. Will have to do that sometime this week.
Novica & Forum Members Tips & Product Reviews Pt 7Still not changing the smile morphs, but you can see you'll have to make minor tweaks depending on the head shape you choose. I like the variety. After I get done, I'll go back and test the ones that needed tweaking and show you a good smile using those heads.
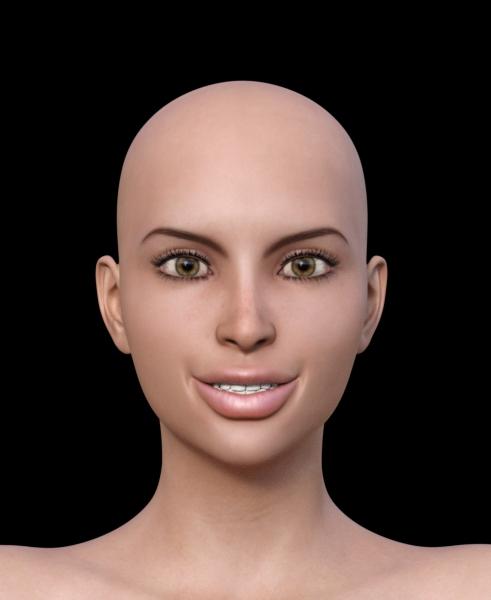
Whoa, look what it does to the eyelashes in the second one, #7 head morph. Is it supposed to do that? (Yes, I tested it twice. No double morphing.)
As you'll see, there's a bit of pulling on the mouths, so as expected, you'll have to tweak the smiles to go with the face morphs.
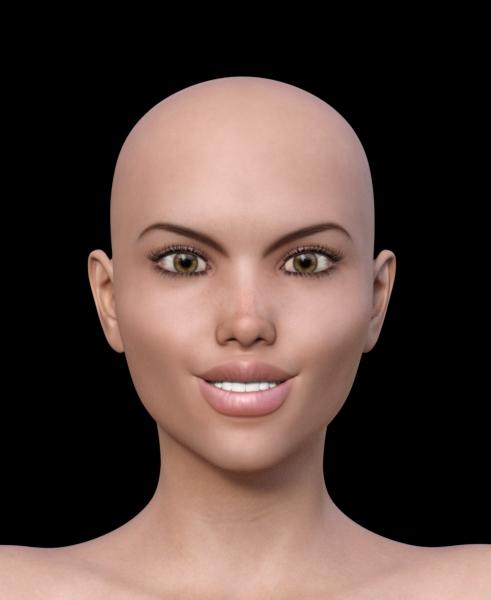
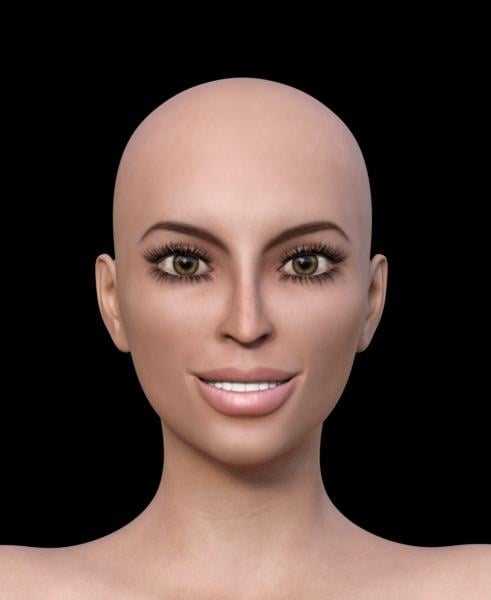
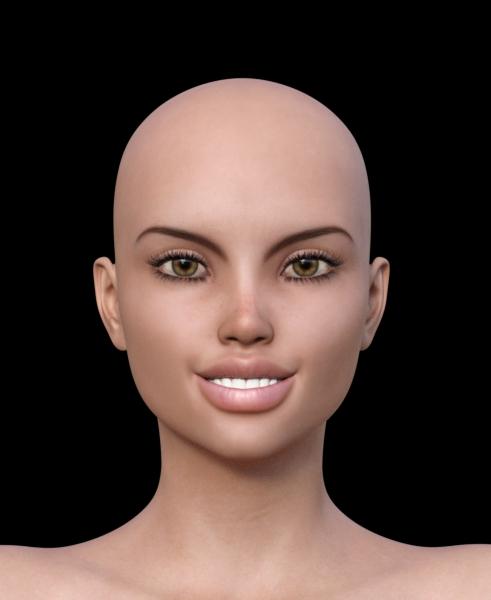
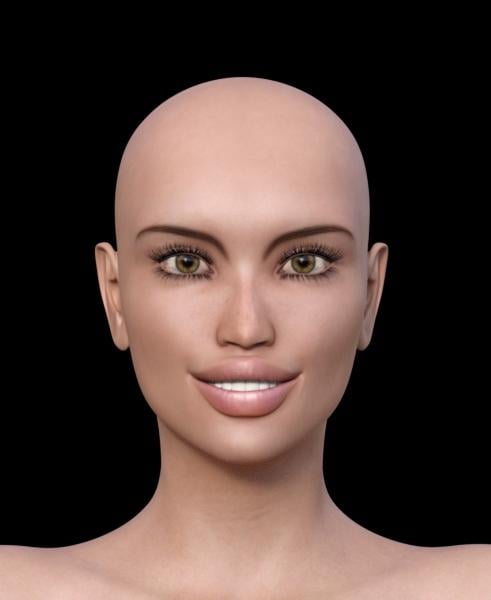
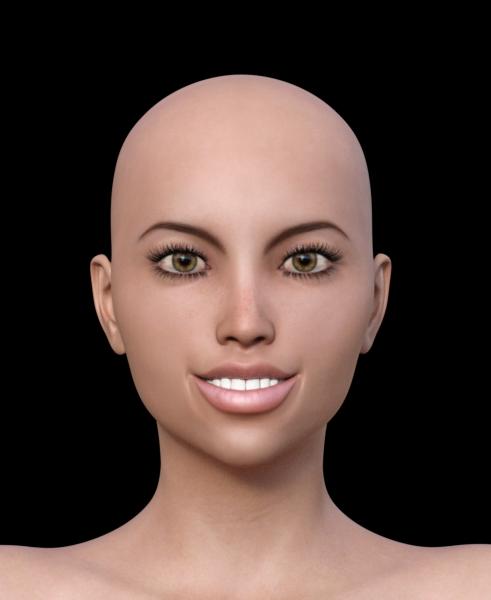 Novica & Forum Members Tips & Product Reviews Pt 7
Going to give you a look at 3A Creative Morphs Merchant Resource Set 01
This will be on Genesis 3 Female, using Adaline's skin. Then applying the morphs. We're not going to change the pose at all, and see how the head morphs do. The smile combination from Smile Delight is:
Smile 12: 77.9%
Smile 15: 22.1%
Smile 18: -10.6% (yes, you should test negatives too)
Smile 19: 6.8%
which looks acceptable on the first morph. How does it do on the other morphs?
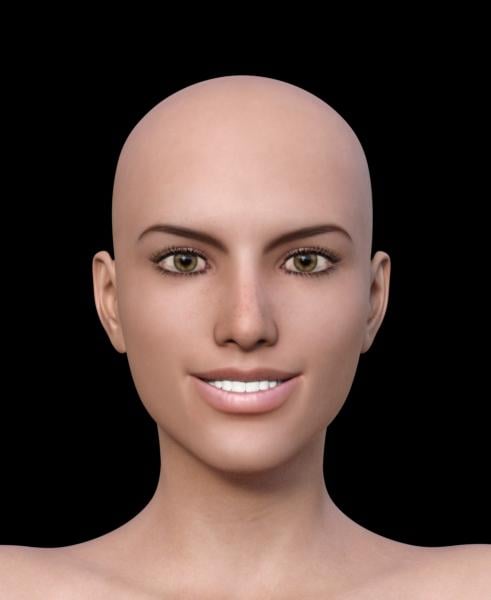
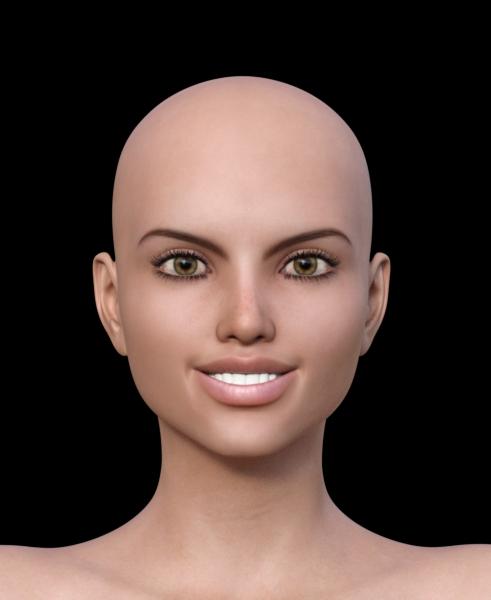
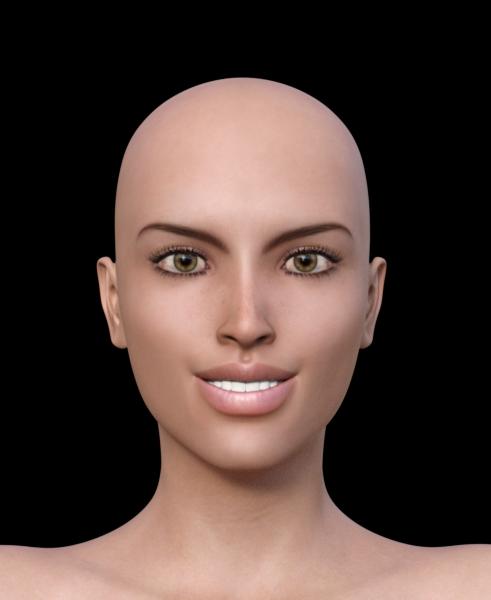
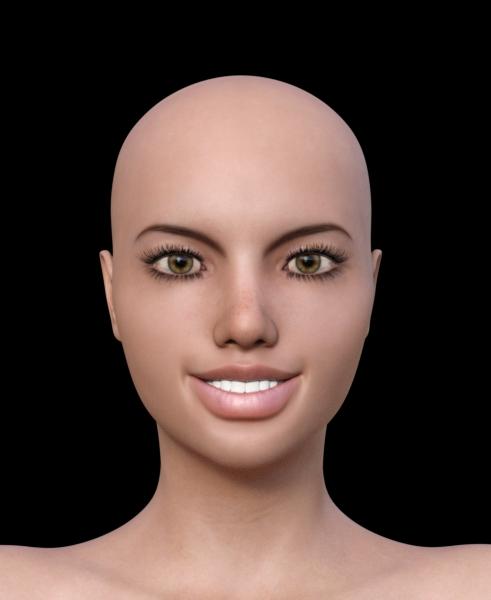
And not good at all on this one.
 Glute Control for Genesis 3 (Commercial)
Insta-boug* Oh, wait, I thought this was released...;^)
Seriously, though I'm already awaiting its place within my cart, BTW, I have your B&G morph package as well, so it's gonna be incredible to see how much more refined this is gonna be!
How to save separate head/body morphs?For G3. I'm trying to create my own character and maybe it's different for Daz than Poser.... Do you just save the whole character and people can dial in the face or body? Basically I'm creating a custom character that I want to sell and am trying to figure out how to save it... Thanks.
Oh, also, how do I save a separate morph for fairy ears and the ability to switch back to normal ears...
* CLOSED* RRRR Story Render ContestJust to confirm the PM, I'm in for the usual.
Let the games begin...!
Pull #1:
3683 - Dot Check
646 - Colors for Viking Male Hair
214 - A Quiet Repose
5800 - The Youth Camp - Camper's Cabin
4338 - Ibis for Victoria 3 (??)
2397 - Beach Hair
3571 - Severed Man (This could get interesting...!)
4655 - Central Park - TwilightNow to figure out what all this crap is...! (Victoria 3!? Seriously!?)
TAG: obanion#01
Title: The New Scooby-Doo: Velma Gets Her Moment in the Sun
(In which we pay homage to the previous RRRR theme, 'Sequels')
<Image #1>
Used in this image:
Beach Hair
Ibis for Victoria 3
Central Park - Twilight
Dot CheckAlso used:
Stephanie 3 Petite (the Ibis morph and texture worked on her; who knew!?)
Amiel Hair
4 Style Square-Toe Pumps for V3/A3/S3
Genesis 3 Female
The Mystery Solver for Genesis 3 Female
Michael 4
Hard Core for M4
Moonshines Diner
Moonshines Diner Interior (I and II)
Diner Waitress for Genesis
Tears Hair for Genesis
Millennium Dog
Step VanWith Daphne and Freddie currently honeymooning in Aruba, and with Shaggy in rehab (again! -- and before he could finish the paint job on the new, improved Mystery Machine, too), Velma did not want to go it alone; so she found some help -- from Martin and Alexis (yep, they're back)! They met at a diner on the outskirts of the city, and after a nice lunch, they all piled into the Mystery Machine and headed down the highway. Their destination: the infamous Camp Crystal Lake....
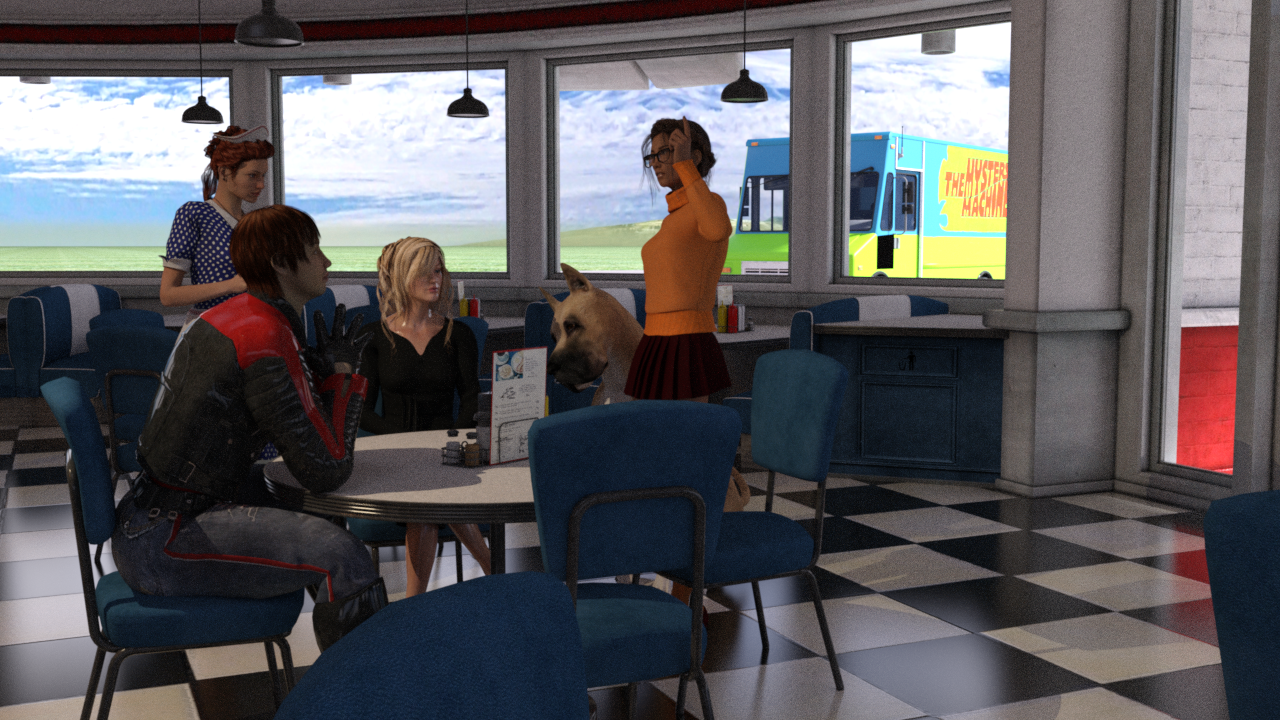
(To be continued)
Genesis 3 GoZ with HD.... My suggested work-around was to load the base mesh into ZBrush, divide it, set it back to base, and then export as OBJ. Load that "do nothing but distort" shape as a new morph, set it to 1, then use Reverse Deformations when you load your real morph to cancel the ZBrush distortions.
Oh my, that takes me back a few years. We used to use that process to isolate morphs that were made on top of other morphs. I was hoping we had gone beyond that by now. Especially as the GoZ route does create a morph dial which gives the difference between the original figure shape and the new morphed shape.
Mind Flayer or Cthulthu Headed characterA morph for G3 probably isnt going to happen. It is too different a structure.
Dynamic Clothing Pane Missing Some Optionsa off looking figure would not be a problem, To do the initial drape in optitex I only need a static mesh without any texture. Or does "off" refere to poses as well?There shouldn't be pose problems, it's just about the shape — if the figure is morphed using morph sets that are installed on the first computer but not the second, then of course those missing morphs won't contribute to the final figure shape once it's copied to the second computer. How much of a problem this is for draping dynamic cloth depends on how significant the morphs are. E.g. a missing "broad shoulders" morph might affect the way a shirt hangs on the figure.
A way to save just one body part as a morph?You can transfer part of a full body morph in Blender using Shape Keys and the following is a tutorial on how it can be done. It's fairly long but I'm partly putting it here so I don't forget it myelf. As is often the case with written tutorials it's not as complicated as it looks. I hope it's useful for others.
Load your base figure into Blender as you would when creating your own morph. This will be your target object.
Export the figure (zero pose and base resolution) with the FBM you want to transfer from applied and import this into Blender, too. This will be your source object (and you can move it to the side in Object mode so the two figures aren't occupying the same space, although it doesn't matter). Don't move your target figure, though.
Select your source figure (right click) and then select your target figure (shift right click). The source will have a red outline and the target a yellow outline. The yellow outlined object is the active object and it must be your target.
Click the Object Data icon (its the inverted triangle icon) in the Properties Panel, which is on the far right of Blender. In that tab you will see the Vertex Groups and Shape Keys sub panels. You will need both of these.
Under Shape Keys you will see an empty area with a plus and minus on the right under which is a small black triangle icon on a dark grey button. This is the "specials" menu. From here click "Join as shapes". This creates two keys "Basis" (this represents the unmodified shape) and a key that has the name of the source object, and this holds all the differences between the target and the source (in terms of vertex positions). You target figure will show no apparent change, but if you select that second key and use the Value slider underneath the list of shape keys and slide it towards a value of 1.000 you will see the morph applied. Return it to zero for now.
So far this isn't much use as you now have the whole FMB as a shape key in your base figure. This is where Vertex Groups come in. If you exported with Write Groups checked you will have a whole bunch of vertex groups, but we need to make a new one which contains all the vertices we want the morph to affect.
Tab into Edit mode and press A to deselect all (assuming all vertices are selected, which they will be by default). Now what you need to re-select will depend on the morph (it may require trial and error and some cleanup morphing of your own where the morphed parts meet the unmorphed parts). I won't go into details and methods of selecting, but you essential need to select everything you want the morph to affect.
With these selected, go to the vertex groups panel and press the plus icon. A new group called Group will be created (you can rename it if you want). With the new group selected press Assign and all your selected vertices will be added to it. You can test by clicking the Deselect and then the Select buttons and the selection should go on and off.
Now down to Shape Keys again. Under the Value slider you see a title "Blend" under which is an icon of 7 dots in a hex shape. Click that and you will see a list of the vertex groups. They are in alphabetica order unlike the main list so it's not too hard to find your new group. Select it and your group name will appear next to the hex icon.
Now go back to Object mode and dial the Value back to 1.000 again. Now only your selected vertices (those in your vertex group) will be morphed.
Just a word about exporting your result. As far as I know if you export with shape keys only either the changes (the shape key itself) or the Basis (the unmorphed object) will be exported, depending on which key is selected. There is a way to "apply" the shape key(s) though:
Go back to Shape Keys sub-panel, click that Specials menu icon again, but this time select New Shape from Mix. Another key is created (probably called Key 2). You do not need to dial it. What you do next seems counterintuitive to me (but hey, it's Blender!), but you delete Basis and the key you created (plus any other keys you may have made) and finally (and you must do this last) delete "Key 2" or whatever the key created by New Shape from Mix created for you. There should now be no shape keys left, yet the morph is still there! Now you can export it.
For fun I tested this using Ogora the Orc, which is a full body morph (for good reason) and transferred the head only. I needed to do a lot of clean up work to make the head blend with the G2M body, but you can see the results below (with the Gianni 6 body).
 account sales?
No, in general content (and so accounts) from Daz are not transferable. In particualr circumstances you could open a support ticket but I would not expect a transfer by sale to be allowed.
4.9 Has Turned Grindingly SlowRemoving unused morphs by uninstalling the package or by deleting the files in the Data\Publisher\product\Figure\Morphs\Morph creator\Morph set folder should work.
Daz 3D is part of

Connect
DAZ Productions, Inc.
7533 S Center View Ct #4664
West Jordan, UT 84084Licensing Agreement | Terms of Service | Privacy Policy | EULA
© 2026 Daz Productions Inc. All Rights Reserved.