-
Problem with JCMs
Hello again,
The problem persists, even after I set Min parameter to 0. I save out the file, reload it, and I get the following.
Oddly, when the morph is first loaded for an ERC freeze, it looks fine. It's when I reload the model and test the morph that I get this problem.
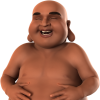
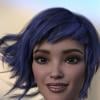
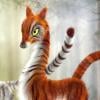
The guy in the promo for the Daily Mindblower - Cath's PBR shadersHi Guys, it is Darius 6 for Gen2 textures but put it on my own iray skin shader , with Unshaven 2 beard, Hair from Hercules , the morph is Darius6 head mixed with Lee6 , you can see the full promo on the product page .
It was pleasure to trick some of you thinking it was something else ..
Cath
General suggestion for pants/shorts/skirtsWhat would be a good thing: If pants/shorts/skirts have a button at the front a width adjustment morph for this button. If one creates a character with a bit wider hip/waist the button spreads and that is should be adjustable with a morph.
The guy in the promo for the Daily Mindblower - Cath's PBR shadersLooks like Darius 6 wearing an unshaven 2 beard to me. Maybe slightly modified morph. It certainly looks like his texture, if you look at it, there are a number of features they have in common.
New Iray SkyDome Super Pak available Now [Commercial]Hi Guys.
Thanks for buying thr SuperPak, I actually had some difficulty finding it, its not on the main auto scroll of products along with the other new realeases>
Maybe Daz havent added it there yet.
Anyway for those that cant find the Read Me its in the \My DAZ 3D Library\Runtime\Magix101-Read Me's folder.
Here are the main parts of that Read Me, also if anyone has any questions...just post them here...or we could start a new thread and I will do my best to answer any questionsREAD ME
Iray SkyDome Super PAK 1
[This product requires Iray SkyDome to be installed]COPYRIGHT MAGIX 101 2016
All of these products content were created solely by MAGIX-101.
A list of all the files and folders contained in this package are at the bottom of this Read Me file.
I can be contacted at [email protected]
------------------------------------------------------------------------------------------------------------------------------------
Thank you very much for buying my "Iray SkyDome Super PAK"
This package is a Super Pak for Iray SkyDomeIt features:-
22 New Pre Set Scenes
24 New Sky MATS
40 New Ground Tiling MATS [incl 6 Legacy MATS]
18 New Water Tiling MATS [incl 2 Legacy MATS]
33 Horizon Background SETUPS [Incl Horizon Sizes and MATS]
12 Spin World SETUPS
12 Spin Skies SETUPS
131 New Texture MAPS [Incl New HD Skies 12000 x 4000]------------------------------------------------------------------------------------------------------------------------------------
INSTALLINGSimply install it into the Daz-Studio 4.8 plus directory.
------------------------------------------------------------------------------------------------------------------------------------
APPLYING AND USING Iray SkyDome Super PAK 1Go to " My DAZ 3D Library\Environments\Iray Worlds\Iray SkyDome\Super PAK1 or where you have the Iray Worlds installed (Check your DAZ installer)
1.Go to the "1 Scenes", the first folder in the "Iray Worlds\Iray SkyDome\Super PAK 1" directory, you will find 22 Pre Set Scenes.
Simply double click on any one and it will automatically setup in Daz Studio.
If you wish to see what it looks like simple select NVIDIA Iray from the drop down menu under the View Icon in either the Main or Aux Viewport.
Depending on your card , it will do a render so you can see what your scene looks like.Thats it, practically all scenes are lit by a single Iray Sun, to change the Sun Intensity, position etc go to the Main Iray SkyDome Directory
make sure the Iray Sun is selected in your scene.
To do this select "IR-Base/IR-Sun" and then go to the main directory and select either "2 Sun Color" or "3 Sun Positions" and apply to your Sun
for all sorts of different lighting angles and intensities.
Dont forget that the sky also provides lighting in the scenes, so complete lighting changes requires not just adjusting the Sun alone.The Render settings should be set up for you automatically when you select a scene from the "1 Scenes" folder, now make sure that the main camera is
in use, its usually called "Film Cam" you should view you Iray scene through that to begin.If you wish to change the Sky, Ground, Water, Horizon or spin the World or Skies, go to one of the folders below.
As an example if you want to change the Sky, then first select IR-Base/IR-Skydome in the Scene Panel, then in Surfaces select IR-Skydome and simply
apply the Sky MAT of your choice.If you want to see whats illuminating the Iray world, the Sky or Sun, to see the skies first select IR-Base/IR-Skydome in the scene tab, then select
Surfaces/IR-Skydome/IR-Skies/Emission and you will see the emission color, temperature and luminance.
The same also applies to the Sun, first select the IR-base/IR-Sun in the Scene tab and then follow the same procedure in Surfaces.
As an example if you want to darken the scene simply select Luminance in the Emission section in either the Sun ot Skies or both and simply take off a
zero, the scene will immediately become a lot darker, because the Sun or the Sky is throwing out less light and light distance.If you wish to change any other feature in the main scene, follow this basic rule, first select the section in the Scene Panel, then the Surfaces Panel
and apply the MATAfter you have your scene set up, simply add whatever figures, architecture or props you wish to add by right clicking on them in the Content Library
and then selecting "merge into scene"Add an Iray Light of your choice from the Iray-LightSet menu and use "merge into scene"
There are some basic morphs on the IR-Base, to access them select IR-Base in the Scene Tab, then Parameters and then Morphs
There is also one morph in the SkyDome, select IR-Skydome then Parameters and then Morphs, this morph adjusts the height of the lower clouds.
Thats pretty much it, this Super pak makes Iray Skydome incredibly versatile and you should be able to create very professional looking scenes very
quickly with a bit of practice.
I really hope you like using Iray SkyDome Super PAK 1, and I hope you will find it adds a new dimension to your Daz Studio creations.
Poser vs. DAZAnother issue Poser has with any new users, is it needs to hook them in quickly. It is only a matter of time before a new user discovers the bulk of the figure assets available both as freebies and commercially are not compatible with the figures in Poser, and before long will discover DAZ, and shortly after DS.
Oh, I don't think it's come anywhere close to that, yet. There are still tons and tons of Poser-ready products out there, including a huge number here at DAZ. However, the vast majority of those items were designed for V4/M4, not any of the SM native figures, while most of the remainder are created for either the Hivewire figures or DAZ's Genesis/Genesis 2 figures. Even if SM pulled the plug on Poser tommorrow, people would be able to continue using Poser for years, but with few PAs seeming to be interested in developing content for Pauline/Paul and the other major addition to Poser 11 - the superfly renderer, the question becomes whether people will be willing to continue to upgrade to new versions for increasingly smaller benefits.
When I was a new user, the fact that there just isn't much out there for Poser figures made me think of them as a dead end, whereas the Genesis line was immensely appealing because you could mix and match all of the different characters, making every character, clothing, and hair purchase more worthwhile. (Also, initially I bought into Genesis 2 with the thinking that it was more advanced than 1 but had a lot more out and was more likely to get sales than 3.)
V4 also actually takes quite a lot to set up properly. You essentially need to buy the base, 4.2++ and probably elite skins or at least some other characters. For a Genesis generation you get the base and software for free, and really only need to buy the head and body morphs. The way everything interacts is also a lot simpler for a new user to 3D to understand (no talk of morph targets or injections or specific characters or whatever, just Genesis 1, 2, or 3.)
Obviously as we become more experienced we learn that this isn't always the case and that there are ideal ways to buy from various stores to get a lot more for your money, but those were my impressions at the time.
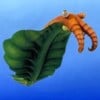
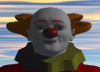
Star Trek Builders Unite 7: The Continuing MissionSpent the morning trying to make a Ferengi morph...
Ended up with a fin headed crime against nature.
The quest continues...
Looking for a sexier minotaur ...I have a minotaur as well, this one for Genesis 1...
http://www.daz3d.com/minotaur-for-genesis
Since it's a single morph, you could always only partially apply the dial, maybe tweak it with other Genesis morphs.
Knittingmommy's LaboratoryThanks for trying this out, I was getting that Mutiplied formula error too and had no idea what it meant. I hadn't tried to load the bear figure into the scene tho but did set all values to zero but then wasn't sure how to get the values for the bear as when I just dragged the item over to the GenX tab like I did for V4 morphs nothing seemed to happen. I have Slosh's UV setter but not on my Daz computer so will grab that again and install. I am trying this out again when I get home from work and hopefully all goes as should, as last nite I thought I had incorrectly installed GenX when it wasn't cooperating with the transfer. I will let you know how it goes later
Knittingmommy's Laboratory@Kharma How to Get Bear Clan Regenesis transferred onto G2 figures:
Push the 'Source' button and select Genesis from the drop down box.
Select Target Figure. I selected the G2F figure as it has an extra step not needed for G2M figures.
Here is where you need to do things a little differently
Actually, load the Genesis figure into your workspace in DS. Next find Bear Regenesis and load the desired shape morph. I chose _FemaleBear_MOR from my Content Library as I don't use Smart Content. I think if Bear Regenesis shows up in your Snart Content, you should be able to just load the figure to your workspace. To be safe, load the figure without the LAMH preset. It probably won't make difference, but I didn't want to complicate things.
Now, you need to zero out all of the morphs you loaded into GenX. Push the 'Select' button and choose "Set All Values to Zero".
Next, push the 'Select' button and choose "Get All Values from Figure".
Make sure 'Shape' is set to Genesis and 'Target' is set to Genesis 2 Female.
Push 'Transfer' button and name your morph.
Close DS and restart as normal.
I don't know why, but doing it the normal way, causes the morph to double when it makes the morph. So, when you go into DS to load the morph shape onto G2F, you need to move the slider only halfway or the morph looks very strange. I also get a message when I load Genesis into GenX that there are "Multiplied formula with more than one mult/add" and I have no clue why. In the end, it doesn't matter because we are setting all values to zero and basically starting from scratch.
Now, you should be able to load your G2F figure and find the Bear morph under Shaping>Generation X>Genesis. Apply the materials preset for the Bear. You'll notice that the UV map is all wrong. For some reason, the correct UV map seems to set automatically for the G2M figure and I didn't have to do anything further with it. Unfortunately, Bear Genesis uses the M4 UV map and I couldn't figure out a way to apply the M4 UV map to G2F from the included map presets as they come with DS. So, I did a little internet searching and found that @Sloshworks is our hero of the day. I guess he has run into problems with the available presets. He made his own presets and they are available on his ShareCG page. You need to download UV Setter for Genesis 2: Revised and Updated. Slosh actually has a UV Setter for Genesis 2 thread for this. I had downloaded back in December, but had forgotten about it because I hadn't actually had a need for it yet. Since Slosh's presets work no matter which figure they are applied to, we can use it to apply the M4 UV set to G2F. It works like a charm. Once you've installed it, you simply find his preset for M4 and apply it to your G2F figure and the materials for the Bear will look as it should.
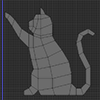
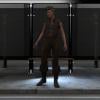
I've included a screen shot of my work space as I had it while doing the conversion and the finished Bear on G2F with just the texture (not the LAMH preset) to show what I got it to look like.
Let me know if anyone has any problems following the steps I laid out above. I hope this helps.
ADDED NOTE: While the above method works, it is a little convoluted and has some extra steps for the PandaFemale morph which aren't really needed. Thanks to MN-150374 we now have informtion on doing the transfer in a slighty different and easier way.
Select 'Source' Genesis
Under Morphs click on the arrow next to >(region) actor and select one of the following from the list:
(for the girls)
RAW_BearFemale
RAW_PandaFemale
(for the guys)
RAW_Bear
RAW_PandaTarget: Genesis 2 figure (either male or female depending on which morph you are doing)
Mode: Selected Morphs
Click on Transfer Button (doesn't bring up a dialogue box, but immediately transfers to a slider.
Close DS and restart. Load G2 Figure. Select G2 Figure in Scene tab. Under Shaping tab click on Actor>Generation X and you'll find your morph for the Bear Clan Regenesis figure. This method works even with the Panda Female morph.Thanks to MD-150374 for providing us with this information as it save a few steps from the method given above.
After transfer, follow directions above for changing the UV map to M4 UV map. Experiment and have fun.
edit: fixed a line; added additional screen shot.
New Iray SkyDome Super Pak available Now [Commercial]Hi Guys.
Thanks for buying thr SuperPak, I actually had some difficulty finding it, its not on the main auto scroll of products along with the other new realeases>
Maybe Daz havent added it there yet.
Anyway for those that cant find the Read Me its in the \My DAZ 3D Library\Runtime\Magix101-Read Me's folder.
Here are the main parts of that Read Me, also if anyone has any questions...just post them here...or we could start a new thread and I will do my best to answer any questionsREAD ME
Iray SkyDome Super PAK 1
[This product requires Iray SkyDome to be installed]COPYRIGHT MAGIX 101 2016
All of these products content were created solely by MAGIX-101.
A list of all the files and folders contained in this package are at the bottom of this Read Me file.
I can be contacted at [email protected]
------------------------------------------------------------------------------------------------------------------------------------
Thank you very much for buying my "Iray SkyDome Super PAK"
This package is a Super Pak for Iray SkyDomeIt features:-
22 New Pre Set Scenes
24 New Sky MATS
40 New Ground Tiling MATS [incl 6 Legacy MATS]
18 New Water Tiling MATS [incl 2 Legacy MATS]
33 Horizon Background SETUPS [Incl Horizon Sizes and MATS]
12 Spin World SETUPS
12 Spin Skies SETUPS
131 New Texture MAPS [Incl New HD Skies 12000 x 4000]------------------------------------------------------------------------------------------------------------------------------------
INSTALLINGSimply install it into the Daz-Studio 4.8 plus directory.
------------------------------------------------------------------------------------------------------------------------------------
APPLYING AND USING Iray SkyDome Super PAK 1Go to " My DAZ 3D Library\Environments\Iray Worlds\Iray SkyDome\Super PAK1 or where you have the Iray Worlds installed (Check your DAZ installer)
1.Go to the "1 Scenes", the first folder in the "Iray Worlds\Iray SkyDome\Super PAK 1" directory, you will find 22 Pre Set Scenes.
Simply double click on any one and it will automatically setup in Daz Studio.
If you wish to see what it looks like simple select NVIDIA Iray from the drop down menu under the View Icon in either the Main or Aux Viewport.
Depending on your card , it will do a render so you can see what your scene looks like.Thats it, practically all scenes are lit by a single Iray Sun, to change the Sun Intensity, position etc go to the Main Iray SkyDome Directory
make sure the Iray Sun is selected in your scene.
To do this select "IR-Base/IR-Sun" and then go to the main directory and select either "2 Sun Color" or "3 Sun Positions" and apply to your Sun
for all sorts of different lighting angles and intensities.
Dont forget that the sky also provides lighting in the scenes, so complete lighting changes requires not just adjusting the Sun alone.The Render settings should be set up for you automatically when you select a scene from the "1 Scenes" folder, now make sure that the main camera is
in use, its usually called "Film Cam" you should view you Iray scene through that to begin.If you wish to change the Sky, Ground, Water, Horizon or spin the World or Skies, go to one of the folders below.
As an example if you want to change the Sky, then first select IR-Base/IR-Skydome in the Scene Panel, then in Surfaces select IR-Skydome and simply
apply the Sky MAT of your choice.If you want to see whats illuminating the Iray world, the Sky or Sun, to see the skies first select IR-Base/IR-Skydome in the scene tab, then select
Surfaces/IR-Skydome/IR-Skies/Emission and you will see the emission color, temperature and luminance.
The same also applies to the Sun, first select the IR-base/IR-Sun in the Scene tab and then follow the same procedure in Surfaces.
As an example if you want to darken the scene simply select Luminance in the Emission section in either the Sun ot Skies or both and simply take off a
zero, the scene will immediately become a lot darker, because the Sun or the Sky is throwing out less light and light distance.If you wish to change any other feature in the main scene, follow this basic rule, first select the section in the Scene Panel, then the Surfaces Panel
and apply the MATAfter you have your scene set up, simply add whatever figures, architecture or props you wish to add by right clicking on them in the Content Library
and then selecting "merge into scene"Add an Iray Light of your choice from the Iray-LightSet menu and use "merge into scene"
There are some basic morphs on the IR-Base, to access them select IR-Base in the Scene Tab, then Parameters and then Morphs
There is also one morph in the SkyDome, select IR-Skydome then Parameters and then Morphs, this morph adjusts the height of the lower clouds.
Thats pretty much it, this Super pak makes Iray Skydome incredibly versatile and you should be able to create very professional looking scenes very
quickly with a bit of practice.
I really hope you like using Iray SkyDome Super PAK 1, and I hope you will find it adds a new dimension to your Daz Studio creations.
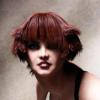
Show Us Your Iray Renders. Part VHere's one of my first Iray renders:
Custom body morph for G3F, Rayn shorts, hair and earrings, and a jacket I found for G3F on ShareCG.
Very nice render, what did you use for lighting?
The lighting and background are from the following HDRI pack, sky number three; http://www.deviantart.com/art/Iray-Skies-Volume-1-522179745
Show Us Your Iray Renders. Part VHere's one of my first Iray renders:
Custom body morph for G3F, Rayn shorts, hair and earrings, and a jacket I found for G3F on ShareCG.
Very nice render, what did you use for lighting?
clothes never seem to fit?I'll be the party pooper here...
Just because it says it's GX compatible, doesn't mean it will work with every character or morph combination.
This just means that it will work with the base character. Anything else and you'll either have to play with morph dials, as other's have said, to try to get to work or break out the d-formers to manually tweak.
Based on what you've stated, it sounds more like the Smoothing Modifer is either way off or non-existent.
Check under Parameters>General>Mesh Smoothing to see what the settings are and if they are even present.
You may want to turn smoothing off and adjust the item manually to get over the parts that are 'poking' through, this way you will reduce the likely hood of "thin mesh" at render time. This usually happens with hosiery in my case.
If the settings are too high the item can literally explode.
As a for instance a skirt i have for G1 has the smoothing iterations set to 20 by default, when applied to G2/G3 the skirt literally explodes.
Changing the setting back down to 4-5 fixes the issue.
ON G3f the Biggest problem i have currently is that jackets and shirts have a tendency to do funky things around the abdomen when i have various chest morphs applied. The only solution, i've found so far, in that case is to break out the D-formers, or do some mods in Z-brush or hexagon.
Show Us Your Iray Renders. Part VHere's one of my first Iray renders:
Custom body morph for G3F, Rayn shorts, hair and earrings, and a jacket I found for G3F on ShareCG.
UNICORNS FAQ in progress :)Since there's been some confusion with the Unicorns transfer and what uses what, what works with what, and what are the base figures, etc (as for prices and such can only hope it smooths out and PTB handle that) I wrote up a list of links that will state what is what and little details. If you see something wrong or have a question please add to the end and I'll try to answer or someone else will. And I will try to update as i can. I'm a HUGE Unicorn (and Star) fan and it can be confusing since some items can work with multiple figures (Youth can wear adult textures, but baby can't, for example) so I wrote this up. Hope it can help a little :)
Base figures:
The Unicorn (aka the ADULT) http://www.daz3d.com/the-unicorn
The Unicorn Youth, which takes the same textures and UV map as the ADULT, but different rigging and morphs : http://www.daz3d.com/the-unicorn-youth
And the the Unicorn Baby, whose shape was different enough it needed a new UV map and therefore its own textures and cuteness: http://www.daz3d.com/the-unicorn-babyAll 3 base figures come with a poser version and DS version, and poser mats and DS mats 3delight. They come with conforming mane, tail, and small waves of hair near the hooves, again with poser and DS conforming versions. There are morphs that include letting you hide the horn or close the eyes, shape the ears, etc.
Hair and horns and wings figures:
long sweeping mane and tail: http://www.daz3d.com/the-unicorn-regal-mane-and-tail and ONLY for the ADULT figure.
new set of different kinds of horns and spikey manes and tail tufts- it is for the Adult, Youth, AND Baby unicorns and works in Poser and Daz Studio (NOTE that the page only lists requirements as Unicorn, but it DOES include the files for hair/horns for baby and youth as well!): http://www.daz3d.com/the-unicorn-bits-and-bobs
Wings for Unicorn ADULT, Poser and Daz: http://www.daz3d.com/wings-for-unicorn
Wings for Unicorn YOUTH, Poser and Daz: http://www.daz3d.com/wings-for-unicorn-youth
Wings for Unicorn BABY, Poser and Daz: http://www.daz3d.com/wings-for-baby-unicorn
FUR:
Fur is all done using the free Look at my hair Plugin, which means it is DAZ STUDIO ONLY and 3delight optimized. Each "fur" was set up individually for each body shape and proportion. You load the unicorn/youth/baby figure, add its texture, pose it, get most of the scene ready, save the scene... then select unicorn figure and apply the fur preset. then render.
LAMH free plugin: http://www.daz3d.com/look-at-my-hair-free-player
Fur for Unicorn adult + Legendary: Tigers texture (texture not included, required): http://www.daz3d.com/furious-tigers
Fur for Unicorn Yourth + Legendary: Tigers texture (texture not included, required):
http://www.daz3d.com/furious-tigers-youth
Fur for Unicorn Baby + Legendary: Tiger Babies texture (texture not included, required):
http://www.daz3d.com/furious-tigers-baby
Clothing for Unicorn:
Winter Cloak for Unicorn Adult, Poser and DS: http://www.daz3d.com/winter-cloak-for-the-unicorn
Winter Cloak for Unicorn Youth, poser and DS: http://www.daz3d.com/winter-cloak-for-the-unicorn-youth
Winter Cloak for Unicorn Baby, Poser and DS: http://www.daz3d.com/winter-cloak-for-the-baby-unicorn
Spring Cloak for the Unicorn Adult, Poser and DS: http://www.daz3d.com/spring-cloak-for-the-unicorn
Spring Cloak for the Unicorn Youth, Poser and DS: http://www.daz3d.com/spring-cloak-for-the-unicorn-youth
Spring Cloack for the Unicorn Baby, Poser and DS: http://www.daz3d.com/spring-cloak-for-the-baby-unicorn
HOOF shackles for Unicorn Adult, Poser and DS: http://www.daz3d.com/hoof-shackles-for-the-unicorn
BODY shackles for Unicorn Youth, Poser and DS: http://www.daz3d.com/body-shackles-for-the-unicorn-youth
HOOF shackles for Unicorn Baby, Poser and DS: http://www.daz3d.com/hoof-shackles-for-the-baby-unicorn
(no, I don't know why the Youth got the BODY shackles instead of the HOOF shackles first, but will try to update the list if it is added or swapped)
Hair and body textures:
Legendary: Tigers for Unicorn ADULT (and YOUTH), Daz Studio AND Poser: http://www.daz3d.com/legendary-tigers
Legendary: Tiger Babies for Unicorn BABY, Daz Studio AND Poser: http://www.daz3d.com/legendary-tiger-babies
Legendary: Kirin for Unicorn ADULT (and YOUTH), Daz Studio AND Poser: http://www.daz3d.com/legendary-kirin
Legendary: Kirin Babies for Unicorn BABY, Daz Studio AND Poser: http://www.daz3d.com/legendary-kirin-babies
Legendary: Deer for Unicorn ADULT (and YOUTH), Daz Studio AND Poser: http://www.daz3d.com/legendary-deer
Legendary: Deer Babies for Unicorn BABY, Daz Studio AND Poser: http://www.daz3d.com/legendary-deer-babies
Legendary: Leopards for Unicorn ADULT (and YOUTH), Daz Studio AND Poser: http://www.daz3d.com/legendary-leopards
Legendary Chestnut for Unicorn ADULT (and YOUTH), Daz Studio AND Poser: http://www.daz3d.com/legendary-chestnut
Legendary Palomino for Unicorn ADULT (and YOUTH), Daz Studio AND Poser: http://www.daz3d.com/legendary-palomino
Legendary Bay for Unicorn ADULT (and YOUTH), Daz Studio AND Poser: http://www.daz3d.com/legendary-bay
Legendary Equus (BUNDLE of Chestnut, Palomino, and bay) for Unicorn ADULT (and YOUTH), Daz Studio AND Poser: http://www.daz3d.com/legendary-equus
Legendary: Bits and Bobs textures- textures for Bits and Bobs (horns, mane, and tails for all the unicorn figures), Daz Studio AND Poser: http://www.daz3d.com/legendary-bits-and-bobs-textures
Legendary: Barnyard Babies for Unicorn BABY, AND The Unicorn Bits and Bobs, Daz Studio AND Poser: http://www.daz3d.com/legendary-barnyard-babies
Legendary: Regal for Regal Mane and Tail for Unicorn ADULT, Daz Studio AND Poser: http://www.daz3d.com/legendary-regal-texturesFairytale Regal Mane and Tail , for Regal Mane and tail for ADULT unicorn, Daz only: http://www.daz3d.com/fairytale-regal-mane-and-tale-for-the-unicorn
Fairytale Regal Mane and Tail , for Regal Mane and tail for ADULT unicorn, POSER only: http://www.daz3d.com/fairytale-regal-mane-and-tail-for-the-unicorn-for-poser
Fairytale Regal Mane and Tail chapter 2, for Regal Mane and tail for ADULT unicorn, DAZ only: http://www.daz3d.com/fairytale-regal-mane-and-tail-chapter-2-for-the-unicorn-for-daz-studio
Fairytale Regal Mane and Tail chapter 2, for Regal Mane and tail for ADULT unicorn, POSER only: http://www.daz3d.com/fairytale-regal-mane-and-tail-chapter-2-for-the-unicorn-for-poser
Fairytale Regal Mane and Tail SWIRL , for Regal Mane and tail for ADULT unicorn, Daz only: http://www.daz3d.com/fairytale-regal-mane-and-tail-swirl-for-the-unicorn-for-daz-studio
Fairytale Regal Mane and Tail SWIRL , for Regal Mane and tail for ADULT unicorn, POSER only: http://www.daz3d.com/fairytale-regal-mane-and-tail-swirl-for-the-unicorn-for-poser
Fairytale Regal Mane and Tail SWIRL chapter 2, for Regal Mane and tail for ADULT unicorn, DAZ STUDIO only: http://www.daz3d.com/fairytale-regal-mane-and-tail-swirl-chapter-2-for-the-unicorn-for-daz-studio
Fairytale Regal Mane and Tail SWIRL chapter 2, for Regal Mane and tail for ADULT unicorn, POSER only: http://www.daz3d.com/fairytale-regal-mane-and-tail-swirl-chapter-2-for-the-unicorn-for-poser
Fairytale Bits and Bobs for ADULT, YOUTH, and BABY (horns, hair add on), Daz mats version: http://www.daz3d.com/fairytale-bits-and-bobs-for-the-unicorn-family
Fairytale Bits and Bobs for ADULT, YOUTH, and BABY (horns, hair add on), Poser mats version: http://www.daz3d.com/fairytale-bits-and-bobs-for-unicorn-family-for-poserFairytale Unicorn BABY, Daz version: http://www.daz3d.com/fairytale-unicorn-baby-for-daz-studio
Fairytale Unicorn BABY, Poser only: http://www.daz3d.com/fairytale-unicorn-baby-for-poser
Fairytale Unicorn ADULT (and YOUTH), Daz only: http://www.daz3d.com/fairytale-unicorn
Fairytale Unicorn ADULT (and YOUTH), Poser only: http://www.daz3d.com/fairytale-unicorn-for-poser
Fairytale Unicorn Chapter 2, Adult and Youth, Daz studio Version:
http://www.daz3d.com/fairytale-unicorn-chapter-2-for-daz-studio
Fairytale Unicorn Chapter 2, Adult and Youth, Poser Version:
http://www.daz3d.com/fairytale-unicorn-chapter-2-for-poser
Fairytale Unicorn Chapter 2, BABY only, Daz Studio version:
http://www.daz3d.com/fairytale-unicorn-baby-chapter-2-for-daz-studio
Fairytale Unicorn Chapter 2, BABY only, Poser only version:
http://www.daz3d.com/fairytale-unicorn-baby-chapter-2-for-poser
Fairytale Bits and Bobs chapter 2 for ADULT, YOUTH, and BABY, Poser only version:
http://www.daz3d.com/fairytale-bits-and-bobs-chapter-2-for-unicorn-family-for-poser
Fairytale Bits and Bobs chapter 2 for ADULT, YOUTH, and BABY, Daz only version:
http://www.daz3d.com/fairytale-bits-and-bobs-for-the-unicorn-family-chapter-2-for-daz-studio
Fairytale Unicorn Chapter 2 BUNDLE- includes ADULT, BABY, and YOUTH, and FairyTale Bits and bobs, DAZ STUDIO VERSION bundle only: http://www.daz3d.com/fairytale-unicorn-chapter-2-the-bundleFairytale wings for Unicorn ADULT wings, Daz only, requires the WINGS:
http://www.daz3d.com/fairytale-wings-for-the-unicorn
Fairy tale wings for Unicorn ADULT wings, poser only, requires the WINGS: http://www.daz3d.com/fairytale-wings-for-the-unicorn-for-poser
Fairytale wings Chapter 2 for Unicorn ADULT wings, poser only, requires the WINGS:
http://www.daz3d.com/fairytale-wings-chapter-2-for-the-unicorn-for-poser
Fairytale wings Chapter 2 for Unicorn ADULT wings, DAZ STUDIO only, requires the WINGS: http://www.daz3d.com/fairytale-wings-chapter-2-for-the-unicornLittle Nitika, for Unicorn ADULT, YOUTH, and BABY, AND the Unicorn Bits and Bobs (horns and mane and tail set for all three unicorn figures), POSER ONLY: http://www.daz3d.com/little-nitika-for-the-unicorn-bits-and-bobs
Little Nitika for Regal Mane and Tail for ADULT Unicorn, Poser only: http://www.daz3d.com/little-nitika-for-regal-mane-and-tail
Spout, Poser only, Unicorn BABY texture only: http://www.daz3d.com/sprout
Starburst for Unicorn ADULT (and YOUTH), Poser only: http://www.daz3d.com/starburst-for-the-unicorn
Snowflake, Poser only, Unicorn ADULT (and YOUTH): http://www.daz3d.com/snowflake
Snowflake BUNDLE (includes Frozen poses-listed as Poser only work but should work on DS version as well) http://www.daz3d.com/snow-bundle
Poses:NOTE about poses- many of these are listed as poser only, but I have several of them- while you have to go down into your basic poser runtime to use them, I have applied them to the Daz Unicorn figures and had the same results. So many if not not all are also daz compatible. FOr that reason i will not list them at Poser or Daz only. Poses can tentatively be mixed between figures but as shape changes affect rigging with various degress of success and tweaking.
Frozen poses for Unicorn ADULT: http://www.daz3d.com/frozen_21590
Whimsical Poses for Unicorn ADULT: http://www.daz3d.com/whimsical
Precious Poses for Unicorn BABY: http://www.daz3d.com/precious-posesFull body morph hates socks! O_OYes, anything that changes the proportions and isn't already set up with corrective adjustments will need the rig adjusting and linking to the morph.
Zone Smoother for Genesis 3 Female(s) Is AWESOME!!Thanks for the much needed enhancement. Is there a commercial support thread for this?
May be I am not using it properly, but I am facing issues where the crease fold between the hips is getting erased even when I am using it to smoothen between the glute and thighs.
Also, how do I remove the redundant morph dials when I rotate my figure at the hip? Is there a workaround of reusing those morphs once the character is rotated around the hip?
EDIT: Found the commercial support thread at https://www.daz3d.com/forums/discussion/73284/zone-smoother-for-genesis-3-female-s-commercial. Awaiting a response there.
Hi mrinal! Each of the zones tapers off over an area to create better transitions, so it's possible what you're seeing is the effect of that tapering. There is not, unfortunately, a way to reuse a morph when the character is rotated at the hip, they need to be regenerated.
Unicorns!Greetings,
<rant>
So...I'm just going to say this. One of the reasons I didn't shop at RuntimeDNA very much is this kind of crud. Not the unicorn, it's *gorgeous*, but stuff like...three different winter cloaks for the unicorn, three different spring cloaks, dozens of bits-and-bobs, none of them clearly defined as what's needed for what.
On RDNA sometimes there'd be a top and bottom, as separate pieces, and then seperate versions for each of three different characters. Hell, once there was a bottom, a shirt, and a baseball cap, and they turned it into 9+ different products, IIRC. It's kinda nuts. :(
I'd rather not see that in this store. I can't really buy into the Unicorn, because I have no idea what all I'd need to make a decent render with it; it's too damn confusing. Why isn't FURious Tigers a single item with morphs for each of the items? Same for the shackles, the cloaks, etc... I don't get why morphs won't work here; is this something that I've been spoiled on by Genesis' massive compatibility between related characters?
I end up walking away, unfortunately.
</rant>
Lovely, if a bit ethereal, unicorn though... I hope it works out well, just...maybe not for the folks who break stuff up that should be kept together. :(
-- Morgan
About FURious tigers, it's LAMH fur, it was created for each shape individually, and it will follow the morphs- just make sure you morph and pose the Unicorn figures and apply the fur very last. it was made before iray but can still be used in Iray if you export the fur as fibermesh. Why would I put all the FURious hair in one set? Well, some people were saying they only had the Unicorn or only wanted the cute little baby so I split it up and made it easier, and they were real deals so very low price (like now!) And they don't have the same exact fur, as i said, each was set up for each- i did the work for each one. And the sets are pretty close to what the cost was at RDNA and even better if you're getting the March madness items. :) RDNA PA didn't have any input in the merger but I am personally happy here. It's a big change but I'm happy to see more toons and content here, and i am VERY glad that the store didn't just disappear or someething as things have in the past.... I think it was one of the best possible outcomes. And now people here who maybe didn't hang out at RDNA get to see all the cute and cool and sometime creepy stuff here, too. :D :D :D
My Star character DD Shimmer comes with poser and DS 4 mats. My my two toon material shaders for sparkly hair have one version for poser and one for DS. And the textures that Daio and I worked on- they all have poser and DS materials for 3delight (Iray wasn't out then). I know we worked hard to make everything compatible for both. I also have had no problem using the poser poses on the Daz version of Unicorn (on any of them). If they transferred correctly every item should have on it's page what materials it has and if it works in poser or daz or both. :)Enjoy the rest of march madness :D
Full body morph hates socks! O_OIt's a model after my own heart, however she's going to have to wear socks at some point.
I've been working on a full body morph for Genesis. Yes yes, I know. Genesis, old news, everybody's using G3 blah blah blah... except me, because Genesis base is so much more versatile with it's gender morphing super power and all. So I'm making this toon that, through her, I hope to learn how to transfer a shape from G1 to G2. But anyway.
Yesterday I finally got her body shape as close as I think I can make it. (I had a specific thing in mind and have learned my artistic sense of aesthetics won't let me do certain things.) Bone fix and ERC freeze done. And she's behaving like she's not a Genesis model at all.
For example, when I pose her she'll fall a bit off as if she's not a Genesis model. You know, like if you tell Genesis to use a V3 pose.
I told her to put on some socks. She kicked them to the side. She'll wear shoes, though, and other bits of clothing go on her alright.
I haven't tested much to know what else is acting strange. And yet I've never had a model misbehave like this before.
I'm no ace at modelling. In fact I've been wondering for weeks now where the tut on how to make ERC morphs that Sickleyield thoughtfully typed out could possibly be cuz I need it again. And I'd originally started morphing the head apart from the body but for seamlessness sake I'm morphing them both together in the slim hope I'll learn how to isolate to separate the two in the future.
Where did I go wrong? *sob* She seemed like such a good kid.
Daz 3D is part of

Connect
DAZ Productions, Inc.
7533 S Center View Ct #4664
West Jordan, UT 84084Licensing Agreement | Terms of Service | Privacy Policy | EULA
© 2026 Daz Productions Inc. All Rights Reserved.