-
Celebrity Look-a-Likes for 3D figures Part 2
Having just picked up the DVD of "Pride and Prejudice and Zombies", I'm now interested in finding a Victoria 4 morph that looks like Lily James or that I can kitbash one from. Does anyone have any suggestions?
Problems with Autofit on custom figureIs that all trousers/skirts/belts or only one set? In general if the clothing item doesn't support all of the morphs used DS will generate new ones, but some items have overly extensive Rigidity groups applied which can put the kibosh on all morph matching that isn't covered by built-in morphs.
So far I've experienced it on a few different sets. This is one (http://www.daz3d.com/gallery/#images/157776) although I was able to hide it pretty good adjusting the scale of the object. The item in the screenshot I posted was http://www.daz3d.com/get-funky-josie. ; Sometimes I can change the scale of the object to hide the issue, or shift on an axis, but that isn't always available (don't know why).
Smoothing and Deformation brushes pluginI accept that much can be done with weight maps, the same is true for external modelling programs like Hexagon, Zbrush or Blender, or many other programs. The point is that whether you use weightmaps or modelling programs, you have to go out of DS toachieve what you want, which is usually a minor modification (such as a nose being pushed out of joint by a fist as kaotkbliss intimates, hehe). In the case of modelling programs, you can see to some extent the effect you are likely to have on the object once you are back in DS, but often (especially with clothing) the effect is not quite what you expected. For weight mapping the problem is even worse. You have to use an external program like photoshop to make a map and guess what effect it will have back in DS. This problem often requires several rounds of trial and error correction before acheiving the effect you want.
If the brushes were active within DS, you would immediately see what effect your brush stroke had, making the whole process immediate and interactive. How often I have seated a figure on a soft chair and thought I should really make a morph for the chair to show that the surface is soft and yields, but the effort is more than it is worth. Or vice versa, where the leg should be morphed when the figure is sitting on a hard surface. How easy that would be with some simple deformation morph brushes. Whilst Deformers are useful they are frequently too blunt an instrument to work effectively and efficiently.
Knittingmommy's LaboratoryI answered a post that @Digitell created in the Commons asking about the possibility of morphing the Little Ones characters by 3D Universe. Since they are G3 based, they can use any of G3's morphs. There seem to be some hidden controls that prevent some morphs from taking over too much. I think that is mostly to prevent the Little Ones stylized look from breaking. Thanks to following @Algovincian's NPR threads, I've actually gotten some ideas for a children's book so I've been working on a couple of characters based on the Little Ones morphs trying to get a couple of more unique looking characters. They are still a work in progress and I'm working on my first actual render with them for the New User's Contest this month as the subject is Portraits.
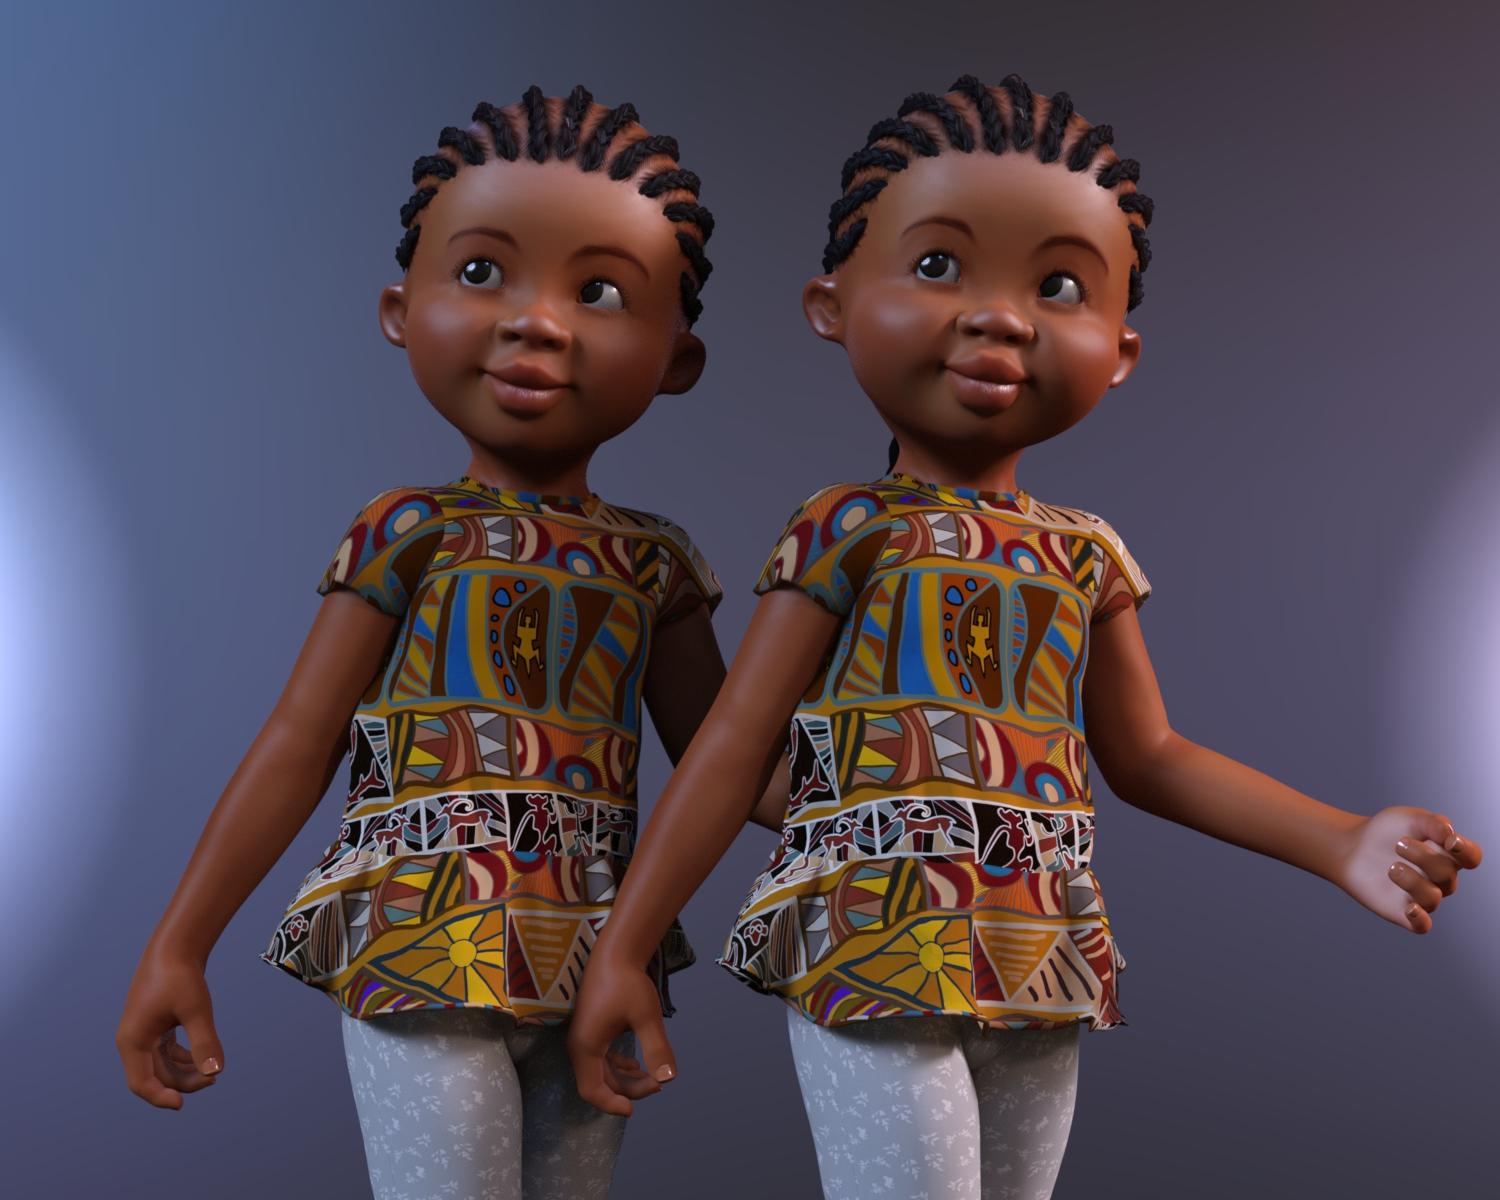
I thought I'd post the images, here, that I posted in the Digitell's thread that shows a comparison of the original morphs by 3D Universe next to my characters that I've been trying to create. To quote my post for the New User's Contest WIP thread,
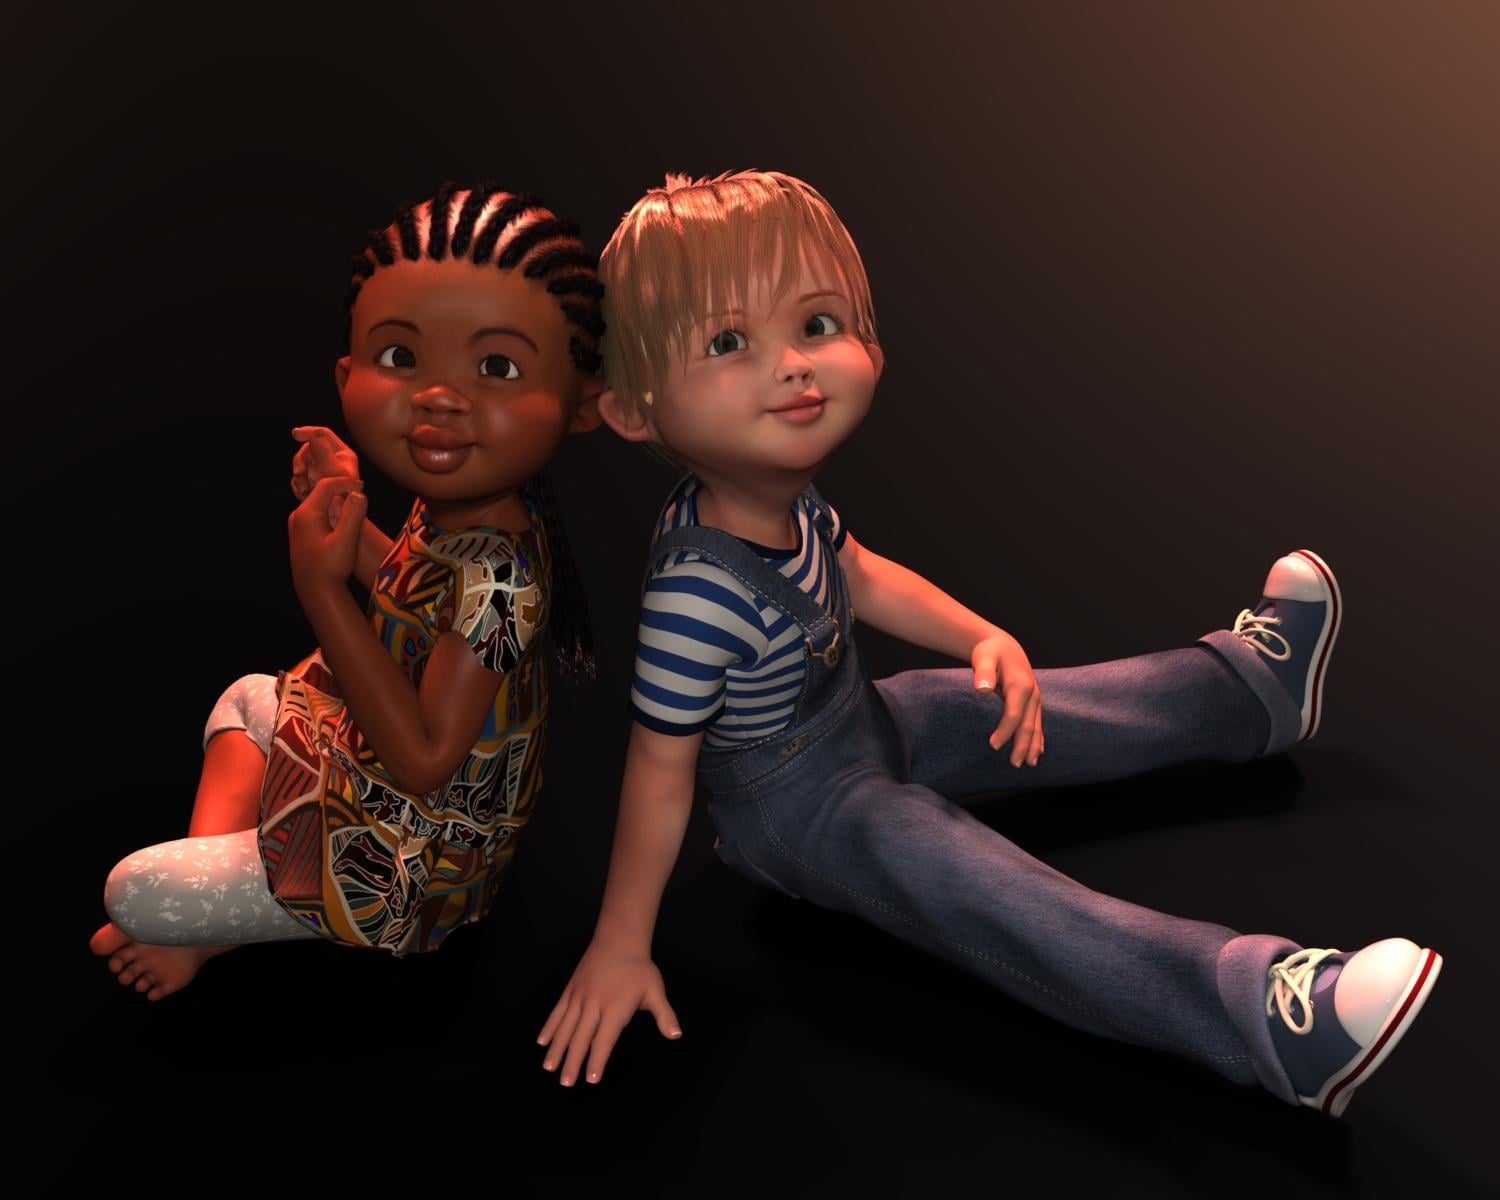
So, here are best friends, Makenna and Toby, who have lived next door to each other the entirety of the young lives and have become inseparable getting into all kinds of trouble much to their parents' dismay.
If anyone wants to see the actual WIP with Makenna and Toby, just click here and that should take you to my post there with my Makenna and Toby portrait wip.
The original 3D Universe morph is on the left and my character is on the right. The changes I've made in my character, Makenna, are subtle. I may make a few more changes to her, but I haven't decided yet what those changes will be. For now, I gave her slightly chubbier cheeks, moved the ears slightly, raised the brows just slightly and changed her lips and jaw line. I, also, gave her a slightly protruding little tummy.
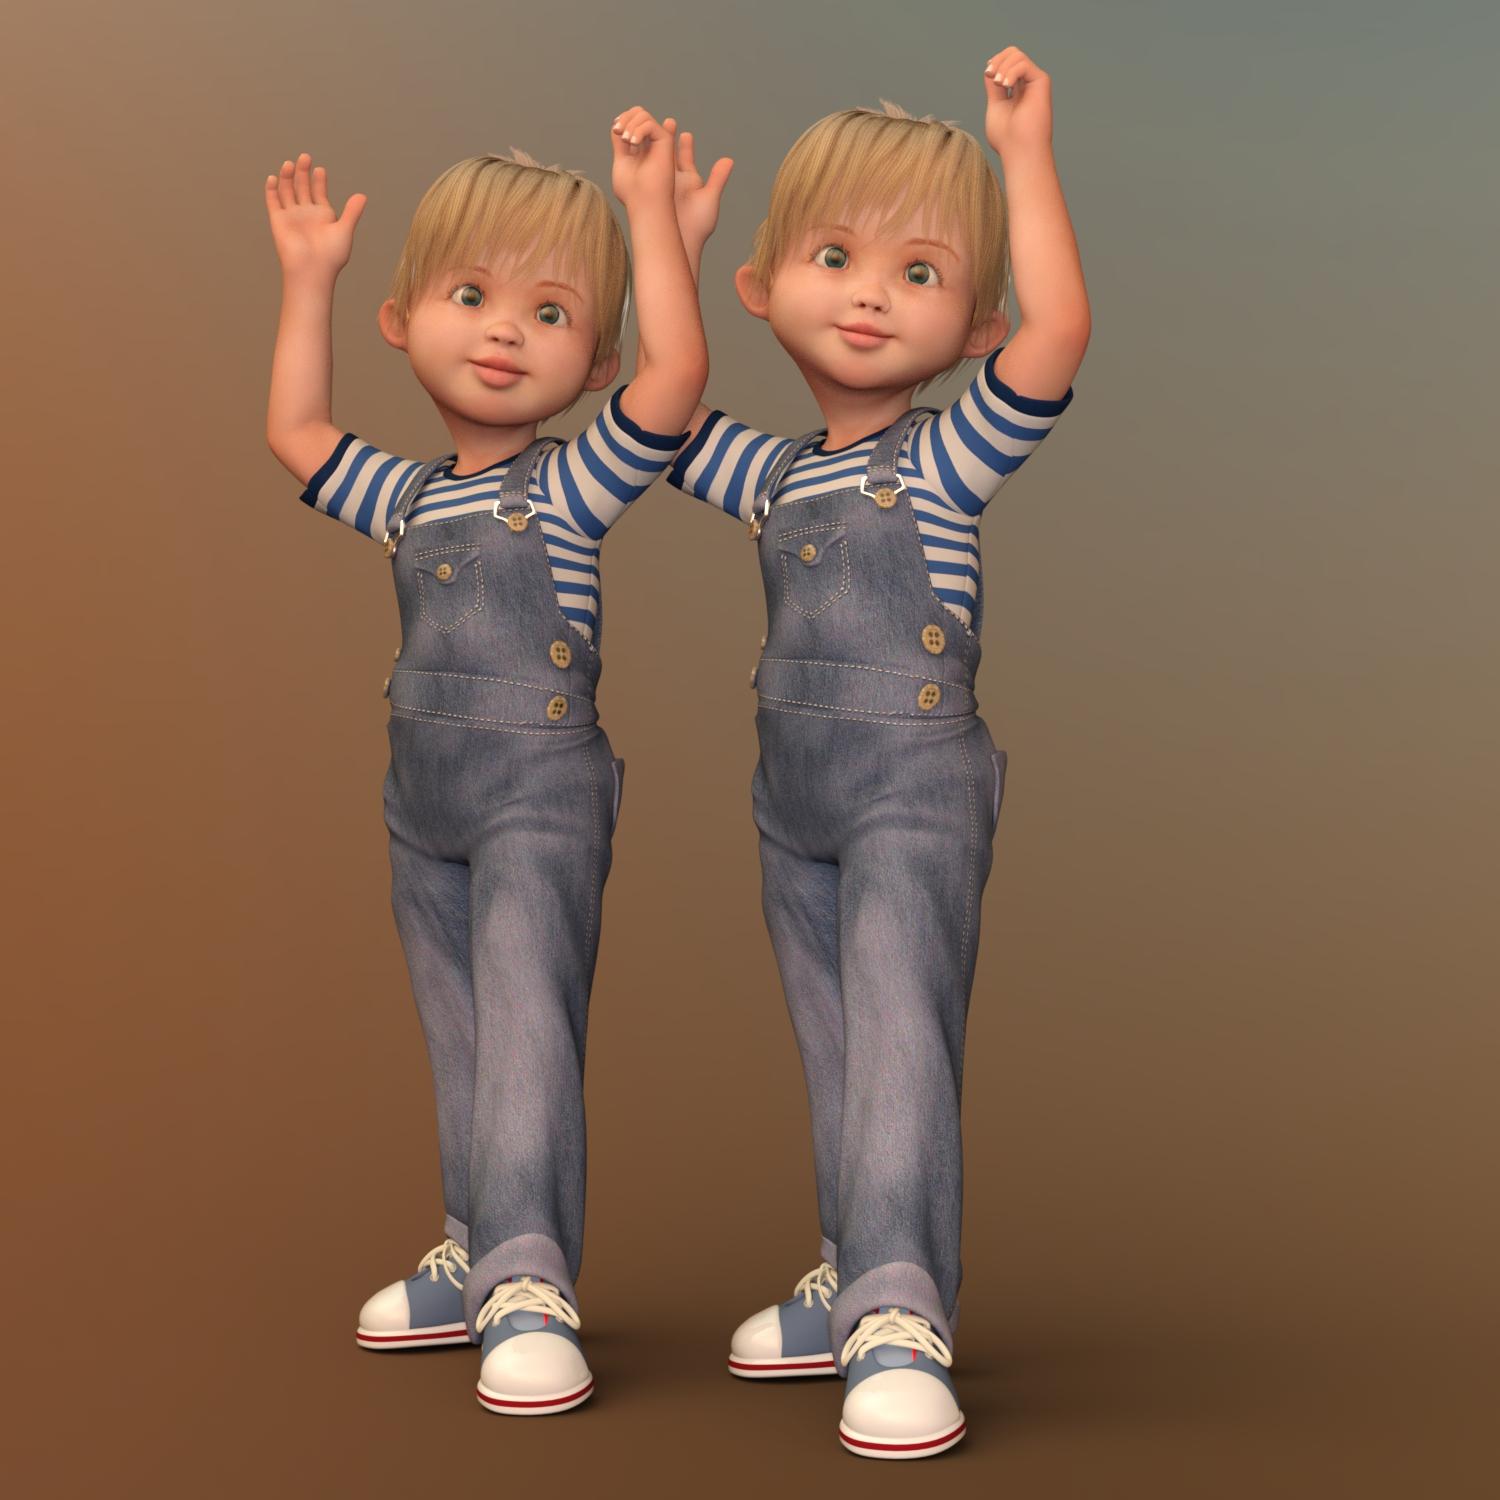
And this is Toby. On the left, again, is the original morph by 3D Universe and on the right is my character. I made more changes with Toby. As well as changing individual facial features, I also, added in a partial of a full head morph that had a jaw line and pointed chin that I thought were just about perfect for how I envisioned Toby.
I'll post more images as I work on these characters. There are still a lot of changes that will be made to make them a little more unique. I haven't even started on their own skins, yet, but making slight modifications to their skins and hair are on the agenda as I continue to work on these characters. Personally, I think they've turned into adorable kids and I already have a few images in mind to help tell the story of these two best friends, Makenna and Toby, making mischief as only 4 year olds can. And after raising three boys, I have lots of real life antics from which to choose.
LoRenzo posing question ... Now create lowrez MA/V4 & turning figures into propsIs there a way to easily replace a dressed, posed M4 with a LoRenzo figure then transfer the clothes to him so I can delete the M4 figure?
The Little Ones-QuestionYup you can add morphs to it or you can add the Little One morph to other characters to get different looks as well .
I didnt think about adding the Little One morph to others..that is a thought. Thank you!
The OceanQueen Megabundle question - *pose and texture the dragon plus missing files update"know if the dragon works in Daz Studio version 4.6?"
Well, yes, and no. Everything that is there loads fine in 4.6, and all the morph and pose sliders function as expected, but ...
The membranes seem to be problematic. With the dragon loaded in the zero-pose position, the membranes (which are separate props) load correctly and parent themselves to the dragon's chest. However, if the wings are adjusted using the pose sliders, the membranes refuse to follow. Attempting to use the sliders for the membranes to duplicate the position of the wings was an exercise in futility. Strangely, if one of the canned poses was applied to the dragon, and the same pose applied to the membranes, everything seemed to fit as it should. I'm not certain what is going on there, and its going to take some sleuthing to try and unravel it. For myself, I have Poser anyway, so a lot will depend on how much wrestling I want to do. Others may have some ideas and it certainly isn't beyond the realm of possibility that I missed something simple. But if that was the case, it certainly was not for a lack of trying.
The wing membranes are intended for the Poser Dynamic Cloth room, however Arki also made them morphing props, so they have morphs that allow you to simulate certain wing positions.... at least that's how I read it looking at the readme. I'd double check how accurate it was, but I have a render brewing at the moment.
The Little Ones-QuestionYup you can add morphs to it or you can add the Little One morph to other characters to get different looks as well .
Skin in Iray vs Cycles vs ???A couple of things...
You used the V7 with a couple HD morphs and your Cornea morph...so they will throw a 'not found' error for those of us who don't have the V7 HD add-on.
And I agree on Blender's hair...I just wish there was an easy way to convert Blender hair to something usable elsewhere. (yeah, convert to obj...but you think LAMH makes BIG, machine eating meshes...Blender's conversions are in the same category).
I have a cyHairs module for LAMH but no one was even remotely interested in it. And LAMH's FiberHair is SIGNIFICANTLY smaller than any other geometry strand hair out there that I am aware of.
Kendall
Transfer Utility distortionNo, when you dial up a morph - if there isn't already a morph of that name - DS will generate one. The trick you want here is probably to zero the shape, then with the dress selected go to Edit>Figure>Clear Generated Morphs - that will restore the dress to its base state. Now on Genesis you need to get the names of the V5 and V5 Supermodel morphs - click the gear icon on the slider and select Paarmeters Settings, then copy the Name value to a text file. Now switch back to the dress, right-click on the Parameters pane and put it in Edit Mode (if it isn't). Right-click, Create New property, and give it the name of one of the V5 morphs. Repeat fro the other V5 morph. This will stop DS from attempting to match the morphs. Now use Morph Loader Pro to load your original mesh OBJ as a morph. Set Genesis to V5+Supermodel, set your new dress morph to 1 - does that work?
Some DNA purchases not appearing in DazBut be careful. Some of the things I bought separately, came over in a bundle. They didn't transfer automatically. I had to contact support.
My Renders, Now I can go to beduseing a LinearPointLight, that seem to be the light I've been looking for. I haven't used a LinearPointLight in a long while just never thought of giving it a try
Not exactly what I'm looking for, but now I have something to start with
Intensity 150% Still a bit bright, but like a mentioned already it's a starting point
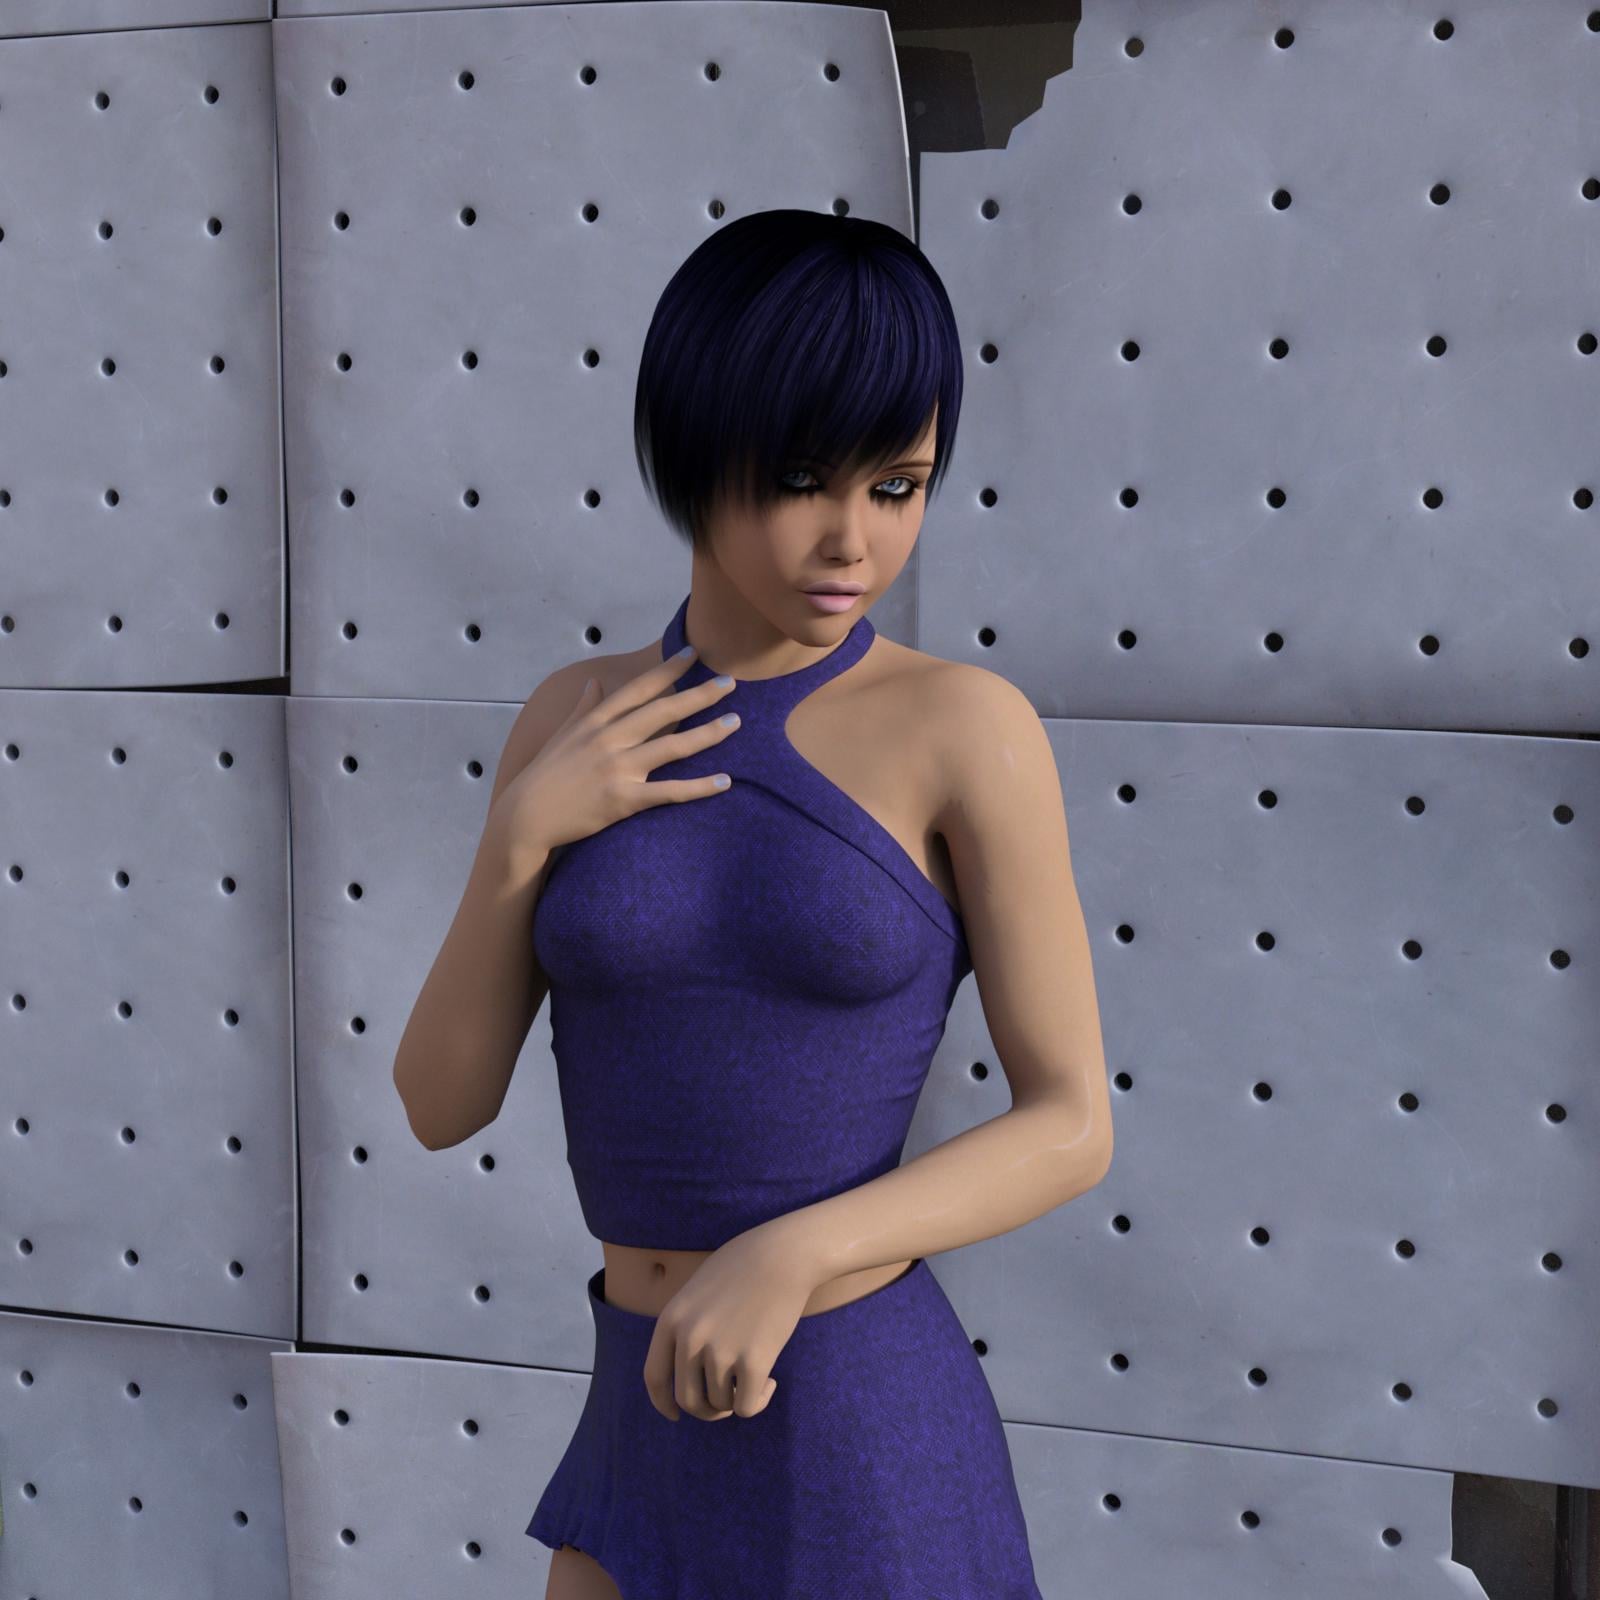
Genesis female with some Morph dials
Emilie from Odd ones mats, changed Skin Deffuse 200 . 180 . 160 ( this can be played with a lot more, just going for something quick) if I didn't then she was too pale
 Excluding certain body parts in morphs
Is that a character from Daz? if so please report this as a bug, it's most likely the result of applying sub-division with smoothing in ZBrush. It is possible to remove the effect of the morph on the teeth - but if the head scale has changed that will have undesirable consequences of its own so before doing anything else can you compare Emma with the base shape and see if the head size changes (if it does then removing the morph will leave the teeth projecting through the face or shrunk inside the mouth). It may also be a good idea to look at the Currently Used group in the parameters pane to see if any other morphs are in use, in case it's simply amatter of removing oen of those rather than a fault with the Emma character.
Excluding certain body parts in morphsHello,
I am still fairly new to Daz and the world of 3D animations, but a the short time I've come very far. Although I am having an issue with something and have tried to figure it out on my own, but to no avail. I recently purchased a character named Emma. I've been using her body and face morphs as a main character in a story I was working on. I've spent countless hours on different scenes, poses, storylines etc. and I was 100% satisfied with everything until I had a scene where the main character opens here mouth to speak and realized that her teeth were all messed up. Chipped, thin and gangly looking, you name it. I was extremely dissapointed when I realized this because she is supposed to be a super model in the story line and with the amount of work I have done to create all the other scenes am extremely reluctant on using another character. I spent hours trying to figure out if there is a way to morph everything but the teeth with this "Emma" character, but haven't been able to find a way. If anybody out there knows of a way that this can be achieved I would be greatly appreciative.
Thank you in advance,
Martin
Is It A Secret?Put the mouse down and step away from the computer. :)
You are trying to make a morph for the head, is that correct? If you are trying to save, you have then gotten the morph made and into Studio. I still haven't seen you say what you used to make the morph and if you kept it at base geometry. Did you use the default as I suggested to keep the default of Morph Loader Pro to make it easier to find the morphs? Just until you learn to save things properly, you could keep them in this default area.
To save properly, save as a morph asset. This will save the proper data file so that your parameter slider will remain when you start Studio up again. Otherwise, the parameter dial will disappear. The only other option is to save a scene with the morph dial in place. Either way, you want to eventually save it properly.
It will help us help you if you answer the questions I ask here and earlier. :)
The OceanQueen Megabundle question - *pose and texture the dragon plus missing files update"know if the dragon works in Daz Studio version 4.6?"
Well, yes, and no. Everything that is there loads fine in 4.6, and all the morph and pose sliders function as expected, but ...
The membranes seem to be problematic. With the dragon loaded in the zero-pose position, the membranes (which are separate props) load correctly and parent themselves to the dragon's chest. However, if the wings are adjusted using the pose sliders, the membranes refuse to follow. Attempting to use the sliders for the membranes to duplicate the position of the wings was an exercise in futility. Strangely, if one of the canned poses was applied to the dragon, and the same pose applied to the membranes, everything seemed to fit as it should. I'm not certain what is going on there, and its going to take some sleuthing to try and unravel it. For myself, I have Poser anyway, so a lot will depend on how much wrestling I want to do. Others may have some ideas and it certainly isn't beyond the realm of possibility that I missed something simple. But if that was the case, it certainly was not for a lack of trying.
As for the missing texture maps and the files for the M4 version of the clothing, I believe that I know what happened there. DAZ and RDNA tended to package their content for download differently. RDNA was all manual downloads only, of course, and they tended to break up large downloads into bite-sized zip archives in deference to those who may not have the bandwidth to handle everything in one gulp. The Ocean Queen megabundle, for example, original was broken up into 14 separate downloads. From experience I know that these archives tended to be given somewhat cryptic filenames that did not reveal which elements each contained. Not really a big issue - download them and extract them all to your content folder and everything ends up where it is supposed to be. It looks to me like someone had intended to separate everything into individual zips by the products in the bundle, then found out that was easier said than done, so some stuff simply got lost in translation, with two archives basically ending up being empty. So its easy to understand how it could happen.
Transfer Utility distortionJust the one. It wasn't even necessary for me to use the Supermodel morph, but I did.

Hmm, so do you keep running the same collar through the Transfer Utility then? Once to create the conforming clothing item, and twice more for the V5 and Supermodel morphs?
Thanks again for your aid! Really, I was trying to create something I could then open up in Carrara and use on Victoria 5 there. The Supermodel part of it I just saw and applied without thinking much on it.
Is It A Secret?My brain hurts!! Ok, so I'm reading Sickleyield's tutorial, but let me tell you what I discovered (BTW, I'm using Daz Studio Pro 4.9). Just to see what would happen, instead of saving it as a morph asset, I clicked Figure/Prop Asset I got what you see in the screenshot below, with choices of what to save it as etc. The choices in the drop down you see were: Preset>Morph>Apply>Head, which is what I chose.There was also an "Inject" and "Remove" rather than apply, but I haven't tried those yet. Then you choose Set Catagory, I chose Default/shaping/apply/head. Then choose the compatability Gensis3 male. Then it actually appears in Daz where I can find it in Figures, posted as a "shape". However, when I click on it, it creates a new character with the morphs, rather than applying them to the chosen one already in the scene. I feel like this is just getting rediculous, but I really want to learn this!
By the way, I already know how to package, what I'm basically trying to acomplish is getting all the head morphs into one file instead of having a list of files with every morph from brows to chin and getting it to apply correctly. In short, to compile it all into one file morph that actually works! I already packaged one and placed it for free over on Renderosity. But it's not a single head morph, but an entire file of head mophs. People have been downloading it and only one complaint, so I'm guessing they know how to get around my mistake. You can check it here: (link removed)
July 2016 New User 3D Art Contest “Portrait Rendering” – WIP ThreadSo if I could ask a couple of clarifying questions:
1. If I use an HDRI map, am I basically giving up control of my lighting to the map? It seems that if I add lights when I am using an environment map, they are being ignored.
2. I set a direction light to be the sun node in "Sun and Sky" mode... and all I get is a black image. This isn't my first time toying with Iray, but everything I do I feel like I am giving up control of my lighting, shouldn't the sun node be... well... my main source of light?
Not all HDRI maps are built the same and some are better than others when it comes to good lighting. It's a matter of trial and error for the most part. The washed out colors might be helped with a few adjustments in Tone Mapping under your Render Settings. Gamma and Saturation settings are usually the culprit for that washed out effect if you played with those settings. Without knowing what your current settings are, I doubt I could help. I'm still learning a lot of that stuff, too, but I or someone else might be able to offer some suggestions if you show a print screen of your tone mapping settings. However, usually going up in the settings makes things a little softer and going down increases or intensifies the color. Crush Blacks and Burn Highlights can also affect how the colors look. You can use other lights in a scene besides HDRI. Make sure your Dome is set for both Dome and Scene. I believe the default is Dome Only and you need both Dome and Scene if you are using the HDRI and scene lights. Make sure that you turn off the Headlamp on your camera, too, as this added light can really mess up your lighting and give you effects you don't intend. I do like the pose and camera angle.
As for Sun and Sky mode, I haven't used it much, but from what I can tell, that mode is ONLY Sun & Sky, no other lights. That mode does seem to completely take over the whole show and you need to change things around by changing the time of day, the date, and longitude and latitude to make any real difference. I believe one of the PAs had a product that used the power of Sun & Sky effectively, but I don't have it. A tutorial about using that mode effectively would be nice, but I haven't seen one yet. Maybe Sickleyield will tackle it at some point in the future. Some people find it useful. Like I said I haven't played with it much. My preferred lighting is the use of HDRIs and Scene lights.
My latest progress. fixed eyes and other tweeks. changed point light color in front of girls face. Been looking for a youtube video from way back that tackled the volumetric shader (or something like that) for dust in the lighting but can't find it anywhere. Darn I really wanted to try that affect out. Anyone know a good link (with video if possible).
It's a really easy trick and Sickleyield, that goddess of all things when it comes to Iray tutorials, has an excellent tutorial on doing exactly that on her YouTube channel.
Just trying this one out.
Sonja, I love this. I love the intensity of color on her eyes in the first version which seems to have gotten toned down a little in the postworked version. Is there anyway to tone it back a little so that her eyes are as intense in color as in the first one and still have the great parts of the second? It looks like a great start and I love her expression and the lighting. Very nice.
Version c. Made a change to the settings on the blade itself so the light wasn't washing out the face.
Shinji - The face looks much better with the bloom toned down. It seems like it could use a few lights to highlight the figure more. It's very monochromatic and your figure seems to wash into the background and not stand out. Maybe some kind of light hitting the back of his head and shoulders?
Okay, so I've been playing with some characters in recent weeks for a story idea I had for a children's book. Mostly, I've just been trying to create my own characters using the Little Ones morphs. You can use G3 morph dials on them and it's been interesting trying to create new characters because the morph dials don't work exactly like they do on a normal G3 figure. I think there might be some hidden controls in there to prevent the user from completely breaking the Little Ones stylist appeal. Which is a good thing because I really like the characters. So, my story revolves around two best friends and I thought I'd do a portrait with my current version of their morphs because I haven't actually done any real renders with them, just test renders. So, here are best friends, Makenna and Toby, who have lived next door to each other the entirety of the young lives and have become inseparable getting into all kinds of trouble much to their parents' dismay. I still have a lot of work to do as this is just a test render of what I've done with posing so far. Still need to work on things like background and possibly different lighting. It's just a start.
 The Little Ones-Question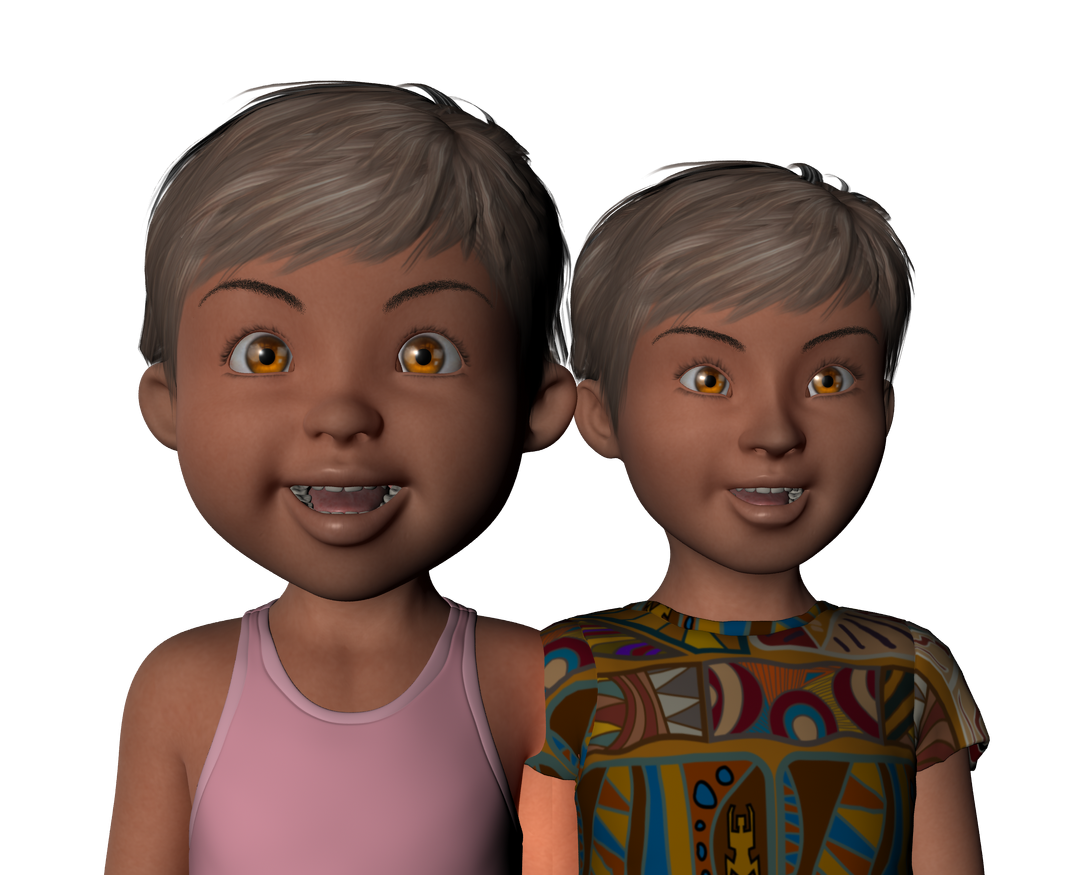
Here's an example I did ,one on left is Little One full morph ,one on right is head 50% with various morphs in the face used to change the eye shape a bit mouth,etc
Daz 3D is part of

Connect
DAZ Productions, Inc.
7533 S Center View Ct #4664
West Jordan, UT 84084Licensing Agreement | Terms of Service | Privacy Policy | EULA
© 2026 Daz Productions Inc. All Rights Reserved.