-
What is the alien/morph?

I've been looking for it. Does anyone know what it's called?
Is there a way to fit Santa Baby outfit to G3F?Most of it works pretty well.
1) Load G2F and autofit Santa Baby dress, sleeves, hair, hat, and boots to G2F.
2) Load G3F and transfer outfit from G2F to G3F via "fit to". Apply smoothing modifier and a push modifier to the dress if needed.
3) Hide bottom parts of boots (as those don't transfer well) and keep the top art (the pretty furry part) visible and couple it with a different pair of boots that fit better.
4) And finally load the wrap and "parent to" G3F. The wrap doesn't work if you try to "fit to".
So pretty much the majority of the outfit transfers well to G3F. The only issue I found was the bottom parts of the boots not fitting, so having to hide the bottom of the boots and just use the top with another pair of boots, and then the wrap that doesn't "fit to". But again, parenting the wrap seems to work ok with a few adjustments, depending on the pose. Most of the outfit seems to work pretty well though. :)

@divamakeup - Wow! That's a fantastic render! Great work! I was struggling with that wrap too. What lighting did you use? I love how the fur showed up on your render. I don't think I've got it to look half as good yet, but I was trying it in Iray. What background is that? I love it.
Thank you! That's sweet of you to say! :)
The lighting is a free HDR that I found online and it's one of my favorites. I did a search for it to try to provide a link but wasn't able to find it again. I THINK I got it from one of these sites: http://www.daz3d.com/forums/discussion/57531/list-of-sites-with-free-hdri/p1 I also coupled it with some lights from: http://www.daz3d.com/promo-style-catch-lights-for-iray
The background is from here: http://all-free-download.com/free-photos/download/beautiful-christmas-background-highdefinition-picture_169747.html
Diva, your render is really fantastic as is the background used. Thank you for the links :-)
Is there a way to fit Santa Baby outfit to G3F?Most of it works pretty well.
1) Load G2F and autofit Santa Baby dress, sleeves, hair, hat, and boots to G2F.
2) Load G3F and transfer outfit from G2F to G3F via "fit to". Apply smoothing modifier and a push modifier to the dress if needed.
3) Hide bottom parts of boots (as those don't transfer well) and keep the top art (the pretty furry part) visible and couple it with a different pair of boots that fit better.
4) And finally load the wrap and "parent to" G3F. The wrap doesn't work if you try to "fit to".
So pretty much the majority of the outfit transfers well to G3F. The only issue I found was the bottom parts of the boots not fitting, so having to hide the bottom of the boots and just use the top with another pair of boots, and then the wrap that doesn't "fit to". But again, parenting the wrap seems to work ok with a few adjustments, depending on the pose. Most of the outfit seems to work pretty well though. :)
@divamakeup - Wow! That's a fantastic render! Great work! I was struggling with that wrap too. What lighting did you use? I love how the fur showed up on your render. I don't think I've got it to look half as good yet, but I was trying it in Iray. What background is that? I love it.
Thank you! That's sweet of you to say! :)
The lighting is a free HDR that I found online and it's one of my favorites. I did a search for it to try to provide a link but wasn't able to find it again. I THINK I got it from one of these sites: http://www.daz3d.com/forums/discussion/57531/list-of-sites-with-free-hdri/p1 I also coupled it with some lights from: http://www.daz3d.com/promo-style-catch-lights-for-iray
The background is from here: http://all-free-download.com/free-photos/download/beautiful-christmas-background-highdefinition-picture_169747.html
StrangeFate's stuff: Wild Kelpie Battle Outfit!Good to hear that Ice Dragon, cause the scabbard was rather painful to rig... having the 3 straps that are attached to it bend more or less correctly when moving the scabbard around was a nightmare. Extreme rotations still mess it up somewhat.
One more without the mask ...I should have everything that's left done before the weekend. I just noticed that I need to add a morph to the forehead piece. It's close to the skin so when playing with facial poses that affect the forehead, it can clip a bit sometimes...
Was playing around with some mesh lights to add more light sources
 3D Rigging? WeightMapping?
Yep tried it.
The result is the same, after the initial success of it fitting I saved it as a figure/prop asset. Then I started fresh and loaded in a new G3F and then posed her then fit the prop to her and it was a mangled mess.
When I rig shoes for Genesis and G2F, It works as expected - I can rig shoes that don't come out warped at wear time and they can be loaded to the scene unconformed to a figure and they don't appear mangled. But I have to do the rigging a bit differently.
In my Genesis/G2F method I do these steps:
1. I Create face groups for the .obj shoes for lFoot and lToe and then rFoot and rToe
2. Then I load the G2F/Gen figure into the Figure setup pane, add the .obj i wanted to rig, choose the rigging type, content type and bones from the character to transfer to the obj and hit accept. The object comes on to the scene but the bones are in a chaotic state but the shoe is no longer a prop, it is now a figure.
3. I solve the chaos by transferring the rigging from Gen/G2f to the shoe figure- then make sure the shoe is not conformed to figure
4. I use the Transfer utility to transfer a basic weight map to the shoe figure and then it fits the shoe to the character figure and it becomes a jumbled mess again.
5. I solve the jumbled mess by transferring rigging again to the shoe figure and making sure the shoe is not fit on to figure
6. I confirm that the default weight maps are in place
7. i fit the shoe to test its rigging and it fits perfectly.
8. Then I would unconform the shoe and use the joint editor tool to memorize rigging and it's over. New perfect shoes that fit and don't mangle and can be loaded to a scene without conforming to a character and mangling itself .
I can't seemt to use the above steps on G3F because the shoes come out deformed after the Transfer Utility. The difference seems to be a heel bone and a bunch of little toe bones from the previous Genesis and G2F models. However the procedure works for both Genesis and G2F even with the difference in foot bones between those two. I may try some different things with G3F and go back to trying out the Gen/G2F process like taking the toe bones and the heel bone out because the heel gets mangled as well.
I switched to that youtube version for G3F because i can successfully rig the shoe but as i mentioned earlier, it's a hot mess when the shoe is loaded by itself and not fit to a G3F.
virtual penny 4 yor carrara thoughts ?dunno, doesnt crash, but need the character morphs.
i dont understand how the morph channels work, i don't see pointers to the morphs files
Dynamic deformation of meshI have a rather ambitious project I want to create. I use Lightwave and it has this Bullet engine that is used for collisions. It's very powerful. So I want to import my scene into Lightwave and apply some collision FX to a figure's hair and clothing for example. This part is fine. I now want to create a plugin in DAZ (not sure how to do this yet) that will connect to my own plugin in Lightwave (I know how to connect to and create a Lightwave plugin) and request the morph for the current frame and apply it. This would let me use the physics engine in Lightwave inside of DAZ Studio for the objects I tell it to.
I guess a simple version of this would be similar to the smoothing in DAZ Studio. It's not a morph, but it deforms the mesh. So two questions:
1. How do I get the current frame number? is it scene->getTime() / scene->getTimeStep() ?
2. What's the best way to have dynamic deformations?
For #2, I'd like to have local deformations if possible. A custom morph would be good if I can change the deltas at each frame. Or is a WS modifier the way to go? I would need to ensure that this morph is the very last one applied.
I'm not sure what's the best class to use. DzModifier? DzMorph? Is apply() called when you change frames? I don't think I can use DzMorph. One of the apply() methods supplied the deltas. Not sure how that even makes sense. I thought the DzMorph instance already knew what its deltas were.
Anyways, any help would be appreciated! Thanks!
edit: Just got an even better idea... if I manage this, I could write another plugin that sends the scene directly to Lightwave where I could then configure the physics settings. This is too good! lol
Obj to clothing - Transfer Utility - What do I need?Then set the selection and other polygon groups, weight maps, adjust bone placements, jcm's... yup. fun stuff. Actually, it is kinda fun when you know where everything is.
There was one thing I can't remember anymore. I had a morph that was affecting the wrong part of the clothing and the weight maps did nothing. I think it was some kind of polygon grouping. Basically, the polygons associated with the bone that is affected by the morph will update those vertices, but nothing else (I think that was it). It can be kinda weird when you expect a morph to do something and nothing happens. Wish I could remember the exact details.
Luckily, you can just fit an object that you imported onto the figure and it'll auto transfer everything (set both options to undefined or whatever the first option is). That'll get you most of the way there and then there are the adjustments, jcm's, weight map fixing/adjusting, etc.
Oh, and then there is the famous snapping back when you stop moving the mouse. This happens when the figure hasn't been saved.
virtual penny 4 yor carrara thoughts ?i not seeing any tool in ds49 that says dual quat, there is general, triax, and blended.
the hunter gear jacket was general/dualquat/scalemap, i converted it to the blended option, now it says blended/dualquat/scalemap
not bad, it kept the morphs and g3m's urban poses works on it. lil better than colladae export
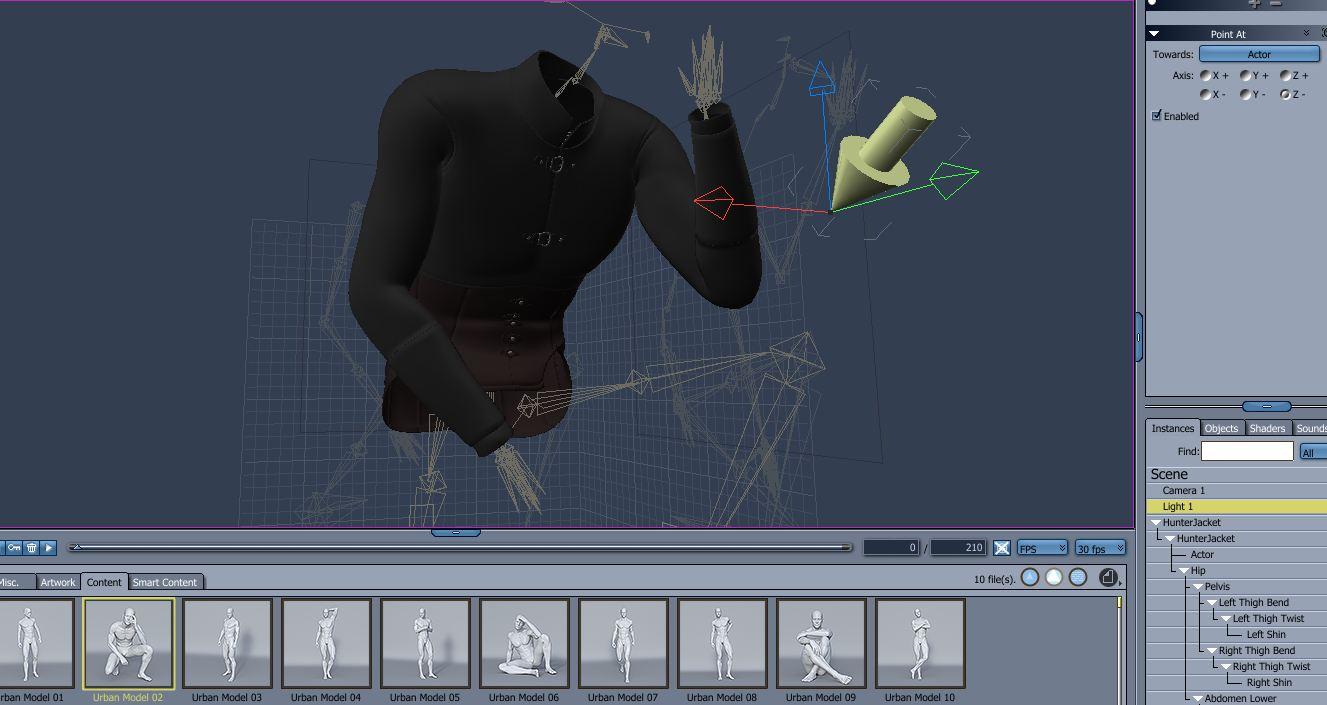
was excited for a few minutes, tried the same process on g3m, nup >.< it did get further though, carrara crashed at 69%
next experiment, tried something similar to wendy's experiment.
i didconvert figure to prop on g3m, to make it like a conforming suit, used the transfer utility on it, then converted to blended weightmap.
only 1 bodymorph came over, and not all the face bones came over
but it did work with the urban poses.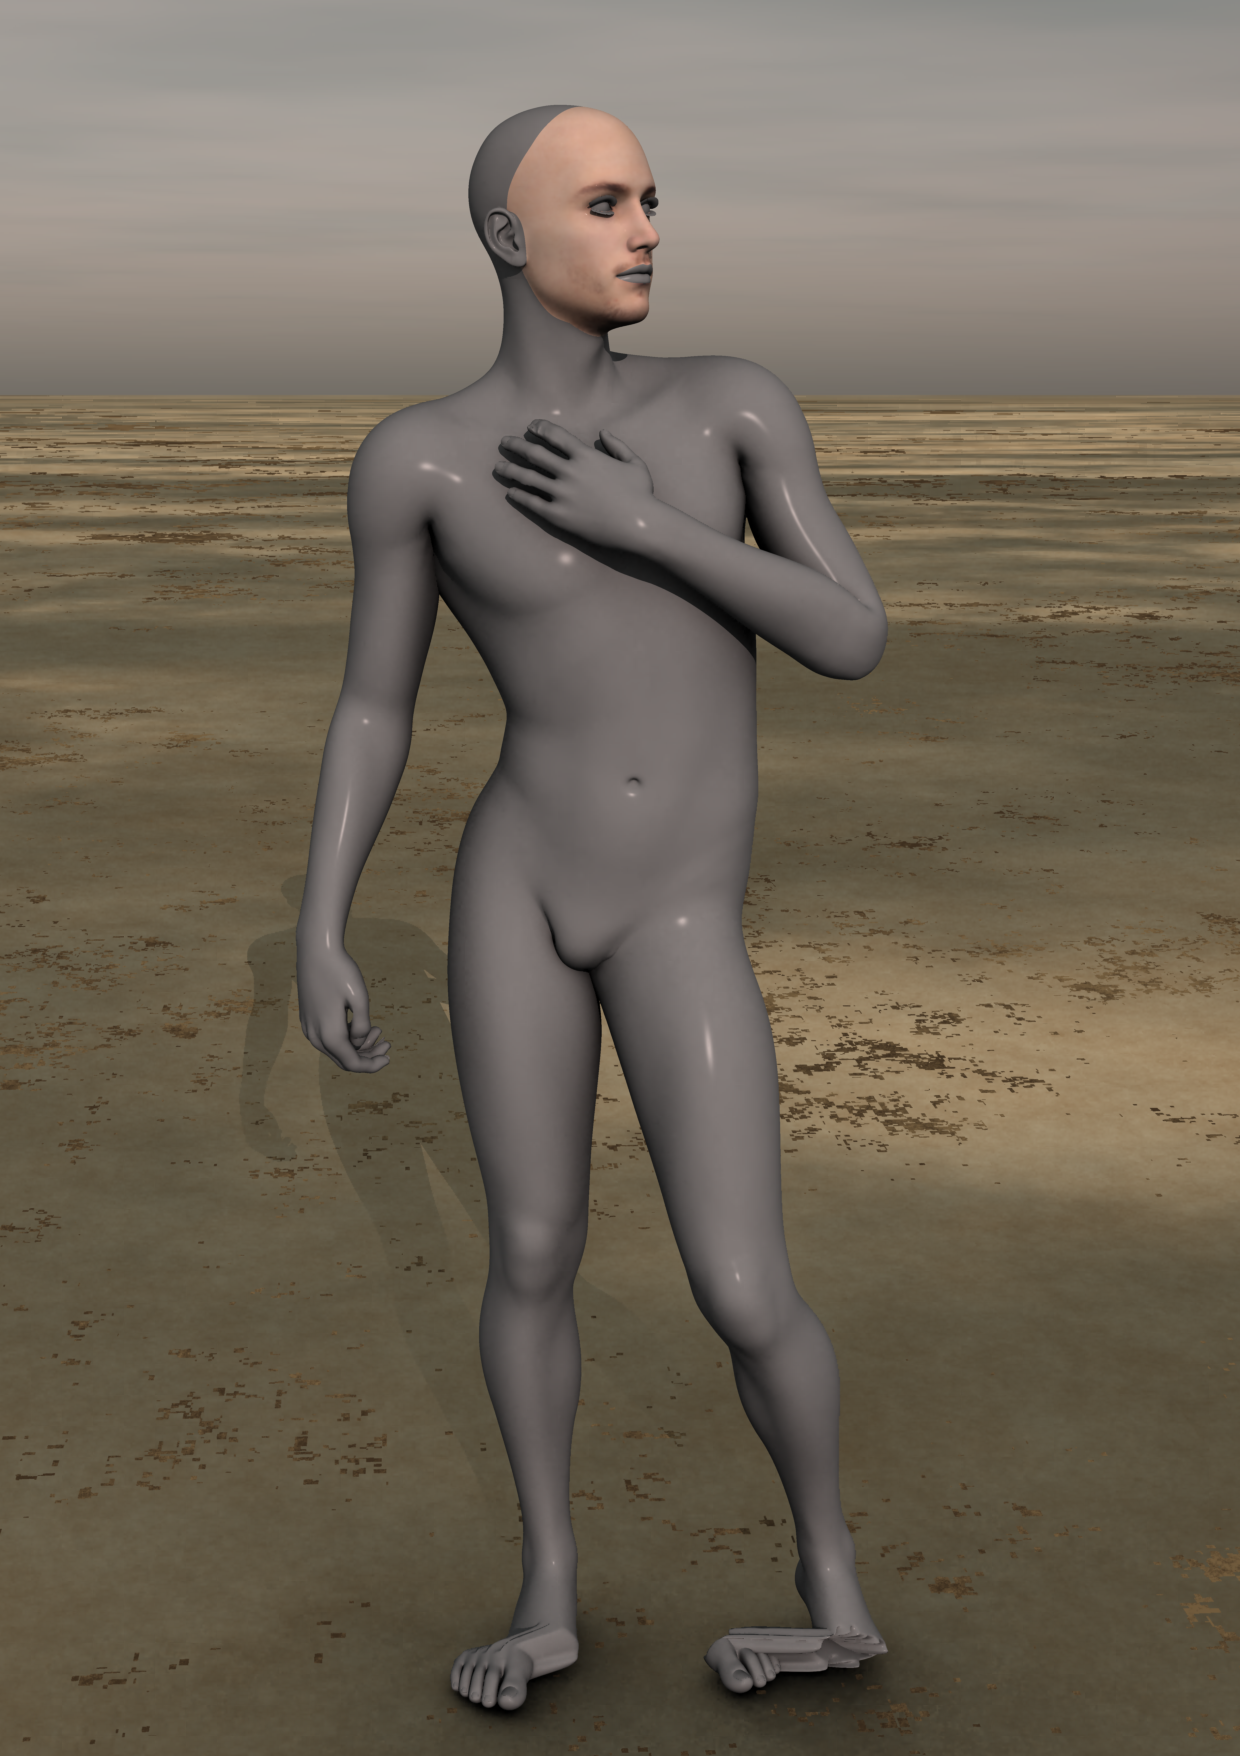
cept the feet messed up, opened the ik menu, but no understands
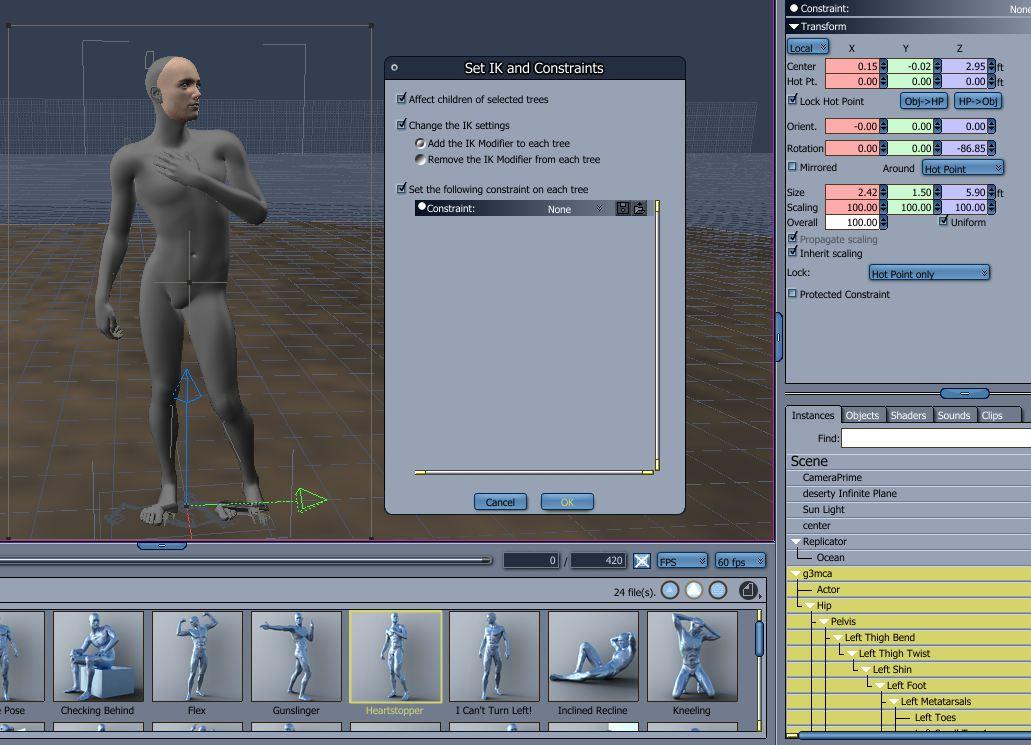
seeing the blended weightmap, looks to me daz might be making some progress making compatible rigging.
also noticed selectmap for g3m differs from g2m. g2m starts with abdomen, g3m starts with left collar, prolly makes no difference
made a g3m donor rig in ds. it looks cute in rara, seems all the face bones are there
Genesis 2 vs Genesis 3The issue I have with G3 is the limitation of morphs, unless I am doing something wrong. There is one head morph and no face morphs, where as G2 has a TON of face morphs.
These are the morphs that come with G2. Are there extra morphs for G3 that can be purchased?
G2 body morph file is 4.5MB, where as G3 body morph file is 1.9MB.
Because of this I am leaning towards G2, however if there are more body morphs (especially face) for G3 then that's me sorted.
Thanks again nonesuch00
No, I've bought male and female bundles of Genesis 2 head morphs, Genesis 2 body morphs, Genesis 3 head morphs, and Genesis 3 body morphs. You can buy them in a male & female together bundle for Genesis 2 and a male & female bundle together for Geneis 3 or each of the products individually.
There is also a male & female set of expressions for Genesis 2 and for Genesis 3 that are worth while.
Those products are all DAZ Originals, there are also morph products by independent vendors you can buy too. It's up to you and how much you want to spend.
If you are not a member of the platinum club plus it is worth while checking how much those products would cost if you buy them as a member of the platinum club. They also sometimes go on sale or free occassionally if you buy certain new releases but I can't recommend that you sit around and wait for such a sale, you should just see if they are cheaper if you join the PC+ club and buy them if they are affordable and you want them.
http://www.daz3d.com/genesis-3-male-body-morphs
http://www.daz3d.com/genesis-3-male-head-morphs
http://www.daz3d.com/genesis-3-male-expressions
http://www.daz3d.com/genesis-3-female-body-morphs
http://www.daz3d.com/genesis-3-female-head-morphs
http://www.daz3d.com/genesis-3-female-expressions
and there are equivalent products from the male and female Genesis 2 models.
I notice they are on sale now for a really big discount.
Genesis 2 vs Genesis 3The issue I have with G3 is the limitation of morphs, unless I am doing something wrong. There is one head morph and no face morphs, where as G2 has a TON of face morphs.
These are the morphs that come with G2. Are there extra morphs for G3 that can be purchased?
G2 body morph file is 4.5MB, where as G3 body morph file is 1.9MB.
Because of this I am leaning towards G2, however if there are more body morphs (especially face) for G3 then that's me sorted.
Thanks again nonesuch00
3D Rigging? WeightMapping?Just got done with the run through of taking bones out right after the transfer utility step where the rigging/bones get transferred and I still get the same result at the end. The item is fine and looks good right after the final fit to G3F. Then i save it as a wardrobe/wearable preset. When i clear the scene and apply the wearable preset the shoes come out deformed again.
It seems like whatever Allen is doing in that flatfooted pose keeps the item from being warped at wearing time but crushed if loaded on to the scene by itself unattached to a G3F.
These are the steps I follow as per Allen's video. Maybe you can poke holes in the logic?
Allen's Document:
-------------------------------------
Load the Genesis 3 Figure into a new blank scene and reapply the foot pose
Record the value of ‘pJCMFootDwn_75_L’ and ‘pJCMFootDwn_75_R’. If your initial pose was symmetrical, the two values should be the same. The clipboard is your friend. You may need to turn on Show Hidden Properties in the options menu of the Parameters Tab. They should be easy to find in the ‘Currently Used’ parameter group.
Switch to the Joint Editor tool and with the Genesis 3 Figure selected, click Edit>Bake Joint Rotations...’ from the Tool Settings Tab options menu. The ankles of the figure should shift as the pose becomes the new zero state, causing the JCMs to turn off due to the lack of value in the driving Controller.
Re-apply the value noted/copied in Step 4 to both ‘pJCMFootDwn_75_L’ and ‘pJCMFootDwn_75_R’. This will restore the figure to it’s original shape, the shape to which your shoes were modeled to fit.
Import your shoes. If you modeled your shoes as a SubD model, you will need to convert them to SubD in Studio by selecting them in the Scene Tab, and clicking ‘Edit>Geometry>Convert to SubD…’ in the Scene Tab options menu.
Run the Transfer Utility by clicking ‘Figure>Transfer Utility...’ from the Edit menu.
Apply the following settings in the Transfer Utility dialog:
Source Scene Item: Genesis 3 Female
Source Item Shape: Current
Target Scene Item: <filename of the imported shoes>
Target Item Shape: Default
Leaving all other Options at their default, click Accept.
Select the root node of your shoes and apply a zero value to the two above mentioned JCMs. (‘pJCMFootDwn_75_L’ and ‘pJCMFootDwn_75_R’) They will appear in the ‘Currently Used’ group of the Parameters Tab. Also, If your shoes are SubD, the Resolution Level of your shoes will revert to ‘Base’. I recommend setting it back to ‘High Resolution’ prior to continuing.
Select the root of the wearing figure and zero the Pose Controls that comprise your figure pose. Again, the parameters in question should appear in the ‘Currently Used’ group in the Parameters Tab. Do NOT zero, restore, or apply a pose to the figure to accomplish this, particularly at this stage.
Select and smooth the weights of your shoes and flood fill any high heel geometry into the Left and Right Heel bones, all while keeping this pose. (This is a severe glossing over of this complicated step and more information is pending) The effort taken in this step will define how your shoes appear in degrees of rotation other than the pose for which they were modeled, including the zeroed “T-Pose”. However, regardless of that effort, your shoes will appear correct in your intended pose, making this step somewhat optional but highly recommended.
Return to the Joint Editor tool and with the Shoes selected, click Edit>Bake Joint Rotations...’ from the Tool Settings Tab options menu.
Unfit the Shoes from Genesis 3, and delete the Genesis 3 figure from the scene.
Export a temporary OBJ file of your shoes, making sure to do so at Base resolution.
Zero the Currently Used JCMs in the shoes. (‘pJCMFootDwn_75_L’ and ‘pJCMFootDwn_75_R’)
From the Scene Tab options menu, select Edit>Geometry>Update Base Geometry. Click OK with the ‘Update Vertex Position’ setting and choose the OBJ file you saved in Step 15. This “bakes” the appropriate amount of the JCM’s deformation/effect into the base shape of your shoes, relative to your specific pose requirements. At this stage, your shoes likely look funny because their shape has had the ‘high heeled’ pose reverse out of them.
Load a new Genesis 3 Female figure and fit the shoes.
---------- End Document ---------
Lilflame has seemed to have figured it out for her Overknee boot and Foxy Pumps etc. so i am interested in making this work since it seems possible.
Obj to clothing - Transfer Utility - What do I need?And don't get discouraged if your first impression of blender is shell shock like mine was.
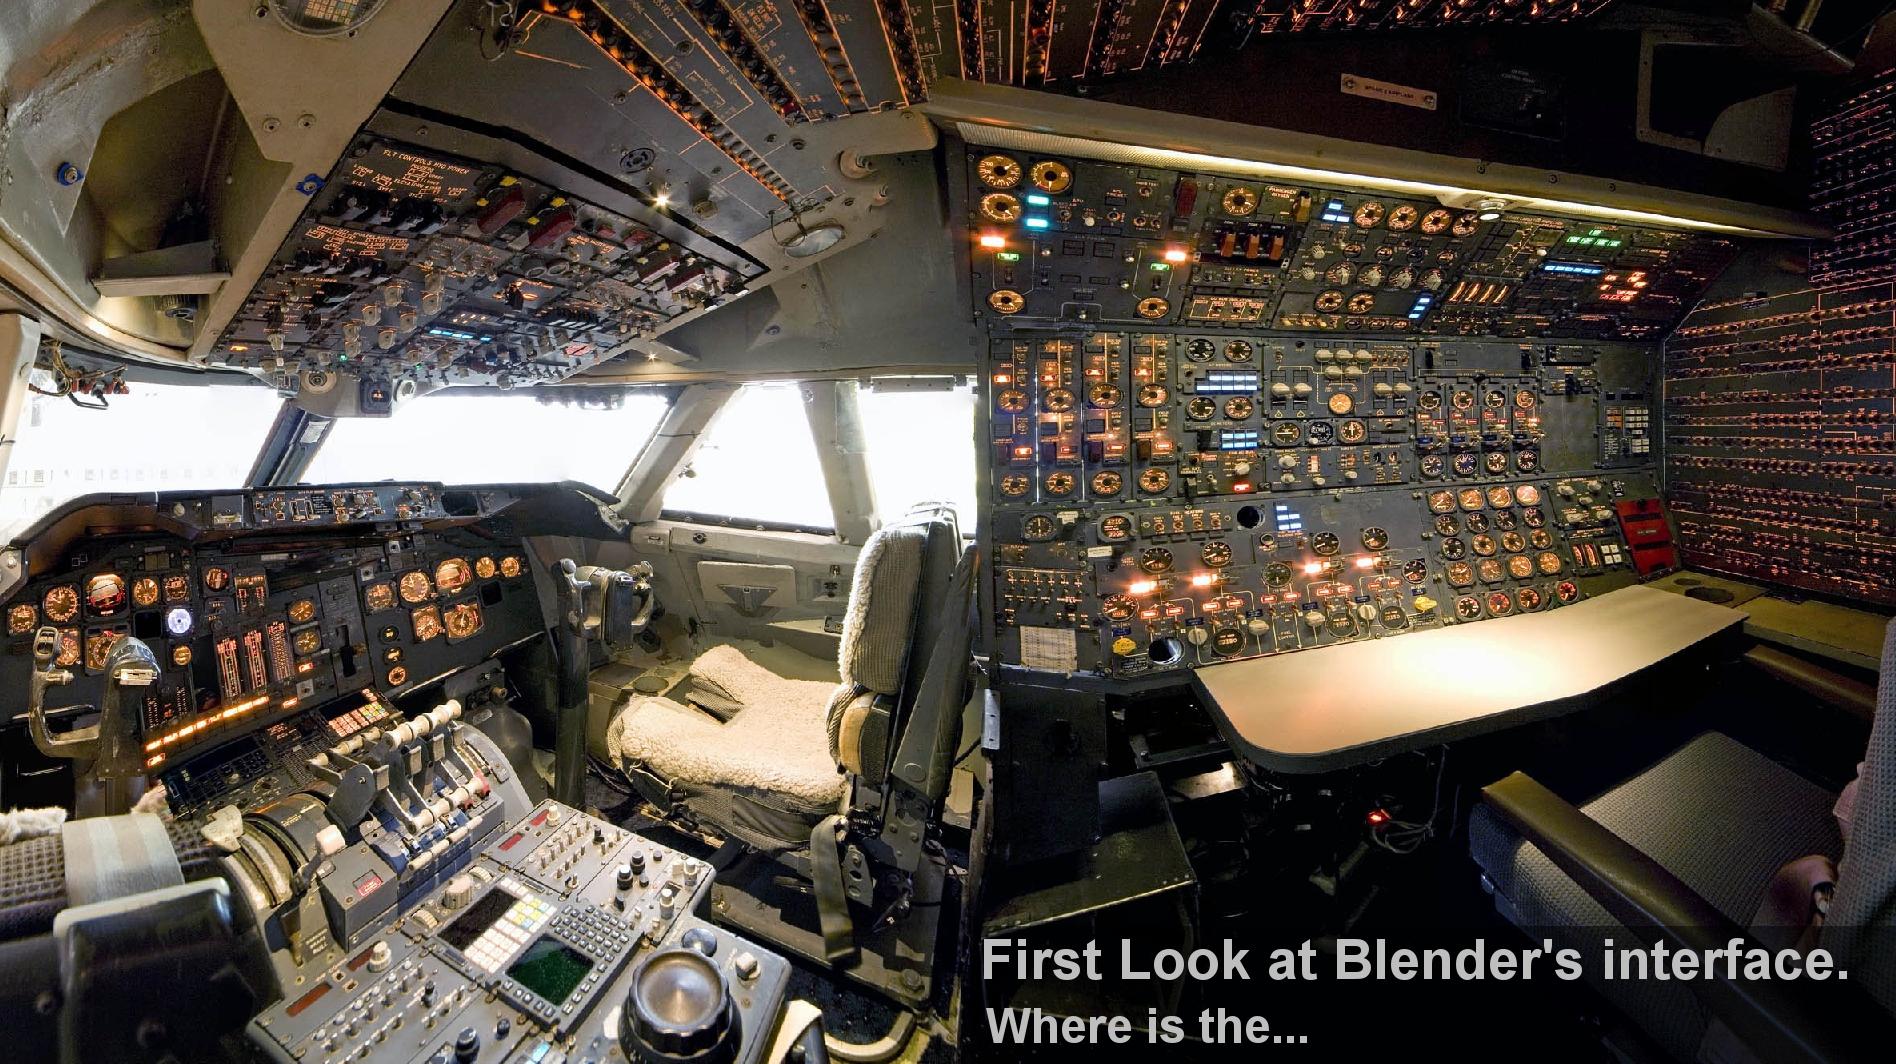
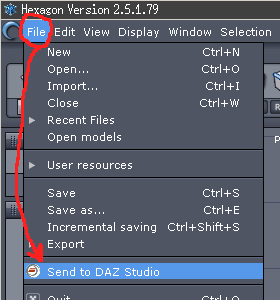
There is a button switch and lever guide somewhere (I don't remember the link). And if your lucky enough to have Z-brush or Hexagon already, there is a very convenient bridge-thing to Studio.
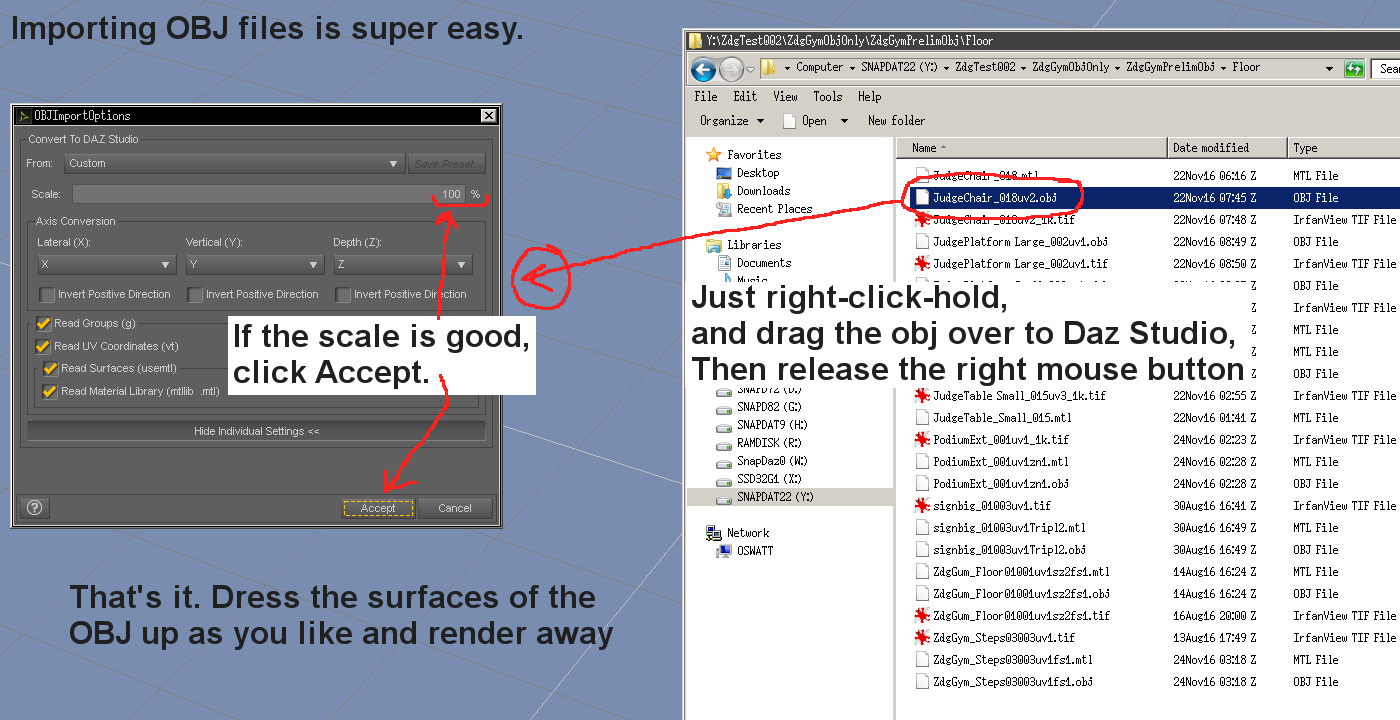
Tho you need not use them as Studio allows importing OBJ files in a few ways (Via menu, or just drag it over from a file manager window).
That is about where my knowledge ends and my confusion begins. I have a few of the 'clothing rigs' somewhere and have no clue how to use them. The others that posted above know that stuff much better then me. I'm completely lost somewhere between page one and two of that guide, and should be watching a Z-brush course I'm delinquent on instead of being lost, lol. (OK, I think I found myself. Was looking for where Daz Studio begins after already having an OBJ from a modeling program.)
Starting midway threw Part2.
And instantly stumped I am. Where is that "Transfer Utility"... It is not a tab or tool tab thing, it is a menu 'Edit' kind of thing.
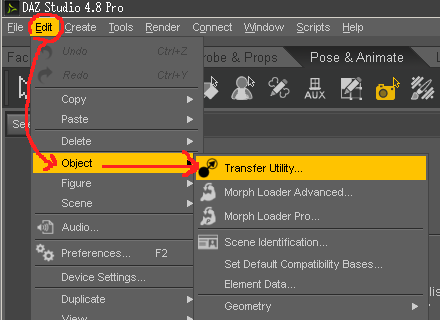
I'm guessing the clothing item should be selected in the scene tab when that "Transfer Utility" thing is done?
Always apply a smoothing modifier. This is what enables collision and makes it much easier for users to use your mesh on a figure with unsupported or mixed morphs. It doesn't really matter if you choose "fit to source figure" or not. This will just determine whether or not the new rig is fitted to the figure from which you copied.
Is that why some clothing items do not follow the joint rotations of the figure when the figure is posed, or is that something else?
And something glanced over in the next paragraph as well, the path for the saved item (Asset Directory). Do you want it saved to the DIM/Connect (My DAZ 3D Library) folders, or the user "My Library" folder path. That can make finding the files to pack up a bit difficult to find if it's in the wrong set of folders.
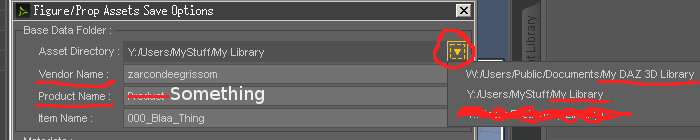
And the other stuff SY mentioned as well. I almost feel like I could fumble threw that if I did not miss something.
Genesis 2 vs Genesis 3Thanks for the explanation nonesuch00, perfect.
I need lots of face morphs to create three different characters, to be used in graphic novel. So Genesis 3 offering more facial details is a bonus, however the lack of morph options compared to G2 would cause restrictions and frustration.
Before I get started I need to make sure I use the figure that doesn't restrict me during my workflow.
Well, if you value the believability and identifiability of the facial expressions then it is actually Genesis 3 models that would seem to better suited for that. Believable human expressions are the most difficult part of posing these characters. If you are talking strictly human figures then Genesis 3 is an easier choice but if there are orgres and wierd creatures than you have to go with the Genesis generation that has those creatures morphs most like you seek. It would be difficult for a person to ascertain for example that a lizard man was smiling or raising his eyebrows so which generation of Genesis you use doesn't matter much. If you have a specific human look in mind and intend to dial it in using morphs then it is still Genesis 3 that comes out ahead if you are to believe the technical claims, which I do, but if the human character you want your character to look like is already created and in the DAZ Store you just buy that.
Very important is if you intend to use Carrara then you definately want Genesis or Genesis 2.
Have fun.
How do you make these bokeh effects in IrayMoar expiriments!
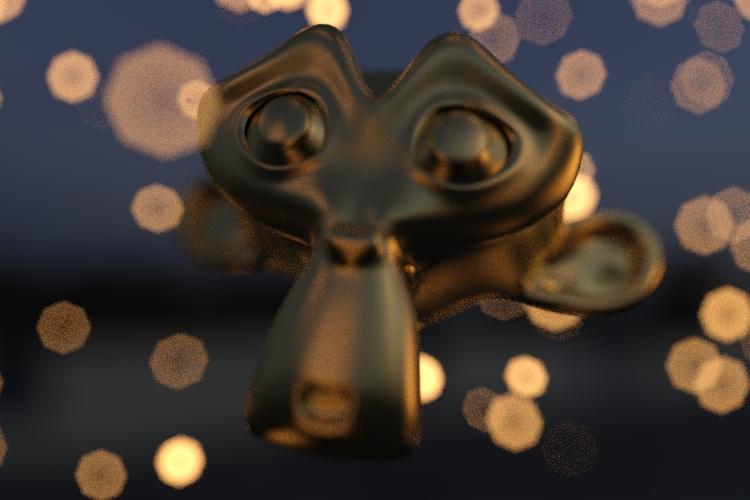
The same scene in blender (there are marginal differences to the dof as they don't really transfer over so it was more my guestimates, I do think cycles dof gets smoother faster for whatever reason, also this render only took 5 minutes, but who knows)
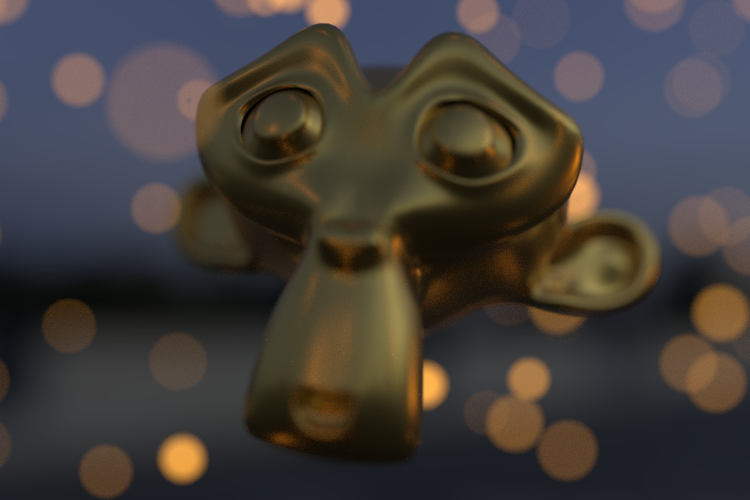
Dof in Iray again, but with some of the new camera features, I love that there's one to make the bokeh more ring-y as thats something thats generally viewed as a negative in real world cameras, as are stong bokeh shapes tbh, but hosestly I think the shapey bokehs look cool. I didn't let this one cook near as long, in case you can't tell, more just a quick poc.
 Genesis 2 vs Genesis 3
Thanks for the explanation nonesuch00, perfect.
I need lots of face morphs to create three different characters, to be used in graphic novel. So Genesis 3 offering more facial details is a bonus, however the lack of morph options compared to G2 would cause restrictions and frustration.
Before I get started I need to make sure I use the figure that doesn't restrict me during my workflow.
Finding content (Buddha statues) in CarraraI'm letting DIM handle all DAZ store content. Then I have a separate 'RobDAZ' runtime where i put anything else I've acquired.
Says 8.5.1 Pro Build 19 for Carrara Pro.
Would love to get everything categorized if that would transfer over. i often end up trying to find things in DAZ because that seems to work better, than hunting about in Carrara which seems hit or miss.
Haen't gone back to re-categorize within DAZ Studion as I had done back in version 3.x because didn't think that transferred into Carrara. If it did (does), It would be worth my hassle to spend a couple of days resorting my few thousand items so i knew what I had and could easily skim through and find what I wanted . Does Carrara had a way where you can categorize ? So I could have a folder with weapons, and subfoled for swords, another for spears and so forth.
ZDG random Daz Studio discoveries and questions.OK, forget about the fact that my first attempt of a morph dial moves the bottle randomly around the scene, lol. I think it has some potential if it gets a bit more work. It may even look good in the cups as well.
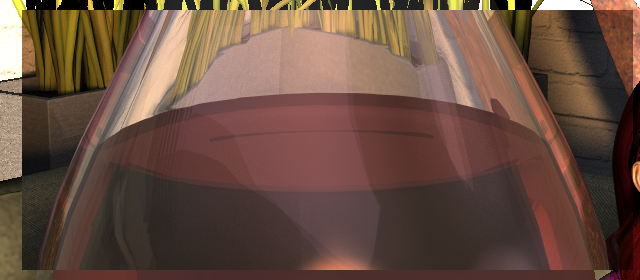
And I bet Predatron can make said morph dial much better then me, without the random moving around the scene functionality.
Or is that supposed to be something with a Surface Cohesion more like mercury rather then adhesion of normal water? Hmmm,
 what are those figures drinking, lol.
(Note to self, I need to try this on g3f, again. Dynamic Circle Skirt)
I'm also kind of on the fence about a few other things. The ear rings are incredible, and I know I had a few sleepless days testing them to be sure there something I can recommend to others. And there is a very nice fabric set that would be perfect for wizards robs. Lets just say that I'm not sure I want to teas people with stuff that is not available for them to buy, So at the moment I feel sort of paralyzed. I will have some fun with the fabric maps on something
 GenX2 Update / Genesis 3 Add-On [Commercial]
Do you have Genesis (the initial version) installed? To transfer morphs from a Poser figure to Genesis 2, GenX needs Genesis 1 to transfer the clone morphs from Genesis 1 to Genesis 2 before it can transfer the actual morphs.
Face swapping....The easiest & most accurate product to do that remains Singular Inversions FaceGen Artist Pro 1.9. It will set you back $140 but will make accurate faces from decent pictures for Genesis, Genesis 2, and Genesis 3 characters and then it is easy to buy the DAZ 3D head and body morph bundles to make cartoon caricatures from those faces too, if that is what you want to do.
The more difficult problem is getting a reasonably close match to the hair style, hair color, and skin tone of who you are caricaturing or trying to represent. It is easier to get a better likeness of someone as a young person because as we grow older we become more unique, not less. It is better to use the various Genesis 3/Genesis 2/Genesis Aging Morph bundles (from Zev0 & DraagonStorm I think), in my opinion, to make a face look aged then to try and use high resolution texture sets of wrinkled people because those wrinkled texture sets always look so extremely exaggerated on on the model and also clearly the wrinkles that belong to another person, not the person you want to caricature. Also, if you think you can use the photo of the person to create the texture set, without professional photographs made with the intent to use to create textures from, there is the problem of trying to have a person's face lit 100% with diffuse light so that for example, you don't use a face texture that has a nose shadow at 10 AM permantly, even 9 PM at dusk.
Daz 3D is part of

Connect
DAZ Productions, Inc.
7533 S Center View Ct #4664
West Jordan, UT 84084Licensing Agreement | Terms of Service | Privacy Policy | EULA
© 2026 Daz Productions Inc. All Rights Reserved.