-
Using the Transfer utility to transfer bones from Genesis 8/9 to a prop
Hi, I have a humanoid character created in Blender and I have imported it into Daz3d as an .obj file. Is it possible to use the Transfer utility, or any other products from the shop, to transfer the bones from a standard Genesis 8/9 figure to my prop? I need to rig this character but figure setup or manual creation of bones both seem painfully slow!!!
Thanks,
Cliffborne
Diffeo - problem with thigh bending bulgeAlso check if you have the similar wrongly-defined corrective morph properties of some characters in Currently Used..., as shown in the attached screen shot.
Besides the default Base Corrective Morphs, if you find some characters' corrective morphs on a G9 Base, that means they were wrongly set in ERC links (no 2nd Stage controller...). I guess there might be some... on your side.
Because of this wrong one I have, you can see the morph on the G9's belly are not 100% correct either... in the above posted screen shots.
Long Load Times – Why is this still a problem?This is going to get a bit long.
@TheMysteryIsThePoint
The 'solution' you propose, for the duplicate formula error, sounds good, but there's problem's you're not considering.Let me start by restating the problem and the only solution.
Duplicate formula errors are the result of two formulas in either one or multiple DSF/PZ2(morph) files attempting to link to the same property while having the same name/ID.
The solution is to change the ID(s) in the file(for conflicts in a single file) or to change the ID's in one of the files, when dealing with conflicts present in separate files.
TheMysteryIsThePoint,'s solution, is attempting to prevent the issue from happening.
As stated in his post, daz(the company) creates a database of all ID's contained in all files, available through Daz3d.com, already created for use in DS. Any conflicts are corrected, either manually or through some form of automation. Subsequently submitted files for publication/distribution would be subject to the same comparison and corrections made.
This idea could work and be fairly easily implemented, imho.
Now for the problems with this idea.
The biggest issue, not all content used by us comes from Daz3d. We purchase/procure from other websites, such as renderosity, or make our own.
The solution to this problem, either implement forced 'unique ids'(as has been done in DS), or require a constant internet connection and make DS more intrusive then it already is.
Neither solution works, if the developer or user aren't using the updated version of DS,or the developer or user chooses to not use the unique id's system and 'corrects' the id's with something they prefer.
Encrypting the saved files is the only way to stop the second one.
The more intrusive solution(s), which again won't work unless the dev or user update DS, would be to do a comparative between what the dev/user trys to name something during creation, or when they go to save said file.
The problem here, no internet, no comparison, potential conflict created.
A local DB won't work as it won't be current enough to avoid potential conflicts.
And the last problem i'll bring up, user's updating.
Not only do not all users run the latest version of DS, they don't always update their assets, and in some cases, there's no update to have(No Longer Availalbe, NLA content).
In conclusion, the Duplicate formula's error, isn't a problem that can be totally solved, there are just too many variables.
And in my next post, explaining the long load time problem and why it can't be solved.
(other than by not trying to have every asset you own installed/mapped in DS)
back in a bit.
Correcting morphsHello everyone.
I made a new character morph (full body + head) based on g8f. My character is a little shorter than default g8f figure and has some curves. I rearranged (not sure if I am using correct word) bones so it would fit new geometry, and all seems more or less normal, but some poses doesn't look good. For example when the stomach area is bended inward there are very ugly bumps. The same goes to pelvic area, when the caracter sits. I can correct this in blender, making new morphs, but I want to include those corrections in base character morph, so it would "work out of the box". Is it possible somehow? Would be grateful for any information regarding this issue.
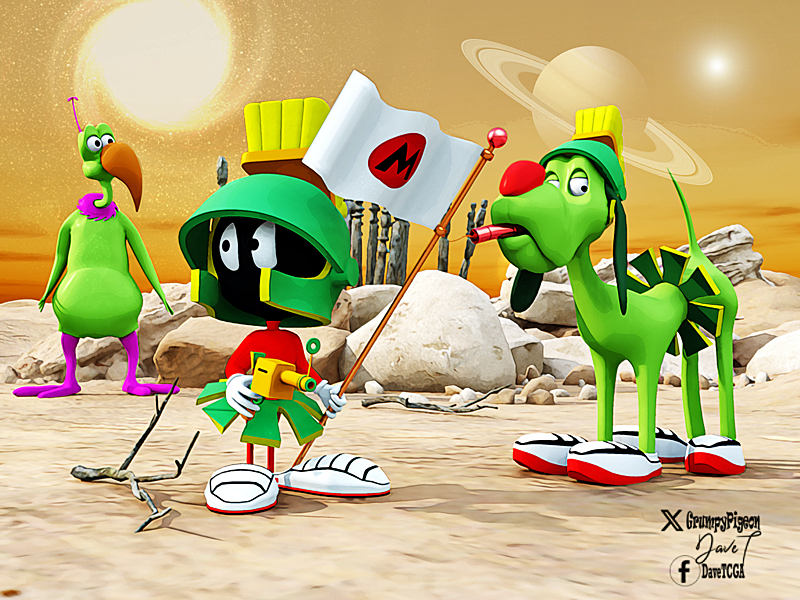
more....Wacky Modelling ~ In Carrara ~from the grid & cylinder tools a flag and pole with a morph
and an illudium q36 explosive space modulator

 Morph/ Design Help...
If you are wanting an exact recreation of your photo you will likely need to hire an artist to sculpt and texture the character. That will cost you $$$.
I suggest that you take a long look at the characters in the store and find a "close enough" character. This will cost you less $$$. If you want to take it further, look at the morphing assets that are available in the store. These are tools that will allow you to alter the shape, body and face of a character by pulling a slider. Morphs are easy to use but difficult to master, there is a learning curve. If you go this route make sure your morphs are for the correct generation of character (Genesis 3, Genesis 8, Genesis 9, etc.). Bear in mind that textures can be used on a different character but you may need to buy additional tools to swap between character generations. You can also dial in more than one character on one figure if they are of the same generation.
Same advice for the outfit and hair, see if you can find a "close enough" equivalent in the store.Morph/ Design Help...Greetings to all,
I'm VERY new to 3d and DAZ and I have a question. For a project I'm working on, is anyone capable of morphing/ altering a bas figure into someone I have photos of? Simularly, I'd like the outfit replicated as well please, so that I might use it for posing and environments to create my project and vision? Being so new to DAZ and 3d in general, I was hoping to streamline my project by asking for help here in getting the figure to match my model in all aspects. Thank you for your consideration and hope everyone is well. Have a great day.
Gundamry
Dion G Smith IIDaz Studio 4.22[.0.x] Pro, General Release!PerttiA said:
paulawp (marahzen) said:
Hi, all. I'm trying to figure out a render slowness issue which seems to have emerged when I upgraded from 4.21 to 4.22.0.16 earlier this month. The problem is specifically noticeable when rendering an Ultrascenery scene; the problem is the same in the new Ultrascenery 2 which I just installed today. It can finish the render, it's just absurdly slow compared to my beta Daz, which is on 4.22.1.88. For instance, I created a new scene today in the release version which took 8 and half minutes to finish rendering. The same scene in beta Daz rendered in 34 seconds. The two Daz instances are on the same computer.
Windows 10, Geforce RTX 3090, Driver: 31.0.15.5123
I have not found errors in the log.
I attempted to compare likely settings between release and beta, but there are some differences in these versions.
I've inquired in the Ultrascenery thread but thought I would ask here also to get additional eyes on the question.
At this point, I'm still trying to confirm if anyone else (among the USC regulars) is using 4.22.0.16, so I don't know if the problem is inherent in the version. Are there known driver issues that could lead to 4.22.1.x being happy and 4.22.0.x being a slug? If not, my next concern is plugins; my beta install does not acknowledge most of my plugins (which didn't matter for what I was using it for). I don't have LAMH (known to cause problems in USC) and never installed Heat. Can I uncheck plugins in Help -> About Installed Plugins to test without them? Do I need to restart Daz? Is doing that likely to cause havoc with Daz and my plugins?
Otherwise, seeking any suggestions.
Minimum driver version for 4.22.0.16 is 526.98 and for 4.22.1.88 minimum version is 537.13
If I translate your driver corrextly, it is version 551.23, so it should be new enough for both, but finding the correct drivers to use for something, can sometimes take time - That is why I don't usually update any drivers unless I have a reason to do it (if it works, don't fix it)
I had updated drivers in January to accommodate testing Face Transfer 2 in the beta version and had noticed no painful problems in either instance then or until this. It's perplexing. My 4.22.1.x Beta can render the same scene literally 10-20 times faster than my 4.22.0.x release. At least I technically can render USC scenes - I can create them in my main instance and save them, then open them in beta and render. I'm going to try testing plugins today as noted above.
Long Load Times – Why is this still a problem?Leana said:
I think the suggestion was to have some kind of global inventory of all product IDs that would be updated wich each new product, and then the vendor or QA team could have an utility to check if files for a new product use an existing ID.
Problem would be how to initialize such inventory with the thousands of existing products...
Not to mention products thata re being developed concurrently. However, DS does now append an additional character string to morph names to reduce the chance of conflicts - as long as the morph is created and has ERC added inside DS, if the file is hand edited or copied from a template as an alternative route to setting up a lot of links then that may fail.
LIVE! In the store NOW!! LowPi - the Low Poly Figure, and Crowd Creator Scriptsbarbult said:
luci45 said:
barbult said:
luci45 said:
barbult said:
@luci45 I autofit the SG Ball Cap and SG Knitted Cap without using either template and saved the Asset. They worked fine on posed LowPi. That was a great idea of yours to use Genesis items. They were low enough resolution that I didn't feel a need to decimate. It makes the process faster that way.
They look great. I recently autofitted and saved, then put baseball hat on head as attachment and it follows the figure, including resizing. Did you change them to objs?
No, for those two hats, I didn't decimate, so I didn't export to OBJ and use Transfer Utility to rerig. I just saved the autofitted hat as a new wardrobe asset for LowPi.
What do you mean by putting it on the head as an attachment? Do you mean in the wearkit as an attachment like the bangs?Edited for spelling. How can I misspell "didn't" wrong twice two different ways?
The weird (original) problem I have is that any hats I autofit, including lopoly genesis, don't move with the figure.
Also I didn't know you had to export and rerig after decimating. (I don't read all the instructions and then forget what I've read anyway>)
This is how I do it: After decimating, select Create LOD on the Decimate pane. Then in the Parameters pane, under Mesh Resolution, select that LOD. Then export ot OBJ and select remove unused vertices. Import the OBJ and rig to LowPi with the Transfer Utility. I don't use a template when rigging hair or caps. The imported OBj will not import all the settings of the original surface materials. You may choose to copy the material surfaces from the original item and paste them to the surfaces of the newly rigged LowPi item. Then save it as a new asset.
(I use the V3D Scene Optimizer to reduce the resolution of the texture files before saving the final asset, if they are above 1K)
Thanks, barbult. That makes sense.
G8F Head ShapesTaoz said:
Taoz said:
felis said:
If you in parameter preferences untick 'Consolidate Properties', then I think you should get 2 morphs. And then you can check the parameters for each and at least see the path.
Thanks, that actually separates them yes, so they don't conflict. I have already reported it though, DAZ seems to consider such conflicts a bug (at least they use to fix them).
Got the answer from CS today that they can't fix it, they say I have to uninstall one of the products to make the other work. I don't understand this, I've reported such issues before and they've all been fixed so the products do not conflict anymore. Seems to be a new supporter, don't recall having seen that name before. Wonder if that person really understands the issue? They don't seem to know the workaround suggested by @felis either. Or is this a special case?
BTW, I tried to rename the dials with the combined morphs under their Parameter Settings by removing the last character under "Label", that actually splits them up so they work independently. It only seem to affect the loaded character, if you delete it and reload it using ctrl+c it reverses the editing so they combine again. So that seems to be the Label that conflicts, isn't it possible to fix that by editing the files for one of the products? In any case, this also seems to solve the issue though I don't if it has any side effects, like not being saved with the scene.
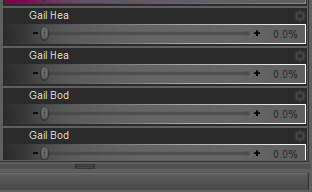
You did it correctly but you still have to save the morph assets, otherwise the original morph assets (dsf files) will be still loaded when you place a new figure / character into the scene.
After changing the labels in Parameter settings, go to the menu: File - Save as - Support Assets - Save Modified Assets... Check if the morphs are listed in the dialogue box, then click Accept.
Elor's way is also doable. I usually fix such similar issues by modifying DSF files with Notepad++.
PS: Just in case, if the issue still persists after saving assets / reloading figures, press F2, clear DSON cache, then reload the figures.
New Free Digital Art Live seriesSaturday June 15 - Episode 004 - The Amazing Predatron

Join hosts Paul Bussey and Dartanbeck on “Creative Cart,” where we explore essential assets that can transform your digital art projects. Each episode is themed to highlight a DAZ vendor as well as a range of assets and tools—including characters, shaders, environments, scripts, clothing, and props—tailored to enrich your artistic endeavors!
“Creative Cart” is more than just a showcase; it’s an interactive platform. We feature a community section where you can share your own artwork, recommend your top asset picks and engage in discussions about how these tools have influenced your creations. Get ready to share and show; jot down artwork you’d like to screenshare, helping other artists learn from your creative projects.
Journey Through 20 Years of 3D Magic with Predatron
Join us in celebrating Predatron, a household name in the DAZ 3D community. With a career spanning nearly two decades, Predatron has been a cornerstone of the DAZ store since 2004. His dedication and artistry have enriched the DAZ ecosystem with hundreds of high-quality products, captivating countless 3D artists.
Predatron’s journey began with a nudge from his wife Diane, already established at DAZ 3D, igniting his passion for 3D modeling. Merging iconic movie titles “Predator” and “Tron,” Predatron crafted a unique artist name reflecting his creativity and love for the fantastical.
A generalist with a penchant for grungy medieval styles, Predatron draws inspiration from a myriad of sources — from architecture and nature to Tolkien and artists like John Howe and Boris Vallejo. His creative process often skips traditional sketching, diving straight into 3DS Max or Blender.
Predatron’s work has evolved over the years, gaining confidence and refinement through experience. His creations, such as the beloved “Ye Olde Library,” blend meticulous detail with imaginative design. Despite his extensive experience, Predatron remains dedicated to updating his older products, ensuring they leverage the latest DAZ Studio advancements.
When he’s not crafting stunning 3D assets, he enjoys Cornwall’s coastal beauty, local cuisine, and working on his fantasy trilogy.
Join us in this exclusive focus into Predatron’s creative world, exploring highlights from his product range, and gain insights from his wealth of experience.
During the session Dartanbeck will delve into a world of mythical creatures and heroes with highlights including the fearsome Troglodytes, mischievous Goblins, and the formidable Angor (Beastmen). He’ll look at some of his favourite Predatron environments.
Predatron LoREZ Products
We’ll also look at the super-useful LoREZ product series:-
Lorenzo LoREZ is a versatile bundle offering various ethnicity skin tones and a broad selection of clothing, alongside extensive morph options for shaping and customization. It provides an easy-to-use, low-resolution figure ideal for diverse character creation, from humans to creatures.
Loretta LoREZ mirrors Lorenzo’s features, supporting a wide range of shapes and skins while being resource-efficient, making them perfect for populating scenes without taxing system resources.
LoREZ Masked Hero enables easy creation of superheroes, with options for further customization. It’s compatible with Lorenzo, enhancing diversity for star ship crews or other character needs.
LoREZ Horse 2 is an upgraded low-resolution horse model with high detail and compatibility with existing animations, complemented by a textures add-on.
Predatron’s LoREZ Animals Bundle includes light-on-resources, versatile animal models like dogs, pigs, a crow, a rat, and a cat, each packed with morphs and textures to fit various needs in your scenes.
Fantasy Realms : Community Challenge
Using Predatron’s 3D assets, create a scene that captures the essence of fantasy — be it mystical forests, enchanted castles, or taking advantage of one of the many mythical or fantasy creatures by Predatron.
Share your masterpiece in the Digital Art Live STUDIO forum - DAZ Studio - The Creative Cart.
Have you used any of Predatron’s assets in your scenes already?
If so -we’d also love to see your creativity with these – share your work during the webinar!
Let your imagination run wild and join the adventure!
 G8F Head Shapes
I would wait for wiser heads than mine for advice, but if they are not HD morphs, these files should not be encrypted and I think you should be able to edit them directly with any text editor (if you get gibberish in your text editor, the file is likely compressed so uncompress it first then edit it), to change the label here. Maybe you can also simply change the label in Daz Studio and overwrite the original morph
I prefer the first method because at least, I know what I did and can easily reverse the change (even if at worse, you can always re-install the product through DIM) because after saving the file, I'm keeping it open in my text editor, then I test if I didn't break anything and if I changed what I wanted to change, then and only then, I close the file: if there is any mistake, I can easily cancel all my changes and save the file as it was when I opened it.
LIVE! In the store NOW!! LowPi - the Low Poly Figure, and Crowd Creator Scriptsluci45 said:
barbult said:
luci45 said:
barbult said:
@luci45 I autofit the SG Ball Cap and SG Knitted Cap without using either template and saved the Asset. They worked fine on posed LowPi. That was a great idea of yours to use Genesis items. They were low enough resolution that I didn't feel a need to decimate. It makes the process faster that way.
They look great. I recently autofitted and saved, then put baseball hat on head as attachment and it follows the figure, including resizing. Did you change them to objs?
No, for those two hats, I didn't decimate, so I didn't export to OBJ and use Transfer Utility to rerig. I just saved the autofitted hat as a new wardrobe asset for LowPi.
What do you mean by putting it on the head as an attachment? Do you mean in the wearkit as an attachment like the bangs?Edited for spelling. How can I misspell "didn't" wrong twice two different ways?
The weird (original) problem I have is that any hats I autofit, including lopoly genesis, don't move with the figure.
Also I didn't know you had to export and rerig after decimating. (I don't read all the instructions and then forget what I've read anyway>)
This is how I do it: After decimating, select Create LOD on the Decimate pane. Then in the Parameters pane, under Mesh Resolution, select that LOD. Then export ot OBJ and select remove unused vertices. Import the OBJ and rig to LowPi with the Transfer Utility. I don't use a template when rigging hair or caps. The imported OBj will not import all the settings of the original surface materials. You may choose to copy the material surfaces from the original item and paste them to the surfaces of the newly rigged LowPi item. Then save it as a new asset.
(I use the V3D Scene Optimizer to reduce the resolution of the texture files before saving the final asset, if they are above 1K)
LIVE! In the store NOW!! LowPi - the Low Poly Figure, and Crowd Creator Scriptsbarbult said:
luci45 said:
barbult said:
@luci45 I autofit the SG Ball Cap and SG Knitted Cap without using either template and saved the Asset. They worked fine on posed LowPi. That was a great idea of yours to use Genesis items. They were low enough resolution that I didn't feel a need to decimate. It makes the process faster that way.
They look great. I recently autofitted and saved, then put baseball hat on head as attachment and it follows the figure, including resizing. Did you change them to objs?
No, for those two hats, I didn't decimate, so I didn't export to OBJ and use Transfer Utility to rerig. I just saved the autofitted hat as a new wardrobe asset for LowPi.
What do you mean by putting it on the head as an attachment? Do you mean in the wearkit as an attachment like the bangs?Edited for spelling. How can I misspell "didn't" wrong twice two different ways?
The weird (original) problem I have is that any hats I autofit, including lopoly genesis, don't move with the figure.
Also I didn't know you had to export and rerig after decimating. (I don't read all the instructions and then forget what I've read anyway>)
LIVE! In the store NOW!! LowPi - the Low Poly Figure, and Crowd Creator Scriptsluci45 said:
barbult said:
@luci45 I autofit the SG Ball Cap and SG Knitted Cap without using either template and saved the Asset. They worked fine on posed LowPi. That was a great idea of yours to use Genesis items. They were low enough resolution that I didn't feel a need to decimate. It makes the process faster that way.
They look great. I recently autofitted and saved, then put baseball hat on head as attachment and it follows the figure, including resizing. Did you change them to objs?
No, for those two hats, I didn't decimate, so I didn't export to OBJ and use Transfer Utility to rerig. I just saved the autofitted hat as a new wardrobe asset for LowPi.
What do you mean by putting it on the head as an attachment? Do you mean in the wearkit as an attachment like the bangs?Edited for spelling. How can I misspell "didn't" wrong twice two different ways?
LIVE! In the store NOW!! LowPi - the Low Poly Figure, and Crowd Creator Scriptsluci45 said:
barbult said:
@luci45 if it is an unrigged prop, did you parent it to the LowPi head, so it moves with the head? What is an example of a problem hat. I'll try it if I have it.
The two in the renders are by smay for genesis;https://www.daz3d.com/sg-baseball-cap-for-genesis and https://www.daz3d.com/sg-headdresses-for-genesis.
I also tried this one that does not autofit, just parents to head and has adjustments: https://www.daz3d.com/headwear-for-genesis-2-and-3-male-s
I noticed your army guys are wearing hat. No problems with those? Which uniform is that?
I have all three or those products, so I will try them and see what happens for me.
The army guys are wearing a decimated version of dForce Combat Uniform Outfit for Genesis 9. For the uniform part (excluding the hat). I autofit it to LowPi and decimated and exported all of it, including the shoes, as a single OBJ and rigged it as one full body item of clothing. I used the bodysuit template in transfer utility and fit it to LowPi.
Yes, that hat gave me terrible fits! I had the problems that you described. I overcame the problem, and now it works fine. I tried so many things, but I think what ended up working was autofitting it to LowPi, decimating it and exporting as OBJ. Then rigging the hat to LowPi without using a template, but not fitting it to LowPi. I just parented it to his head. I don't know how much of that was necessary or what part was the magic.
Since then, I've converted other hats that worked fine. I converted the B.E.T.T.Y ball cap, the Desprerado cowboy hat and they worked fine when fit to LowPi.
LIVE! In the store NOW!! LowPi - the Low Poly Figure, and Crowd Creator ScriptsLyrra Madril said:
Luci - since Lowpi is so lowpoly compared to other figures it was difficult to get the conversion clones precise. Dense polys over chunky polys almost always gets clipping issues. I've found it best to convert the item, adjust the obj so it fits better and then rig it. However if thats a bit much for you, there should be an ExpandAll morph so you can make the item a bit bigger which should help.
The strange part is that converted genesis hair fits perfectly, clothes fit OK too. It's just that every hat I try moves over 2-4 inches (DAZ World scale) when the figure is posed. Enlarging doesn't help. I haven't ever rigged anything, but I don't see the point of rigging if that means putting joints in the hat. I just want it to stick on the center of the head, and not shift over.
The new set looks great! And I bought it.
LIVE! In the store NOW!! LowPi - the Low Poly Figure, and Crowd Creator Scriptsok I'm going to check over everything , this is very irksome becasue I know i've fixed this before.
Incidentally .. the second expansion Dinner and a Show is out.
https://www.daz3d.com/lowpoly-crowd-creator-expansion-dinner-and-a-show
Luci - since Lowpi is so lowpoly compared to other figures it was difficult to get the conversion clones precise. Dense polys over chunky polys almost always gets clipping issues. I've found it best to convert the item, adjust the obj so it fits better and then rig it. However if thats a bit much for you, there should be an ExpandAll morph so you can make the item a bit bigger which should help.
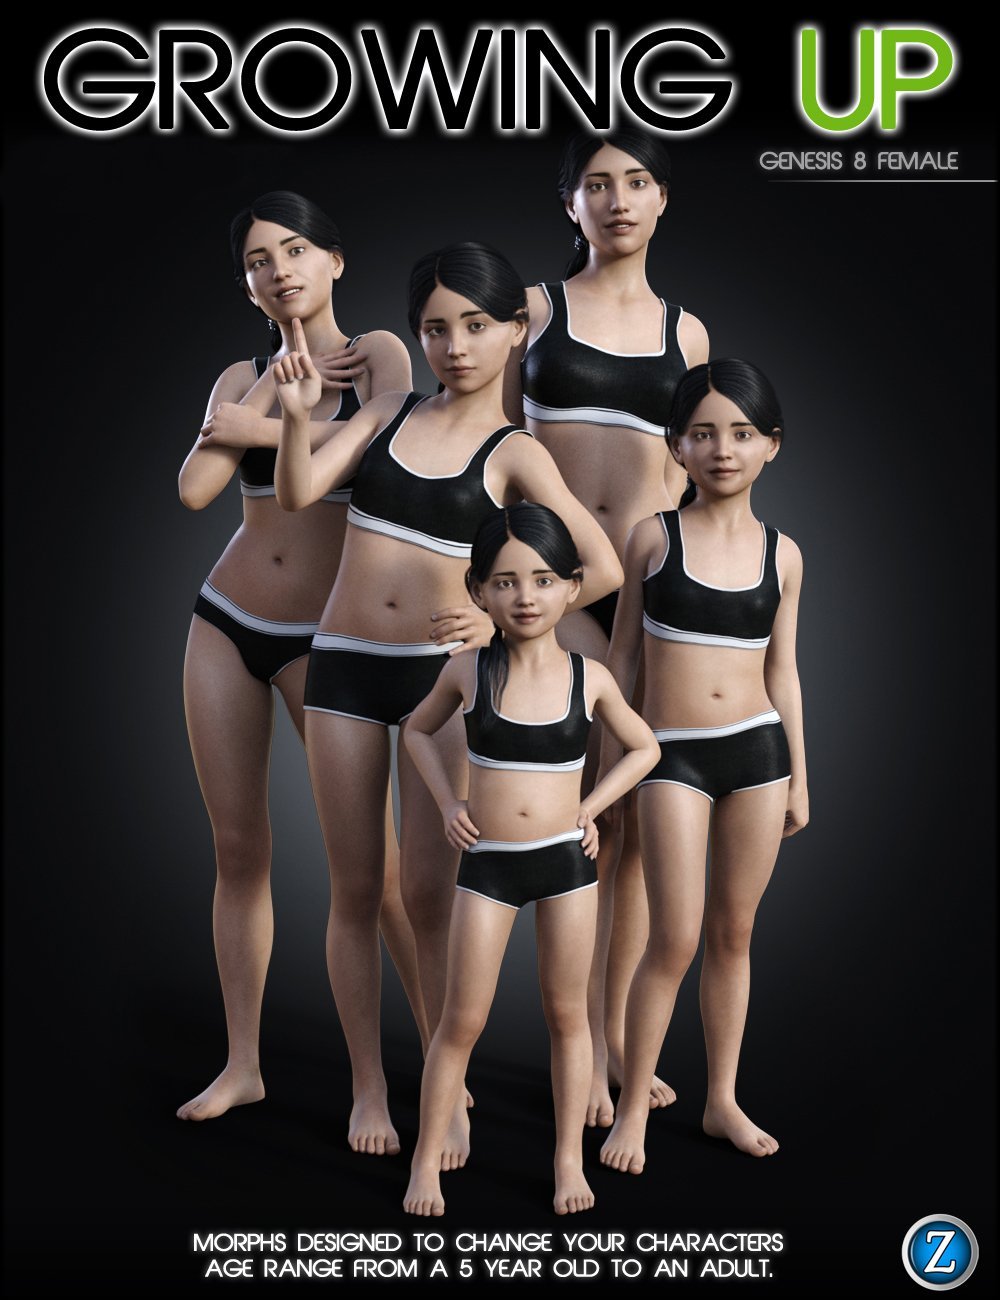
How to get child model ?? Genesis 2At the time Genesis 1 was new technology and it included these basic CHILD body morphs to show off it versatility, thus the child morphs was included in the free starter essential.
Later version of the other genesis generations, like 3, 8, 9, did not have a child morph included in the starter essential pack but customers could buy specific morph packages to add that functionality.
A good example is Growing UP https://www.daz3d.com/growing-up-for-genesis-8-female-s
Daz 3D is part of

Connect
DAZ Productions, Inc.
7533 S Center View Ct #4664
West Jordan, UT 84084Licensing Agreement | Terms of Service | Privacy Policy | EULA
© 2026 Daz Productions Inc. All Rights Reserved.