-
[Released! HD Face Burns for G8F + Add-On] FenixPhoenix's Commercial Products
thejackal0815 said:
FenixPhoenix said:
guilhermegubz said:
Hi guys!
I'm having a problem trying to get these beautiful burns into Maya - I will animate the character there.
I'm just doing a simple export, trying all settings possible, if anyone could help me it would be really awesome!
Some screenshots are attached.
Thank you all in advance!
Thank you for your purchase! If the problem is that the morphs aren't showing, then you need to set the figure to Subdivision of 3 or 4 (we included a readme inside the product with more detailed instructions. The included script that's called "Read Me" should spawn it). For convenience, I'm attaching the readme to this post. Page 9 talks about the importance of Subdivision and how to set it up if you don't want to use the included Subdivision scripts.
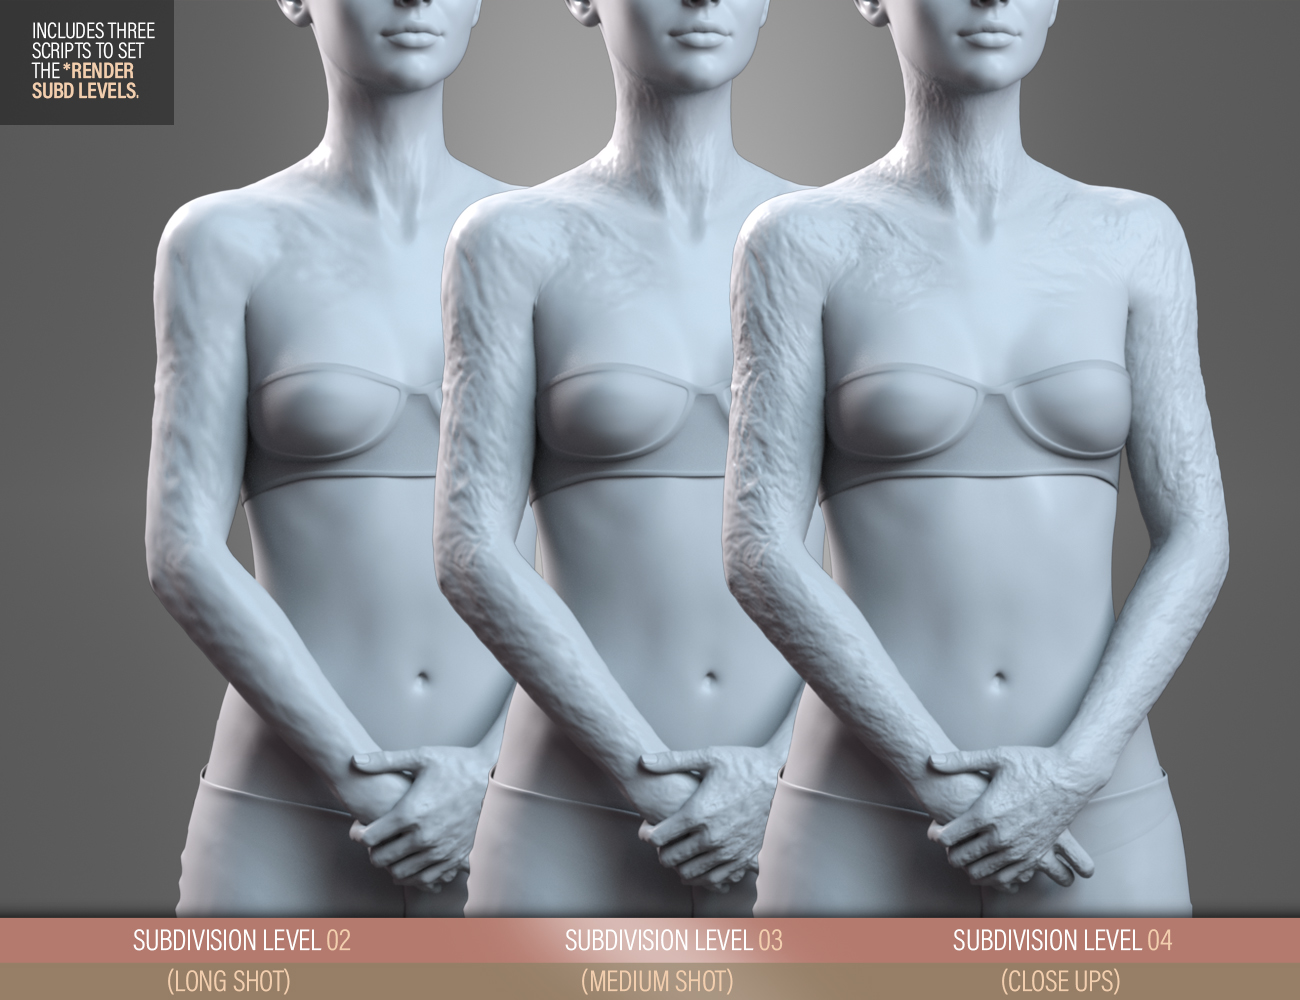
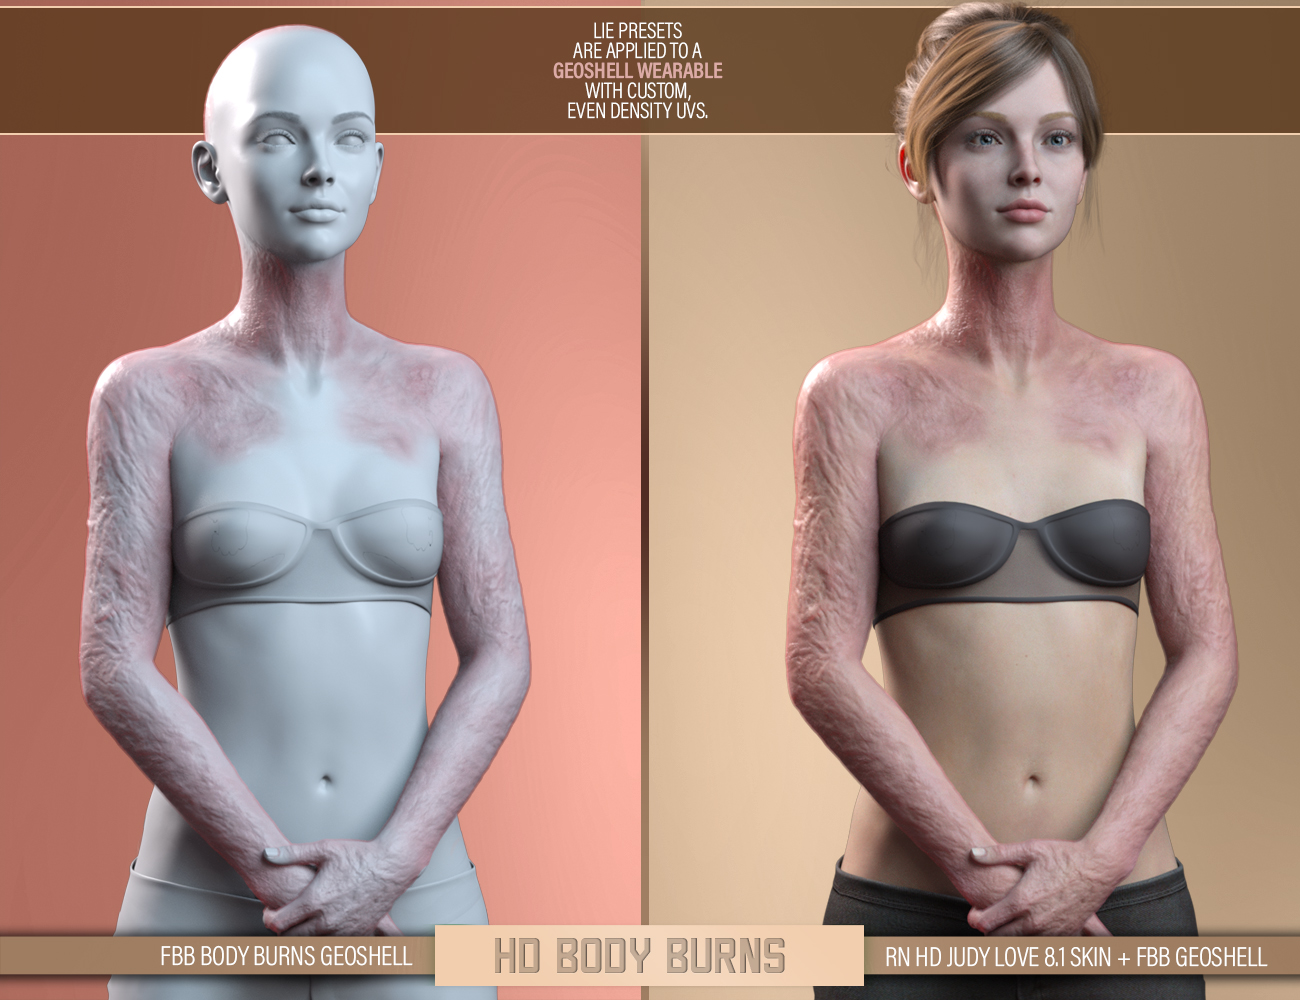
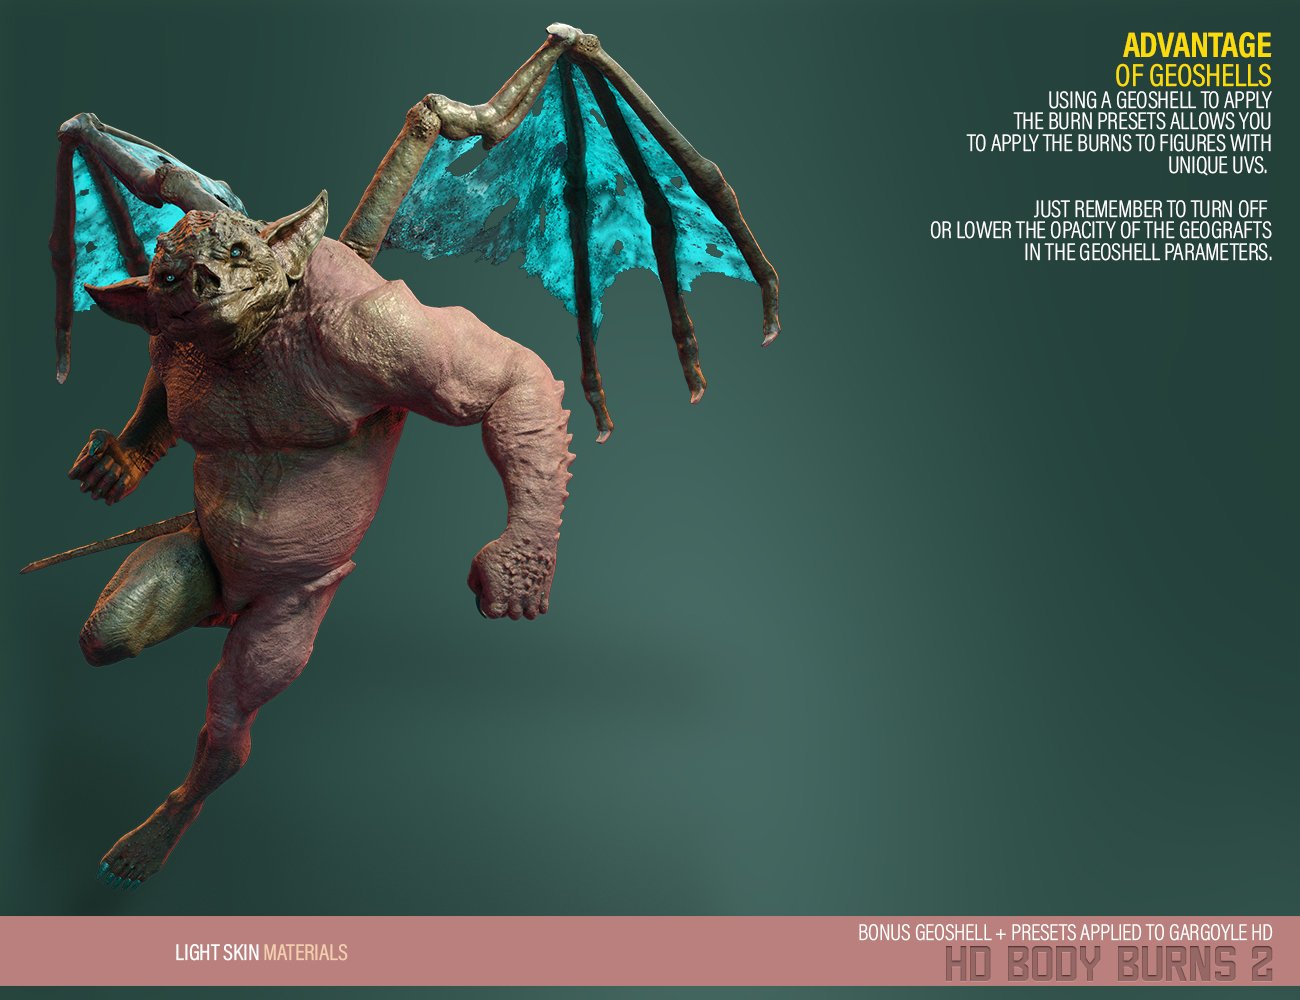
If you are referring to the textures, these are applied on a supplied geoshell that uses custom UVs to ensure an even transition. This method ensures that the burns maintain their look regardless of what character you're applying them to (and makes it possible to apply to Genesis 8.1, includying figures with different UVs). As each vendor has a different way to set the skin, it was easier to ensure the final "look" this way. As explained in the read-me and the product page, the geosell is really where you're applying the textures:
If the program that you are using to animate not Daz Studio?
These are looking fantastic. For a project I am in need of body burn textures to cover the whole back and your product looks quite realistic. However, as you mentioned you are using different UVs than the original figure. Can you tell me if the Body Burns pack would work with other geografts (for example the belly graft from Cyperfox's "CF - Jiggily Dynamics")?
(I don't mind if it's complicated as long as it is doable :) )I will ask Esid tomorrow, as he's the one who did the even UVs for this set. I don't own the belly graft to experiment or give a definitive answer. The problem is that these burns use a custom UV set (rather than the Genesis 8 Base UVs) to ensure a smooth transition between the maps. You have the four maps (face, body, arms, & Legs) laid out in one big 8k map. Unfortunately, I am not proficient enough in using UV transfer to check if that can be used to transfer those custom UVs to the belly.
Issue with some poses after creating a new face morphI've not encountered such an issue with wrapping result so far... Have you correctly Adjust the Rigging and ERC Freezed the character morph property ? Like the example of a wrapped result of a G9's character I show in the screenshot, if they're correctly rigged and freezed, there should be no such issue...
Well, I couldn't reproduce your issue by now but I would suggest you further try: also hide the EyeSockets on the floating geometry in Wrap, before wrapping. See how it works... Otherwise, in your current case, you may have to make quite a lot of "fixing morphs" for those eyes related expression properties.
Genesis 9 No Breast/Pectoral.. Possible?Hi, there's also the left and right chest volume, 2 morphs, for some reason, separated from the rest and found under "tools"(warning, writing this from impaired memory
 ) And Zev0's GU product has a flatten chest morph - to use it, first just set the main GU body morph to any value slightly over zero. Of course you can just scale the pectorals manually and mess with the scale of spine 3 - disclaimer, all of that probably wouldn't do what you intended cause of the extreme change necessary but that's some extra stuff to use, especially dealing with base G9's giant pecs
 / peace P.S. I've found I can do some radical scaling/ morphing, add lots of generic smoothing, then sucessfully bake the smoothing modifier to create something very useable and different from the original.Vo Julie, Young, and Male HD for Genesis 9 Bundle
Julie Young plus about 45% Julie Male seems to make a reasonable boy, especially after reducing the Young head morph a bit.
Does DAZ save unused weight maps?I am still not following what you are trying to do - FBX export from DS is meant to avoid unnecessary data, so if you want to export additional weight maps you would probably need a second export with the maps assigned to bones. If you want to store maps within DS without having affect the model, use a do-nothing dForm or Push Modifier (with a Push Modifier weight node) - which is how the weight-maps for splitting morphs with Morph Loader Pro are stored.
[Released! HD Face Burns for G8F + Add-On] FenixPhoenix's Commercial ProductsJust as a general piece of advice, if you need to use things with an irregular UV on a geograft, assuming that geograft has access to the base UVs (which I imagine a belly would need to have if it can use regular skins), you can load the textures with irregular UVs on a figure without the geograft loaded and use DAZ Studio's Map Transfer utility to get a copy of the textures that uses the regular UVs. You can then manually slot those new maps on the geograft and, if needed, save them as a texture preset.
4-Armed Alien!kaotkbliss said:
Attached is my version of G8F 4-arms, static props ready to be geographed again. I deleted the ones I had already geographed because the rigging didn't work and thought that I needed to rig before making it a geograph, but that didn't work either.
My rigging consisted of attempting to transfer the rigging from G8F to the arms in various ways, but all ended in failure due to the arms being in a new location I think.
I can't share the actual arm geometry since they are actual G8F arms with a couple added polys to connect the arms to the new location on the G8 figure for geographing.
how you've created that extra arms joints ?
Issue with some poses after creating a new face morphYes, there are. It seems eyes pass before the eyesockets when I use the Eye Side-sude morph. I also tried the Eye Crossed morph, and I got the same issue, I gess it would happen with any moph making turn the eyes...
In fact, I importes the character with the Eye Side-Side morph into Wrap, this afernoon, to try to see what hapen. I create an eyesocket subset from the character with the Eye Side-Side morph, and another eyesocket subset from the character with the zeoed pose, in order to compare their position. The both eyesocket subsets seem to superpose correctly, so I have not the impression that the eyesocket have moved when I used the Eye Side-Side morph... It seems rather thhat the eyeballs passed before the eyesockets, so as I can't see them...
What Makes a G8 Item NOT Conform to Genesis 8.1?So yes, indeed it was wrong. It was set to be for Genesis 8.1. But I was fitting it to 8.1, so I don't know how that prompts the Auto Transfer dialog.
And even after correcting it to Genesis 8 Male (from Genesis 8.1 Male) it launches the Auto Transfer Dialog when trying to fit it to Genesis 8.1 Male
PerttiA said:
If an item triggers the autofit dialogue, the items Scene Identification is not correct, you need to fix it.
Issue with some poses after creating a new face morphyuyu.atem said:
Ah ? Even if the eyesocket is visible in with zeroed pose ? How could I to be sure that the eyesocket morph setting is ok without to use the eye side-side morph ?
Oh oh ~~ maybe I misunderstood the issue. Pls clarify: on your wrapped character, before dialing Eyes Side-Side, are the eyesockets in right place or not ?
Issue with some poses after creating a new face morphAh ? Even if the eyesocket is visible in with zeroed pose ? How could I to be sure that the eyesocket morph setting is ok without to use the eye side-side morph ?
What Makes a G8 Item NOT Conform to Genesis 8.1?Why do some items for G8 want to launch the transfer utility when you try to load them on G8.1 and others don't? The default behavior is that they are supposed to just load.
DAZ To Unreal - Characters importing into Unreal 5.1 rotated 90 degrees offHello,
Just wanted to share some information which might be helpful. I was using the newest vesion of DAZToUnreal from here: https://github.com/David-Vodhanel/DazToUnreal/releases
I am using UE5.4 version. To transfer the DAZ Genesis 9 model to Unreal I am unchecking "Zero root rotation in import" in Unreal engine project settings->DazToUnreal plugin settings, keeping the Fix Twist Bones and Rotation checked. In DAZ application while using DAZ to Unreal plugin to export the character I unchek "Import facing right" and leave the "Fix Twist Bones" checked. In this way i get my DAZ character transferred in Unreal facing the correct way to front (facing the camera).
By doing this I was getting the problem to retarget the animations to may DAZ character. The provided IK and retarget assets by the plugin were not aligning the charracter correctly. The character was skewed and almost laying on the ground by side. Automatic retargeting (new feature in UE5.4 - checkbox in retargeting window) was not working corrctly as well: left hand pulled to left side and all body leaned a bit to the left side. I do not know why byt started to think it was because I transferred the character facing to the camera and not to side as by default (also be default the plugin rigs are facing to the side and not to the front).
Then I copied the original G9IKRig and G9Retargeter from plugin folder to my new created character folder to make experimenting. First I opened G9Retargeter and made the target character (DAZ) auto aligning to source (Quin character) by entering to edit mode and selecting root and pressing the button AutoAlign->Align All Bones. This made my character aligned correctly and seems was very happy to see all animations working correctly. Meaning "almost correctly) untill I spoted some weird head movements on some animations. I spend 3 days to find out what was wrong still. Did not find any information neither in Google nor in Youtube. I started to check everything from the skeletons - all the chain to the retargeter. And I hope I found a problem (at least for now). What I found thet the G9IKRig provided by plugin uses retarget chain for neck1->neck2->head as Head but Quin/Manny has 2 chains for neck and head. So I made correction (splitted) G9IKRig neck chain into 2 correct chains: neck1-neck2 into chain Neck and head to chain head.
This made my day very happy. As all problems dissapeared. I hope this will help someone having same issues like me because nobody before reported these problems and how to solve them.
Smart Parenting, or Rigid Follow Node, but Not Both?Richard Haseltine said:
lukon100 said:
crosswind said:
You have to parent this Prop to a Figure rather than another Prop before saving Wearable Preset... Wearable Preset only works on a skeletal Figure. If this Prop never needs a Figure as its parent, you can just save it as a Subset with its children, after saving Prop assets and setting rigid follow node and assigned Props.
Yes, this prop has no occassion to be parented to a skeletal figure. It therefore makes no sense to save this prop as a wearable preset.
Therefore...
If I understand you correctly, you are recommending that I simply save my prop as a scene subset, because that is the only way I can save the prop with the rigid follow node.
But this returns my to the original delimma: I can't have both a rigid follow node and "smart parenting".
So, are you in fact confirming that there is simply no way for this prop to have both a rigid follow node and smart parenting? (no way short of parenting it to some random rigged figure)
This gives me an idea. Is it possible to temporarily parent my prop to a rigged figure long enough to save the prop as a wearable preset with its rigid follow node, but then un-parent it and let it stand alone as an unparented wearable preset type of prop from that point on, forever?
The hierarchy has to remain for the preset to apply. You could create a really simple figure as a root for parenting, that would have very little impact on the scene.
Worth a shot. So I tried it. I made a rigged version of the planter. It had 2 bones. One of the bones was the soil surface. Parenting a flower to it failed to make the flower move up or down with the planter's height morph. So back to the rigid follow node idea. I made the soil surface bone also be a rigid follow node. Parented the flower to the rigid follow node, Failure again. Flower did not move up or down with the morph. No point in even trying to save this failure as wearable preset or in any other form, since it didn't work.
BUT... I found a solution that did work: Don't use a height morph on the planter. It seems items parented to something that moves by means of morphing won't follow the morphed movement unless using a rigid follow node. So, since I can't use a rigid follow node, I can't use a morph. So I used another method for changing the planter's height. I converted the entire top of the planter to become the second bone of the the rigged planter prop. Unlike the experiment in the previous paragraph, this time the second bone includes the top rim of the planter, not just the soil surface. Now that the entire top of the planter is the second bone, I can adjust the planter's height by YTranslating the second bone. The rim and the soil move up or down together. And, flowers parented to this second bone will move accordingly. DONE!
This only worked by the graces of how simple my model is. I consider myself lucky.
Smart Parenting, or Rigid Follow Node, but Not Both?Gordig said:
You could do the same thing with an invisible plane inside the planter to which you parent your desired plant.
I do not understand how this could fix the problem.
Where in the structure is this invisible plane? Is it built-in to the planter's mesh? Is it a separate mesh that is parented to something?
I already have a plane that is built into the planter's mesh. In is the inside the planter, a little lower than the top rim. it is the plane meant to be the top of the planter's contents, such as soil. It is the soil I mentioned earlier, to which I have assigned the rigid follow node. So I have a soil plane that is the rigid follow node, to which I parent the flower. This soil plane in not invisible. It takes on the soil shader. Ok, so I have a plane of sorts already. it is not an invisible one as you suggest. Which leaves me wondering why the plane you suugest must be invisible. And I wonder about what other ways the plane you suggest must be different from my soil plane. Perhaps the plane you suggest is not only invisible, but is also separate from the planter's mesh - a separate node at least. And if this is so, I'd like to understand how - and why this could fix things.
You see, I don't understand how a plane that was not already part of the planter's mesh could move up and down with the morph that makes the planter shorter or taller. The morph already does move the soil plane up or down, because the soil plane is part of the planter's mesh. Too bad I can't simply parent the flower to the soil plane. That's why I wanted to make the soil plane a rigid follow node. I can parent a flower to a rigid follow node. This method totally works! Only problem is rigid follow nodes can't be saved with regular props. They must be saved as scene subsets. But scene subsets can't have smart-parenting. And I want smart-parenting. Hence the title of this post.
Smart Parenting, or Rigid Follow Node, but Not Both?Gordig said:
I'm not clear on your objectives. What do you want the rigid follow node to do?
I want the rigid follow node to move anything parented to it when it moves.
There is a morph that will move the rigid follow node up and down. I want anything parented to the rigid follow node to move up or down with the morph.
The prop is a planter that you put plants in - plants like flowers or ferns.
The soil in the planter is the rigid follow node. So if you parent a flower to the rigid follow node assigned to the soil, then the flower will move up and down with the morph that moves the soil up and down. The morph that moves the soil up and down is the morph that changes the height of the planter.
Easy Peasy Challenge #1Bunyip02 said:
Fettbemme said:
Bunyip02 said:
Pool Sharks
Trap for new players - Exported this small scene from DAZ Studio as an obj, size 1.68GB. Bryce ran out of memory.
Used Decimator on the scene so it was a lot smaller and it then imported.
WOW, any idea why the file size skyrocketed?
No idea why the size ballooned, it was a couple of M4 figures which I thought Bryce would handle. The use of the Decimator reduced the file size to 627MB.
Out of curiosity I did an obj export test:-
M4 Base - 10.7 MB
M4 with Shark Morph and conforming tail - 809 MB
M4 with Shark Morph and conforming tail Decimated to 10% - 247 MB
Issue with some poses after creating a new face morphOh, I just saw your message! Thank you very much, I will try !
Edit: Huh, to be sure to don't make a mistake, if I understand well, I have to:
1. To load the character morph I created (aloready done, sice I tested it...
 )
)2. To dial the Eye Side-Side morph
3. To import the mesh in obj file into blender withe the Eye Side-Side morph activated
4. To move the eyesocket until it woulb at the correct position
5. To export the corrected mesh into DS by using the Morph Loader Pro, dial it and lock it, while the Eye Side-Side morph is activated
Is it that?
Thank you in advance for your answer!
Custom morphs only works with default models?After selecting the file to import in Morph Loader Pro click the triangle next to its name to show the settings, reverse deformations will be one of them. Using a shorter figure and double-applying it will, as you found, make the figure even shorter; it will also lose the links that adjust the bone placement, so even if you emoved the initial shape the figure would pose badly. If you reverse the deformations you will get just the chnages you made on top of the original shape, with all the adjustments links for the original thereby still working.
Custom morphs only works with default models?First, thanks Richard for answering. Second, yes i used the same settings both times. It worked fine with Genesis 8 default body but scaled down and deformed wrongly on purchased character (teen model, 1.55cm or 5' height).
I folowed the explanation on here (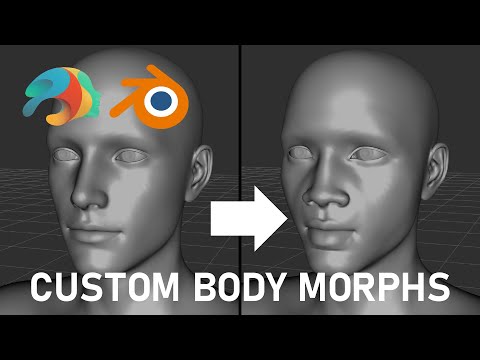 ).
).I cannot find the "Reverse Deformations" option when importing morph. I'm using Daz Studio 4.22.
Daz 3D is part of

Connect
DAZ Productions, Inc.
7533 S Center View Ct #4664
West Jordan, UT 84084Licensing Agreement | Terms of Service | Privacy Policy | EULA
© 2026 Daz Productions Inc. All Rights Reserved.