-
Need purses or handbags that open.
https://www.daz3d.com/night-out-purse-and-accessories-for-genesis-8-female is a morphing handbag with a 'purse slouched open' morph
Need purses or handbags that open.[email protected] said:
Thanks for the suggestions, Charlie. I'll see if the Purrrsed one works for me. I'm just amazed that with all the products out there, nobody has really made one where you could have a model reaching inside of it very easily.
Probably because most purses are not rigged, which makes it easier to model and most users have no need for that option I was looking for one that was open and the contents spilling out for a project last year, ended up creating my own basic morph to get the look I was after.
AIUTO...CHI CONOSCE L’ITALIANO? PARTE QUATTORDICIImago said:
Kainjy said:
Tieni premuro CTRL mentre applichi la posa.. ti apparirà un menu dove potrai disattivare le traslazioni
Ho notato che alcune pose se ne fregano di quel trucchetto, non so perchè!
Ogni tanto me lo fanno anche alcuni materiali, per quanto io gli dica "Ignore", quelli rimpazzano tutte le textures.
Forse perchè anzichè spostare i joint hanno usato un morph per muovere il personaggio.
question about creating clothesThat sounds as if the lifted arms were already in effect when you loaded the morph - I think recovering from that will be tricky, it would probably be better to use Blender to rshape the emsh to fit the base pose.
question about creating clothesOn fact, I fisrt posed the the figure, but after, I imported it as an obj file and reimported it as a morph by Morph Loader Pro. I did that because when I just posed the figure and sent it to Blender, I don't know why but the arms was upper in Blender than in DS, it was more like a Y pose... So, I dialed the arms in DS less up, and sent it to Blender, where I had an actual T pose. After that, I saved the T posed G8M as an obj file, and reimporeted it to DS as a morph by Morph Loader Pro.
How to save new character morphs?I don't understand what happen: when I do ERC Bake and try to dial the morphs, they don't recreate the shape I want, they recreate the shape that I obtained by the slider. It looks like ERC Bake had changed the effect of the morphs...
 I tried to do ERC Bake with the slider to 0 and 100%, but it didn't work. Is there something to do before ERC Bake? Or could it be because I have several AV wings in my file? I am working on a new AV wings in the same file to compare to the first one and to be sure that the shapes correspond...
Edit:
I finally succedded by working directly on the first wings, without needing to delete the other. I works much better, now!
 However, I saved the slider by Morph Asset, not Save Modified Asset because there was another asset, not only the slider, and I wasn't sure if it was normal: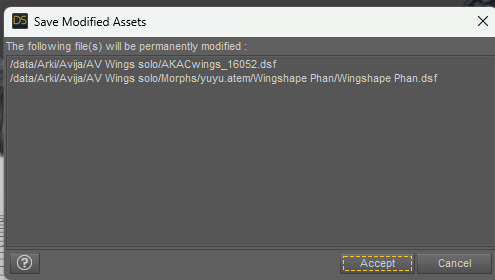
Is it normal that there is not only the slider?
By the way, I have the impression that I made a mistake by choosing "Wingshape Phan" as the product name: it is the name of the slider, but I gess "AV Wings" would be better for the product name, right? Is it possible to change that?
Thank you in advance!
question about creating clothesDid you use a morph to get the T pose or did you literally pose the figure? Reverse Deformations won't help with the latter, but you can use Bake rotations to make the system think that the T pose is zeroed and rig from that, then repose to go back to the regular pose and bake the clothing's rotations to get a version that fits the egular figure. In gernal working on the true default pose will be easier.
question about creating clothesYes it is best to model against the base character in default pose.
With your t-shirt you can in Transfer Utility set shape to current for character, and tick Reverse Source Shape from target (clicking More...)
question about creating clothesThank you very much! I tried, but it doesn't work correctly. In fact, since it was simplier to create the cloth from a T-posed character, I posed the G8M in T before importing it into Blender. Then, I created the cloth with a T-pose, and imported it into DS, still having my G8M in T-pose:
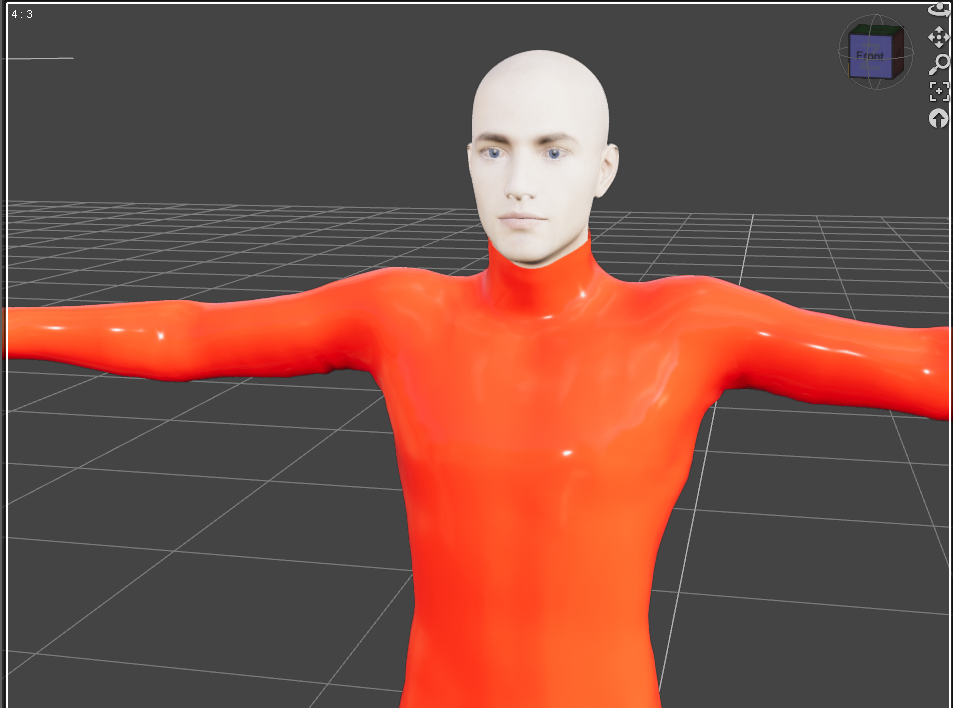 ose:
ose:I don't know if it can explain the issue that I am encountering, but when I use Transfer Utility, I get that:
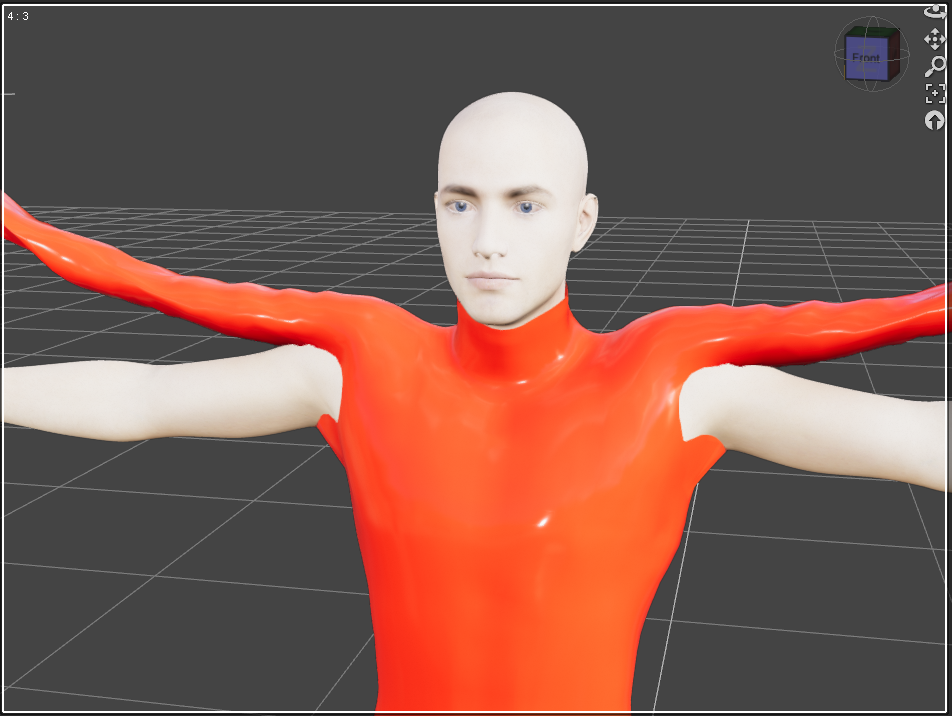
Was it a mistake to use the T-pose to create the cloth? Is it better to use the default pose?
Thank you in advance!
question about creating clothesdForce is a physics system, so you need to simulate it in order to see the results. If you don't already have it open, open up the Simulation tab and hit Simulate. If you want the clothing to follow the figure while you're posing it, what you want is rigging, not dForce, and you should look into the Transfer Utility.
How to save new character morphs?Hi! I just noticed that my slider controlling the head and body appears only in the parameter pane:
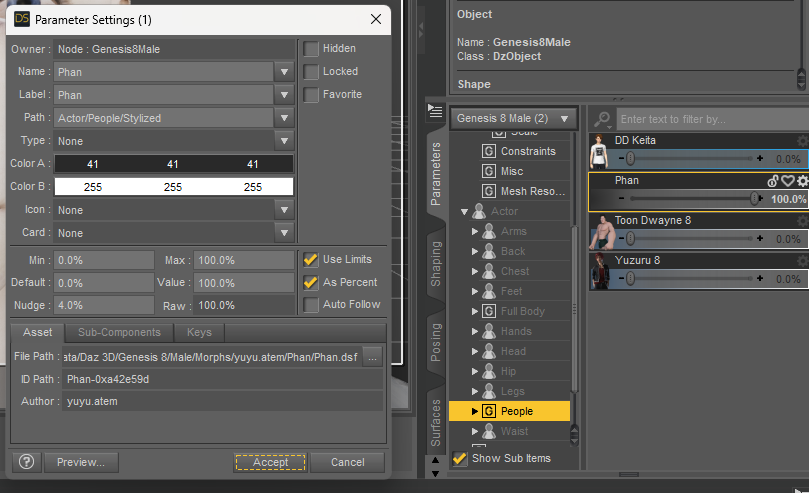
But it is not available in the shaping pane:
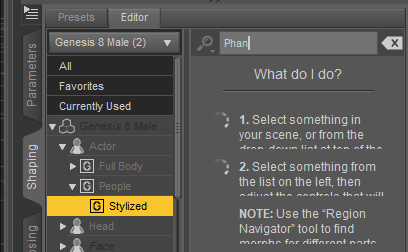
I don't understand because the head and body morphs correctly appear in the shaping pane:
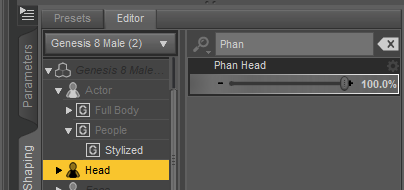
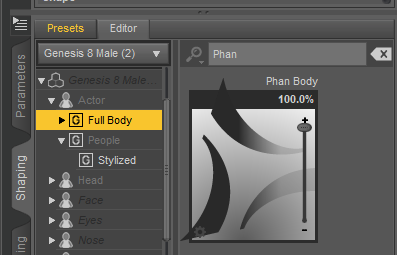
Is it possible to make the slider available in the shaping pane? I already bsaved this slider as a morph asset, could it be a problem to do that?
Edit:
Hi again! I am realizing that I have also an issue on the Avija Wing slider that I created before. Here is what I obtain on the character that I used to create the wing slider:
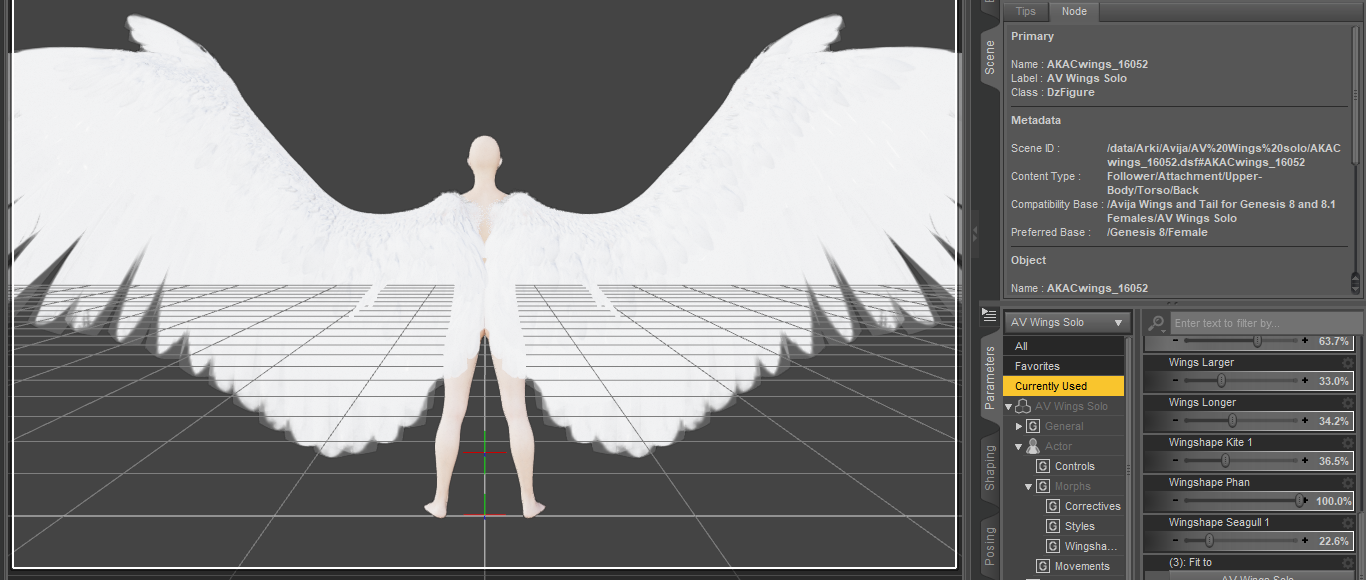
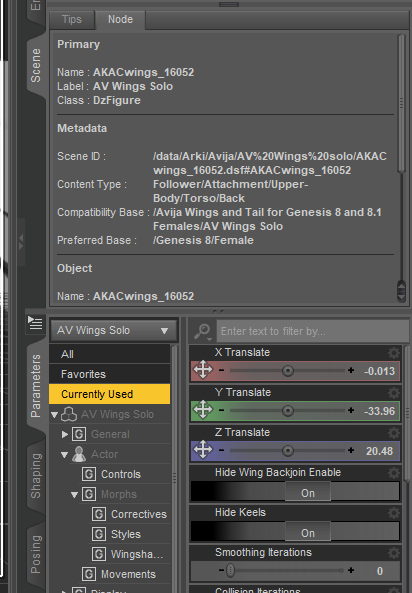
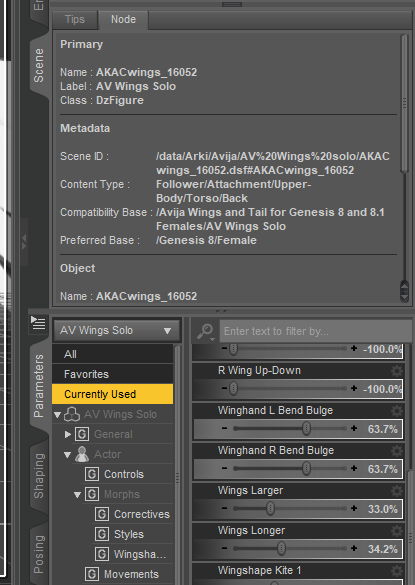
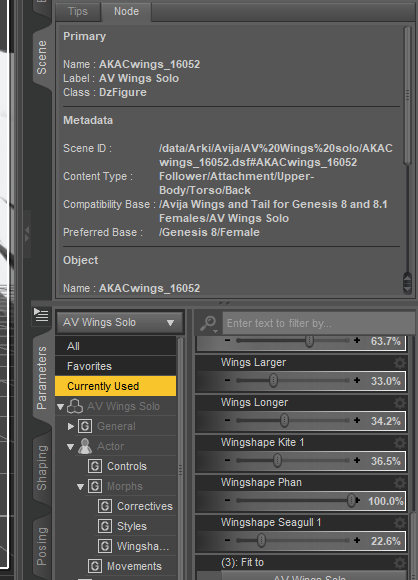
And Here is what I obtain after loading a new G8M and new AV wings, and applying the same slider that I created on the first one:
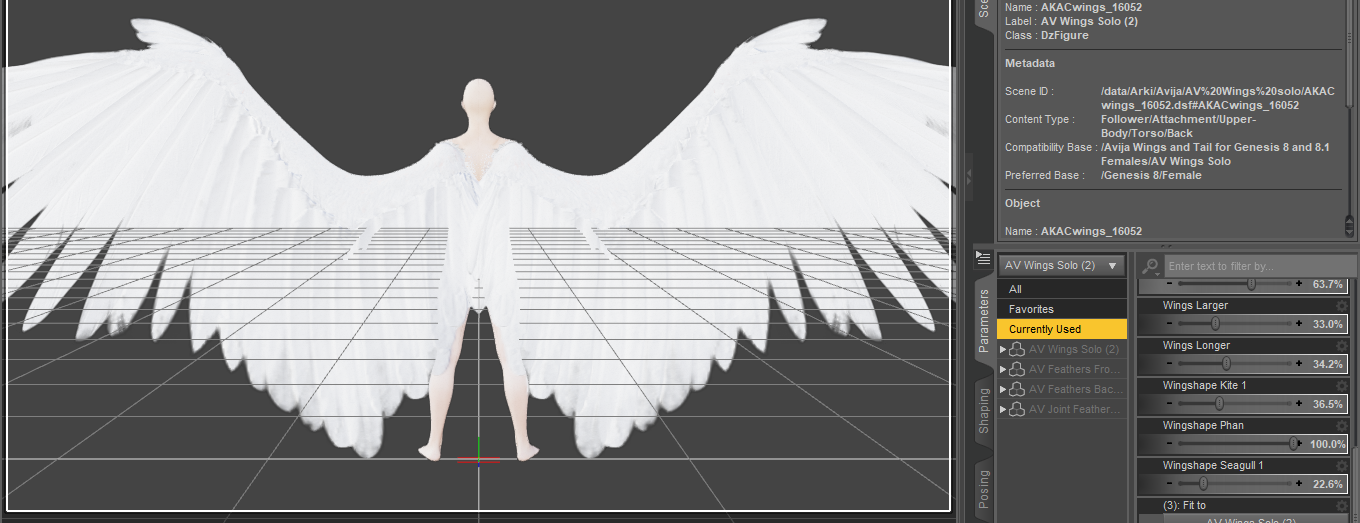
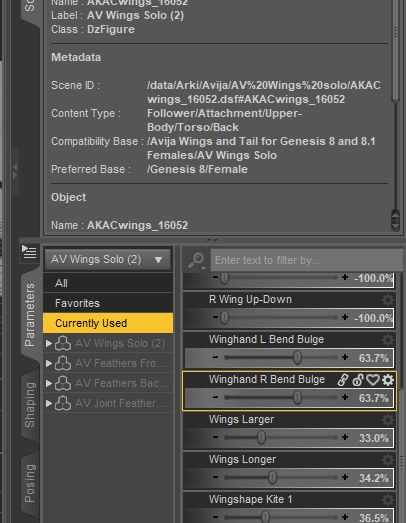
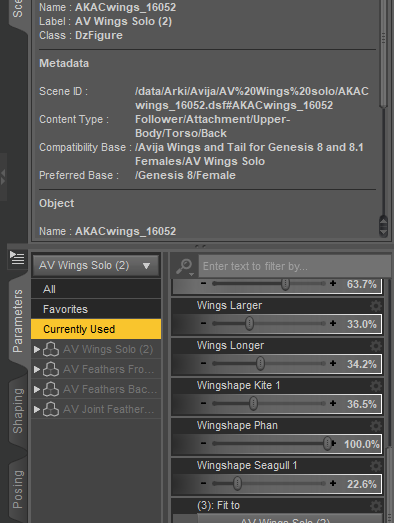
I applied the same slider, the morph values seem to be the same, but the actaul wing shaoe is not the same...
When I tried to dial the same morph values to the without using the slider, the shape become the same, so, it looks the the issue comes from the slider but I don't understand why. I just saved the slider by Save As -> Support Asset -> Morph Asset, I don't understand why I don't obtain the same shape on other AV Wings... Could you help me, please?
Furthermore, I don't know if it can due to the same issue, but it seems that the material isn't completly applied the my first AV wings (the ones that I used to create the slider):
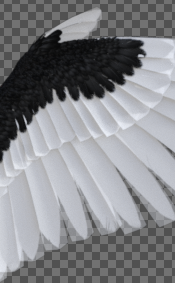
I just applied the black material as I did before, but, now, it isn't correcly applied, while it is still correcly applied on other AV wings... So, on my forst AV wings, the slider works correctly but not the material, and on new AV wings, the slider doesn't work correctly but the material does...
Thank you in advance for your help!
How to create eyelashes correctly?felis said:
I can't make out what the images show.
But have you done transfer riiging to your eyelashes?
I used transfer utility standard settings.
Now I'm thinking of making a Geograft out of eyelashes. so that the edges always match.
Tell me, is this a good idea?
Will there be problems when I subdivide the model?
[Released] Character Converter from Genesis 3 Female to Genesis 8 Female(Now Conv JCMs) [Commercial]jdavison67 said:
I see what is happening now....
It's seems that once the transfer happens. The slider that is created is set to 100%
But this exagerates the result.
If I dial the slider back to 50% and increase the scale... I get a better reppresentation of the original character.
See Image 1
This could be... because the generated character combines a couple attributes to a single slider...
The original character contains a Guy 7 body and a Guy 7 slider
See image 2
The generated character only has the guy 7 body slider... not the Guy 7 slider...
If the new charcter slider is set at 100% the result is extreme... 50 % seems to be good with a few tweeks to the scale ... as seen in image 1
JD
The Guy slider is just a control slider; it dials in the morphs (head and body) of Guy all at once (and scale BTW though it looks like you mostly turned it off). I think that might be what is confusing the script is the scale and the negative height are combining to give you the height of the character, and it is getting them wrong somehow.
Smooth Out BumpI tried smoothing out the bumps on her bum with Blender. When I apply the suit morph in Daz, it doesn't work properly.
Part 1: https://mega.nz/file/vMN33bCJ#AMlBQn7eNbgrJ0BN0AhLIMa4I3BLRgK--QBkG_gy-Cg
Part 2: https://mega.nz/file/fYUklKBL#ZycSPSN6v651auroH0iUu_XevtgKnbx3zE9HQXieuPk
Missing Toes With dForce Twilight OutfitNorthOf45 said:
The shoes use a geograft to hide unwanted polygons, in this case the toes, so that the user does not have to squeeze them inside the shoes everytime. It's easier than making a morph to make them fit. The thing is, it seems once the targeted faces are included in the autohide for the graft with the shoes, they can't just be removed. Some polygon somewhere on G8F must be sacrificed in their place. So, let's start with loading the shoes onto G8F.
Find a polygon somewhere on G8F that will not be missed, like maybe the back of the tongue or throat, or some area that will always be covered. With the Geometry Editor Tool, select that polygon. Right-click, navigate to "Geometry Assignment" and select "Set Graft Faces for Attachment..." and then repeat for "Set Auto-Hide Faces for Attachment..."
This will set the new polygon as the one to be auto-hidden when the shoes are worn. (The hidden polygons are stored in the shoes, not G8F, so unless you save the shoe geometry, the hidden faces will revert to the original, i.e., the toes, if you remove them and add them in again). Normally the workflow is to save the modifications and reload it (Save As... -> Support Asset -> Save Modified Assets... *WARNING* this will overwrite the original geometry file and cannot be undone, but you can always re-install). If you want to see the results immediately (if only to check if it works), right-click again, navigate to "Geometry Visibility" and select "Show All Polygons". This should toggle the original hidden toe polygons ON, and hide the new selected "graft faces for attachment". You can proceed to try to squeeze the now-visible toes inside the shoes...
(I hope I got that right. I had to go through it a couple of times to get it all)
Another option is to actually edit the geometry file to remove the graft section, but that is unknown territory for me. Could be tricky, or it could be as simple as deleting one section of data.
Thank you! This did the trick.
Missing Toes With dForce Twilight OutfitThe shoes use a geograft to hide unwanted polygons, in this case the toes, so that the user does not have to squeeze them inside the shoes everytime. It's easier than making a morph to make them fit. The thing is, it seems once the targeted faces are included in the autohide for the graft with the shoes, they can't just be removed. Some polygon somewhere on G8F must be sacrificed in their place. So, let's start with loading the shoes onto G8F.
Find a polygon somewhere on G8F that will not be missed, like maybe the back of the tongue or throat, or some area that will always be covered. With the Geometry Editor Tool, select that polygon. Right-click, navigate to "Geometry Assignment" and select "Set Graft Faces for Attachment..." and then repeat for "Set Auto-Hide Faces for Attachment..."
This will set the new polygon as the one to be auto-hidden when the shoes are worn. (The hidden polygons are stored in the shoes, not G8F, so unless you save the shoe geometry, the hidden faces will revert to the original, i.e., the toes, if you remove them and add them in again). Normally the workflow is to save the modifications and reload it (Save As... -> Support Asset -> Save Modified Assets... *WARNING* this will overwrite the original geometry file and cannot be undone, but you can always re-install). If you want to see the results immediately (if only to check if it works), right-click again, navigate to "Geometry Visibility" and select "Show All Polygons". This should toggle the original hidden toe polygons ON, and hide the new selected "graft faces for attachment". You can proceed to try to squeeze the now-visible toes inside the shoes...
(I hope I got that right. I had to go through it a couple of times to get it all)
Another option is to actually edit the geometry file to remove the graft section, but that is unknown territory for me. Could be tricky, or it could be as simple as deleting one section of data.
Help with fixing a geometry issueTo fix any ill-behaving (non-zero default value) morphs, do as follows;
1. Open DS and load "Genesis 8 Basic Female" (to an empty scene)
2. Right Click at Parameters Tab->Preferences->Choose "Show Hidden Properties" (part 3 zeroes only 'visible' dials)
3. Right Click at Parameters Tab->Zero->Zero Figure (Zeroes the value of all the 'visible' dials)
4. Right Click at Parameters Tab->Memorize->Memorize Figure (Sets the current value of all the dials as their default value)
5. File->Save As->Support Asset->Save Modified Assets (Writes the changed default value to the morph files that were changed)When saving "Modified Assets" DS shows a dialog and asks for confirmation;
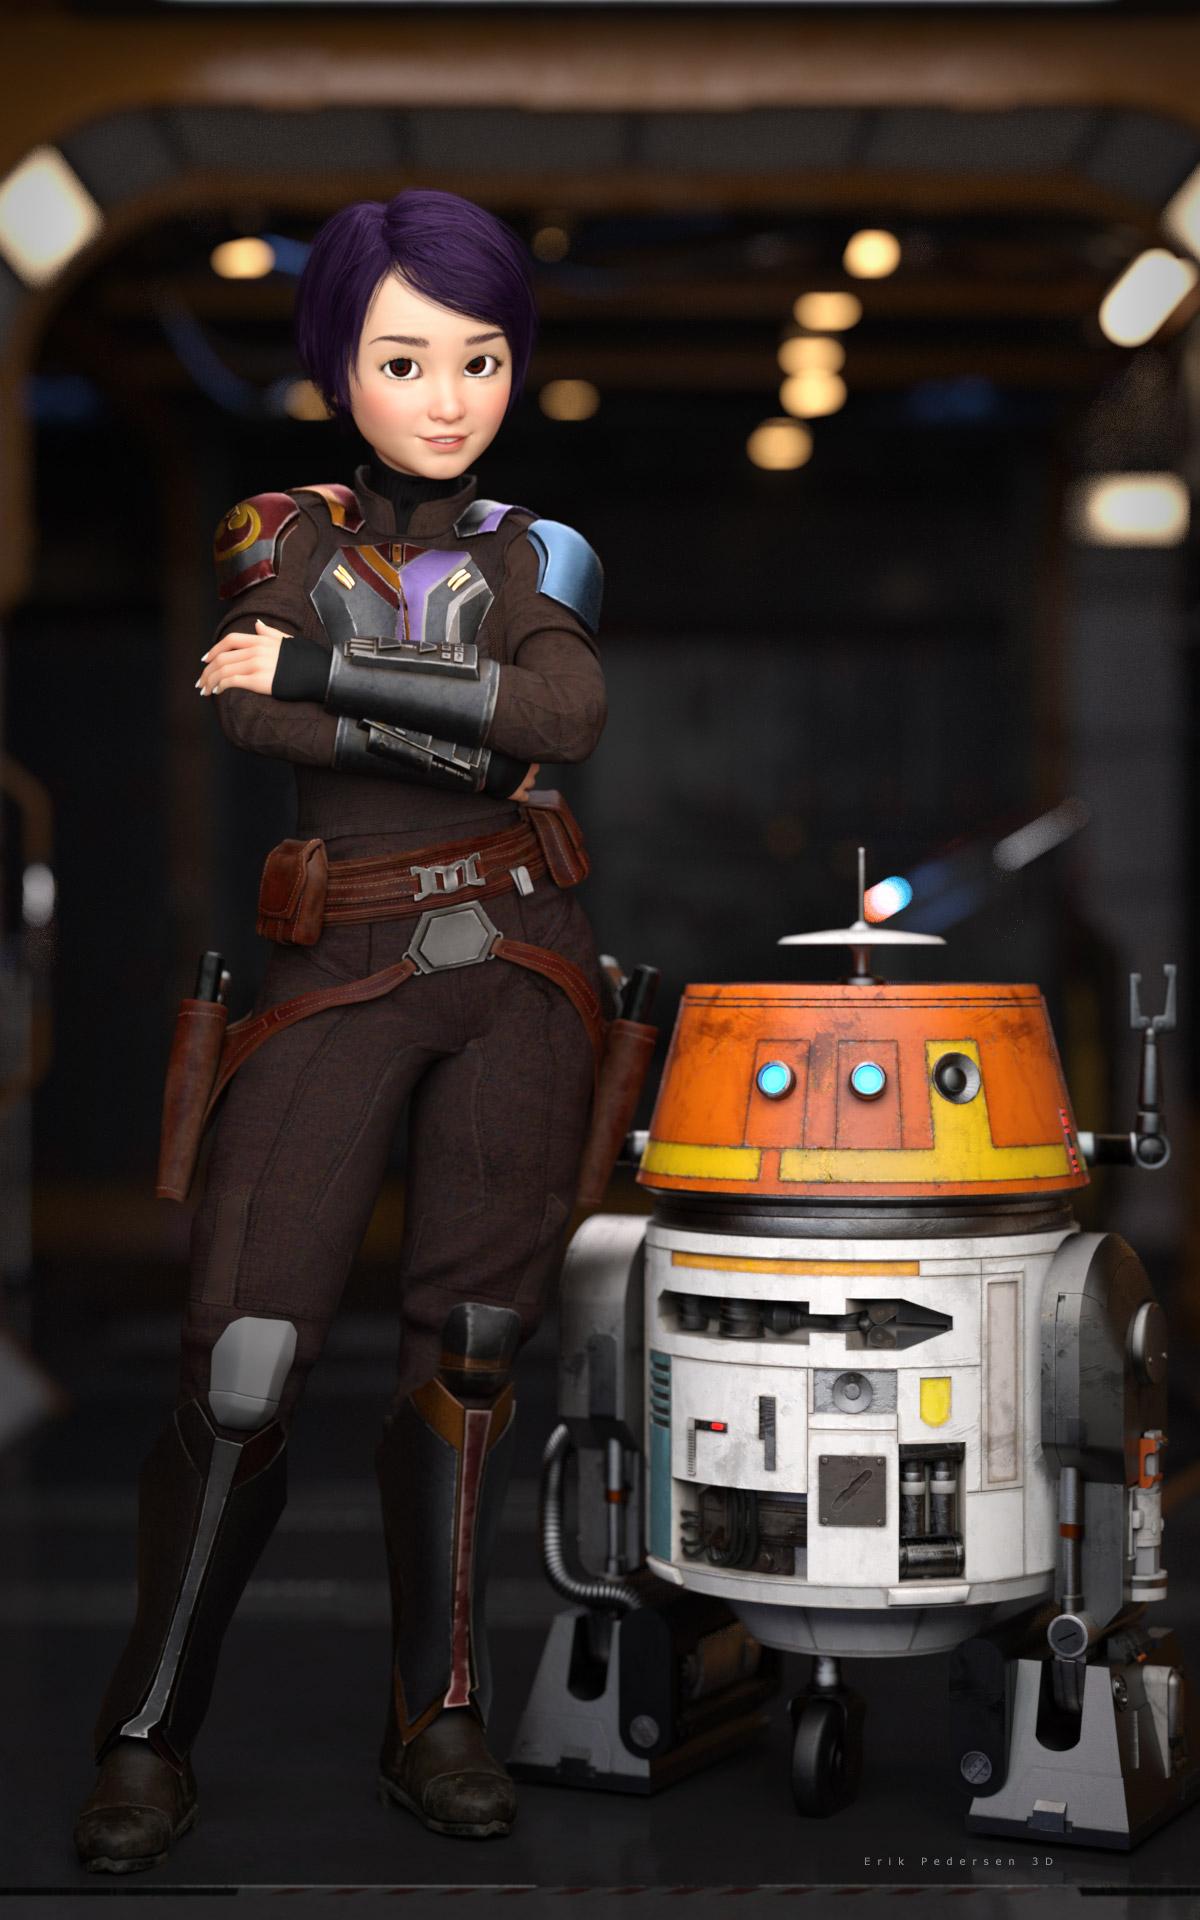
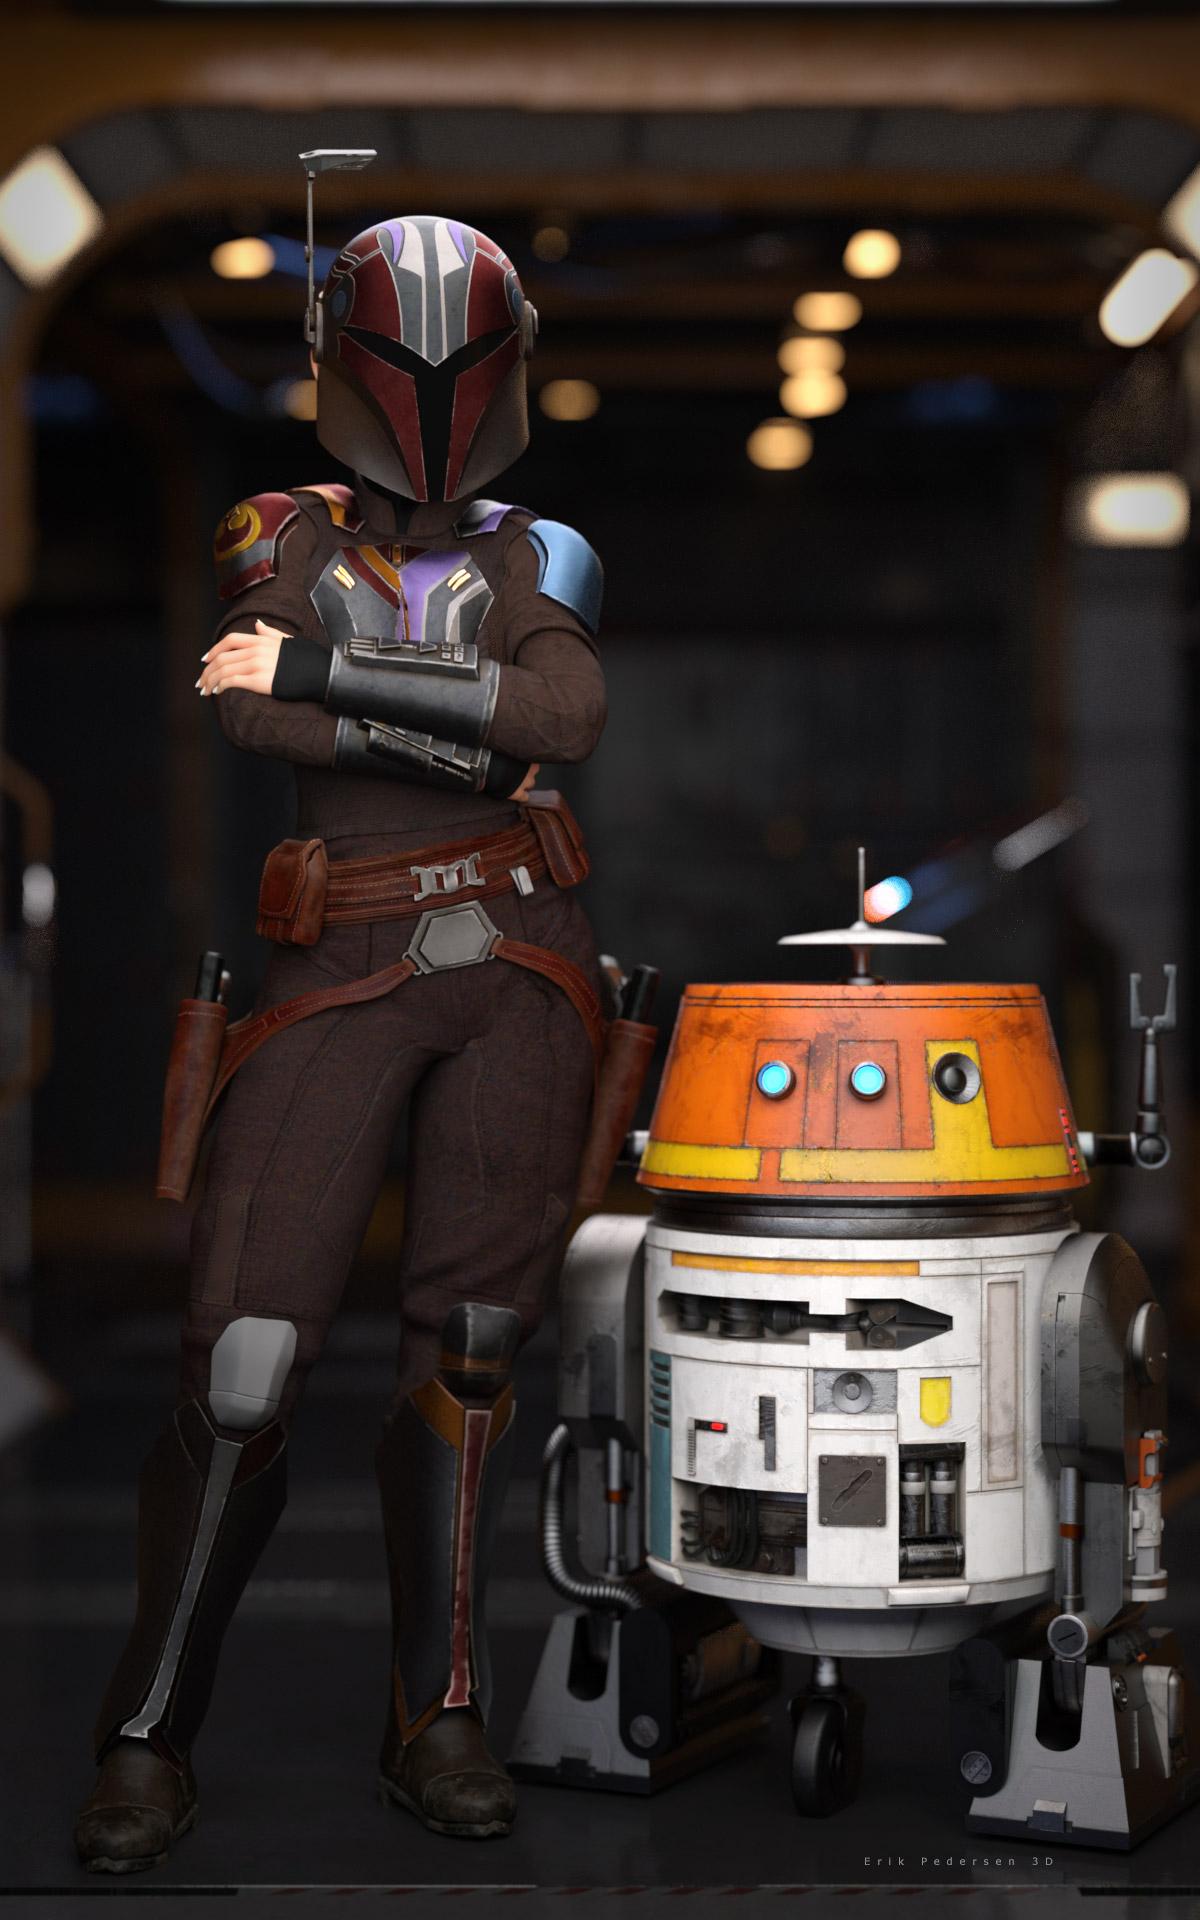
"The following file(s) will be permanently modified:" - "Accept/Cancel" - Choose "Accept"Star Wars Renders 2013 +Sabine Wren with a cartoon morph added. Chopper approved.
 Help with fixing a geometry issue
mechw8 said:
PerttiA said:
mechw8 said:
felis said:
It looks like you have an Big Girl unupdated morph installed.
Go to paramaters, and in setting enable 'show hidden', and then with the character selected in the scene tab, in Parameters click 'Currently used'.
One of the shown morphs is the culprit.
The image I uploaded was a base G8 female with no morphs applied to it; It has this problem out of the box. If you load a base female or male into the scene, spread the leges and bend them at the thights, you will see the same result.
It does not matter that you load a base figure, you can still have some rogue morphs applied - Just follow the advice given
Okay guys I followed the instructions above and this is what I got, see pic. I'm not sure what I'm looking for here; do you guys see anything that's out of place?
Since you've posed the figure, there must be hidden corrective morph properties shown... You need to tick "Show Hidden Properties..." in the hamburger menu (upper left corner - Preferences).
Help with fixing a geometry issuePerttiA said:
mechw8 said:
felis said:
It looks like you have an Big Girl unupdated morph installed.
Go to paramaters, and in setting enable 'show hidden', and then with the character selected in the scene tab, in Parameters click 'Currently used'.
One of the shown morphs is the culprit.
The image I uploaded was a base G8 female with no morphs applied to it; It has this problem out of the box. If you load a base female or male into the scene, spread the leges and bend them at the thights, you will see the same result.
It does not matter that you load a base figure, you can still have some rogue morphs applied - Just follow the advice given
Okay guys I followed the instructions above and this is what I got, see pic. I'm not sure what I'm looking for here; do you guys see anything that's out of place?
Daz 3D is part of

Connect
DAZ Productions, Inc.
7533 S Center View Ct #4664
West Jordan, UT 84084Licensing Agreement | Terms of Service | Privacy Policy | EULA
© 2026 Daz Productions Inc. All Rights Reserved.