-
Fern Lake & Through The Woods (Commercial)
not sure I'd call any of those older trees fast rendering, it's really only in the last year or two that I've started making trees that are all geometry based and make no use of transparency maps.the transparency is what makes most trees render so slowly,and yes,shrubs and smaller plants are on the to-do list
"plus obj's included for import to other engines"
Thank you!
Last night I was poaching trees from every set of yours I own, from US2 to Cloud Temple to Abandoned City to the Enchanted Forests, because you're one of only a handful of modellers (Orestes Graphics, E-Arkham, and a couple of others) who seems to make a point of creating FAST rendering trees. And I was wishing you'd make something like a simple tree/shrub pack. But these sets will be gorgeous. :)
Being a Poser user, I'll miss out on the lovely shaders. But fortunately Caisson and Colm have made some great shaders for Poser. So with the obj's it should work out very well. Look forward to seeing them in the store.
Edit: But you might want to edit your posts: you appear to have mistakenly uploaded one of your photo references. http://www.daz3d.com/forums/uploads/FileUpload/6d/fa2381973bef0a65a1469e421408c3.jpg
:D
Fern Lake & Through The Woods (Commercial)"plus obj's included for import to other engines"
Thank you!
Last night I was poaching trees from every set of yours I own, from US2 to Cloud Temple to Abandoned City to the Enchanted Forests, because you're one of only a handful of modellers (Orestes Graphics, E-Arkham, and a couple of others) who seems to make a point of creating FAST rendering trees. And I was wishing you'd make something like a simple tree/shrub pack. But these sets will be gorgeous. :)
Being a Poser user, I'll miss out on the lovely shaders. But fortunately Caisson and Colm have made some great shaders for Poser. So with the obj's it should work out very well. Look forward to seeing them in the store.
Edit: But you might want to edit your posts: you appear to have mistakenly uploaded one of your photo references. http://www.daz3d.com/forums/uploads/FileUpload/6d/fa2381973bef0a65a1469e421408c3.jpg
:D
DS Creative- the magazine for DAZ Studio usersThe love & death of romance contest-
Prizes are:
1st-
15$ From BWC
1 item from Orestes Graphics http://www.daz3d.com/orestes-graphics2nd place-
10$ From BWC
1 item from Pandygirl http://www.daz3d.com/pandygirl or her rendo store3rd place-
5$ From BWC
1 item from Sedor http://www.daz3d.com/sedorFlash Sale alertsAnd flash sales as well:
http://www.daz3d.com/imaginex
http://www.daz3d.com/dumor3d
(Buy something else, get discount type...)
And two more:
http://www.daz3d.com/orestes-graphics
http://www.daz3d.com/jack-tomalinRRRR - Murphy’s Law Render Contest *closed*Pull #2...2970 Enchanted Bubble (ironman13, EmmaAndJordi), RR
1588 Classic Barbecue (blondie9999), DAZ
9622 The Necropolis of Agarii (Orestes Graphics), DAZ
687 Asterella for GIS Empress (Moyra), DAZTAG: Karibou #2
Title: The Annoyingly Cheerful Co-workerMurphy's Law: The harder you try to keep a secret, the more likely it is to become public knowledge.
Bastinda had tried to keep the date and location of the picnic from Glinda, but somehow the annoyingly cheerful girl always found them.
 Flash Sale alerts
65% off, with purchase: http://www.daz3d.com/orestes-graphics
Contest~ Entries~ Because I Said So! ~ Dec/JanChristmas on Level 19
entry #1
"Yep, there's no place like home for the holidays."
Items used:
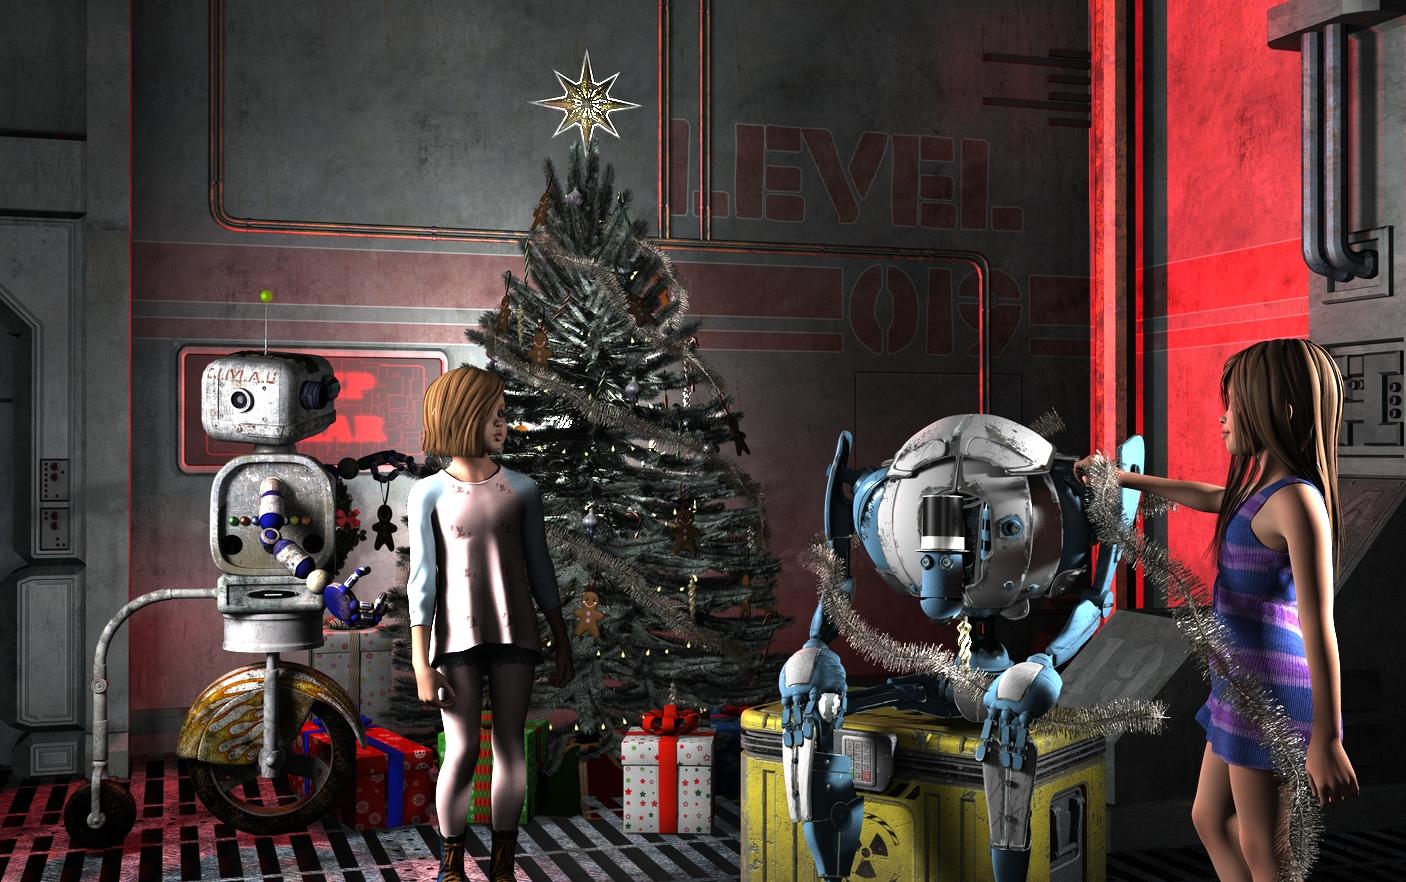
Rayn: What are you doing?
Skyler: Decorating
Rayn: When they said decorate for Christmas, I don't think this is what they had in mind.
Additional Items Used:
InaneGlory's Point and Shoot Bundle
Orestes Gifts O Terrer and Cheer
Fun With Yarn - Nifty Knitting Shaders
Home One Bundle - this is where I found the cute texture for Rayn's shirt and leggings
RRRR - Murphy’s Law Render Contest *closed*Karibou, glad to hear your dad is okay, that would be so scary. And love the rustic tones of your explosive render!Thank you -- the render was very fun to make! And the experience with dad WAS terrifying. Indescribably so. But he's now kind-of a rock star at the hospital. His outcome just doesn't happen for people who've had multiple episodes of cardiac arrest. He was on a ventilator and in an induced coma for a week, part of which was spent in therapeutic hypothermia (which is a very bizarre treatment to observe -- his body temp was lowered to 88°F or 31°C, so he felt like a dead person when you touched him.) You'd never know any of that looking at him now. He's back at home, doing more than he should (he owns a small business and is making my mother drive him there for a few hours each day.) His worst complaint is pain from the multiple broken ribs sustained during his many rounds of CPR. It was just... not his time yet. We are blessed.
An now moving along to pull #2...
2970 Enchanted Bubble (ironman13, EmmaAndJordi), RR
1588 Classic Barbecue (blondie9999), DAZ
9622 The Necropolis of Agarii (Orestes Graphics), DAZ
687 Asterella for GIS Empress (Moyra), DAZLooking for opinions on some of my first serious artworkHey guys and gals,
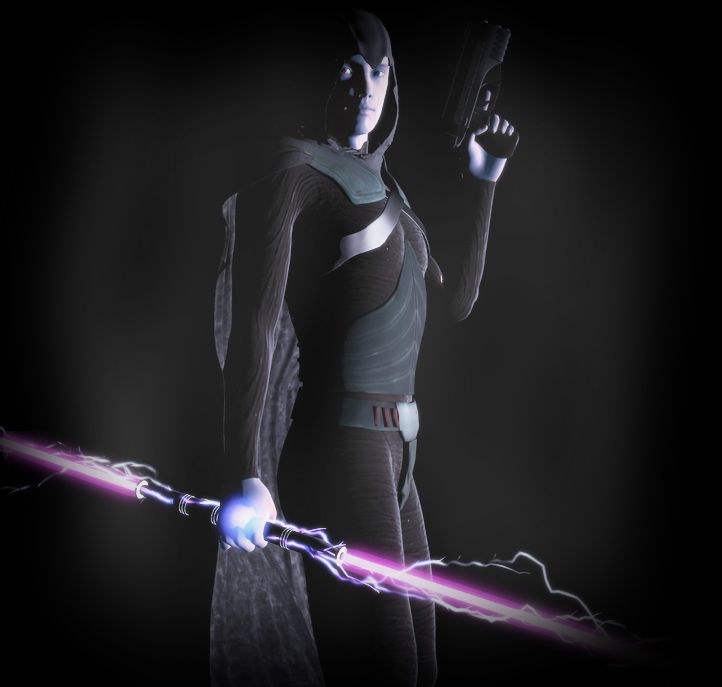
I made these two images recently and am looking for some feedback.
1) Ondre Bersson, Grey Knight
Programs used:
DAZ 3D
The GIMP
Files used:
Genesis 2 Male
Legacy 5 Shapes for Genesis 2 Male
Assassins Hood by adamthwaites
The Sith Lord outfit and dualsaber by EvilEliot
Nightguard Cloak for Genesis
Orestes Electromancy
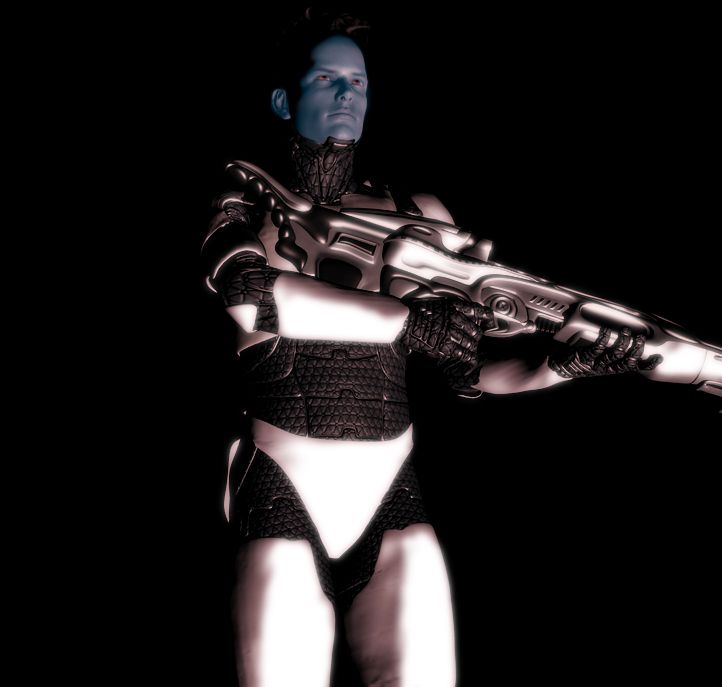
2) Kato Holleri, Sorian Elite Commando
Programs used:
DAZ 3D
The GIMP
Files used:
Genesis 2 Male
Wildmane Hair
Nano Suit for Genesis and its laser rifle
Classic Forward Recon Armor for Genesis 2 Male (This is a custom set of armor I made in Hexagon. It is based on the Star Wars the Old Republic armor of the same name)
 November 2015 New User Contest "Materials" (WIP-THREAD)
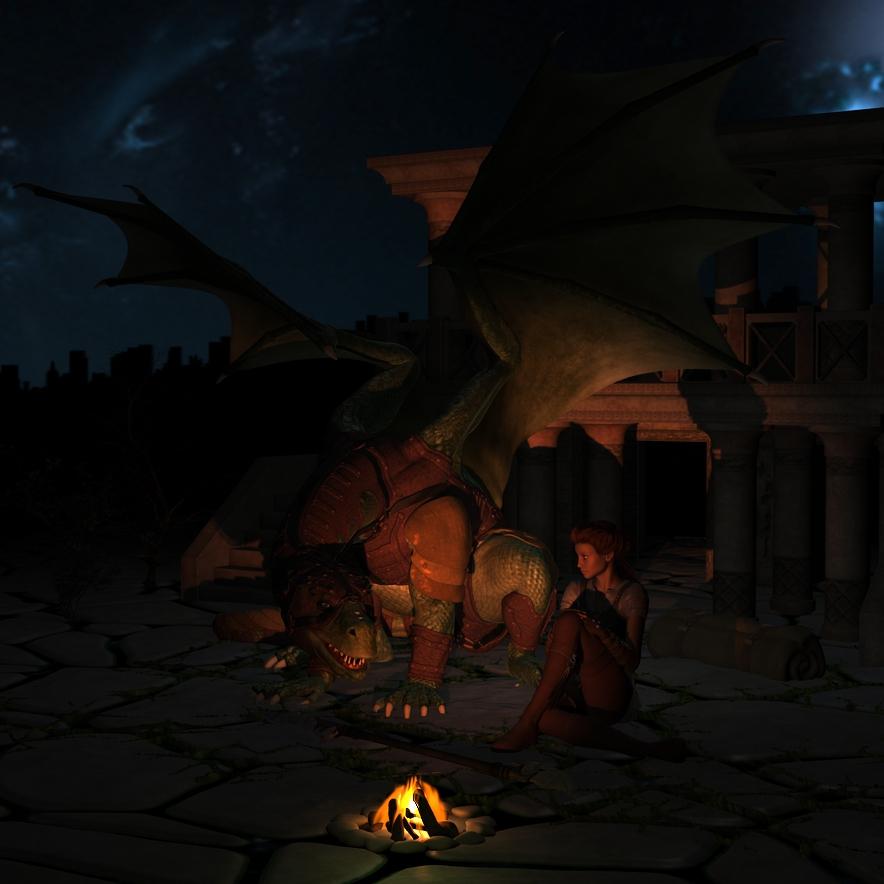 Changed out the background, added a building instead of having the plane for a background. Changed her hair and changed the angle just a bit. I am going to have to do the grunge and dirt in post work but other than that I think I am getting there. Any comments or suggestions before I pull it into photoshop?
I like the changes very much, everything looks much more natural and the sky and the building fit to the situation. Two things are maybe to be considerated. I would move the rige a bit closer to the two of them, so that there is no shadow on the ground between them and the fire, that would fit better to the lights on the dragon and the lady. The other thing would be to apply the rule of thirds, play around with camera anlge and format with the third grid on (use a new camera in case you dont wnat to loose your settings here. Don't be afraid to cut of part of the dragons wings, it will only add to the size of the dragon.
For the grunge and dirt there are some optiond to do it in your scene like geometry shells or if you have the orestes leaves you can put them o the ground. If you have grass tufts from some other prop in your runtime you could add those as well. just some ideas
The girl is directly on the lower part of the rule of thirds so I am not sure how else to go about making it line up more. But I will play around and see. and I may move the spear slightly behind them. somehow during the background change it actually ended up going through her left shoulder lol, so I had to move it. But I will work on changing the position of that as well.
November 2015 New User Contest "Materials" (WIP-THREAD)Changed out the background, added a building instead of having the plane for a background. Changed her hair and changed the angle just a bit. I am going to have to do the grunge and dirt in post work but other than that I think I am getting there. Any comments or suggestions before I pull it into photoshop?I like the changes very much, everything looks much more natural and the sky and the building fit to the situation. Two things are maybe to be considerated. I would move the rige a bit closer to the two of them, so that there is no shadow on the ground between them and the fire, that would fit better to the lights on the dragon and the lady. The other thing would be to apply the rule of thirds, play around with camera anlge and format with the third grid on (use a new camera in case you dont wnat to loose your settings here. Don't be afraid to cut of part of the dragons wings, it will only add to the size of the dragon.
For the grunge and dirt there are some optiond to do it in your scene like geometry shells or if you have the orestes leaves you can put them o the ground. If you have grass tufts from some other prop in your runtime you could add those as well. just some ideas
Something I noticed is the bedroll behind your figure. It looks like it has sunk into the ground.
Lol yes, it has apparently lol. Must have happened during the background change.
November 2015 New User Contest "Materials" (WIP-THREAD)Changed out the background, added a building instead of having the plane for a background. Changed her hair and changed the angle just a bit. I am going to have to do the grunge and dirt in post work but other than that I think I am getting there. Any comments or suggestions before I pull it into photoshop?I like the changes very much, everything looks much more natural and the sky and the building fit to the situation. Two things are maybe to be considerated. I would move the rige a bit closer to the two of them, so that there is no shadow on the ground between them and the fire, that would fit better to the lights on the dragon and the lady. The other thing would be to apply the rule of thirds, play around with camera anlge and format with the third grid on (use a new camera in case you dont wnat to loose your settings here. Don't be afraid to cut of part of the dragons wings, it will only add to the size of the dragon.
For the grunge and dirt there are some optiond to do it in your scene like geometry shells or if you have the orestes leaves you can put them o the ground. If you have grass tufts from some other prop in your runtime you could add those as well. just some ideas
Something I noticed is the bedroll behind your figure. It looks like it has sunk into the ground.
November 2015 New User Contest "Materials" (WIP-THREAD)Changed out the background, added a building instead of having the plane for a background. Changed her hair and changed the angle just a bit. I am going to have to do the grunge and dirt in post work but other than that I think I am getting there. Any comments or suggestions before I pull it into photoshop?I like the changes very much, everything looks much more natural and the sky and the building fit to the situation. Two things are maybe to be considerated. I would move the rige a bit closer to the two of them, so that there is no shadow on the ground between them and the fire, that would fit better to the lights on the dragon and the lady. The other thing would be to apply the rule of thirds, play around with camera anlge and format with the third grid on (use a new camera in case you dont wnat to loose your settings here. Don't be afraid to cut of part of the dragons wings, it will only add to the size of the dragon.
For the grunge and dirt there are some optiond to do it in your scene like geometry shells or if you have the orestes leaves you can put them o the ground. If you have grass tufts from some other prop in your runtime you could add those as well. just some ideas
November 2015 New User Contest "Materials" (WIP-THREAD)Boy, you guys are just posting like bunnies this month. There are already more posts than we had at this time last month. I still need to go through and catch up on posts and look at all the renders, but thought I would put my bear up so others can see what I have done while I catch up. I followed AM's tutorial with his new wolf and everything went well. I changed a few surface settings to get the wolf the way I wanted him to look. He turned out so well that I added some woods and a knight and decided to enter him in the PC Anniversary contest. I had a few hangups when I then tried to do the same with the bear cub. I don't know if it is because he is an older model, but I had a more difficult time getting the bear cub to render after hitting him with the Iray Uber shader. Let me tell you, naked bear isn't quite the look I was going for. However, I did manage to finally get him to render and then played with his settings. There are two renders. The first one is the bear with just the Iray Uber Shader applied and only the ruins HDR for lighting. I didn't have the camera setup correctly and cut off his head, but since this was just my reference I didn't fix it before going on to the next step. I used this as my base reference to see if the changes I made actually made a difference. The second bear: I changed some of the surface settings like the surface color and the glossy layered weight as well as a few others. I added some lighting that I think helps him look a little more realistic. Now I have to find an appropriate background and add the thing he is looking at and playing with. I have Orestes Falling Leaves and Orestes Trees and thought it would make an interesting render to have my bear cub sitting amonst the trees playing with the leaves floating in the air. So, that is the scene I'm setting up and will render overnight now that I think the bear is where I want him. The only thing I don't like is how his back feet are so shiny now. I think it is a lighting issue and I will try adjusting the pose to see if that helps. Now, I'm off to catch up and see what everyone else has been doing..
The fur is looking better. Others have commented on length, but I think the fur is picking up the light nicely, so well done. I'll refrain from further comment till I see what you do with the rest of the image. :)
Flash Sale alertsNovember 2015 New User Contest "Materials" (WIP-THREAD)Boy, you guys are just posting like bunnies this month. There are already more posts than we had at this time last month. I still need to go through and catch up on posts and look at all the renders, but thought I would put my bear up so others can see what I have done while I catch up. I followed AM's tutorial with his new wolf and everything went well. I changed a few surface settings to get the wolf the way I wanted him to look. He turned out so well that I added some woods and a knight and decided to enter him in the PC Anniversary contest. I had a few hangups when I then tried to do the same with the bear cub. I don't know if it is because he is an older model, but I had a more difficult time getting the bear cub to render after hitting him with the Iray Uber shader. Let me tell you, naked bear isn't quite the look I was going for. However, I did manage to finally get him to render and then played with his settings. There are two renders. The first one is the bear with just the Iray Uber Shader applied and only the ruins HDR for lighting. I didn't have the camera setup correctly and cut off his head, but since this was just my reference I didn't fix it before going on to the next step. I used this as my base reference to see if the changes I made actually made a difference. The second bear: I changed some of the surface settings like the surface color and the glossy layered weight as well as a few others. I added some lighting that I think helps him look a little more realistic. Now I have to find an appropriate background and add the thing he is looking at and playing with. I have Orestes Falling Leaves and Orestes Trees and thought it would make an interesting render to have my bear cub sitting amonst the trees playing with the leaves floating in the air. So, that is the scene I'm setting up and will render overnight now that I think the bear is where I want him. The only thing I don't like is how his back feet are so shiny now. I think it is a lighting issue and I will try adjusting the pose to see if that helps. Now, I'm off to catch up and see what everyone else has been doing..
This came along very good, the fur is reacting nice to the environment light so thumbs up!
Some hints: The hair on the head looks a bit short to my feeling, but I don't have your reference in my mind right now. The skin surface on the paws looks very glossy, I guess the secularity is very high? The eyes look a bit strange to me, do they come like this with the bear cup? For most animals you don't see the white in the eye except they are in great fear and the irises should be almost as dark as the pupils.
I look forward seeing it in the leaves.
November 2015 New User Contest "Materials" (WIP-THREAD)Boy, you guys are just posting like bunnies this month. There are already more posts than we had at this time last month. I still need to go through and catch up on posts and look at all the renders, but thought I would put my bear up so others can see what I have done while I catch up. I followed AM's tutorial with his new wolf and everything went well. I changed a few surface settings to get the wolf the way I wanted him to look. He turned out so well that I added some woods and a knight and decided to enter him in the PC Anniversary contest. I had a few hangups when I then tried to do the same with the bear cub. I don't know if it is because he is an older model, but I had a more difficult time getting the bear cub to render after hitting him with the Iray Uber shader. Let me tell you, naked bear isn't quite the look I was going for. However, I did manage to finally get him to render and then played with his settings. There are two renders. The first one is the bear with just the Iray Uber Shader applied and only the ruins HDR for lighting. I didn't have the camera setup correctly and cut off his head, but since this was just my reference I didn't fix it before going on to the next step. I used this as my base reference to see if the changes I made actually made a difference. The second bear: I changed some of the surface settings like the surface color and the glossy layered weight as well as a few others. I added some lighting that I think helps him look a little more realistic. Now I have to find an appropriate background and add the thing he is looking at and playing with. I have Orestes Falling Leaves and Orestes Trees and thought it would make an interesting render to have my bear cub sitting amonst the trees playing with the leaves floating in the air. So, that is the scene I'm setting up and will render overnight now that I think the bear is where I want him. The only thing I don't like is how his back feet are so shiny now. I think it is a lighting issue and I will try adjusting the pose to see if that helps. Now, I'm off to catch up and see what everyone else has been doing..
Flash Sale alertsDaz 3D is part of

Connect
DAZ Productions, Inc.
7533 S Center View Ct #4664
West Jordan, UT 84084Licensing Agreement | Terms of Service | Privacy Policy | EULA
© 2026 Daz Productions Inc. All Rights Reserved.