-
3D Printing Plugin for Daz Studio - GamePrint [Commercial]
And yes, a cheap $200 reprap (which can be used to make more cheap repraps!) or similar printer will be lower quality than a high end laser-resin one, BUT once painted the end result will look very similar AND you can make far more than one for the cost.
One fundemental thing that these printers can produce is the level of detail because a high quality resin printer will produce details on a 25 micron scale while a cheap printer can only do 400 microns or higher given the nozzel diameter will be 0.4 mm or bigger, that is16x higher resolution which means details like hair, clothes textures, etc won't show with such prints as well as the need to live the hell of the process of removing support material.
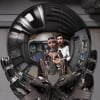
This is what you get out of an "office printer"
I printed each version multiple times, due to many errors I or the printer made, spend aprox. 100$ in filament which is now in the trashbin.
Took me about 5 month to get to the shown results.
They are still not postworked (sanding and painting)
yellow was printed with a 1000$ Flashforge Dreamer - needed to print in parts and glued after, due to the limited build volume.
blue was printed on a "cheap" (420$) china CR-10, printed in one piece.
The "silver" thingie in the images is a Zippo lighter - for height comparison. (no banana available)
So, considering the cost of my printers and the amount of filament used to get these two, GamePrint is offering a great deal here.
By the way, I printet this bot because I was not able to print any hair - at least no good looking ones.
 that's true, with the cost of filament needed for the print and the support it is not cheap at all with office printers given the quality it produces3D Printing Plugin for Daz Studio - GamePrint [Commercial]
And yes, a cheap $200 reprap (which can be used to make more cheap repraps!) or similar printer will be lower quality than a high end laser-resin one, BUT once painted the end result will look very similar AND you can make far more than one for the cost.
One fundemental thing that these printers can produce is the level of detail because a high quality resin printer will produce details on a 25 micron scale while a cheap printer can only do 400 microns or higher given the nozzel diameter will be 0.4 mm or bigger, that is16x higher resolution which means details like hair, clothes textures, etc won't show with such prints as well as the need to live the hell of the process of removing support material.
This is what you get out of an "office printer"
I printed each version multiple times, due to many errors I or the printer made, spend aprox. 100$ in filament which is now in the trashbin.
Took me about 5 month to get to the shown results.
They are still not postworked (sanding and painting)
yellow was printed with a 1000$ Flashforge Dreamer - needed to print in parts and glued after, due to the limited build volume.
blue was printed on a "cheap" (420$) china CR-10, printed in one piece.
The "silver" thingie in the images is a Zippo lighter - for height comparison. (no banana available)
So, considering the cost of my printers and the amount of filament used to get these two, GamePrint is offering a great deal here.
By the way, I printet this bot because I was not able to print any hair - at least no good looking ones.
BIt of a newbie questionWhat setting is the 100% Efficiency coming from? If you mean the Luminous Efficacy that is the Lumens per Watt coming from the light source. It is based on real world lights and Efficiency is something completely different. The default when using an Emissive surface is 15 which is for an Incandescent Bulb.
https://en.wikipedia.org/wiki/Luminous_efficacy#Lighting_efficiency
I set the emissive surface setting to 100% efficiency because at 15% in Iray you need to use crazy high wattage numbers unless you use a tiny emissive surface. If I built the internal components for the light bulb and illuminated the filament, 15% would probably work fine.
3D Print
The ones I'm looking at are just under $2,000 price point. Though $2000 isn't cheap it's affordable compared to what they used to cost. It's about what I spent building my pc. I've seen a few for around $500 but it's safe to say results would be sub par. There are some getting pumped out of kick starter around $1000 that do make some really nice prints. One thing I learned about filament printing which could likely apply to sla is that software can be more Important than the physical components. Most filament printers have a nozzle .4 mm, and contain similar step motors. But where the difference in quality can be found is in The execution. How it slices how the print head behaves. I plan to buy shortly after Xmas, as the prices continue to drop rapidly.I'm holding off on getting a 3D printer until the quality improves. Right now the technology is at 1970's dot matrix printer level. I'll wait at least until it gets to the 1990s inkjet printer level.
Had lots of people ask me if I'd sell figurines of my Lolo Hai chibi figure. I told I will as soon as 3D printers can make them look as good as the Iray renders.
 Please. I'm looking at buying the printer that printed this. I don't understand why people cant understand this simple concept we have moved beyond plastic filament. These machines are running $800-$5000. Affordable. Highly Detailed can print 25 micron layers. Lasers and resin.
Looks good, is that from an $800 printer or closer to the $5000 one?
-- Walt Sterdan
3D PrintI'm holding off on getting a 3D printer until the quality improves. Right now the technology is at 1970's dot matrix printer level. I'll wait at least until it gets to the 1990s inkjet printer level.
Had lots of people ask me if I'd sell figurines of my Lolo Hai chibi figure. I told I will as soon as 3D printers can make them look as good as the Iray renders.
Please. I'm looking at buying the printer that printed this. I don't understand why people cant understand this simple concept we have moved beyond plastic filament. These machines are running $800-$5000. Affordable. Highly Detailed can print 25 micron layers. Lasers and resin.Looks good, is that from an $800 printer or closer to the $5000 one?
-- Walt Sterdan
3D PrintPlease. I'm looking at buying the printer that printed this. I don't understand why people cant understand this simple concept we have moved beyond plastic filament. These machines are running $800-$5000. Affordable.Yikes, not for me. A 3D printer should cost the same as a high-end inkjet paper printer. $350 or less. That is affordable.
3D Print
Please. I'm looking at buying the printer that printed this. I don't understand why people cant understand this simple concept we have moved beyond plastic filament. These machines are running $800-$5000. Affordable. Highly Detailed can print 25 micron layers. Lasers and resin.I'm holding off on getting a 3D printer until the quality improves. Right now the technology is at 1970's dot matrix printer level. I'll wait at least until it gets to the 1990s inkjet printer level.
Had lots of people ask me if I'd sell figurines of my Lolo Hai chibi figure. I told I will as soon as 3D printers can make them look as good as the Iray renders.
3D PrintYou are correct about them being molded after an original is 3d printed. But as for everyone saying that current 3d printer can't print detailed enough. Yes they can print very detailed. And no you won't get a good print with a filament based printer. But sla and dip printers are hitting the market fast!!! A $2000 machine available today has a accuracy range within of 5 microns(0.005 mm) and layers as thin as 25 microns. No I'm not talking $100,000 machines the price of these machines have come down 1000% in the past year. I follow the community closely and am avid printer. Take a look at some consumer grade dip/sla prints.Drawing tabletsActually, my pad is still in good shape, and I'm still using the very first nib.. after years and years. Maybe it's because I just don't bear down hard very often.
Another tip from a friend: A certain size Weedeater filament (dunno what size) can be cut into tens of thousands of workable nibs for a Wacom.
Strictly speaking my pad would still have been good if I hadn't left a pile of stuff on top of it once. When I moved it all off later there was a mark that got in the way of the pen and by adding a cover on top it also covers that problem.
I think I've just started my fourth nib since the original purchase, which I can't remember when that was but the tablet was very newly on the market.
That's a fine tip for new nibs, I'll bear that in mind but I still have plenty of spares.Drawing tabletsHere's a tip I found for everyone: I can't get hold of the main pads that you draw on anymore, they don't make them. I found that a single sheet of clear laminate (smooth side up) secured over the main pad and drawing area works really well. It actually lasts longer than the main pad does and stops you wearing the original one out!!
Actually, my pad is still in good shape, and I'm still using the very first nib.. after years and years. Maybe it's because I just don't bear down hard very often.
Another tip from a friend: A certain size Weedeater filament (dunno what size) can be cut into tens of thousands of workable nibs for a Wacom.
Natural Iray lighning for roomsHi Kurt,
the viewport works with OpenGL, and not Iray. The way it displays light is quite different from the way that Iray does.
Unfortunately, Meshlights can't be hidden; just like you can't make the lightbulb or light filament invisible.
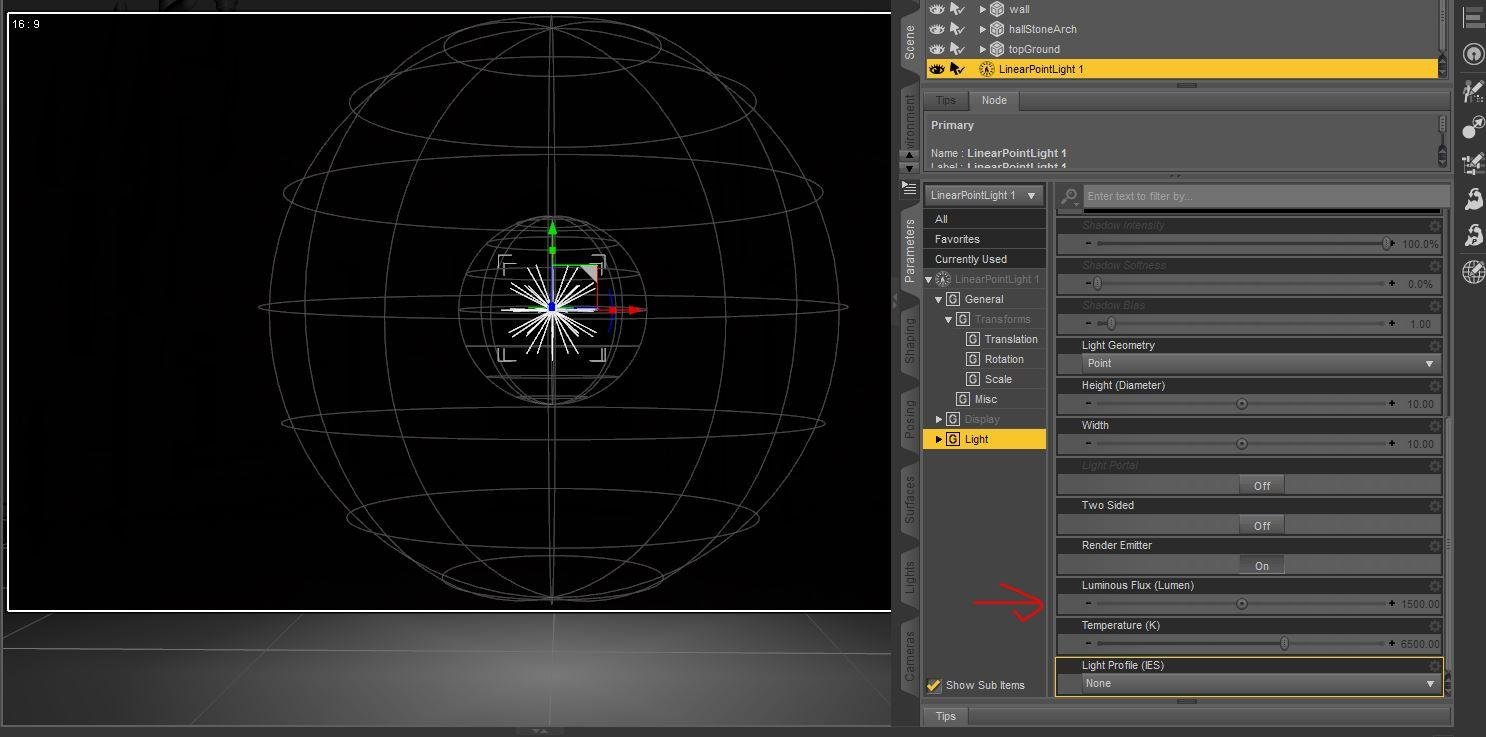
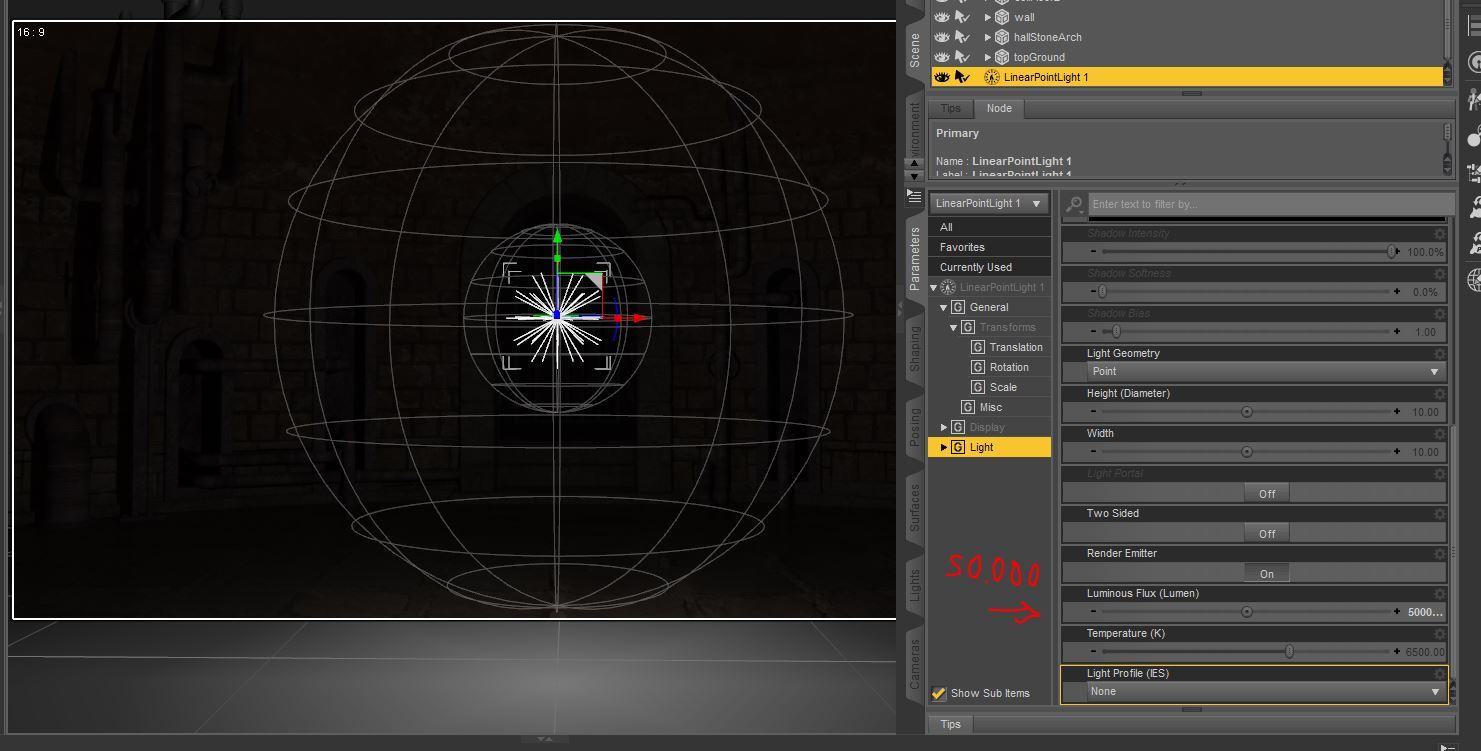
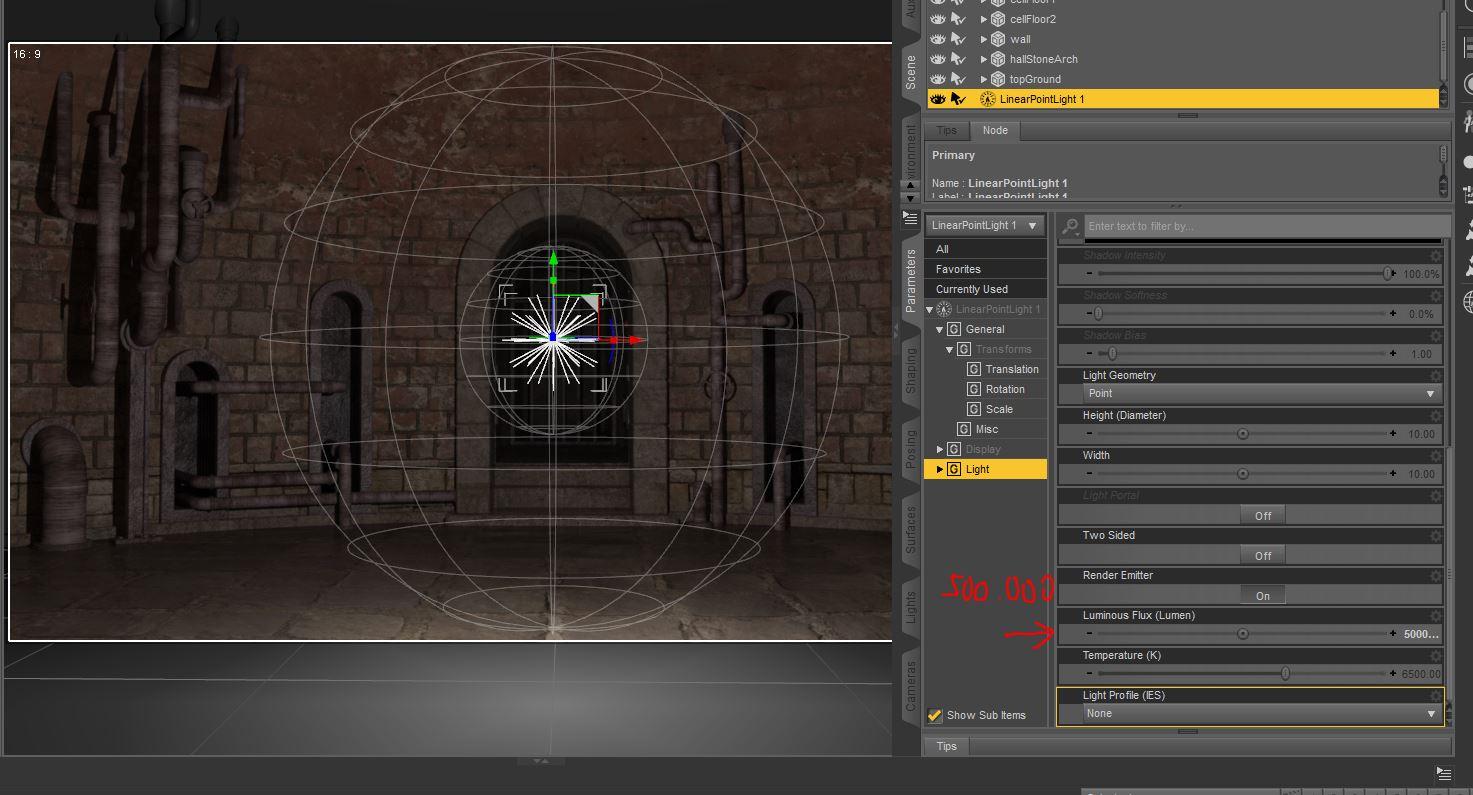
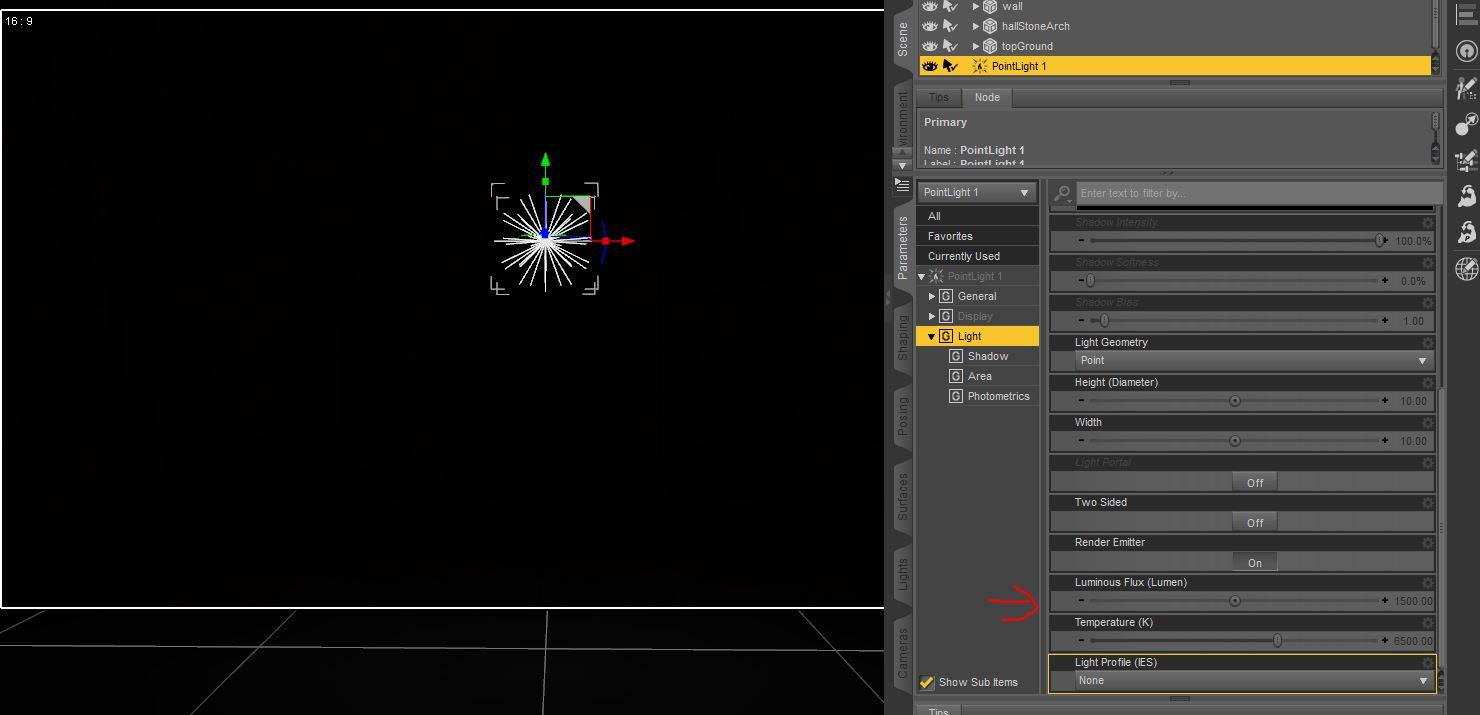
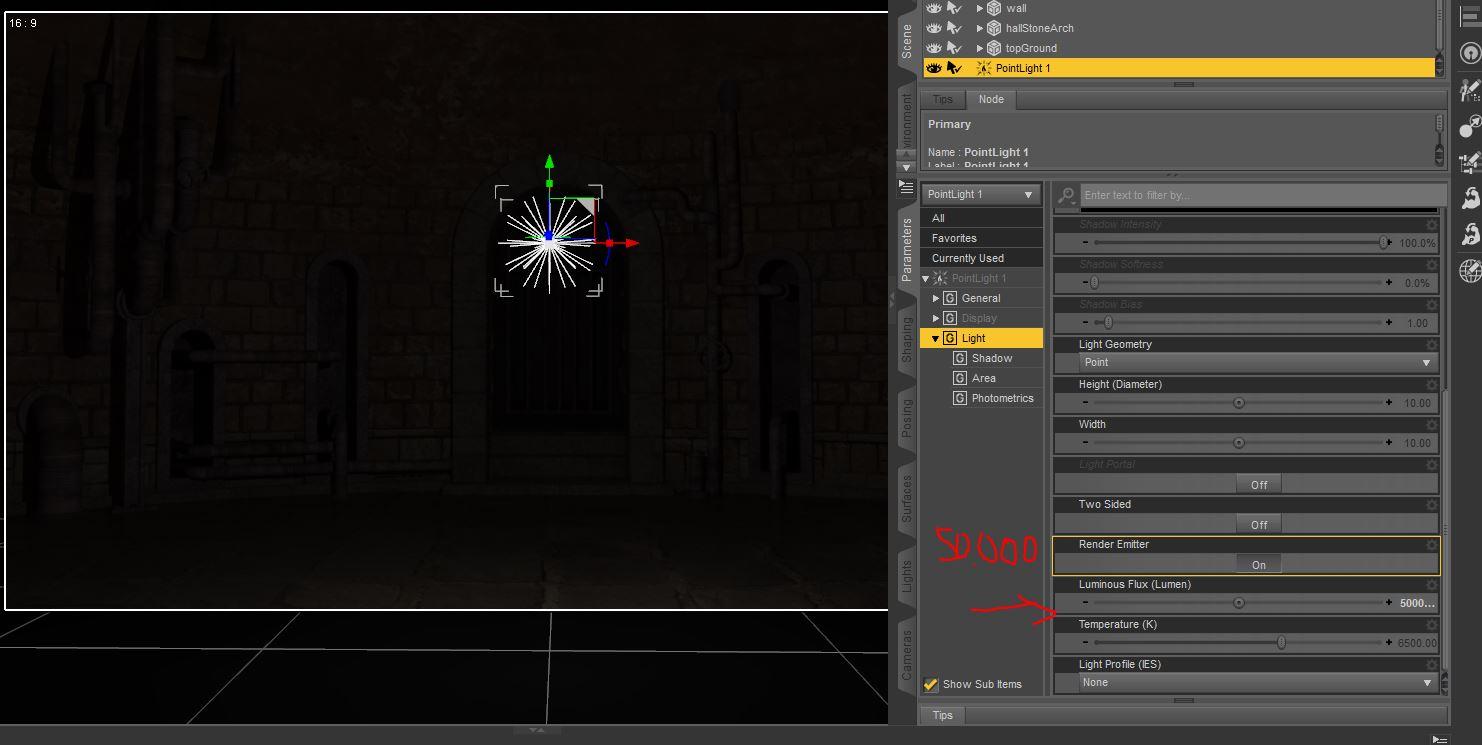
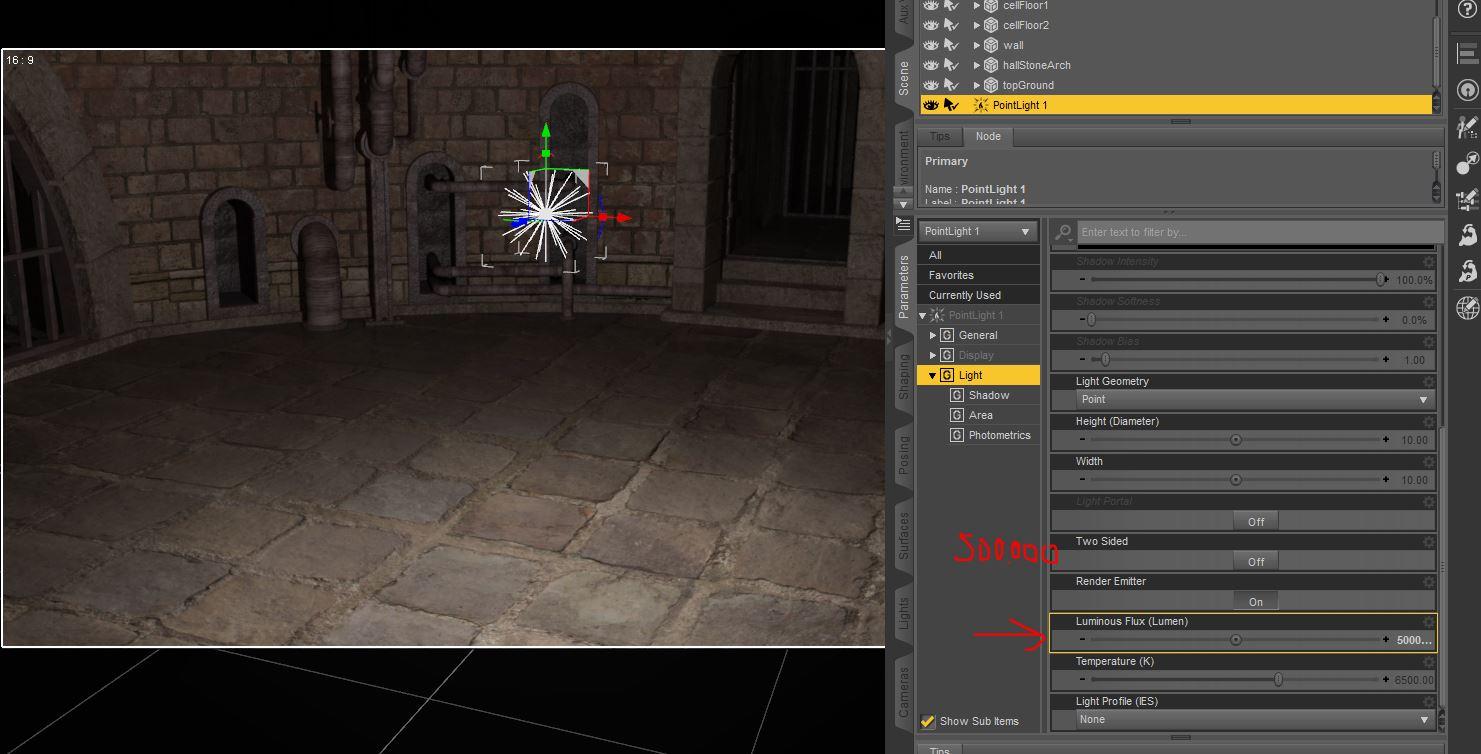
The Point light use a setting in the Parameter tab, called "Luminous Flux" for strength. I made three examples for you at the default 1.500, at 50.000 and at 500.000 units. Note: This was rendered in the preview window, so it still has the light marker from the light I selected.
As you can see, only higher values will have any effect at all.
Linear Point light at 1.500 units.
Linear Point light at 50.000 units:
Linear point light at 500.000 units:
Point light at 1.500 units:
Point Light at 50.000 Units:
Point light at 500.000 units
 Vendors: We all don't use Iray ...
For a light bulb, you don't really want to turn the whole thing into an emitter, anyway...it's just the filament (on an old fashioned incandescent) that emits the light. And that can be done as a single one quad rectangle, buried inside the bulb...but it would need, DS terms, a clearly defined and accessible material zone. Same thing can be done with florescent tubes and even LEDs. The only time you really need the 'whole' thing is for large fires. And simpler is better.
For things like display screens, again, a single quad is all that's needed.
And single quad 'mesh' lights are just about as fast as photometric points (even in 3DL with UberArea simple geometry is significantly faster).
Autodesk Fusion 360 Free for hobbyistsAwesome! Thank you for the heads up! Now I can go shopping for a 3D printer! :)
If you aren't afraid of putting it together yourself, you can order kits from china CHEAP. Same printer kits (RepRap, Rostock, etc.) but a LOT cheaper. As in 'one-third' the price, for the same hardware.
Now that might be worth trying. Though, if a print comes out funny looking, it'll be hard to tell if it was due to printer or more likely the person who built it!

Any reputable sites or dealers that you've seen?
Lots. Most sell through AliExpress, but there's plenty of variation there. And shipping does take a few weeks. Make sure you look at feedback/orders records and such for any seller you are looking at buying from (I wouldn't recommend buying from anyone on there with less than 100 orders and a positive feedback of less than 97%). And even if the kit is of lower quality, it is a good way to get some experience with 3D printing (and kit assembly!) BEFORE spending a lot on a better one. Also, make sure you are in fact getting what's pictured (read the ad thoroughly) since some of the sellers can be a bit deceptive with the product images..... Something like this is a good deal for a beginner: http://www.aliexpress.com/store/product/2015-Guaranteed-100-DIY-sunhokey-prusa-i3-3d-printer-2-rolls-filament-SD-card-free/1502993_32379090327.html ;
Things to look for: Heated Bed (sometimes it's an upcharge, but not a lot), Auto-levelling (so you don't break nozzles/beds, also sometimes a small upcharge), free shipping
As a beginner, you don't need to spend extra for double or triple nozzles, aluminum frames (though nice if you can afford the extra price), full shrouds, or extra-large bed sizes.
Thanks for the information and the recommendations!
Autodesk Fusion 360 Free for hobbyistsAwesome! Thank you for the heads up! Now I can go shopping for a 3D printer! :)
If you aren't afraid of putting it together yourself, you can order kits from china CHEAP. Same printer kits (RepRap, Rostock, etc.) but a LOT cheaper. As in 'one-third' the price, for the same hardware.
Now that might be worth trying. Though, if a print comes out funny looking, it'll be hard to tell if it was due to printer or more likely the person who built it!
Any reputable sites or dealers that you've seen?
Lots. Most sell through AliExpress, but there's plenty of variation there. And shipping does take a few weeks. Make sure you look at feedback/orders records and such for any seller you are looking at buying from (I wouldn't recommend buying from anyone on there with less than 100 orders and a positive feedback of less than 97%). And even if the kit is of lower quality, it is a good way to get some experience with 3D printing (and kit assembly!) BEFORE spending a lot on a better one. Also, make sure you are in fact getting what's pictured (read the ad thoroughly) since some of the sellers can be a bit deceptive with the product images..... Something like this is a good deal for a beginner: http://www.aliexpress.com/store/product/2015-Guaranteed-100-DIY-sunhokey-prusa-i3-3d-printer-2-rolls-filament-SD-card-free/1502993_32379090327.html ;
Things to look for: Heated Bed (sometimes it's an upcharge, but not a lot), Auto-levelling (so you don't break nozzles/beds, also sometimes a small upcharge), free shipping
As a beginner, you don't need to spend extra for double or triple nozzles, aluminum frames (though nice if you can afford the extra price), full shrouds, or extra-large bed sizes.
iRAY emissive shader + visible glow - How?Thanks for all the additional input, I hadn't checked here for a while.
I think we're all fully aware that much post processing takes place in just about any visual/audio media - I post-process extensively when composting music videos for example - there's no way to get some of the lighting and ‘texture’ effects of which I am fond with real light. So I wasn’t arguing against post-work as a blanket statement. But I do want to learn ‘this thing’ as much as possible, there will be plenty of post-work left I’m sure.
When I get back to playing with the bulb, I’m going to try as suggested and build some geometry around the filament and apply a volumetric shader; this would allow me to animate the camera (for example rotate around the bulb) and yield continuous, believable glow I assume.
I just need to find come time to play.
iRAY emissive shader + visible glow - How?Thanks for your response but I would like to learn to do this without post work. I did try the following: made the filament a separate object – previously it was only a material zone of the entire bulb. I applied a glow texture to that: no improvement. So then, I created a 'Geometry Shell' of the filament and applied a glow texture, also changed opacity of the shell, hoping the original filament would shine through … still no good.
There are several Iray-specific issues here. The first is that in its current implementation, bloom cannot be applied on a per-object or surface basis. If you add too little bloom, you won't get the glow effect; if you add too much, everything takes on a "smeary" look. Sometimes that look is acceptable, and sometimes it's not. This is why post work often provides exactly what you want, because you're not settling for something in the middle. There is nothing wrong or bad about doing things in post -- compositing is a common practice in all 3D work, including animated features.
Since you're looking to just making the filament glow, and not the whole bulb, you need to be careful how you shade the glass of the bulb -- or if you comp images, simply remove the bulb and render the filament only. Shaders on the glass can diminish the effect of emissive surface. Do a google in-site: search to the forum leads on how to apply the best glass shaders for self-lit bulbs.
iRAY emissive shader + visible glow - How?Glow in render works great on the entire scene, however I just want one object to glow. I have a lightbulb; all I want is for the filament to glow, but with render-glow, the entire bulb glows.
Three ways, all of them fairly easy, though all three require combining images in Photoshop, GIMP, or other graphics program:
1. Render it twice, and in Photoshop, apply a layer mask to the bloomed image. Isolate just the lamp on this layer.
2. Click off everything in the Scene tab except your lamp, and render it separately with the bloom as high as you want.
3. Use the canvas feature, and select the lamp as a node. Render just the node. Be sure to half the Alpha option turned on. The benefit of this approach is that the shadow and ocluding effects of other objects are preserved. In other words, if your character is holding the bulb with his hand, the part of the bulb blocked by fingers will be transparent (won't render). This makes compositing much easier. Do a Google search here for rendering nodes on Iray canvases.
Thanks for your response but I would like to learn to do this without post work. I did try the following: made the filament a separate object – previously it was only a material zone of the entire bulb. I applied a glow texture to that: no improvement. So then, I created a 'Geometry Shell' of the filament and applied a glow texture, also changed opacity of the shell, hoping the original filament would shine through … still no good.
iRAY emissive shader + visible glow - How?Glow in render works great on the entire scene, however I just want one object to glow. I have a lightbulb; all I want is for the filament to glow, but with render-glow, the entire bulb glows.
Three ways, all of them fairly easy, though all three require combining images in Photoshop, GIMP, or other graphics program:
1. Render it twice, and in Photoshop, apply a layer mask to the bloomed image. Isolate just the lamp on this layer.
2. Click off everything in the Scene tab except your lamp, and render it separately with the bloom as high as you want.
3. Use the canvas feature, and select the lamp as a node. Render just the node. Be sure to half the Alpha option turned on. The benefit of this approach is that the shadow and ocluding effects of other objects are preserved. In other words, if your character is holding the bulb with his hand, the part of the bulb blocked by fingers will be transparent (won't render). This makes compositing much easier. Do a Google search here for rendering nodes on Iray canvases.
iRAY emissive shader + visible glow - How?Here are the examples (I didn't bother to let the renders finish, you can see the issue clearly).
The only difference between the two renders is 'Glow' is on for the bottom one. That amount of glow for the filament is what I want ... just not on the entire scene. I would like to do this without any postwork.
Thanks.
iRAY emissive shader + visible glow - How?If you can isolate the filament in the scene tab and the surface tab then add the emissive shader to it and it will glow as a light. Adjust the temperature and lumens to get the glow you need.
Thanks. I've got that part working just fine; the filament is 'emitting' quite nicely, even lighting up what's around it as it should But it needs to bloom in addition.
Daz 3D is part of

Connect
DAZ Productions, Inc.
7533 S Center View Ct #4664
West Jordan, UT 84084Licensing Agreement | Terms of Service | Privacy Policy | EULA
© 2026 Daz Productions Inc. All Rights Reserved.