-
TRansfer, Fit to and other issues
So the bone is bent? That will trigger some morphs, and those morphs will be projected into your mesh. You would need to identify the morphs and add custom channels - either with a morph of your own to accomodate the shape chnage or, if that's not needed, just an empty property with the same name. Trun on Show Hidden Parameters in the parametrs pane option menu then find the morphs in Currently Used with the bend applied, get their names by clicking the gear icon on their sliders and selecting Parameter Settings.
Michael and Friends Appreciation Association [Images] Pt 2Ghost of Sparta

Having fun making a morph of Kratos fron the new God of War game. He's based on G3M.
What's up with the Black Leather Jacket?Basic rig might be easy for those that know how to do it.. but for those of us that don't have a clue.. it's really not. And like Griffin I sure as h*** hope this is a one time thing only.
After importing the item, load Genesis 8 Female (or the intended target).
You need the Transfer Utility, which is accessible in a couple of ways, one such:
Edit > Object > Transfer Utility
Source dropdown: Genesis 8 Female.
Destination: the item you imported (such as the jacket).
Leave everything as default will give a basic rig.
Edit: Click Accept
If you want to save the item for reuse, you can save as a subset, but probably better to save as a scene/prop asset
File > Save As > Support Asset > Figure/Prop Asset
Edit2
Unparent/Unfit before saving, just in case (no idea of what, as no clue if trying to save when fitted/parented can cause issues).
For conforming clothes leave it fitted at least.
Zbrush to Daz is not accurate (mixed up)The trouble with spawning a single morph from multiple other morphs is that you lose any joint adjustments and corrective morphs.
If you just want to have a single slider for your shape it's safer to set the shape up, and have no other settings applied, then right-click in the Parameters pane and check Edit Mode (if it isn't), then right-click in the group you want to have the controller in and Create New Property, set the new property to 100%, then right-click on it and select ERC Freeze; run your eye down the list of SubComponents to make sure there's nothing there that shoudln't be and click Accept, check the result works, File>Save As>Support Assetss>Morph Asset.
What's up with the Black Leather Jacket?Basic rig might be easy for those that know how to do it.. but for those of us that don't have a clue.. it's really not. And like Griffin I sure as h*** hope this is a one time thing only.
After importing the item, load Genesis 8 Female (or the intended target).
You need the Transfer Utility, which is accessible in a couple of ways, one such:
Edit > Object > Transfer Utility
Source dropdown: Genesis 8 Female.
Destination: the item you imported (such as the jacket).
Leave everything as default will give a basic rig.
Edit: Click Accept
If you want to save the item for reuse, you can save as a subset, but probably better to save as a scene/prop asset
File > Save As > Support Asset > Figure/Prop Asset
Edit2
Unparent/Unfit before saving, just in case (no idea of what, as no clue if trying to save when fitted/parented can cause issues).
Thank you, once again, nicstt
March Madness is here! Buyer Bonus: Justus for Darius 8 and A Gentleman's ExpressionsI know I'm a little late to the party, but I usually dial up Core character HD morphs to 150% or more so I don't have to increase the SubD. I use them with whatever character I want, auditioning to see which ones give me the best results without making the face look old.
I bought all the Genesis 3 Male ones (except Kenji & Guy), but I only got the Genesis 3 Females that have definition in their faces and hands; so, no Kalea, Olympia, Eva or Bethany. (Why make an HD morph without details?!! C'mon Daz.) Also, Raiya's HD morphs have a lot of detail on the noses, and that can cause problems when not using the base character morph. The Genesis 8 HD morphs seem to have more detail, and that is a good thing to me. HD morphs add that extra bit of realism that can trick the mind for a second or two.
hi does anyone know if this jacket would work in daz studioThe product page lists this:
Daz Studio:
- Import FBX or OBJ, Assign maps in Surfaces Tab
- Skin clothing using Transfer Utility. This item fits Daz Genesis 8 Female.So it will sorta work: it's not a regular DS clothing item, you'd need to import it and then rig it with transfer utility and assign the materials yourself.
What's up with the Black Leather Jacket?Basic rig might be easy for those that know how to do it.. but for those of us that don't have a clue.. it's really not. And like Griffin I sure as h*** hope this is a one time thing only.
After importing the item, load Genesis 8 Female (or the intended target).
You need the Transfer Utility, which is accessible in a couple of ways, one such:
Edit > Object > Transfer Utility
Source dropdown: Genesis 8 Female.
Destination: the item you imported (such as the jacket).
Leave everything as default will give a basic rig.
Edit: Click Accept
If you want to save the item for reuse, you can save as a subset, but probably better to save as a scene/prop asset
File > Save As > Support Asset > Figure/Prop Asset
Edit2
Unparent/Unfit before saving, just in case (no idea of what, as no clue if trying to save when fitted/parented can cause issues).
Released: Jesse for Genesis 3 Male (Teen Boy Character) [commercial]https://www.daz3d.com/jesse-for-genesis-3-male
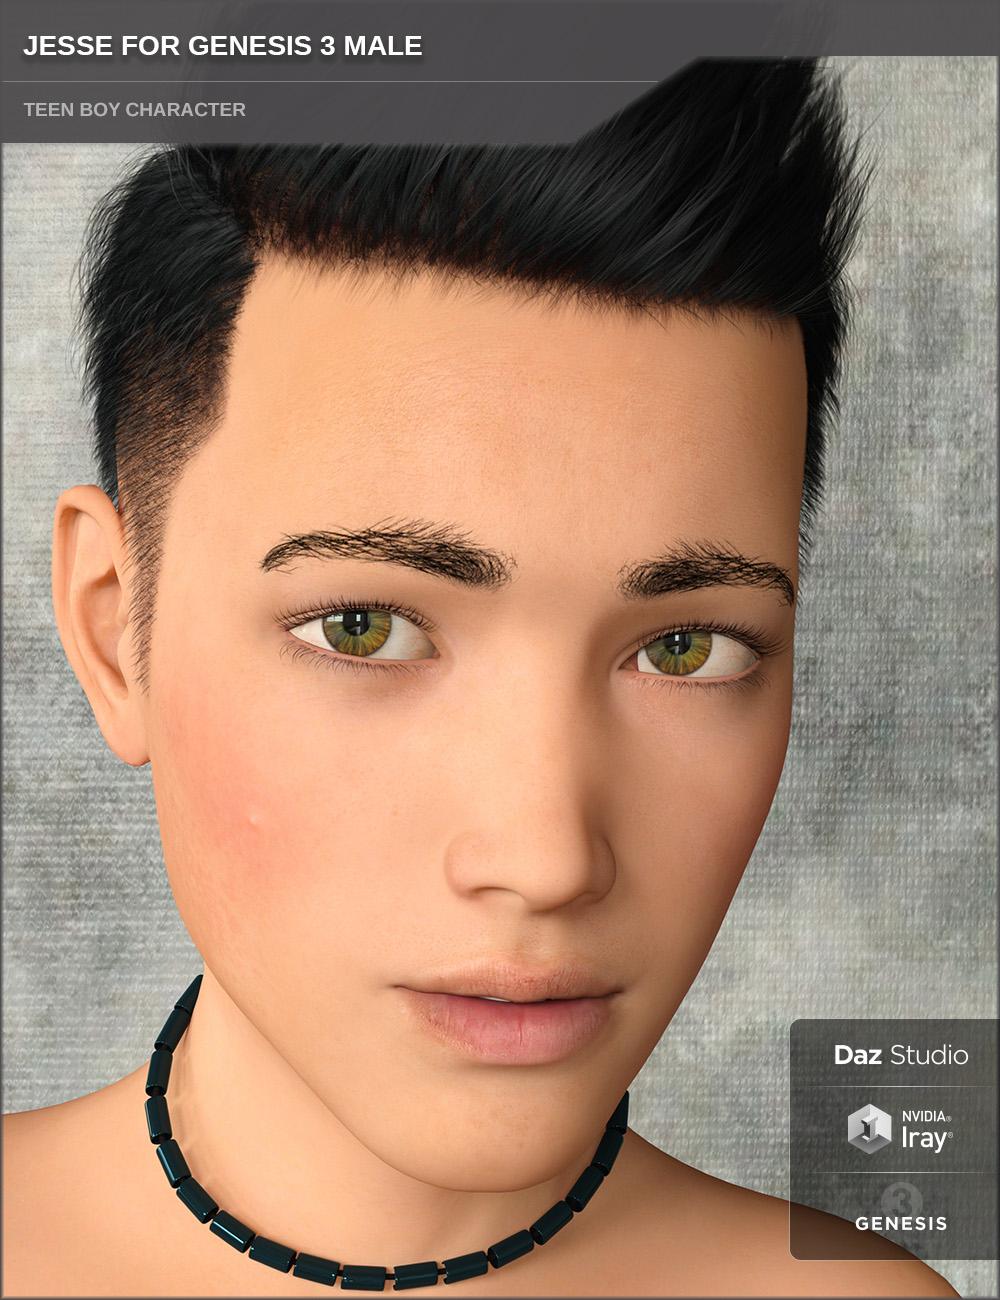
Jesse is a mid-teen-aged boy character for Genesis 3 Male.
He is perfect as the everyday teenager, the cool boy in school or whatever you want him to be.
With the included options you can vary his appearance, like pimples, muscular body, upper lip fuzz etc.His head/face, body and the muscular morph are custom created and the skin uses elements from real photo references. No other morph packs are required.
He comes with lots of materials and shaping options, like different eye colors and eye brows, different teeth shapes and materials, pimple options, facial hair fuzz options, muscular body shape and more.
Beside the 3 different eye brows presets a NO BROWS preset is included too so that you can easily use other eye brows (LIE or Diffuse Overlay) from other products or characters.Since he is built on the Genesis 3 platform, you can dial in morphs from any of your Genesis 3 Male Characters to make him even more unique.
- Jesse for Genesis 3 Male: (.DUF)
- Jesse Full Character Preset
- Shape Options:
- Body Muscular (Add and REM)
- Height (Taller and Default)
- 03 Teeth Options (02 Younger Teeth, Default)
- Shape Presets:
- Jesse Body Add/REM
- Jesse Head Add/ REM
- Morph Control Dials:
- Jesse Full Character
- Jesse Body
- Jesse Head
- Jesse Height
- Jesse Nipples
- Jesse Navel
- Jesse Young Teeth
- Jesse Young Teeth Alternative
- Jesse Head Size Adjuster
- Jesse Muscular Body
- Material Options:
- Full Material Preset
- 11 Realistic Eye Colors Presets
- 02 Teeth Materials
- 01 Face No Brows Preset
- 05 Different Eye Brows Presets
- 03 Skin Tone Presets
- 03 Body Hair Presets (Armpit Hair / Chest Fuzz / Leg Fuzz) and removal presets for each of them
- LIE Facial Options (Pimples 1 and 2, Upper Lip Fuzz)
- Textures Include:
- 76 Texture, Bump, and Specularity Maps (2048 x 2048 to 4096 x 4096)
- Daz Studio Iray Material Presets (.DUF)
Zbrush to Daz is not accurate (mixed up)Hello cris, Thank you for your reply.
It's genesis 8 and I'm using other people content but its for personal use only.( I start scrath if i want to sell it)
I just want to edit this model in zbrush and send it to Daz so It be only 1 morph (as genesis 8). I used GoZ, If you have any other way to acheave this please tell me.
Ollie 8?@Divamakeup , thank you for the eye morph. I've just downloaded it and it works beautifully

Found were it was, would have been handy for that last render that I did. Many thank-yous as well.
Zbrush to Daz is not accurate (mixed up)So you are using Genesis, the original Genesis, not like Genesis 8 or other iterations?
If you are adding morphs, are you wanting to use this character for yourself and not for sale? You can't use other morphs from DAZ or PAs (unless they are from a Merchant Resource that tells you can bake them in) to create a morph to sell.
I export objs and don't use GoZ, so I can't address the problem you're encountering. I know with obj, I don't have trouble.
I don't know what you're doing when you say open lips or stretch eyes. Could you show screenshots?
Zbrush to Daz is not accurate (mixed up)Hello,
I used GoZ for simple morph and that's working great, but when I want to use it for Complex object (an object that has been edited with other morphs) It doesn't work, how? it miss up the lips (open them) , stretch the eyes, and so on (anyting that I edited in zbrush but so extreme).
I used it in new genises too and It still the same problem. I want to create a single morph to convert genisis to person I want,. Could you guys help?
Thank you
Daz 4.10 and Zbrush 4R8P2
Ollie 8?@Divamakeup , thank you for the eye morph. I've just downloaded it and it works beautifully
How to Use dForce: Creating a Blanket, Draping Clothes on Furniture, and Much More [Commercial]Like many who follow this useful thread, I experiment and question what happens with dForce, and today I think (not sure, as I haven't reproduced it) that it's possible that even small morph errors can sometimes cause cloth explosions. Such as duplicate errors.
Interesting. I'll have to look at the error log next time something explodes like that.
Photo-real characters. A different approach.
Lamh and Garibaldi are strands *in 3delight.* To use in iray, currently, they have to be converted to meshes. LAMH does apparently have some optimizations so that the memory hit is lessened, but no optimization is going to be handle that level of mesh density. And even if you are using 3delight, in my experience, trying to do hair like this with raytraced shadows, let alone bounce light is going to mean long, long, renders Theoretically there could be some benefits to setting up hair in blender, converting to mesh and exporting to Daz. (And I have done it) but, it makes way more sense for me as someone who already uses blender. Learning blender in the hope that it might be marginally more useful for hair (I personally also just find it easier to style with than the DS options) is probably not a good ideaThe mesh, specifically having to have a mesh. Cycles you can do proper strands. There are probably more than 100,000 strands there. If that were a mesh :0. DS *has* strand options, but they only work as strands in 3delight. Conversion to a mesh also has other downsides. Mainly, it's much, much, harder to adjust your shader per strand and along the strand. In the shader above, for instance, individual strands are different colors from one another, but also the root of each strand is darker than the tip.So you're implying other DS options such as LAMH and fiber hair are intrinsically different than a 'strand', and strands consume far less memory.
I'm guessing it wouldn't help to learn to use Blender for hair similar to LAMH (as an external addon) simply because the process to transfer the hair from Blender to DS would require converting to obj with polygons, thus eliminating the benefits.
City of Destruction (tm)I want an urban environment like the one that Stonemason does so well BUT that can morph and change select areas to look like it is being damaged by a superhero fight. Crushed post office boxes, scorch marks, busses ripped in half. Not just the AFTERMATH of a battle, but something that can show, before, during, and after a super-powered donny brook in an urban area.
OH GREAT AND POWERFUL STONEMASON! PLEASE, HEAD MY PLEA! :)
Photo-real characters. A different approach.The mesh, specifically having to have a mesh. Cycles you can do proper strands. There are probably more than 100,000 strands there. If that were a mesh :0. DS *has* strand options, but they only work as strands in 3delight. Conversion to a mesh also has other downsides. Mainly, it's much, much, harder to adjust your shader per strand and along the strand. In the shader above, for instance, individual strands are different colors from one another, but also the root of each strand is darker than the tip.So you're implying other DS options such as LAMH and fiber hair are intrinsically different than a 'strand', and strands consume far less memory.
I'm guessing it wouldn't help to learn to use Blender for hair similar to LAMH (as an external addon) simply because the process to transfer the hair from Blender to DS would require converting to obj with polygons, thus eliminating the benefits.
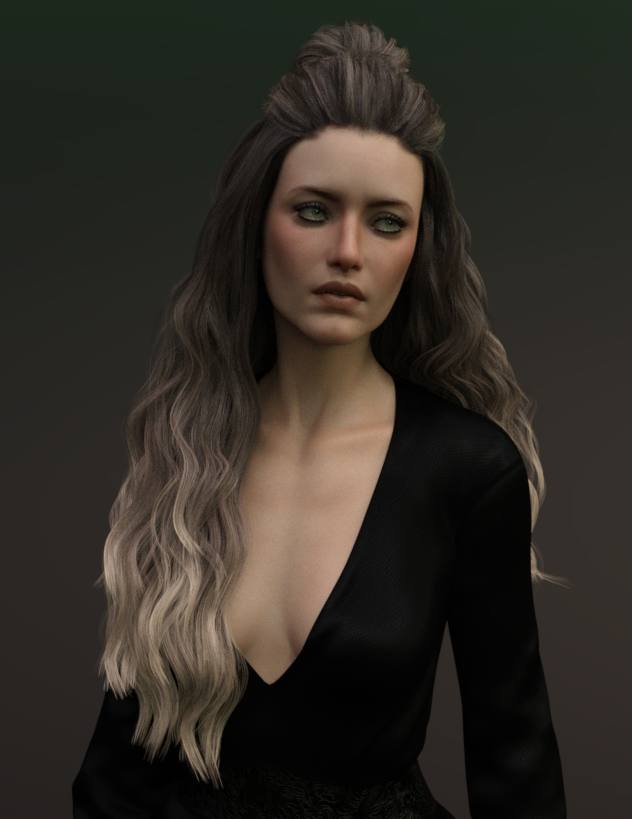
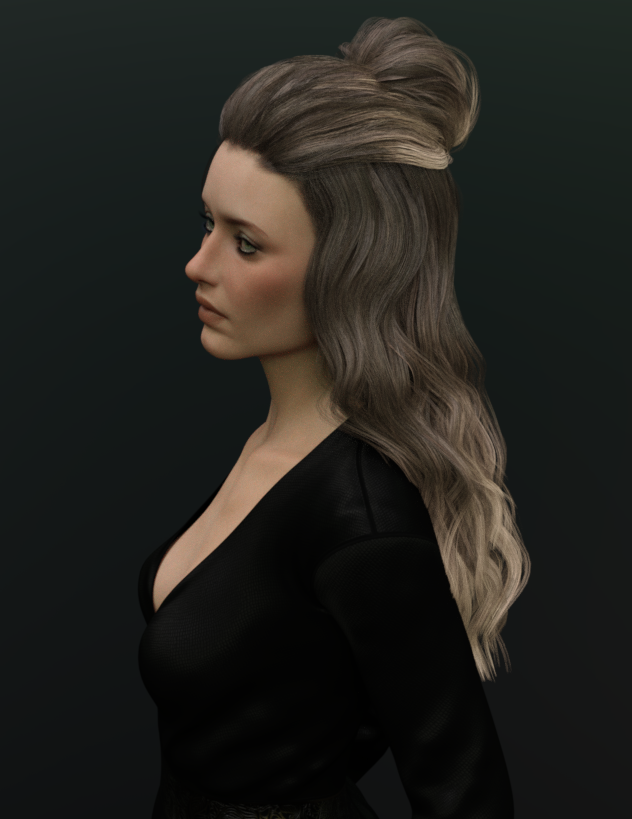
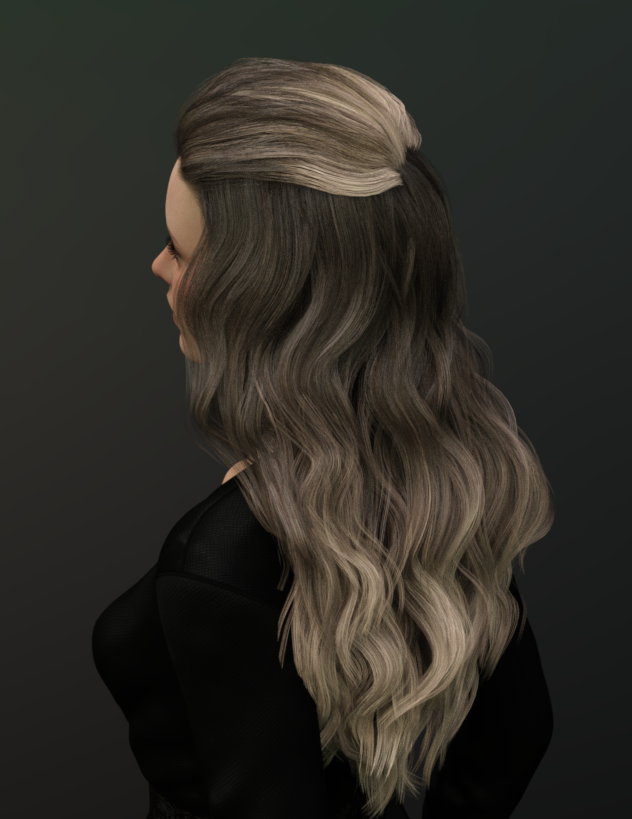
Question about Ulani Hair for Genesis 3 & 8 Female(s)[ANSWERED]Alright im back. For those who are interested, I did a quick breakdown of Ulani Hair with the goal of determining wether or not the bun can be hidden. And the good news is that it can indeed be hidden. Once the hair is loaded, look in the parameters tab with the hair selected. Expand the Actor category and the Style and Move sub-category. Select the "All" section of morphs. You should now see all of the morphs including one that says "Bun Size". Change the minimum value in the Parameter Settings menu to -3.25. For those who do not know how to change parameter settings, look in the upper right hand area of the morph slider. See that little cog looking icon? Click it and select Parameter Settings from the drop down menu. Once the parameter settings window appears, find the "Min" setting. Clear whatever value is in the "Min" field and enter -3.25. Click Accept at the bottom. Go back to the "Bun Size" morph slider and set that to -3.25. The bun should now be gone from the hair. Please note that you cannot make the bun dissapear in the Surfaces Pane.
And now, pictures with thoughts on what to do with the bun-less hair.
Ulani Hair_1 shows the hair with the bun still visible and the "Front Left Behind Shoulder" morph applied. While im not terribly crazy about the bun, the more I look at the complete style, the more im finding the bun to be less and less obtrusive.
Ulani Hair_2 shows the complete look from the side.
Ulani Hair_3 shows the hair with the bun size set to -3.25. Observe the cut in the back of the hair where the bun is intended to be.
Ulani Hair_4 shows a rear view with the bun removed.
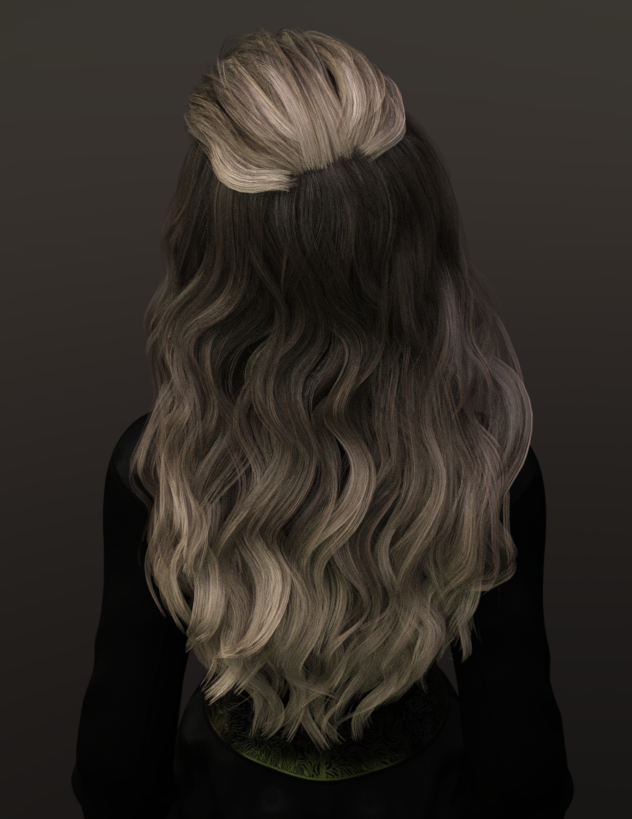
Thoughts on fixes... Now if it is your intent to only display the front of this hair in your render then the cut in the back of the hair should pose no problem. If you need to display a side or rear view then I would try one of three methods to add in some hair.
1: Use hair brushes to fill in the missing hair. Ive seen some really nice quality 2D hair brushes offered at Rendo. I dont know if Daz has any to offer. Perhaps someone can update if they know otherwise. You will of course need photoshop or a similar program to use brushes.
2. Assemble your own hair to fill in the area. You could take a render of the hair and then protoshop an area of the hair to be used to fill in the blank spot in your primary render.
3. Using a second copy of the hair, use the geometry editor to delete the hair you dont need and attach(parent) the remaining portion to the existing hair. This seems like it might be fussy though, who knows, im not going to try that method at this time.
Fixed Hair.jpg demonstrates method 2 above. As you can see it was a really quick patch job but hopefully it demonstrates my point.

So there you go. Overall I really like the hair. If you are turned off by the bun like I was, there are still options. Hope this helped.
 Empty "preset" tab? Why?
Awwww! That's too bad.
 Well, anyway thank you for your support Richard.
I'll try to come to terms with the new version then. Maybe I can at least manually transfer presets to the right tab. If any other problems appear I will get back to this topic.Daz 3D is part of

Connect
DAZ Productions, Inc.
7533 S Center View Ct #4664
West Jordan, UT 84084Licensing Agreement | Terms of Service | Privacy Policy | EULA
© 2026 Daz Productions Inc. All Rights Reserved.