-
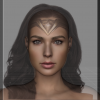
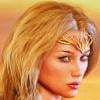
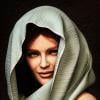
Mika 8
Can you do one of Teen Josie 7 next to Mika 8? I think Teen Josie 7 looks a lot like Mika 8.
Sure =)
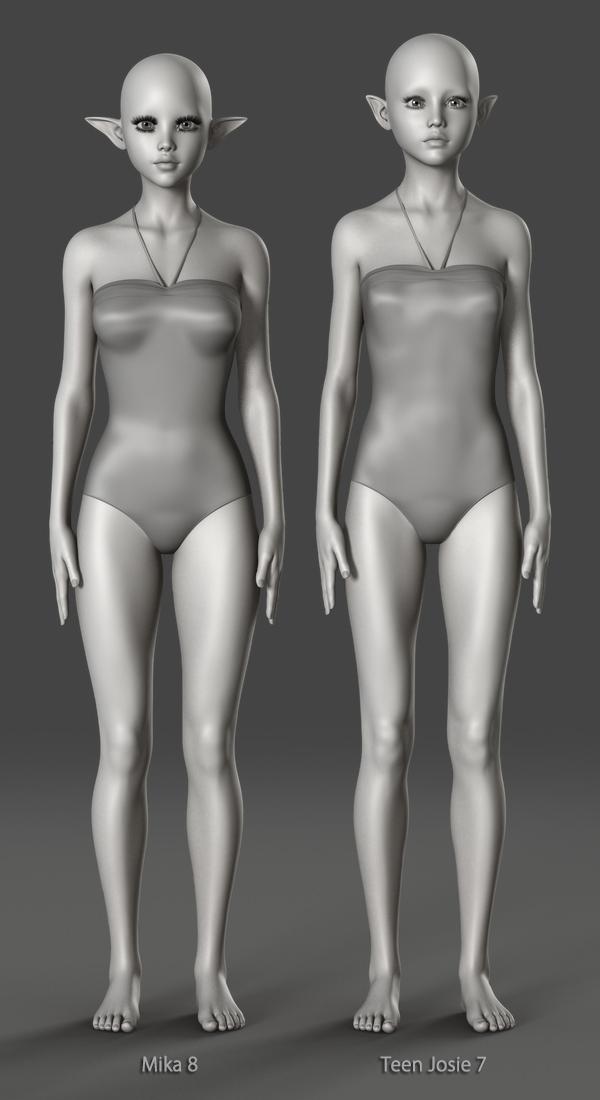

Thanks a bunch. Just as i suspected. Teen Josie 7 and Mika 8 as basically the same with small morph differences.
I guess this makes a Teen Josie 7 for Teen Josie 8 product kinda pointless... not entirely, but...
Mika 8Can you do one of Teen Josie 7 next to Mika 8? I think Teen Josie 7 looks a lot like Mika 8.
Sure =)
Thanks a bunch. Just as i suspected. Teen Josie 7 and Mika 8 as basically the same with small morph differences.
Star (and Stella) Jumping Vertically When PosedSO JUST HEARD FROM SUPPORT. Yep, almost two years later, here it is:
This is a known issue. Due to the way Star 2.0 is made, it's necessary to adjust the hip upwards when using the proportions morph, which does cause issues with the manipulator tools. Removing the connection between the two however, will break existing poses as well as general compatibility with other Genesis 3 poses.
And as discussed, they had already mentioned the Active Pose tool back in 2016.
One work around that wasn't mentioned in the thread is to use the Active Pose tool rather than one of the manipulator tools. Using the Active Pose tool seems to keep her grounded.
Used items in Promo picturesOne thing I learned over the yaers of trying to support customers is that no matter how much you do, someone will always criticize you for not doing enough.
Yeah, but I'm sure you get a warm and fuzzy feeling every time someone thanks you for a product, and discussions related to your product. Negative feedback has it's place, some is useful while other negative feedback not so much, but unless you really suck at what you do, there's positive feedback too.
Oh, and again much thanks BadKittenCo for the G8F classic biker jacket and engineer boots!!!
- And I'd love to see G8M versions of these, as autofiting G8F on G8M isn't a perfect process, it mostly works in the meantime... If you are so inclined, of course!
Nemesis10
Your points are valid as well. Custom morphed characters, etc. using ZBrush or a bunch of dials, yeah that won't be useful to anyone unless you provide a step by step on how you got there, or the actual .duf (which has it's own issues), and I don't think most people here are suggesting that. A note that it's a custom morph (and leaving it at that) in your commercial product thread can't hurt though, Also, the readme can mention this as well if you want to cover all of your bases r.e. trying to be helpful.
In the interest in making sure your bases are covered, even when 'farming out' promo pics to for other artists to do that for you, well it's good to know the entymology of what they are using.in the promo pics they do for you as it relates to usage rights. It can really suck to be the target of a DMCA takedown, or similar such actions.
(not really related, but there is one particular vendor in Daz/Poser Land that I no longer support because he marketed a product that he didn't actually make, and the person who did make it lodged a complaint, resulting in the product being pulled from a store).
Depending on how you sort your Daz folders, it's much easier for you to determine ownership and associated usage rightrs on your own computer (there's always right click in Product Library/navigate to folder, followed up by checking readmes or googling the vendor & product) than to try to figure out such things on your 'contracted artist's computer' from your own computer.
And yeah, no sense teasing people with old, discontinued product links if they are no longer available. Again though, a mention in your commercial product thread r.e. such products being NLA could be helpful to others.
Anyways just splitting hairs. Again, not expecting EVERYTHING to be shared or listed, mainly use your best judgement and be helpful when you can is my suggestion. Some of your customers will apprecaite this..
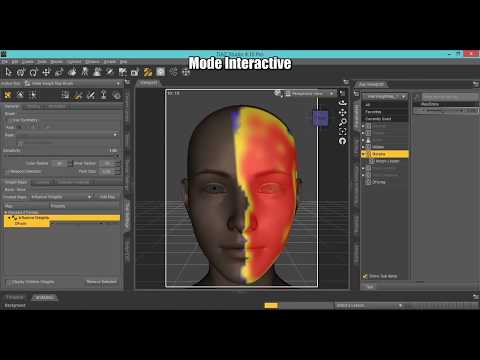
Shape Splitter - Divide, Combine and Save (The new version is already available. 1.2.1)[Commercial]Question about the product: I've been trying to modify heads and faces to look like boxers do when they get punched: noses twisted, lips distorted, etc. It looks like this product will do it. Is that correct?
With weight maps you would possibly have distortion in certain parts like nose and mouth, and you could simulate the effect you want, but it will depend on the existing morphs you have. But the tool was designed only to divide morphs, not to create new morphs. But I was able to do it by increasing the scale and moving the selected, different morphs are created. (funny morphs).
Video weight maps
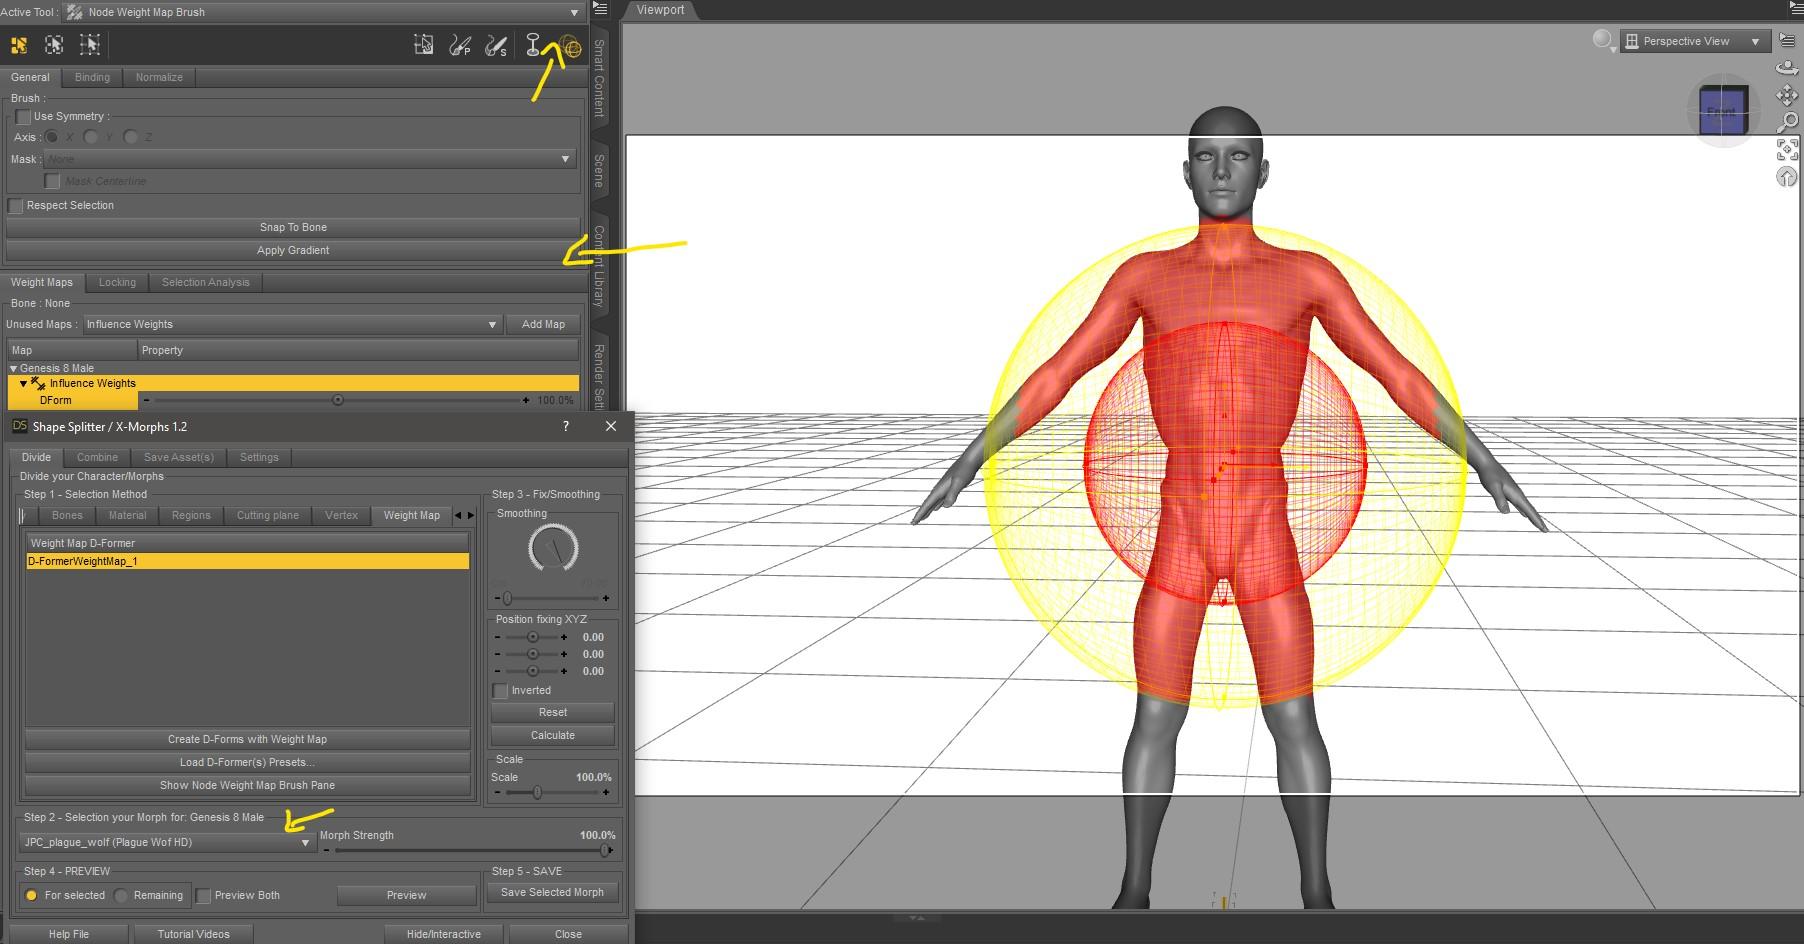
Another queston: When it says this product does not transfer morphs to other figures, does that mean if I do the morphing on a Genesis 3 figure, I cannot transfer it to a Genesis 8 figure? YES
Or, does it mean the morphing is only for that character, and I cannot transfer the morphing done on a Genesis 3 figure to another Genesis 3 figure? Does it mean that the morphing is only for a particualr character?
Saving the morph, as asset, every time you load your Genesis figure, your morphs will be available in the shaping or parameters tab (Actor/XMorphs).
Was it just me or....Was more wondering about g8m but g3m was also not something I had found before, have to take a look. Thanks Noah :)
Edit: Found him.. and ooohh, def gonna get him. Even if just for the skin, might have dialspin someone to use it on as I haven't quite gotten down to elarn how to transfer morhps lol (I have the thread bookmarked, jsuth aven't gotten time to learn)
Raj is one of my favorite characters, along with Shadowborn. Both by Redz for G3M, both totally awesome!
Shape Splitter - Divide, Combine and Save (The new version is already available. 1.2.1)[Commercial]Question about the product: I've been trying to modify heads and faces to look like boxers do when they get punched: noses twisted, lips distorted, etc. It looks like this product will do it. Is that correct?
Another queston: When it says this product does not transfer morphs to other figures, does that mean if I do the morphing on a Genesis 3 figure, I cannot transfer it to a Genesis 8 figure? Or, does it mean the morphing is only for that character, and I cannot transfer the morphing done on a Genesis 3 figure to another Genesis 3 figure? Does it mean that the morphing is only for a particualr character?
Was it just me or....If you own the DAZ Original Body Morphs for G8 there is a 'stocky' morph that works quite well although I think they call it something different than stocky, maybe husky or some other euphemism.
Novica & Forum Members Tips & Product Reviews Pt 10I went ahead and bought Jonah, even though I don't have Ollie. He's hella buff without Ollie, and his head morph at 100% is a bit odd. IMO he looks fine around 70%, and I do love the freckles on his skin. So, I'll keep him, and wishlist Ollie for later.
Since my laptop that can do Iray is currently occupied, here are a few simple 3DL renders of him. Do bear with me as i am absolute crap at 3DL, and this is my back up old-as-balls XP laptop so these renders will be small.
Head at 62%
Head at 100%

Body/head 100%

So, not a bad character for $10. I can't wait to get him into Iray, and really make those freckles SHINE!
Thanks. I have Ollie but i noticed that I need a younger character in the same caricature style so I'll buy him too. Thanks a lot.
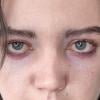
Photo-real characters. A different approach.JCade, I actually do have three different maps for the SSS, though they are procedurally generated versions of the same source JPG. There's a red-tinted, untinted (yellowish tan), and green-tinted layer. My triple-layered SSS shader is essentially a Poser adaptation of one or two Blender shaders that I thought gave excellent results. Trust me, it makes a world of difference! That's one thing I can say with great confidence! As for Diva's face details, I see one very deep crease along each lower eyelid, but that's not a universal human trait (the crease itself may be, but not the depth of it). Besides, are you telling me you don't see a similar crease in the latest render of my auburn-haired, hazel-eyed character? It may not be as deep, but it should definitely be visible.
Rashad, thanks for the in-depth feedback, and I'm glad you and I seem to agree on so much. I'm actually working with Genesis 8, though it was relatively easy to create a functional transgender-morphing version. If you're interested (and use Poser), I have a freebie on ShareCG that will do most of the work for you. My male and female characters all use the same skin and eye textures, with only masked features like facial or pubic hair differing between them. In fact, together with transgender morphing, those material parameter dials I talked about allow you to switch easily between sexes. The main one is a "Male" dial. At 0, it applies the female masks for eyebrows and body hair, and at 1, it applies the male masks. The facial stubble can be controlled with its own dial, so if you want a juvenile or otherwise smooth-faced male, you can do that. Body hair (i.e. pubic hair for both genders and armpit hair on males) can also be independently turned on or off.
I'll toy around with adding noise to my maps and see where it gets me. Actually painting details in Photoshop might not be a feasible option for me. I have a mild-to-moderate case of cerebral palsy, and one of the effects is significantly hindered dexterity. I'm not saying it's necessarily impossible, since I have had some success working with Poser's morph brush, but it will likely be much more laborious for me than someone with a more delicate hand would probably expect. Heck, even my characters' eyebrows, where I think the most improvement has been made, weren''t created by careful mouse strokes with my custom brush (which itself was a bit tricky to create). Instead, I drew a Path along what would become the middle of the eyebrows and used Photoshop's automatic Stroke function. Still, I think I'll at least try to paint some skin details if the easier tactics ultimately prove insufficient.
In any case, I'm certainly open to collaborating with you!
Yeah thats exactly what I didn't mean by actual custom maps. Unless you're painting in like veins by hand the old 3-layer method is pretty much deprecated. Don't take my word for it though, listen to the fine folks at Arnold about 2/3s of the way down:
When rendering skin, you should use a value like 1.0, 0.35, 0.2, indicating that red should scatter deepest and green and blue less. This would replace the three-layer workflow (deep, mid and shallow layers) for skin where you would make the deep layer red to indicate that deep should scatter with a larger radius. Setting scatter_radius.R to a larger value would correspond to that.
Same thing as the 3 layer, just way less overhead.
If you can't se the difference in level of details in the morphs I dont think I'm ever going to be able to explain it to you its not just has crease/doesn't have crease its how crisp the detail looks. I am a young an unlined person but not having crows feet doesn't mean that the corners of where my nostrils meet my cheeks is smooth, the geometries of your characters just look toony to me.
Was it just me or....Was more wondering about g8m but g3m was also not something I had found before, have to take a look. Thanks Noah :)
Edit: Found him.. and ooohh, def gonna get him. Even if just for the skin, might have dialspin someone to use it on as I haven't quite gotten down to elarn how to transfer morhps lol (I have the thread bookmarked, jsuth aven't gotten time to learn)
* Closed* RRRR - Error 404 Not Found! Render Contest1404 - Not Found
Bischof Trowller: You blathering fopdoodle! This the the Book of Extreme Unction.
Bruder Güggler: Pardons, a million pardons, your excellency. I could not locate the Rites of Baptism.
Frau Bauer : But we came for the exorcism, we did.
Urban Shabby Chic
Wyatt Hair for Genesis 2 Male
Summer Edition Josh
The Washroom
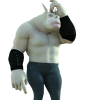
Fantasy Creature Creator HD Morph Pack for Genesis 3 Male
Balneae (I think I drew one too many ;)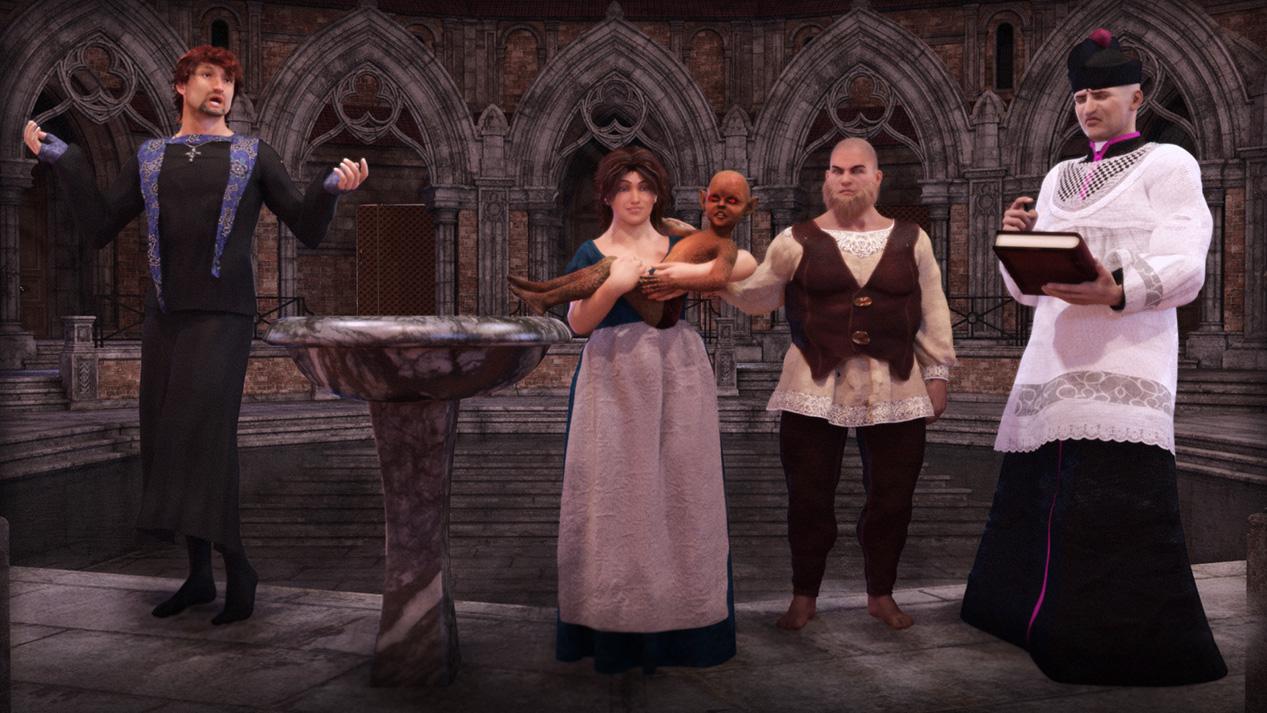 Was it just me or....
Thanks for starting this thread. It wasn't just you. The pattern Daz had established this generation was 2 females, then a male, or so I thought. But we have three females in a row, none of which I purchased (although buying the hairs from the Mika 8 Pro Bundle plus the additional hair is almost the same price as buying the Pro Bundle with the additional hair and one more item; so, I may just cave).
I'm still basing my male characters out of Genesis 3 because Ollie and Owen and Darius do not get me far enough away from the Michael/Lucas/Edward look for my goals, even with massive dial spinning using every morph pack available (unless I'm making a funny-looking [regular] guy, but it's hard to keep them looking real). Additionally, the male full head packs I've seen do not depart enough from the G8M Base's look to be useful.
But I have hopes that the 17th or 24th will bring us a non-stylized male without skin of wax.
Photo-real characters. A different approach.JCade, I actually do have three different maps for the SSS, though they are procedurally generated versions of the same source JPG. There's a red-tinted, untinted (yellowish tan), and green-tinted layer. My triple-layered SSS shader is essentially a Poser adaptation of one or two Blender shaders that I thought gave excellent results. Trust me, it makes a world of difference! That's one thing I can say with great confidence! As for Diva's face details, I see one very deep crease along each lower eyelid, but that's not a universal human trait (the crease itself may be, but not the depth of it). Besides, are you telling me you don't see a similar crease in the latest render of my auburn-haired, hazel-eyed character? It may not be as deep, but it should definitely be visible.
Rashad, thanks for the in-depth feedback, and I'm glad you and I seem to agree on so much. I'm actually working with Genesis 8, though it was relatively easy to create a functional transgender-morphing version. If you're interested (and use Poser), I have a freebie on ShareCG that will do most of the work for you. My male and female characters all use the same skin and eye textures, with only masked features like facial or pubic hair differing between them. In fact, together with transgender morphing, those material parameter dials I talked about allow you to switch easily between sexes. The main one is a "Male" dial. At 0, it applies the female masks for eyebrows and body hair, and at 1, it applies the male masks. The facial stubble can be controlled with its own dial, so if you want a juvenile or otherwise smooth-faced male, you can do that. Body hair (i.e. pubic hair for both genders and armpit hair on males) can also be independently turned on or off.
I'll toy around with adding noise to my maps and see where it gets me. Actually painting details in Photoshop might not be a feasible option for me. I have a mild-to-moderate case of cerebral palsy, and one of the effects is significantly hindered dexterity. I'm not saying it's necessarily impossible, since I have had some success working with Poser's morph brush, but it will likely be much more laborious for me than someone with a more delicate hand would probably expect. Heck, even my characters' eyebrows, where I think the most improvement has been made, weren''t created by careful mouse strokes with my custom brush (which itself was a bit tricky to create). Instead, I drew a Path along what would become the middle of the eyebrows and used Photoshop's automatic Stroke function. Still, I think I'll at least try to paint some skin details if the easier tactics ultimately prove insufficient.
In any case, I'm certainly open to collaborating with you!
Was it just me or....Just I'm surprised the PAs don't extend the choice, I mean no Arab/Indian character like at Renderosity.
First law of IT business: never change a running system... or: don't try something new, if the same old - same old sells anyway
Not that I would like it.. but as long as the stuff gets bought, more of the same will get produced...
And I have to admit, I also belong to the group of people not needing "sexy male toons", as a look at my runtime shows: George, Old Chap, Ollie, Bolnnar the Dwarf, Orc Brute and a couple G8M from either PC+ or freebie sources - which gives me, with the morph programs, all the flexibility I need, for the stuff I want to do.
The list of females isn't that long either, though... and right now I'm still looking for G3F rather than G8F... or better, G3/8F, of which there are quite a few..
In the end, it's usually the extras that make be buy some new "generation" figure, like free pro packs of previous generations...
Novica & Forum Members Tips & Product Reviews Pt 10I went ahead and bought Jonah, even though I don't have Ollie. He's hella buff without Ollie, and his head morph at 100% is a bit odd. IMO he looks fine around 70%, and I do love the freckles on his skin. So, I'll keep him, and wishlist Ollie for later.
Since my laptop that can do Iray is currently occupied, here are a few simple 3DL renders of him. Do bear with me as i am absolute crap at 3DL, and this is my back up old-as-balls XP laptop so these renders will be small.
Head at 62%
Head at 100%
Body/head 100%
So, not a bad character for $10. I can't wait to get him into Iray, and really make those freckles SHINE!
Mika 8Well, I'll buy the Bundle but I just don't know if I should right now. If I remember right, options did get better with the recent bundles within the promo period.
And I have to say it again that this news Figure 7 for Figure 8 is a mess. I have Mika 7 but as I use Gen8 more often recently, I want to be able to have the older shape/texture available easily. Sure could go the manual morph transfer route but why the heck is DAZ not better discounting those products for the owner of the older Generation/Bundle. Heck, actually that product should be free if one owns both Figure 7 as well as Figure 8.
Looking for high polygonal female modelsHello everyone, when I started using Daz3d I found one big problem for myself which I can't understand how to solve: if I want to create a new morph for character figure I need to use default low polygonal body mesh for that. Unfortunately aroung 17000 faces on body is not enough for me to work with and I need at least twice bigger count. First I thought those HD character models in the store is what I am looking for, but as I can see this is the same low polygonal body meshes... So, can someone tell me where I can get full riged female model with 34000 faces on it for which I would be able to create detailed morphs? Or maybe there is some other way to do this? Thank you for your attention.
Photo-real characters. A different approach.Long post....
Magnumdaz,
My feedback is always very detailed so please bear with me.
This is a beautiful morph. I've always loved this face. This is a Victoria 3 model, correct? Though a touch on the angular side, it still reads as sufficiently feminine to be pleasing to me. The tonal saturation might be a smidge too low, but like you I too would prefer to err on the side of undercooked saturation rather than overcooked. The blotchiness of the skin, providing a random sense of unevenness to the tone, works well here. It looks like skin damage caused by the sun and other life stresses which is believeable indeed. This effect however can also appear at times like a poorly captured photo of the real skin, that has been overly processed with contrast filters of various sorts. I feel like I see overprocessing of real human skins very often when sold as products, but more on that some other time. In this particular case it works quite well so no complaints. When building textures from scratch I accomplish this effect with turbulence noise brushes I use to create maps I steal from the terrain generator in Bryce. So man useful filters I can create there such as voronoi celluarl patterns and the like that I find essential to huma skin generating from scratch. But more on that later. Clearly the posing is a strong aspect. I find that whenever characters can interact with themselves in some way, by making contact with their own bodies, it somehow makes the scene seem more lifelike and believeable such as the hand at her waist. Nice work as always!!
Gregorius,
More crazy detailed feedback. Sorry but I can't help myself I love this stuff too much!!
Great great great!!!!! So many things. Firstly, you and I are on similar paths and I think we may even be able to work together at certain points in time. Maybe we can PM and talk a bit. Due to the fact that I am already working in a similar manner to yours, i can offer a few thoughts on what I'm seeing so far. Soon I hope this week I'll begin posting some of my own studies, and hopefully you'll chime in with feedback. Thanks, Bro!!
I love that you are working with Genesis 1 during this skin development study because I too find that swiching between genders helps me to see issues with skin textures I might not otherwise observe. In my opinion most male textures will look acceptable on females if one can separate out the masculinizing aspects such as stubble. When building your own texture from scratch such options of removing stubble become feasible. If it looks good on a female then there's a good chance it will look good on a male.
The examples you are posting are getting better and better for sure in terms of realism. Huge huge huge improvements!!!! I do agree with you that the texture demonstrates the potential for photorealism at this point in time. Potential is key and I'll return to this ideal in a moment. From what I can see there is a sufficient amount of height map detail to begin to make specular effects look reasonably realistic which from a PBR standpoint is essential. However as I've stated before, I do not think your height maps have the degree of detail and sharpness that they should have. What I would at least TRY if I were you would be to add a Gaussain Noise filter (Linear/ Monochrome) just to the height maps (Bump) at about 25%. This will help to replace some of the information that has been lost due to having to derive the height map info from the original color maps. Its not truly possible to do it without losing some info at some point so finding a way to replace some of that info is essential. This is why I abandoned trying to derive details like height from color, its just not the same at all.
In a similar manner I might try also try adding a slight Noise filtering to the color maps, but this time even more subtle at 10% and this time with a chromatic setting. Again, just a taste, as we don't want the noise to draw attention to itself but we do want to give the impression that the texture has greater resolution that what the camera is picking up at the current moment.
Some things however are missing, such as the deeper pores at the cheeks, also the fine line wrinkles under the eye. On the hands I believe we are missing the varying types of leather grain on the back of the hand, the bends at the fingers,the knuckles. But some of this could also be the resolution of the posted images.
More suggestions:
1. Try to paint in 3D if you arent already doing so. If that means using Carrara's 3D Paint feautre or some other appliction like Blacksmith, it really helps to work in 3D if you arent already.
2. Create for yourself a set of stock "brushes" you can use to paint skin details as needed rather than trying to derive them all from a photo based skin. These sample brushes should be roughly 512x512 in resolution and fully seamless. The example I have uploaded are samples I drew quickly on regular paper. But ideally you will want these same types of patterns on a transparent .PNG background.
A. Pores- You need at least one brush for tight standard pores. Youll need another where the pores are a little bit further apart for areas like the cheeks to the left and right of the nose where pores seem to be a bit bigger on most people. Often due to stretchin gthe bigger pores on the cheek are not round but elongated and oval.
B. Fine Lines- You'll need brushes that can provide lines over an area. The lines must appear to be somewhat random in distance from one another , length and other details.
C. Cellular patterns- Cellular patterns are key. I created my own by starting with a blank page and just drawing random triangles of roughly the same size and connecting them all until the 512x512 page was filled in. the black lines were the depressions and the white were the flat tops of the cells. I eventually add other features to break up the uniformity fo the white cells to appear more lumpy as human flesh would. You can also derive cellular patterns from vornoi noise generators but you do not want to capture shadows or any direction biases in the cells. More on that in days.
D.- Leather Grain- This is not so dissimilar to the lines, however instead of these lines being parallel they are instead perpendicular to one another, creating the appearance of crosshatches. Often you can create these brushes by simply using your Lines brushes and stacking them at varying angles to become perpendicular creating the final look of a grid. This is for the rougher skin at the elbows and knees. So long as the lines have the correct amount of randomness the resulting crosshatches should look like a grid with imperfect shaped cells.
E. You need to analyze the skin of everyday human beings, to see which areas are driven mostly by pores, or by leather grain effects, and combine and stack the various brushes as needed to create the desired effect within a particular area of the skin. IT IS NOT EASY TO PULL THIS OFF!!!!
F- All of these brushes are considered types of "noise." This is different than the type of noise I an suggesting you add to the overall maps by means of a Noise Filter.
All the best Gregorius!!!!!!!!!!!!!!!!!!!!!!!!!!!!!!!!!!!!!!!!!!!!!
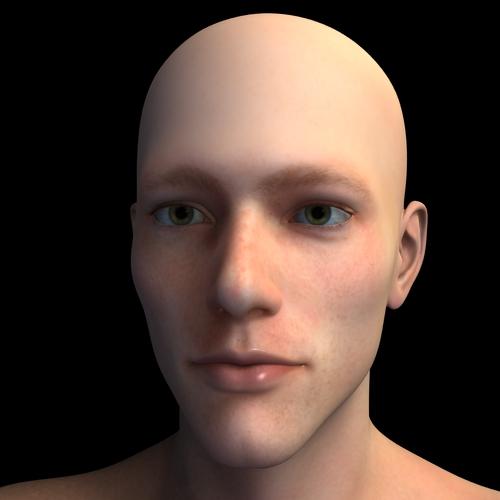
Photo-real characters. A different approach.7 hours?! How? There is no way anything that simple should take that long.
You'd be surprised. Most of it is due to the trans-mapped hair, which tends to really slow down rendering. If the character was bald, I suspect I could've rendered her portrait in about half the time. The quality settings are also rather high overall, too, with 64 pixel samples generally, which of course gets multiplied by Branched Path Tracing values. It may seem like alot, but I've found that anything less fails to reliably produce smooth enough renders. I also activated caustics for an extra touch of realism (particularly on the eyes), though my comparative experiments show that that only adds about 10%-15% to the render times, if even that.
I can't be sure, but it's also possible that all the extra stuff going on in my skin and eye shaders may contribute to the render time. You see, I've rigged the figure so that features like skin color, eye color, and facial/body hair color can all be controlled via parameter dials. For example, setting the Eye Color dial to 2 gives me green eyes, while setting it to 3 gives me blue eyes, and correspondingly, setting it to 2.5 gives me aquamarine eyes. Similarly, a Skin Color dial can go from 0 (dark African) to 3 (light European). This seems like such an obvious convenience that I don't know why more people aren't asking for it, but anyway, this utility requires several more nodes than just a simple material preset. Plus, even without the extra parameters that make the material dials work, I also have three layers of SSS.
Again, I can't be sure how much it adds to render time, though in my experience, complex shaders have rarely seemed to wield much of a noticeable effect (with the exception of some of the more advanced hair shaders). I've certainly been using my elaborate material setup for much longer than what seems like a recent increase in my render times, so the most likely main culprit is still my tinkering with sophisticated hair shaders and more high-quality settings.
Honestly, as long as I'm at least getting closer to something that could pass for a photo, I don't really care if she looks like she has goosebumps. Looking like a real person with goosebumps is better than looking like a CGI model without goosebumps. Of course, looking like a real person without goosebumps is usually better still, but until I've crossed the fake/real threshold (or at least come as close as I possibly can), that's not a major priority for me.Yeah that is still an incredibly excessive render time. and I'm speaking as someone who uses Iray with very mesh heavy transmapped hairs and who also is familiar with with cycles (in blender anyhow where it is definitely faster than iray). Unless your rendering an 8k render or something theres no way a single figure with nothing other than hair and no scenery and no DOF should take that long.
also using 3 sss nodes in cycles is an absolute waste of resourses unless you have actual custom maps for each (and even then its probably not worth it) cycles can set scattering distance per RGB channel (chromatic sss) at least blender can, if the poser version of cycles can't something is deeply wrong.
I also am afraid I have to second the lowpoly comment although low poly may not be entirely the correct word, I would more go overly smoothed and undetailed in terms of geometry. You have before, I believe, mentioned getting your textures to focus on microdetails, however it seems like when you took out the *macrodetails* you never really put them back in anywhere (like the geometry or a normal map). The problem with detail like shadows baked into the diffuse was never that it added to much detail it was that the detail was baked into the wrong place simply removing it doesn't really solve the problem.
And as to the idea that since you're using the same base mesh your morph will have the same detail, that I strongly disagree with. Look at diva's recent render specifically look at the nose or the crease under the eye. Can you really not see the difference in the level of detail in the morph?
If you are truly going for photorealism you cannot say "well I am just focusing on the materials" the mesh is at least as important when it comes down to it.
Daz 3D is part of

Connect
DAZ Productions, Inc.
7533 S Center View Ct #4664
West Jordan, UT 84084Licensing Agreement | Terms of Service | Privacy Policy | EULA
© 2026 Daz Productions Inc. All Rights Reserved.