-
GoZ to zbrush, not keeping mask.
Hello, I recently updated from windows 10 to 11 and did a fresh install so with that I had to install Daz and Zbrush fresh as well. When I was on win10 I could have a model be at a base morph (like freshly loaded in) on frame one of my timeline, I would goz into zbrush and mask out areas I wanted to work on, then I would go back into Daz and go to my last frame and goz with that. This would "update" the model in Zbrush to the version that had all my morphs on it but it would keep the masking I set up earlier from frame zero. After updating to Win11, any time I use goz it seems like it is clearing my zbrush scene and loading the model in as is, losing my masks. This makes it hard to select hair strands and the like if I have them overlapping due to morphs.
I am on Daz 4.23, Zbrush 4r8 p2. My export settings have export at current resolution and export with deformations ticked (I have tried various combinations though with no luck). I have also uninstalled the goz plugin, daz, and zbrush and reinstalled with no luck there. I have also updated the paths in zbrush.
Any help or ideas would be greatly appreciated as this really throws my workflow off. :(
Thanks!
[Released] RSSY Character And Material Conversion Bundle Genesis 8 to Genesis 9 [Commercial]Thanks for the response! I'll keep trying the character product. the others seem very cool. The materials/textures seem to transfer well but I tried everything to get the character transfer working. I'll try it on some other characters... just seems like I'm doing something wrong here. Like others, I found that the morphs which cause the problems are the characters main morph. Maybe your product isn't meant for the custom bought characters with a single morph? I'm not sure. I never tried like standard G8 male or female to see if that works. I'll do that now.
Premier Membership FAQ (Questions Only Please)Cricket said:
This may have already been answered and I just missed it, but if I subscribe and use the Shape Transfer tool to transfer my G8 characters to G9 and then let my subscription lapse, will I still have access to the converted characters? If I understand correctly, I won't be able to access the Shape Transfer tool any more, but what about already converted characters?
Converted characters will be fine. Only Geometry Sculptor (when it is left as a modifier instead of baked to a morph or the like) and Render Queue may leave "live" elements linked to membership, the converters do their job and leave regular content which has no dependency on the membership.
Premier Membership FAQ (Questions Only Please)This may have already been answered and I just missed it, but if I subscribe and use the Shape Transfer tool to transfer my G8 characters to G9 and then let my subscription lapse, will I still have access to the converted characters? If I understand correctly, I won't be able to access the Shape Transfer tool any more, but what about already converted characters?
[Released] RSSY Character And Material Conversion Bundle Genesis 8 to Genesis 9 [Commercial]tvtom100 said:
I bought all of these RSSY products during the Holloween sales but this converter doesn't seem to work at all! I tried 3 different characters (8 and 8.1) and they all created an ugly monster version of the original. :(
If you look at the manual:
The Converted Character’s Body is wrinkled. Because of the way that morphs must be converted, a morph that on Genesis 8 appears to only touch a small part of the head can affect the whole body on Genesis 9. You need to show Currently Used parameters to show all morphs on the converted character. Then, one by one, dial in the morphs to find the offending morph(s). Once you find them, delete the morphs from your HD (click the Gear icon, Parameter Settings, and look at File Path for the asset to figure out where the morph is and what it is called). You should also resave the character with the offending morph(s) dialed out (set to 0).In order to transfer morphs from one generation to another, you need the two characters to match in shape, height, and pose as closely as possible. The script modifies G9's shape to the default G8 shape (using the included "Genesis 8 Female" or "Genesis 8 Male" clone morphs), and poses G9 to the default G8 pose. Once they match, the transfer utility transfers over the morphs and you can save them. However, what transferring means is that the changes between the current G9 shape/height/pose and the morph's shape/height/pose on G8 are what are transferred over as a morph. Because G9 has been changed, the converted morph will "remember" the change in shape, height, and pose as well as the shape changes of the original morph, which can cause problems. This is why, even if the original morph only changed fingernail length or something like that, a converted morph changes the whole body on G9. The script is smart enough to only save the head of a head morph but saves the whole body or figure for all other morphs. This is why small, benign morphs on G8 can cause problems on G9.
I tried the clothing converter which seems to just do the same thing that you can do in Daz3d by default so that's a head scratcher. I haven't tried the Material one yet but so far, I'm super disappointed. I can't imagine paying full price for these tools... unless I'm not using them correctly... but I see from all the comments, everyone seems to get similar results.
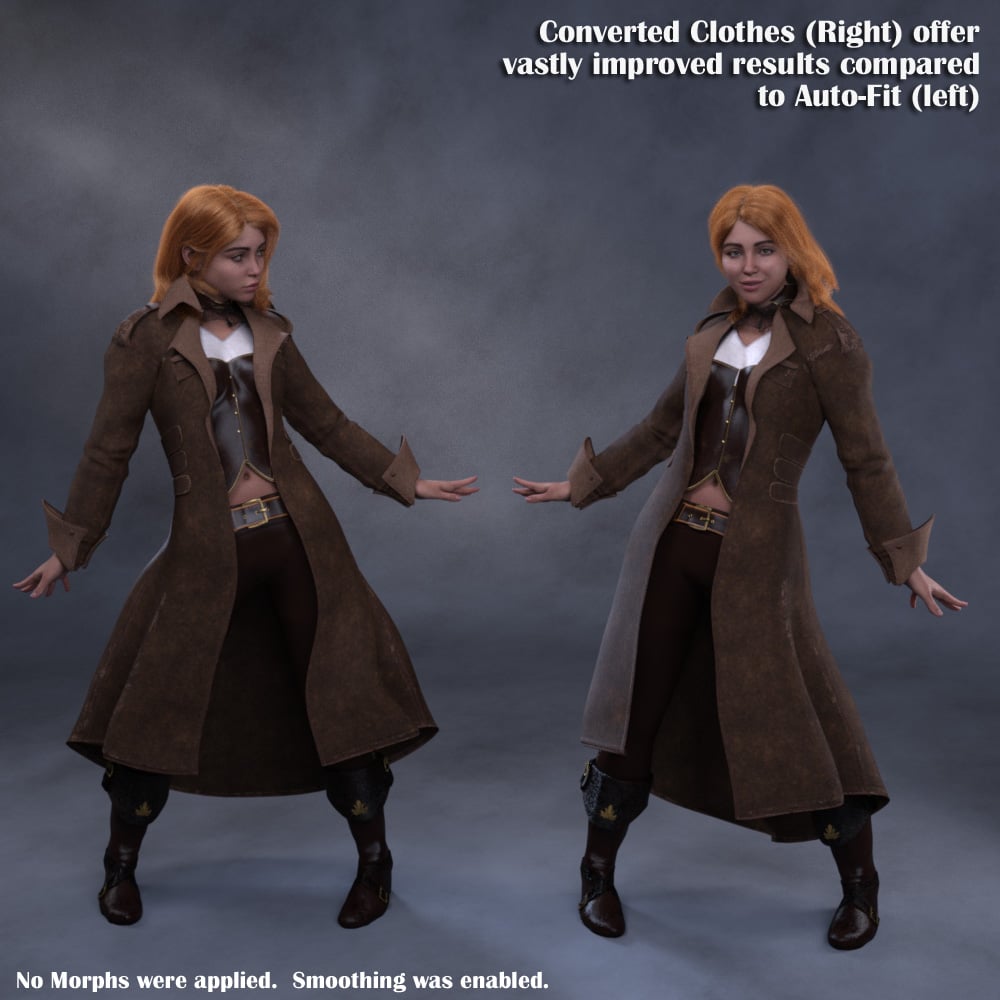
The clothing converter works differently from Autofit. Instead of forcing clothes to hug the body, the converter can use the conformers to detach skirts, jackets, etc from the body:
We have no review process for these products so I just hope people read these posts before spending a bunch of money.
[Released] RSSY Character And Material Conversion Bundle Genesis 8 to Genesis 9 [Commercial]Hylas said:

Ok, it is at the transfer morphs step then. You are selecting "Zero" now that the Zero Figure Shape Action step displays a dialog, correct? If you load the data/RiverSoft Art/Common/RSG8G9CharacterConversionConstants.dsa file in a text editor, change the line that says
var BREAK_POINT = "";
to
var BREAK_POINT = "SETUP CLONE";
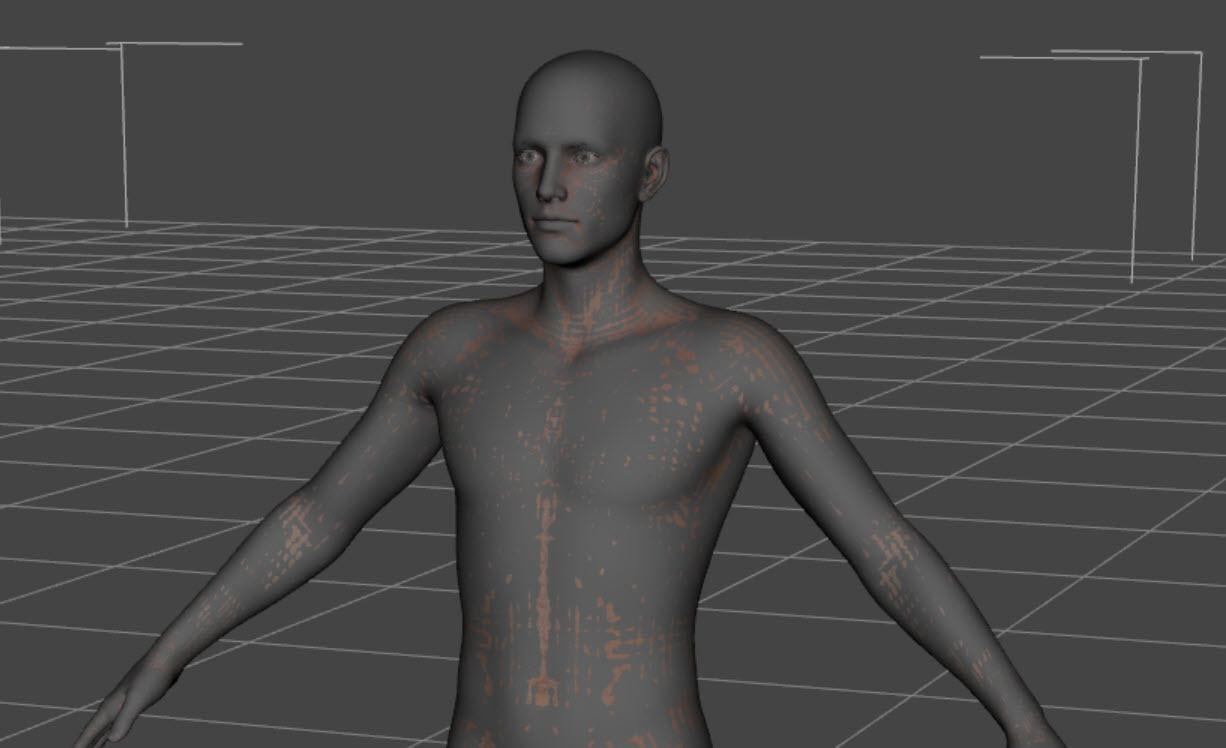
Save, and run again. This statement tells the script to STOP the conversion process right after setting up everything for the transfer morphs step. At that point, your view should look like this (i.e., the G8 figure and the G9 figure should look almost exactly the same and look like the generic Genesis 8 Male.
(BTW, change the BREAK_POINT back afterwards. Otherwise, the script will never do another complete conversion)
Genesis 9 Eyes Pivot Point IssueWell it isn't a morph, something messed up the bones on the character I had saved. Not sure if an update changed something or not (possibly a pose file). I was able to partially correct it by resizing the bones (adjust shape to morph...etc) but my issue wasn't a morph. Not sure about anyone elses. I don't have time to fully track it down. I just started with a fresh G9 and everything is working with all of my morphs back applied.
Genesis 9 Eyes Pivot Point IssueI am having the exact same issue and the morphs on the eyes and the rig are one to one... I tried dialing every morph to zero but with no luck. I am not sure I got every morph so I am going to try it with just the base g9 tonight. If it persists or if I find the eaxct morph causing the issue then I will update the forum. This happend sinc an update in the last week or so. I made some purchases in that time so I will start with those and work my way back.
Clothing not staying fitted to figure when loading sceneYes, if you delete the polygons on a fitted garment, its rigged geometry as well as the dialed morph effect will be destroyed.
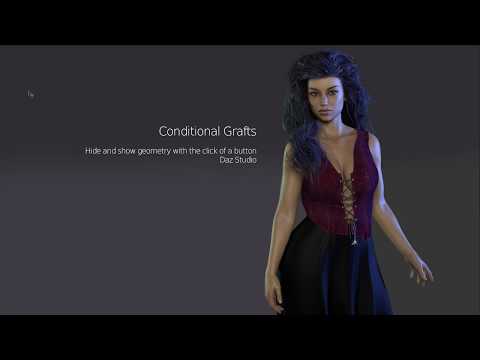
So, never do so on rigged items. Instead, you can easily create Conditional Graft(s) to toggle Hide / Show the designated polygons. Check Mada's tutorial down below:
 Cryptid Heroes Outfit Question
nabob21 said:
Hello,
It is unclear to me in the descriptions for the Cryptid Heores Outfit and the texture expansion (https://www.daz3d.com/dforce-cryptid-heroes-outfit-for-genesis-9 and https://www.daz3d.com/dforce-cryptid-heroes-outfit-texture-add-on) if everyting in these two packages are there to make all of the costumes shwon in the attached promo for the texture expansion set. Specifically, I am wondering if everything is there to make all of the masks that are shown. The Cryptid Heroes Outfit description doesn't really say if the mask is actually morphable like the ones that are shown in my image. Can anyone who has this set let me know if these masks can be made as shown, or if another morph set is required?
Thanks in advance for any replies.
nabob21
Ah, i realized i bought them and never used it... To answer your question, yes, evrything you might need to generate the costumes/uniforms/outfits is present in the product so you are ready to go.
Cryptid Heroes Outfit QuestionHello,
It is unclear to me in the descriptions for the Cryptid Heores Outfit and the texture expansion (https://www.daz3d.com/dforce-cryptid-heroes-outfit-for-genesis-9 and https://www.daz3d.com/dforce-cryptid-heroes-outfit-texture-add-on) if everyting in these two packages are there to make all of the costumes shwon in the attached promo for the texture expansion set. Specifically, I am wondering if everything is there to make all of the masks that are shown. The Cryptid Heroes Outfit description doesn't really say if the mask is actually morphable like the ones that are shown in my image. Can anyone who has this set let me know if these masks can be made as shown, or if another morph set is required?
Thanks in advance for any replies.
nabob21
Script to export geograft morphsRichard Haseltine said:
Well, what he does (if Auto Follow was turned off before fitting) is stop the morphs from being projected into the fitted item as temporary morphs, so he can then add permanent properties with the same name which will follow the settings on the base and will exist to be exported. However, those new properties won't do anything so I am not sure how that helps.
I haven't gotten as far as testing the exported FBX, but I did solve recreating the steps in the video:
First, set a var for the node you want to add the property to. In my case, i called it primaryNode.Then, turn auto follow off:
oProperty.setCanAutoFollow(false);Then, add it to your desired node:
primaryNode.addProperty(oProperty);At this point you've replicated all the steps from the video. I don't yet know whether it's effective, as you said.
That being said, I'm still running into the naming issue. I'm finding these properties using
oProperty = oPropertyGroupTree.findProperty(sProperty);and if that fails, then
oProperty = oPropertyGroupTree.findPropertyByLabel(sProperty);But as I said, it will find "Some Morph Name" on the first pass, but then in subsequent passes I get the "DZ_NON_UNIQUE_NAME_ERROR" error for names that use the first name as a suffix, like "Some Morph Name More 1" and "Some Morph Name More 2" etc. I assume some issue in the core code with regex, although I'm continuing to examine my own code to see if I have created this issue somewhere.
LI Wolfsbane Fur - Lycan 9 / Addon / Pelts - Usage Help & TipsHey everyone! I’m here to share some insights and tips on using the LI Wolfsbane Fur products for Lycan 9, including the base fur, addons, and pelts. I know a few users have had questions, so I hope this helps you get the most out of these products!
Firstly, this was a massive project. What you see out of the box is just the foundation—the fur system can be pushed far beyond the initial presets. If you’re interested in diving deeper, exploring DAZ’s dForce Hair features and experimenting with custom density maps will really unlock the potential here. I designed it to strike a balance between performance and flexibility, making it adaptable to a range of system capabilities.
When working with the LI Wolfsbane Fur, you’ll notice two UV options:
UV BMU (Base Multi UDIM): This setting uses the Genesis 9 UVs, making it compatible with standard Genesis 9 textures. If you’re blending the fur with textures on other Genesis 9 characters, this is the way to go.
UV LYCAN: Specifically tailored for the Lycan 9, this UV setting aligns with the unique texture layout of the character, allowing for detailed fur placement and precise masking.
Why does this matter? Choosing the correct UV setting is essential if you plan to use Density Maps for customizations, like masking specific sections or achieving that “Mange” effect in some presets. Density Maps depend heavily on UV alignment, so selecting the right UV will give you more control over the fur’s appearance.
Some features may seem like “extras” that aren’t immediately necessary, but they’re there to enable advanced customization. If you want to push creative boundaries, try layering different fur regions or experimenting with density adjustments. The fur system is especially useful for characters wearing clothing—custom density maps can “hide” fur in specific regions to avoid overlap.
I’ll be honest, the biggest challenge I couldn’t fully resolve was creating smoothly blended edges. Unfortunately, DAZ doesn’t yet allow density maps to control hair thickness, which would have been ideal for creating more seamless transitions. Still, the potential of this product is huge, with plenty of flexibility for creative adaptations.
Notice:
One of the biggest challenges in crafting the LI Wolfsbane Fur - Lycan 9 product was managing fur density across Lycan’s unique anatomy. Due to the significant morph adjustments that the Lycan 9 character applies to the Genesis 9 base shape, areas like the feet, ears, and snout experience spread-out fur density when additional strands are simulated.
This is influenced by both the UV layout and surface area (cm²) in each region, which can create variations in fur distribution. To address these challenges, additional assets were developed to enhance fur coverage in these areas, ensuring a consistent, natural appearance across the entire figure.
For the best results, keep the fur assets for these regions in Root Radius Mode. While this limits certain simulation options, it preserves the original grooming shape and form, ensuring optimal coverage and detail in tricky areas.
Tips & Tricks for Getting the Best Results:
Tip 1: To push the fur beyond its default limits, use Target Surface Mode in the dForce Hair Simulation settings. This setting unlocks the full functionality, generating additional fur strands for a denser effect. I recommend using Target Surface Mode primarily for the full-body fur simulations. When adding extra fur pieces from the Addon pack, switch to Root Radius Mode to keep simulations more manageable.
Tip 2: Start by applying the Wearable Presets. These presets provide a solid foundation, with essential fur settings already applied. They make it easier to build and customize your look.
Tip 3: Use LI Wolfsbane Fur - Lycan Coat as your base fur layer, then layer on LI Wolfsbane Fur - Lycan Culled to add variety. Adjusting the Culled fur settings can create lighter, flyaway strands, resulting in a natural, layered effect that enhances the appearance of the fur.
Tip 4: Hierarchical Material Compatibility – Hierarchical materials work seamlessly across all assets loaded onto Genesis 9 or Lycan 9, with a couple of exceptions. You can only have one of the Lycan Coat variants (standard or Alt) loaded at a time for hierarchical materials to apply automatically. If both are loaded simultaneously, manual adjustments may be required to achieve the desired look.
Tip 5: Understanding PR and PS Settings in dForce Hair Generation
PR (PreRender): This setting displays simulated fur strands only in the final render, which is useful for animations as it saves on viewport performance while preserving full dForce detail in the output.
PS (PreSim): This setting allows you to see the simulated strands live in the Iray Viewport, making it ideal for static renders. You can make real-time adjustments, which is especially helpful when fine-tuning for still shots.
This is just the starting point! If you have any questions or need additional guidance, feel free to reach out. I’m here to help you unlock the full potential of these products!
Released : "Drops Generator" (Commercial)Sorry guys I did not answer I had an emergency for my dog, and I could not be online... Well let's see what's new here ;)
Thanks for the feedback. Happy to see you like the morph stuff. Feel free to mix and combine for more variety :) Ah, and you should always find morphs to ajust size, thickness, width and length (for drops), I tried to make it as versatile as possible. Happy rendering :)Choppski said:
It's incredibly cool. So many potential uses, and somehow I had missed that the drops and drips had morphs, or that there were props. Really cool.
I hope you'll have fun with it, feel free to share images or ask questions if necessary :)MissLeah said:
It's in my cart right now! I can't wait to have some time to play!

Great ! I understand you used big drops, it goes well with the mood of the image :) And I'm delighted to know the shaders work for filament too... Gosh, if I had known I would have mentionned it in the description..... Thanks for the feedback. And yes, I agree, filament is wonderful for render times :)Artini said:
I have not changed the shader at all. For my purposes is ok.
The speed of rendering in Filament is unresistable and unbeatable (almost instant, max 2 seconds).
I have made such a big drops to see them better.
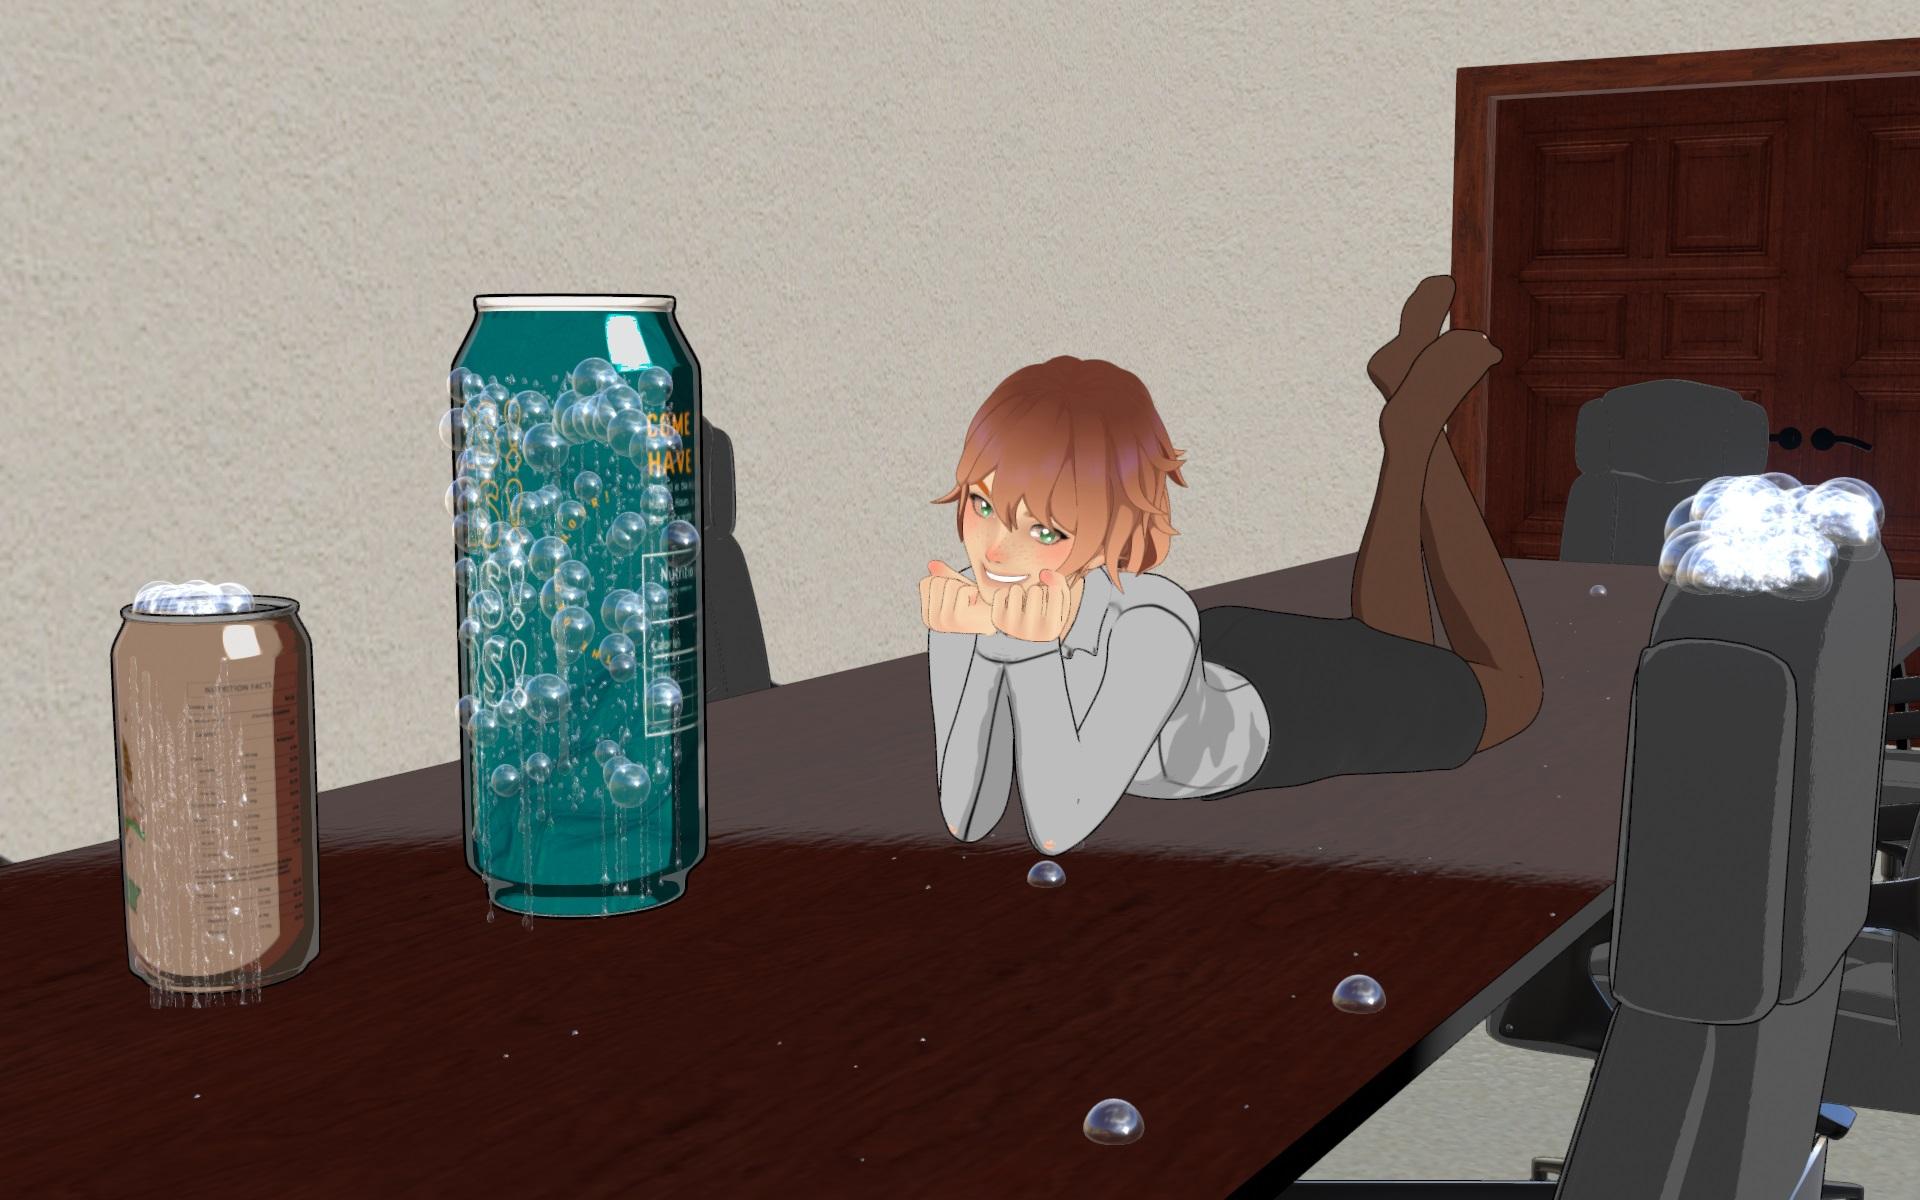
THANK YOU for your tests! Hurray for the Generators in 4.21. Normally they are the most complex scripts, the others should work too in 4.21, let me know if it is not the case.Elor said:
V3Digitimes said:
If anybody has a way to test it on 21 and it works - or not, feel free to let us know.
I was able to create drips and drops with the corresponding script with Daz 4.21, but didn't test the other scripts.
Script to export geograft morphsRichard Haseltine said:
I haven't watched the video (a description of waht youw ant to achieve would be helpful) but copying a proeprty won't help if you are wanting to project a matching morph into a graft - that is a modifier (which will be driven by a property but is rather more than a proerpty itself). If the graft is close-fitting to existing mesh then you will get the projected morph when the morph on the base figure is set and just need to make it persistent, otherwise you would need to create a new morph for he graft.
The gentleman in the video is using the Golden Palace geograft as an example. I have been attempting to replicate the results in script using this shark tail resource which is a SFW geograft:
https://www.daz3d.com/shark-tail-for-genesis-8-and-81-femaleFirst, he opens the settings on the morph he wants to export and unchecks the "auto follow" box. He also copies several of the parameters such as name, label, type, and other settings to notepad.
Then he selects the model, goes into Edit Mode, and clicks "create new property". Property type is "float".
He pastes the params from notepad into his new property. He then clicks "create".
He then clicks on the parameter settings for the new property, and checks the box for "auto follow".
After these steps, he is able to use "FBX to Unity" successfully. I am not exporting to unity, I am exporting FBX 2020 Ascii if that matters.
So, I thought there would be two possible avenues to tackle this in script:
1. Replicate the menu actions that the video describes using script (not sure how to accomplish this)
or
2. Find a more direct way to copy/move the morph to the main model that satisfies the requirements for FBX export
Question about tasha 8 fangsProduct link https://www.daz3d.com/tasha-8
The file list include a fangs morph, but not a preset. So if you load a G8.1F and go to Parameters > Actor > Head and search for fangs it will come up and you can dial it in.
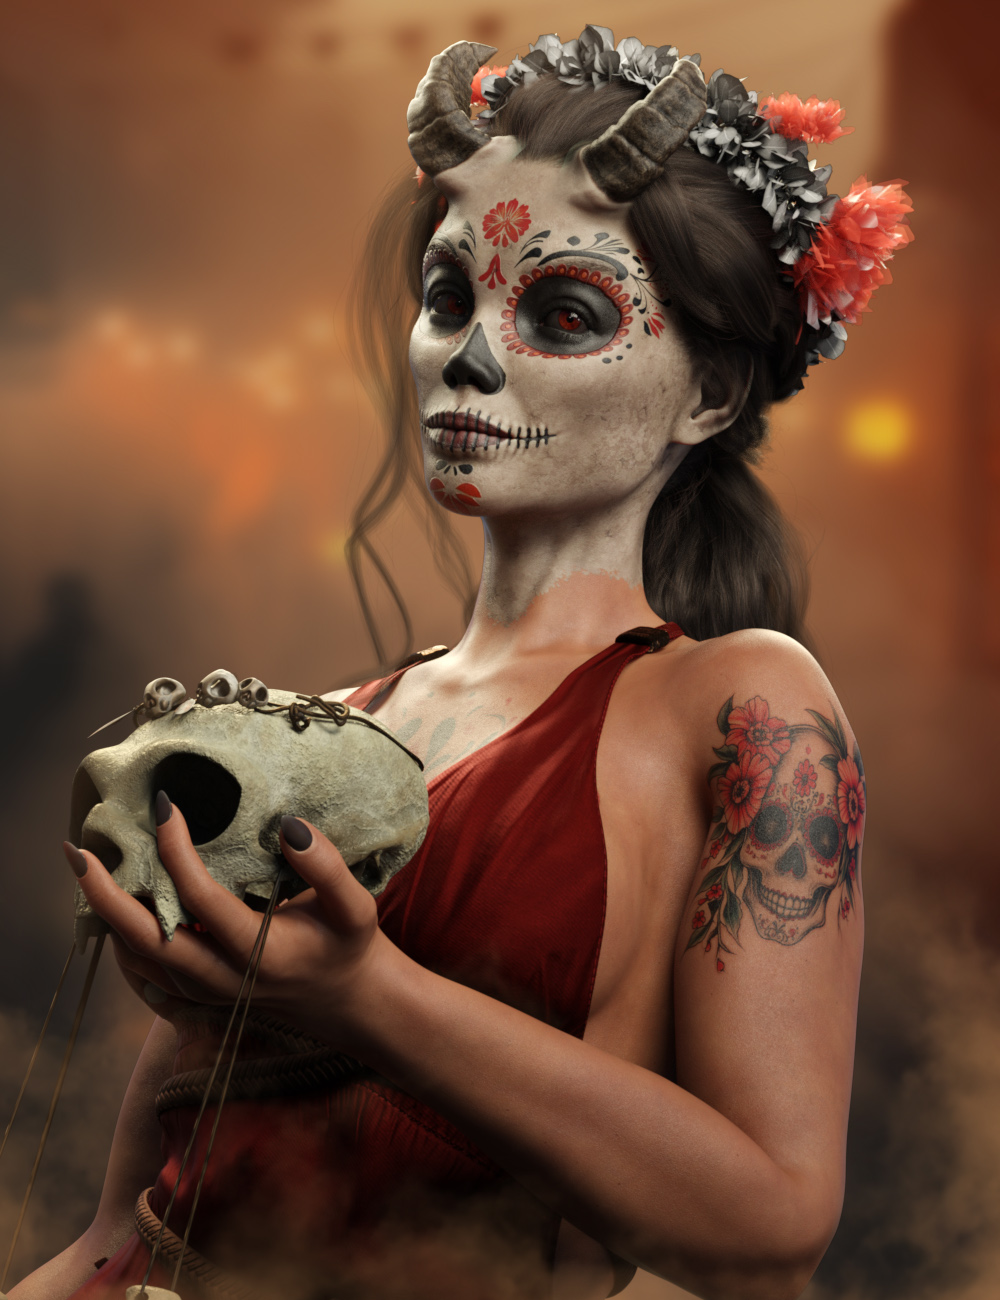
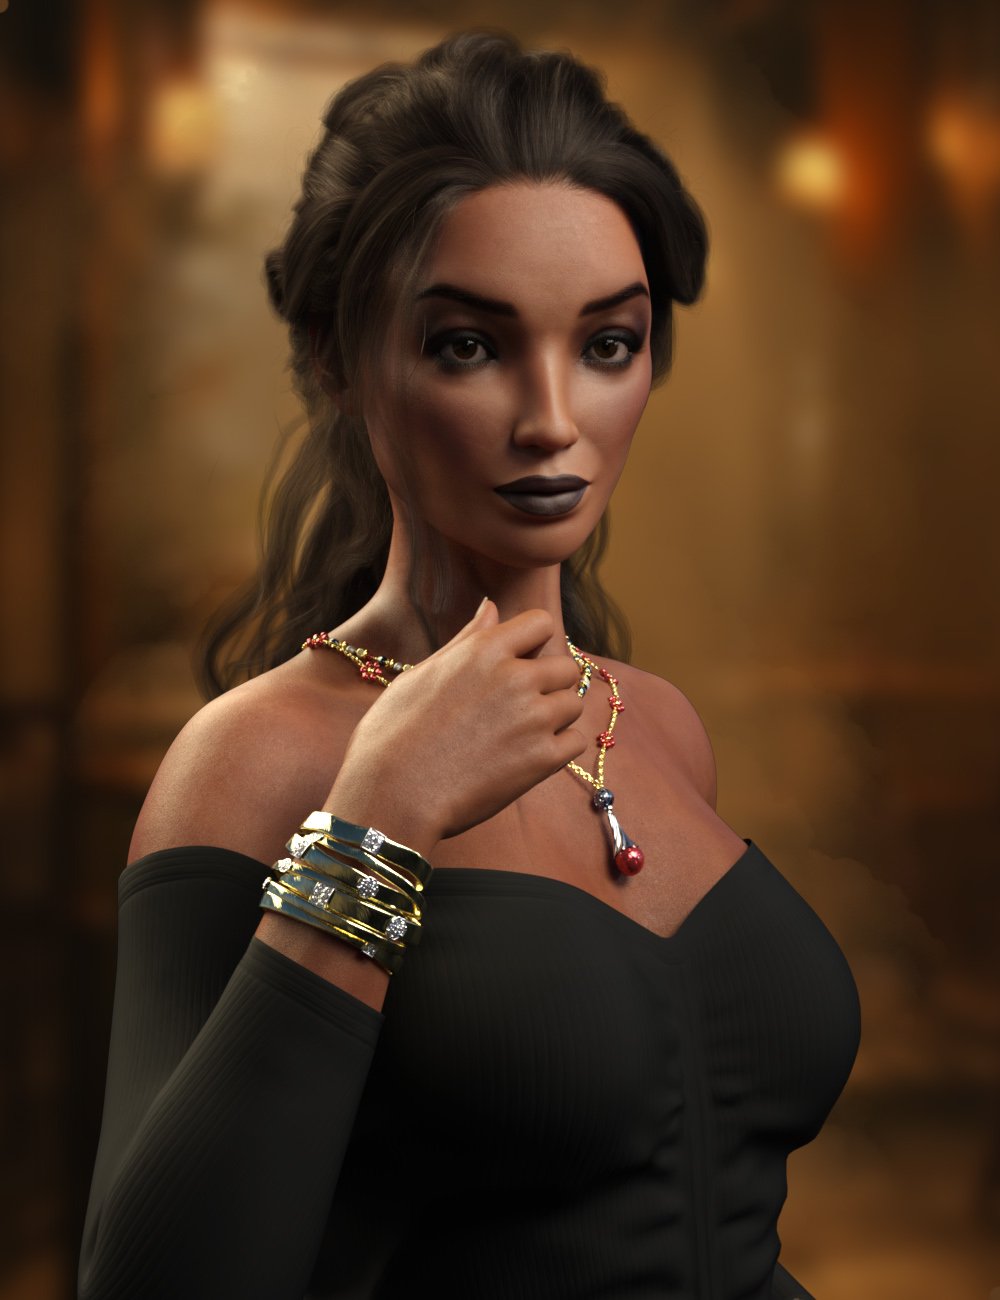
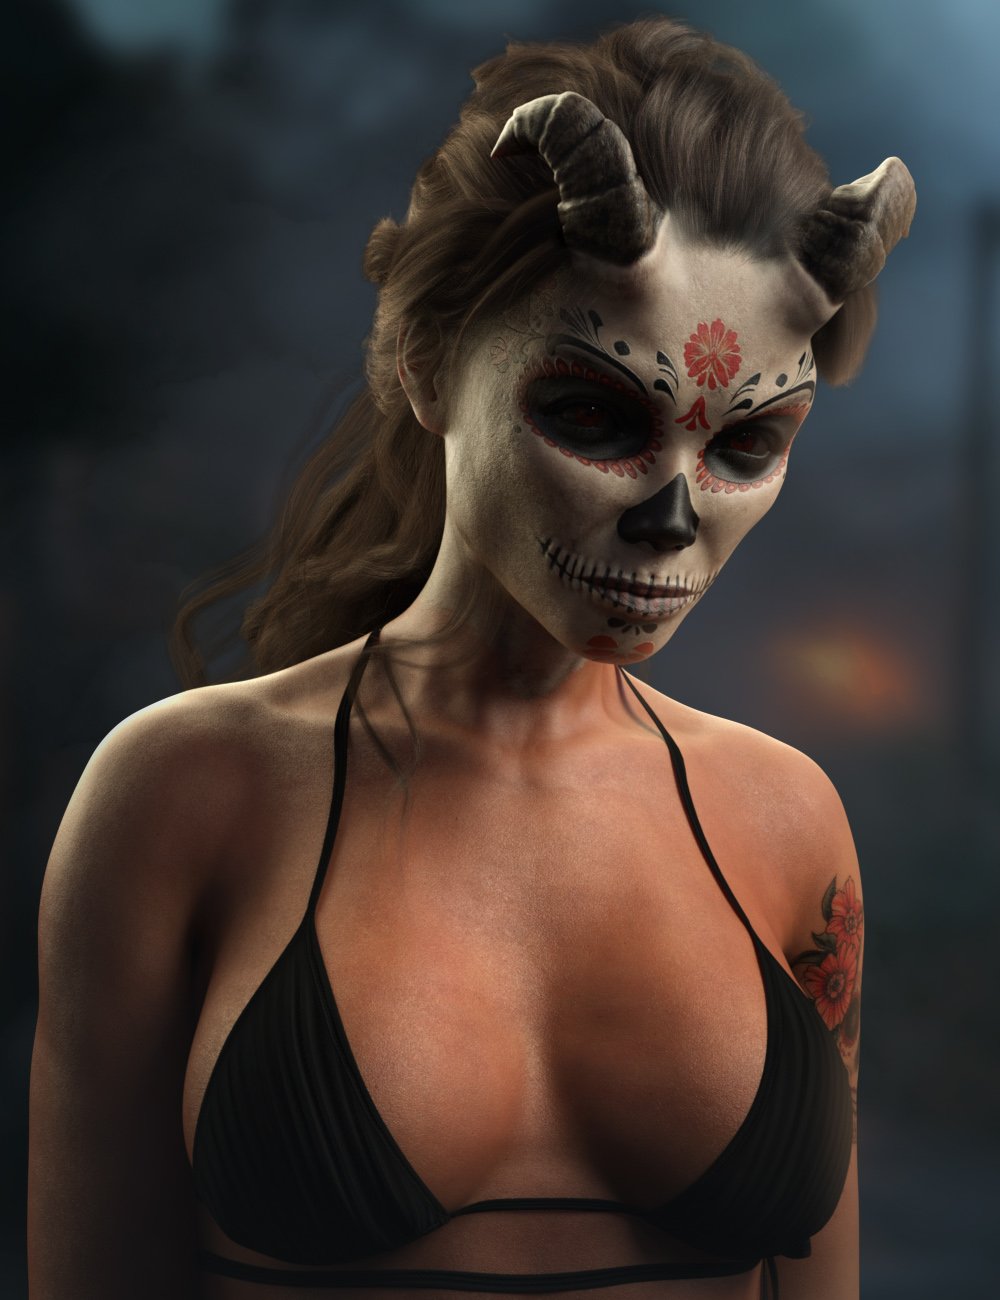
CalaVeera for G9 [commercial]CalaVeera for Genesis 9
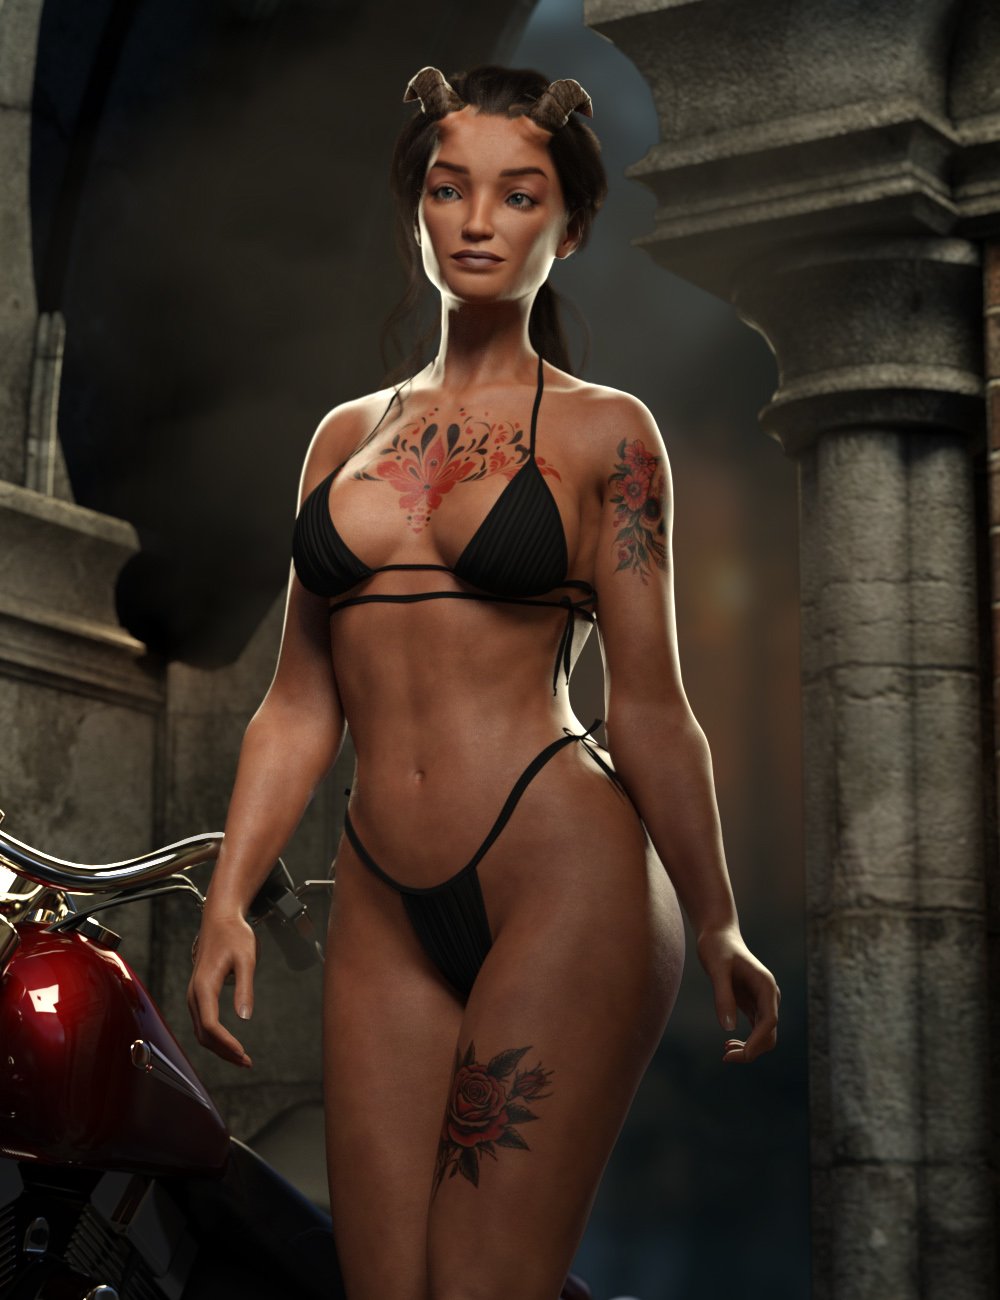
https://www.daz3d.com/calaveera-for-genesis-9CalaVeera is a demon in woman form who comes out during Día de Muertos holiday celebrations.
Makeup variations can turn her from a proud powerful woman, who enjoys the Day of the Dead festival, and ultimately a skull faced demon with horns.
CalaVeera Horns are a geografted figure with pose dials included to adjust into a variety of shapes.
Separate head and body morph dials allow easy blending with other Genesis 9 characters, to create some really unique characters.
CalaVeera comes with High Definitions morphs, Ultra Realistic textures to really bring this character to life for your renders
What's Included and Features
- CalaVeera for Genesis 9: (.DUF)
- CalaVeera Demon Character Preset
- CalaVeera Woman Character Preset
- CalaVeera Demon Shaping Preset
- CalaVeera Woman Shaping Preset
- CalaVeera Horn Details On Preset
- CalaVeera Horn Details Off Preset
- CalaVeera Skull Details On Preset
- CalaVeera Skull Details Off Preset
- Wearables:
- CalaVeera Horn Wearable Preset
- Material Options:
- 01 Full Skin Mat with Female Anatomical Elements
- 01 Bare Face Material Preset
- 04 Face Makeup Material Presets
- 01 Arm Tattoo Material Presets
- 01 Chest Tattoo Material Presets
- 01 Leg Tattoo Material Presets
- 07 Eye Material Presets
- 04 Nails Material Presets
 Fit Control for Genesis 8 (Commercial)
nabob21 said:
I have removed the files that were duplicates and re-installed the Fit Control Add-On but still have the crashes when certain characters remain installed. Herre is the latest log file.
Hi Nabo21, I had a problem that seems identical to yours, though in my case, it also coincided with an upgrade (I upgraded again, but it did not eliminate it).
Tried to remove a character you suggested, but before even trying if it was only that character, I found a workaround (hoping Zev0 is not going to kill me and somehow change the product so the workaround stops working :-P :-)), thanks to an old post in which Zev0 indicated how Fit Control (for G2, I think, but it is the same principle) worked.
If the morphs are correctly installed, they are in reality loaded with the character, just not visible. In the parameters, there is a "hidden" folder - in reality, the morphs you can see there, are not really hidden, but if you use the menu in the "preferences" tab (top left corner) and select "show hidden", you will see the fit control morphs are there.
Once that is the case, you can just select them as "favorites" (the little heart), then use the transfer utility to transfer them from the character to the clothes you want to apply fit control to. If you want to do it for a bunch, or all of them, better pass into "edit mode" and select multiple, that way you can "favorite" them at once.
In basic terms, you would be doing manually the work the the script does.
Of course if you transfer all them and then want to "clean up" becomes a tedious long work, because the scripts from Zev0 normally do all the work for you, and it seems even you untick the "hidden", they still stay hidden (but I did not yet try saving the scene and reloading it), so, it is far from being as good as Zev0 scripts, and I would suggest you really transfer only the morphs you need for the specific clothes.
But at least it works and is better than the alternative I had got from DAZ. Their idea, after a "peer review" of my ticket (worked in helpdesk in the past, loved that one :-)), was to blame it to my database not being in the default location, and tell me I had to remove every daz related, full library included, and reinstall everything, which means thousands of assets, many of which cataloged by myself, and without giving me any way to save and restore that information.
Luckily I work in IT, so, I could see what their indication relly meant :-)
Hope this helps, even if it is only a workaround and not a real solution.
DAZ and Blender Animating.I will hijack this thread for my own questions:
- If you do diffeomorphic transfer and get rigged character into Blender, then animate in Blender using the default rig, is that animation transferable back to Daz? E.g., by fbx export?
- Are JCMs maintained through transfer to diffeomorphic so that the animated figure in Blender will roughly match the figure in Daz Studio when applying the animation in Daz?
RRRR - Weird Holiday Traditions Render Contest *CLOSED*acb said:
Pull#1:
- Undead Creature Creator HD Morph Pack for Genesis 3 Male #34857
- 8bit Retro V2 #58873
- Cb Clementine Corset And Choker For Genesis 8 And 8.1 Females #85649
- Dforce Liberty Grace Outfit For Genesis 8 Female #54203
- LB: Spr Ob Suit Jacket For Genesis 8.1 Female #85996
- LB: Dforce Flirty Bow Dress For Genesis 8 Female(s) #53187
- LB: dForce Succubus Armor Outfit for Genesis 9 #93499
Tag:acb#01
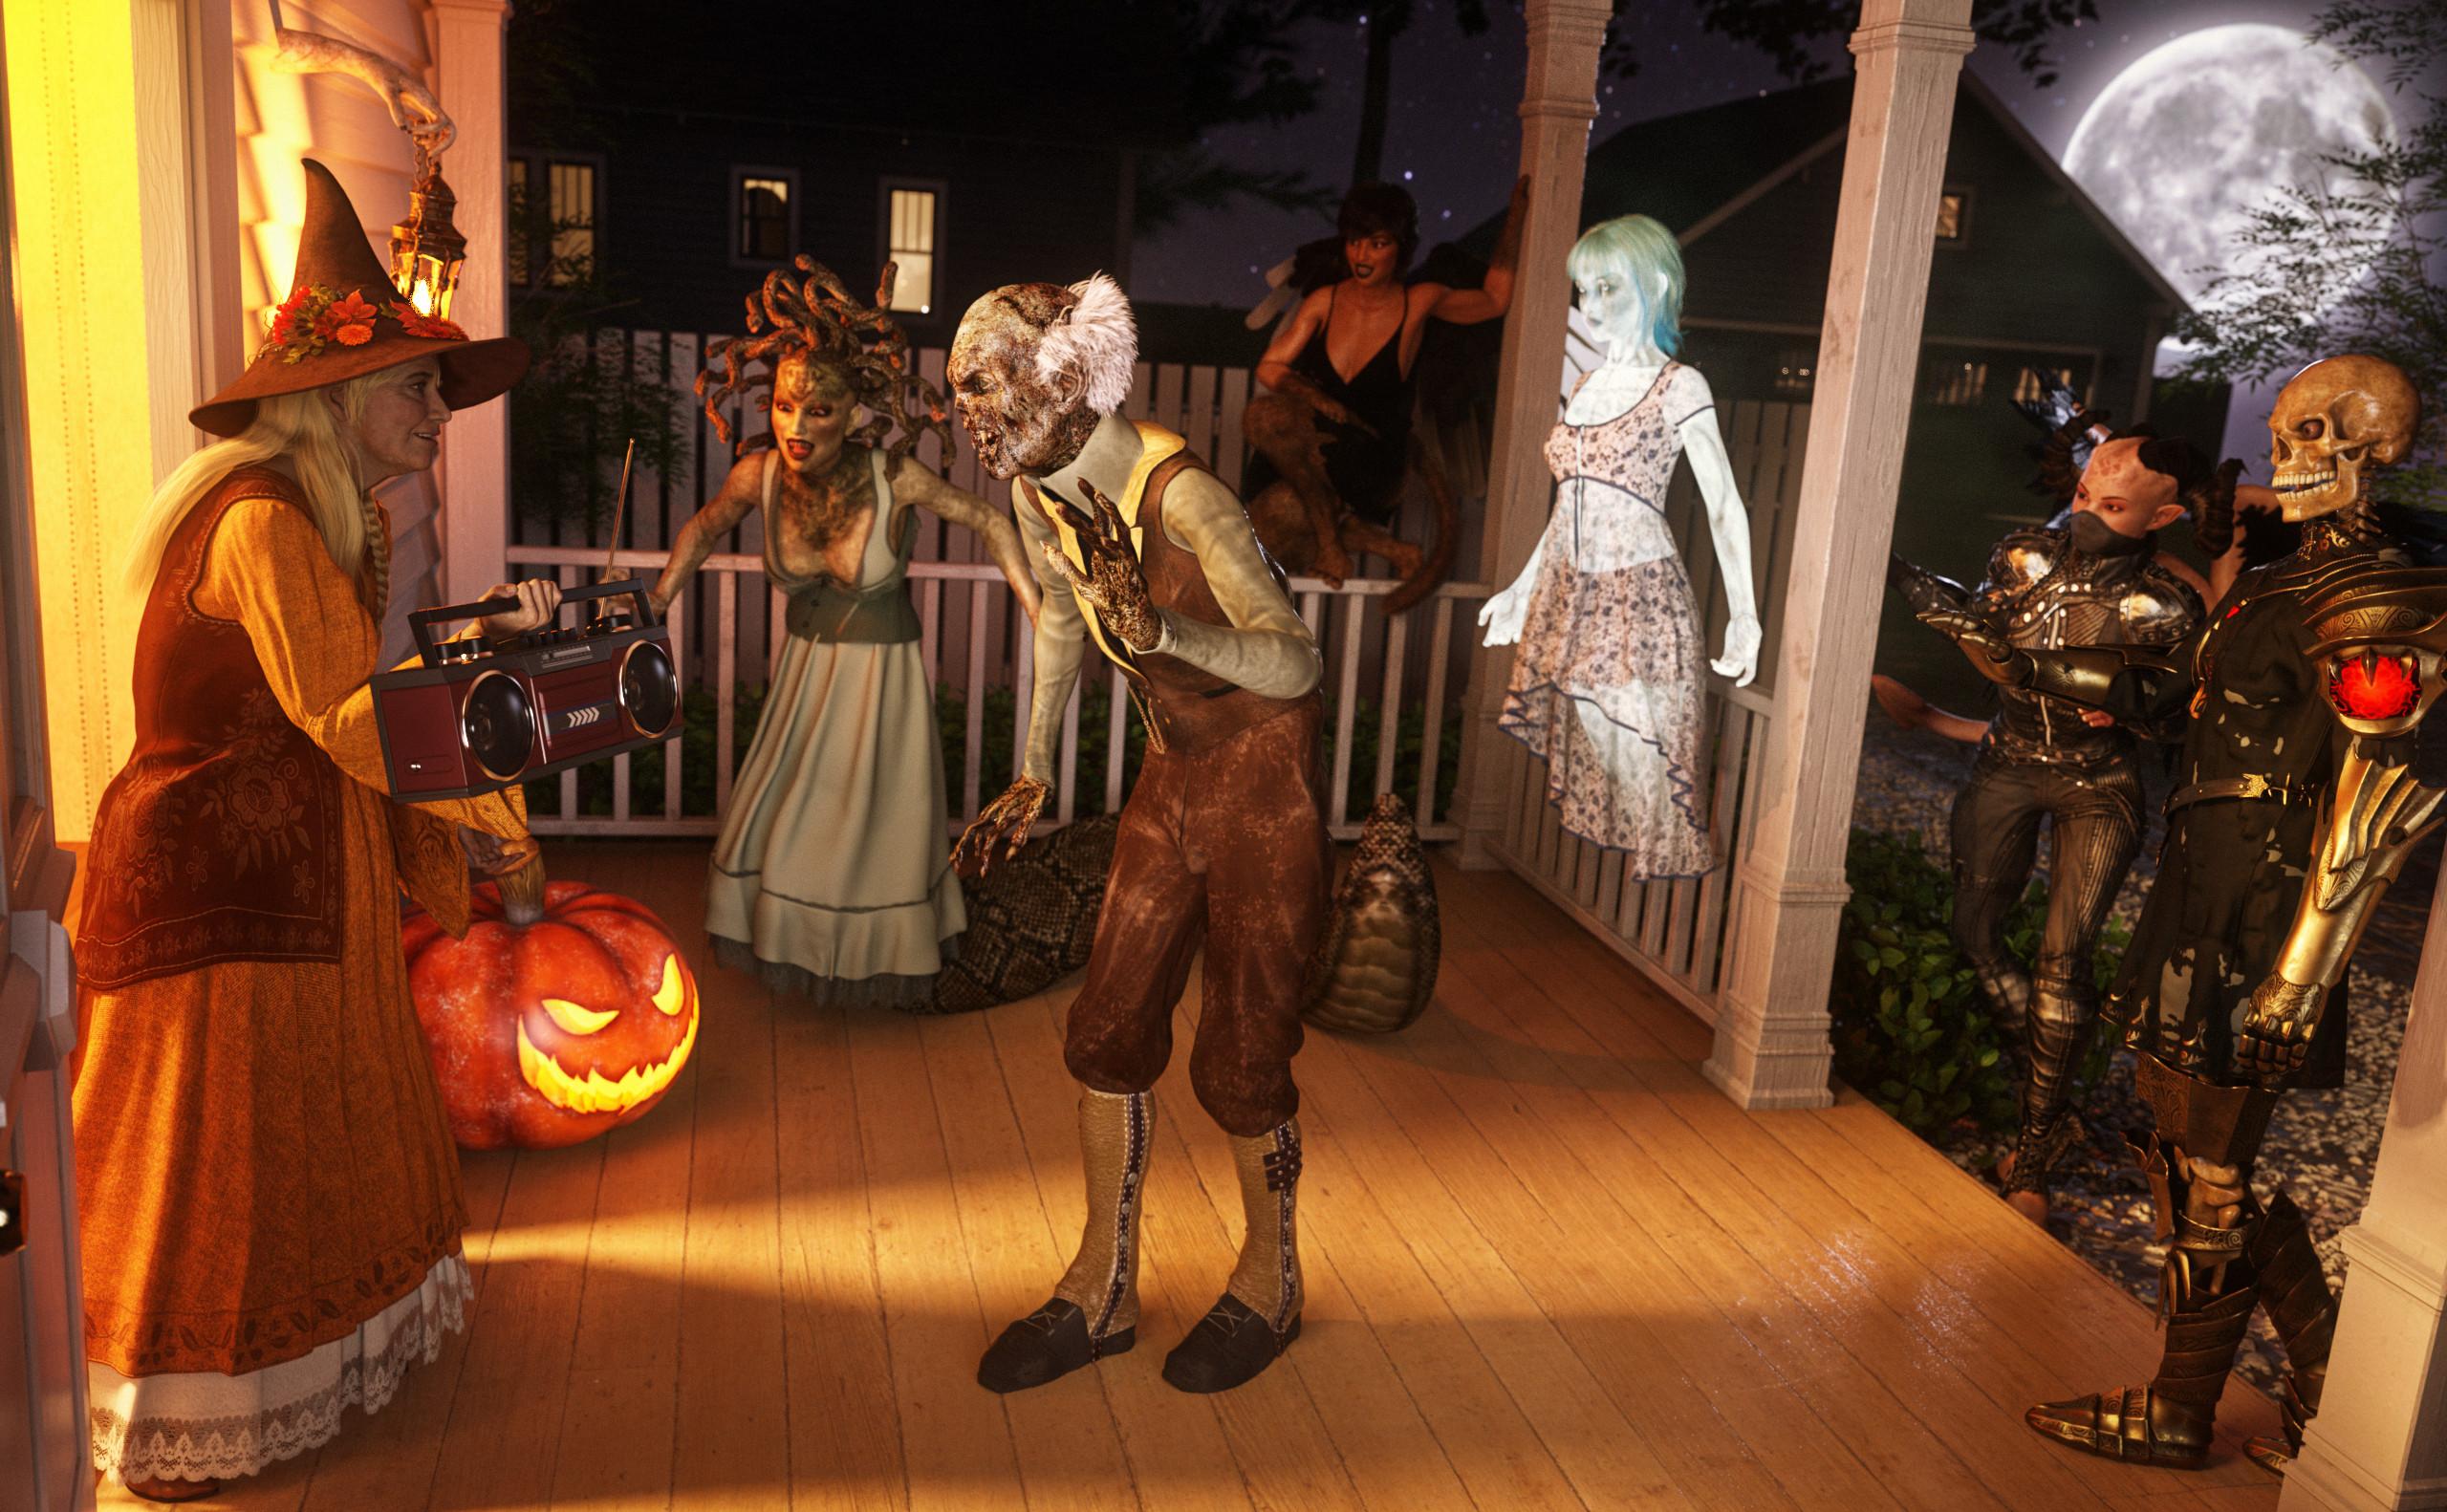
Halloween
Zombie Bert had been wondering for a few years why the humans always dressed like normal people at the end of October and went from house to house. And in return they were given something to eat at every door they rang.
He wanted that too!
This year Bert got his friends together to also go from house to house in normal clothes (apparently everyone has a different idea of what normal clothes are).
And the whole thing was a great success. But the best part was at the Fletchers. There they got 80s tech instead of food.Bert and his friends do this every year from now on.
Daz 3D is part of

Connect
DAZ Productions, Inc.
7533 S Center View Ct #4664
West Jordan, UT 84084Licensing Agreement | Terms of Service | Privacy Policy | EULA
© 2026 Daz Productions Inc. All Rights Reserved.