-
Modeling Objects in Carrara - Q&A - Come One and All
http://www.versluis.com/2014/10/creating-morph-targets-in-carrara/
a tute I found googling that explains it better than I can
thanks
Modeling Objects in Carrara - Q&A - Come One and Allhttp://www.versluis.com/2014/10/creating-morph-targets-in-carrara/
a tute I found googling that explains it better than I can
Modeling Objects in Carrara - Q&A - Come One and AllHi,many nice 3d objects in this thread
havent done much modelling in carrara, except tried it once and offcourse architools plugin
question:isnt it easier to make an animation when the model is made inside carrara, rather imported it from for example hexagon?
so first you make the 3dmodel and set keyframe at first frame,second you go to frame x and deform your 3dmodel and set new keyframe
M
it does not matter where the model comes from but to keyframe vertex changes you need to create morph targets in the vertex room or alternatively rig it
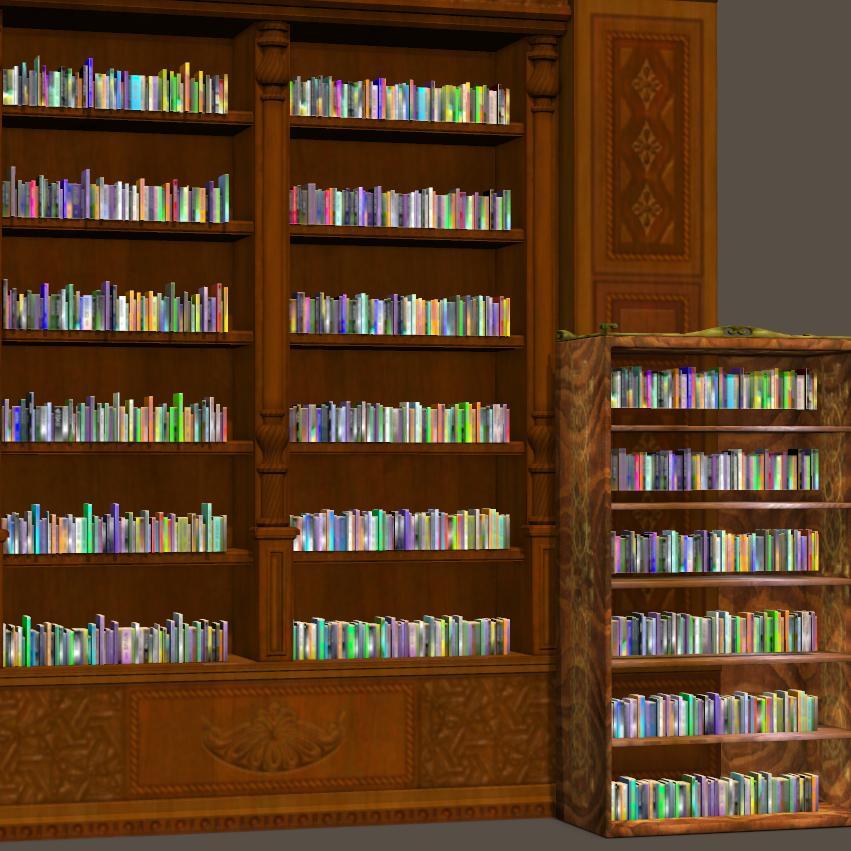
Books for those empty virtual bookshelves - and stacks tooThe basic idea for the six rows works - here they are in the bookcase from The Study (here in the DAZ Store) and in seachnasaigh's bookcase (FW2009) freebie from ShareCG. Just the three dials shown in the previous post (plus X,Y,Z, translation) used to put the booksinthe shelves. The small paperbacks look a bit out of place in the study's bookcase - a size morph (like the 'A4 Size' one in the original book row) would probably help. A more classy selection of books would probably also help - so that'd be a new texture.
As I suspected not all bookcases have evenly spaced shelves, so the 'Shelf Separation' morph may need a rethink. (Edit: something as simple as a 'Fine-Tune Shelf # Height' morph for each shelf should do the trick)
Also the book rows don't fill the shelf width,although I could adjust them to do so using the standard 'X Scale' dial. I realized that the 'Random' morphs in the original book row prop change the overall width of the book row, but in this new six row version they don't. Not sure which is preferable.
Several things to think about on this (suggestions welcome!) - off to bed now.
 Books for those empty virtual bookshelves - and stacks too
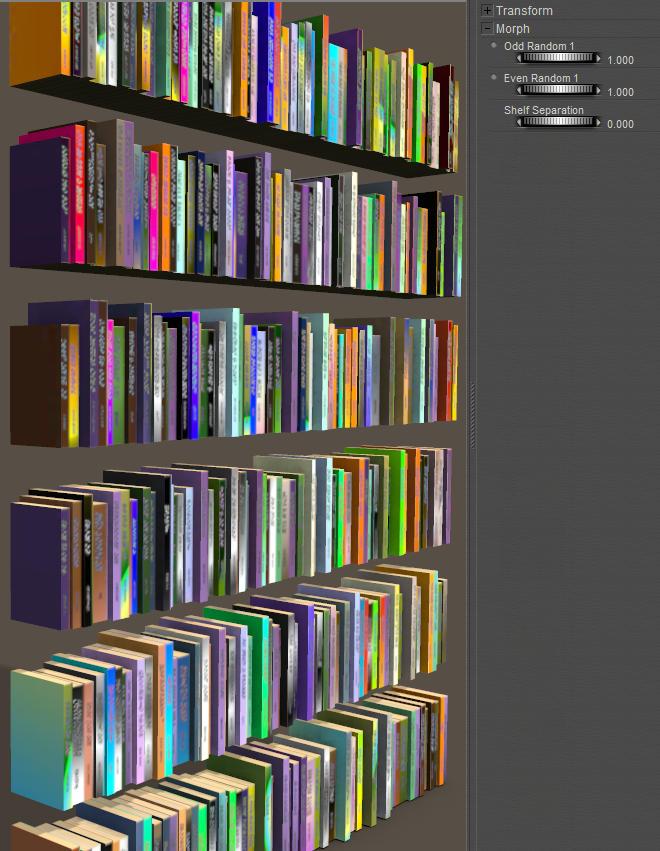
I'm playing with the six-rows-in-one prop for filling a whole bookshelf in one go. I've had a little bit of a rethink on the UV mapping, and I now have a single prop containing 364 books (6 rows, each with 64 books). 3072 vertices / 2304 faces in total (i.e 8 vertices / 6 faces per book). And it's all mapped onto a single 2048x2048 JPG.
So far I've added 'Odd Random 1' and 'Even Random 1' morphs (similar to the single book row already released) to give a bit of interest, and a 'Shelf Separation' morph
Here's a couple of renders to show where I'm up to, plus the texture map (I found a nice gobbledigook font on my system, so I just cut and pasted some random text for the titles/authors. Each spine is only 300x32 pixels, so there's a limit to how fancy you can get with the spine designs .But with 364 of them to do I think simple is best)
At the other end of the scale I'm playing with a single 8 vertex/ 6 face book with all six sides properly mapped.
The varying dimensions of books and magazines mean that separate props might be the best way to do single standard paperbacks, thick paperbacks, magazines, etc. Or perhaps morphs plus alternative UVs - but afaik that can't really be done in Poser, although DS is fine I think?
And I see no reason that the book rows can't be used as CDs, videos, etc as well - so further 'CD size', 'VHS Size', etc morphs may be handy (and I should probably retrospectively add those to the already released single book row)
WHAT IS THE "PRODUCT" FOLDER!?!?!? SOLVED!Ahhh! Great Rivhard! Bellieve me, I thought exactly the same thing. Well I explain you.
My characters are FBM G3 based, not new characters asset (for now)
Usually I do my character morphs using the standard procedure for sell, and, in the save moprh asset menu I write all infos, included the PRODUCT. All this exactly cause my vendor name is Max-S. Ok. Probably, and here the issue, sometimes ago I save a character morph but I forgot to change the name that DS use as default (Product) and never I changed. Probably DS remember that and do this for me, or 2nd idea could be I change some path. Anyway the Morph Asset menu to save my characters usually I don't touch. Yesterday I tried to remove that folder "product" and everything works ok, just to re-save the morph in the right way and it's ok. Later I will try to put my package in a new DS again to see what happen. In the new DS for test I will install G3F only (my characters is for G3F based). I see in my "product" folder that seems like. Sonds like DS made a duplicate. If you need more infos tell me.
Note : In the product folder there are many of the FBM, eCM, clones and so on that I've installed time before (I' don't use them anyway cause my morphs I'm going to modelling in ZBrush, so removing that folder and give the right path works well) and that "product" folder is in my Max-S vendor folder where are all my characters.
WHAT IS THE "PRODUCT" FOLDER!?!?!? SOLVED!The Product folder gets its name from the Product name in the options dialogue when yousaved the morph (or figure) asset. Are those all your own morphs, or have you created a new figure asset from the base Genesis 3? It does sound a bit as if you've done the latter, which wouldnm't be the correct way to handle anything you wish to sell or share (and isn't a good diea on general principle). Please describe what you did in creating your product and it may be easier to see where the issue is.
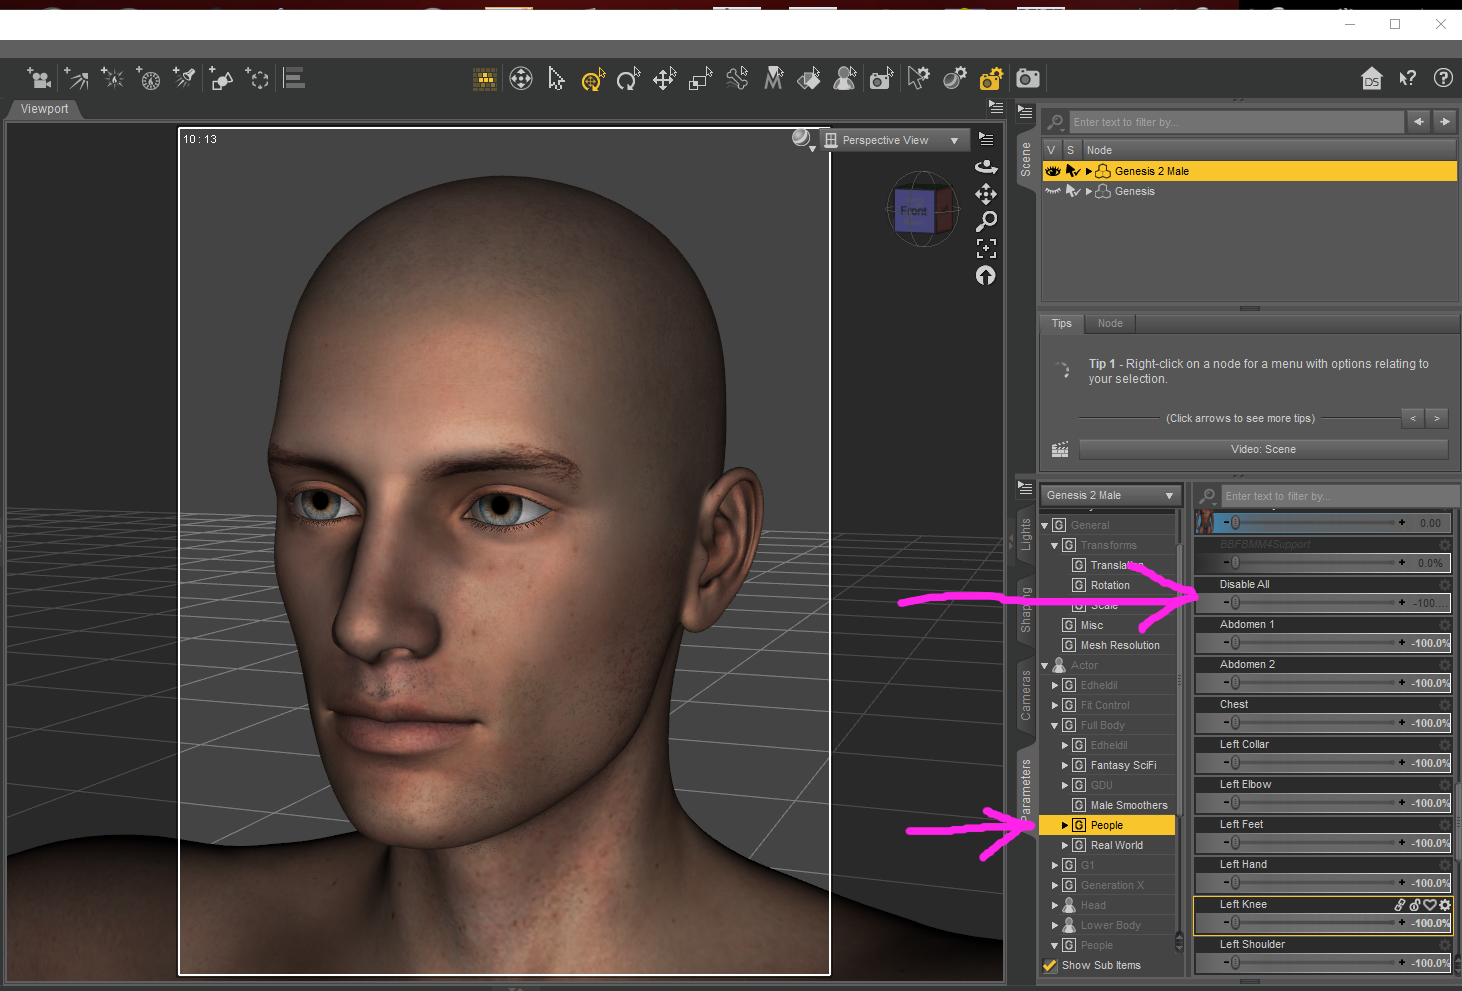
GenX2 - Need HelpJust found the G2M Disable All morph, in Full Body - People. Have no idea what it is related to, had a look in the data directory for clues but had no joy, if anyone else knows, please let us know.
I also tried using the method as outlined by MN-150374 on page 1, give it a go, it saves having to locate the Value files and tick the corresponding boxes. https://www.daz3d.com/forums/discussion/comment/2189421/#Comment_2189421
body hair for CC Foster (genesis 8 male)I don’t own the character but I suspect the problem may be with the HD morph. If there is a separate dial for the HD details, you could try dialling out the autogenerated morph in the fitted hair products to see if it helps.
converting V7 (G3) UV/displacement maps to V4 - possible?hello there!
I have some Ultra-real displacement maps for V7, which I'd like to transfer to V4. problem is...you know...those maps are quite different. is there any tool that might do this, or is my only option is hours and hours on photoshop and hoping for the best?I've heard there is some converter tool, but I couldn't find it for all my digging in the forums depths.
Babies with adult headshttps://www.daz3d.com/growing-up-for-genesis-8-male-s
https://www.daz3d.com/growing-up-bundle-for-genesis-8-female-s-and-male-s
Just morph to a baby ,then the head neutralizer morph might help.
GenX2 - Need HelpThanks, Bunyip02 for taking the time to help.
After your reponse, I thought that maybe I needed to transfer Scott first. So I added him to my scene. Then I said to get the values from the character in the scene. The only morphs that had values were under character. There was one that was set to 1 but showed no morphs, so I might not have selected that one, but maybe I should have. In any case, I got a morph. It would make my character big, but didn't make it look like Scott. That's why I think I should have included the one that was set but didn't show anything in the morph column. Why is it set, if there aren't any morphs? I'm thinking it must comtain some morphs. But there were no values set under head.
Then I thought that maybe I should just load Genesis 2 Male and dial the morphs in myself. So that's what I did. I had to dial the head morphs in first so they had values and dialed in the body morphs. I then transfered the character. I ended with a morph that does appear to be Scott, but I can only dial it to about 0.5. At one the character becomes massively muscular. More than Scott is.
The laughable part is that after I did all that, I found that there already is a morph for Scott's head and body that either came with G3M or came with some other product that I bought.
So anyway, I know what to try to see if I can get Dusty to come over now.
Thanks, again.
With some of the morphs they will be located in the (region) Actor of the GenX morphs instead of the head, so it pays to have a look through the different regions.
For my V3/M3/A3/H3/V4/M4 morphs I export the figure once setup as a cr2 file, then load the cr2 file into GenX, followed by a search of the regions in GenX to find the morphs that have been transferred over. I did try saving a Genesis 2 figure as a cr2 out of curiosity but DAZ Studio crashed on me.
GenX2 - Need HelpThanks, Bunyip02 for taking the time to help.
After your reponse, I thought that maybe I needed to transfer Scott first. So I added him to my scene. Then I said to get the values from the character in the scene. The only morphs that had values were under character. There was one that was set to 1 but showed no morphs, so I might not have selected that one, but maybe I should have. In any case, I got a morph. It would make my character big, but didn't make it look like Scott. That's why I think I should have included the one that was set but didn't show anything in the morph column. Why is it set, if there aren't any morphs? I'm thinking it must comtain some morphs. But there were no values set under head.
Then I thought that maybe I should just load Genesis 2 Male and dial the morphs in myself. So that's what I did. I had to dial the head morphs in first so they had values and dialed in the body morphs. I then transfered the character. I ended with a morph that does appear to be Scott, but I can only dial it to about 0.5. At one the character becomes massively muscular. More than Scott is.
The laughable part is that after I did all that, I found that there already is a morph for Scott's head and body that either came with G3M or came with some other product that I bought.
So anyway, I know what to try to see if I can get Dusty to come over now.
Thanks, again.
Finding texture maps for Freak characterAre you sure there are no UVs? There is an issue with Daz humans and ZBrush - ZBrush doesn't, or didn't, natively hnadle UDims and stacked UVs - where the body is split into surfaces which use different maps, each taking the whole of the UV space. It is possible to work around this, but you do need the surface groups (instead of the bone groups as shown in your image) - you need to check the Mats as Groups option (frorm memory) in the ZBrush OBJ import options.
With the Freak model, I have searched extensively on my C: drive and can not find any UVs for it unless they're embedded in another file. I can find the UVs for every other model I've checked for though.
The different colors of the polygon groups in the Freak model image above might also be surface groups. The color separates mid-thigh for shorts(the 2 colors on each thigh are very similar but separate polygroups) and seem to conform with where the clothing starts and stops. Attached is a "morph to UVs" screenshot from ZBrush. In ZBrush under Texure I can press "new from UV map" and its something similar but seemingly random colors that don't represent the Freak coloration either.
Also attached is a Daz dinosaur that I had no problem assigning its texture to in ZBrush. In addition, a screen shot inside Blender of Stonemason's Urban Future with the textures applied manually(a couple maps in the wrong place on purpose). There is a video tutorial that I have yet to get to that I believe shows a non-manual, more automated way to apply the Daz model textures in Blender. The maps show up in the viewport but I had to create nodes and assign UV textures for them to show up in a Cycles render.
More Non-photorealisitic Renders (NPR II)Trying sketch rendering in Unity of the freebie: MCS female by Morph 3D (division of Daz 3D)
https://www.assetstore.unity3d.com/en/?stay#!/content/45807
 SereneNight's Sci-fi Fun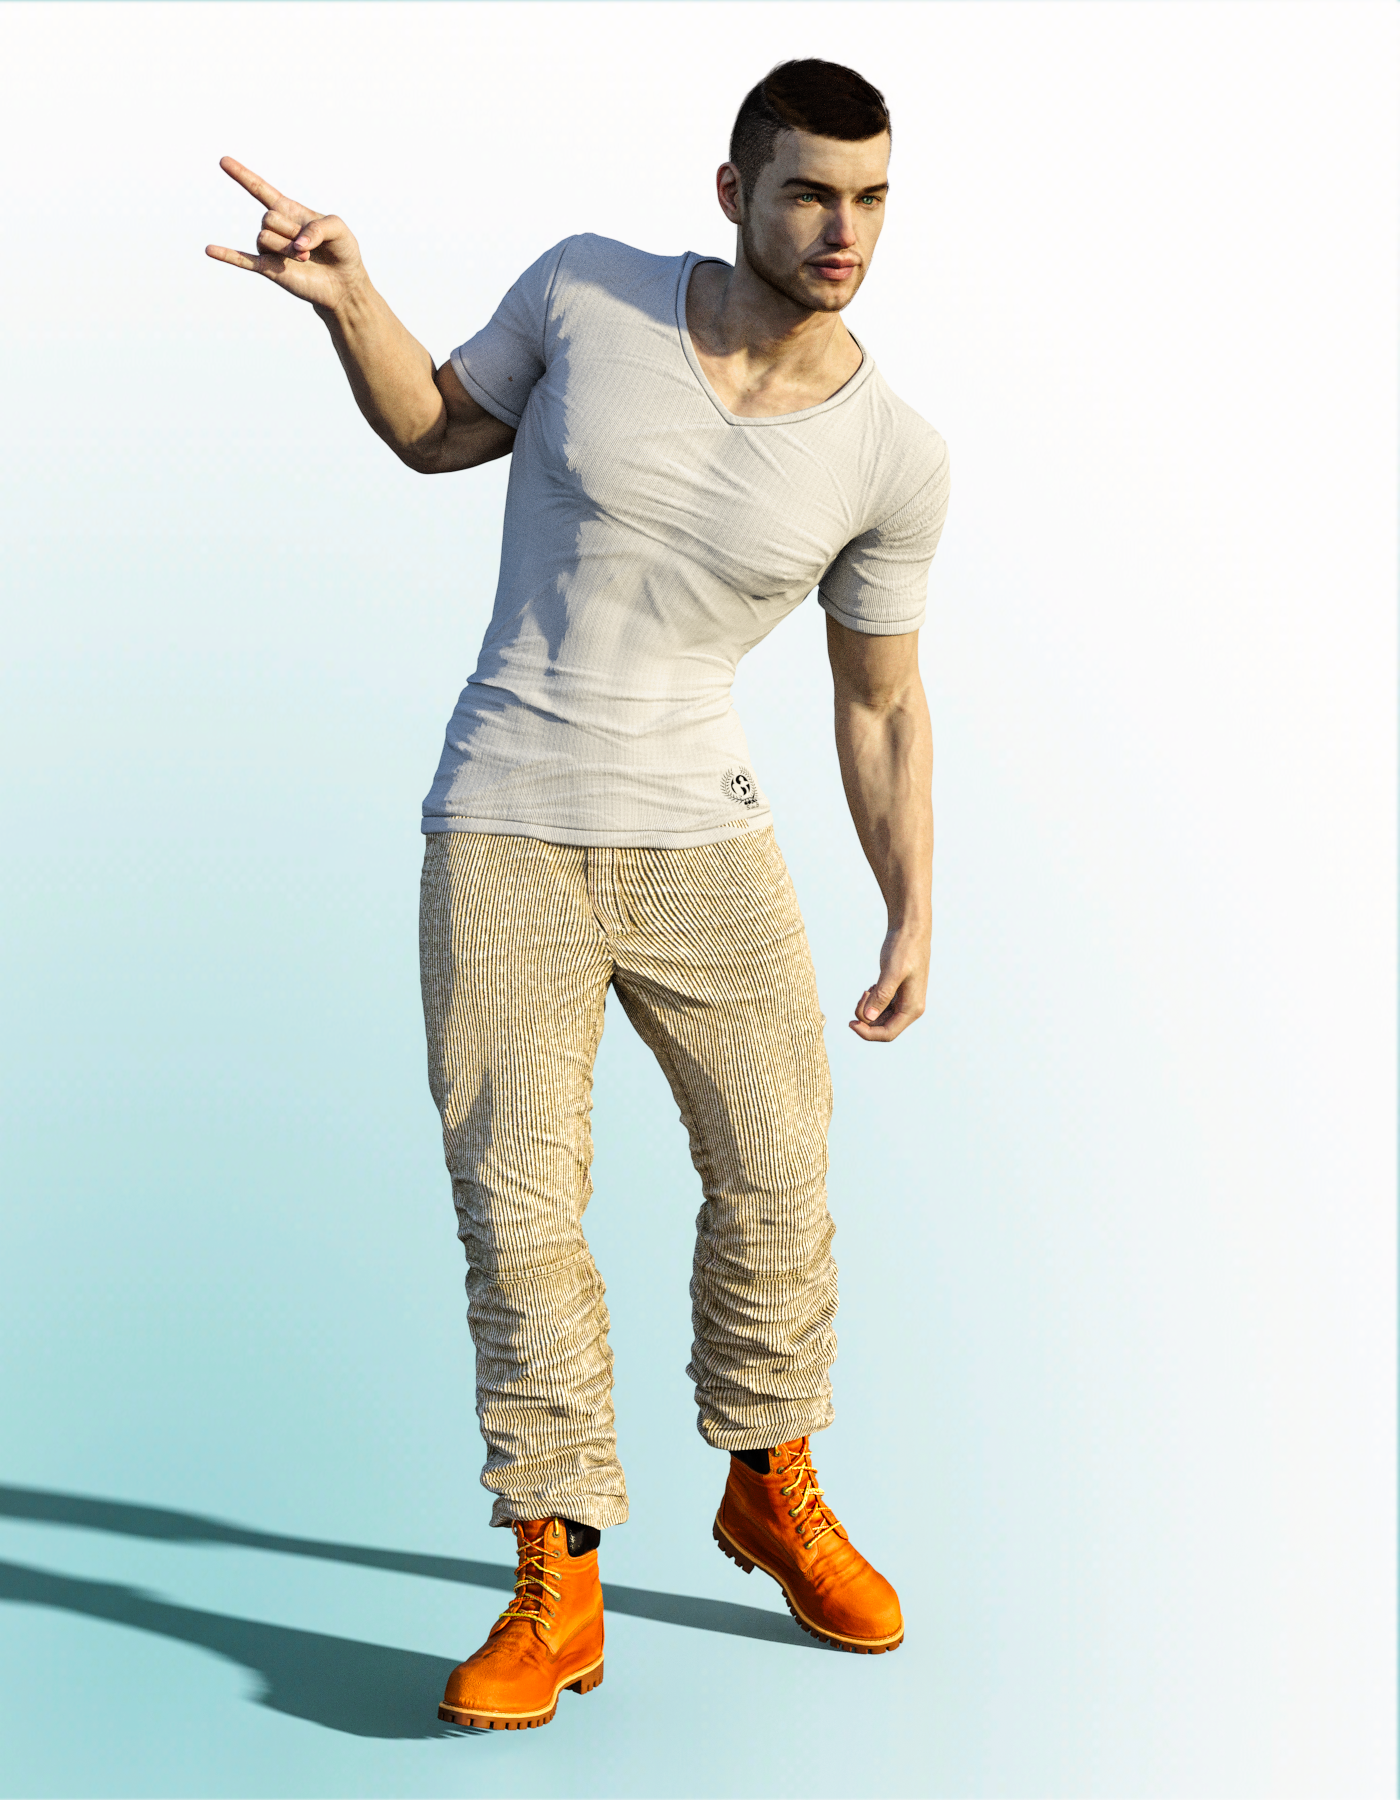
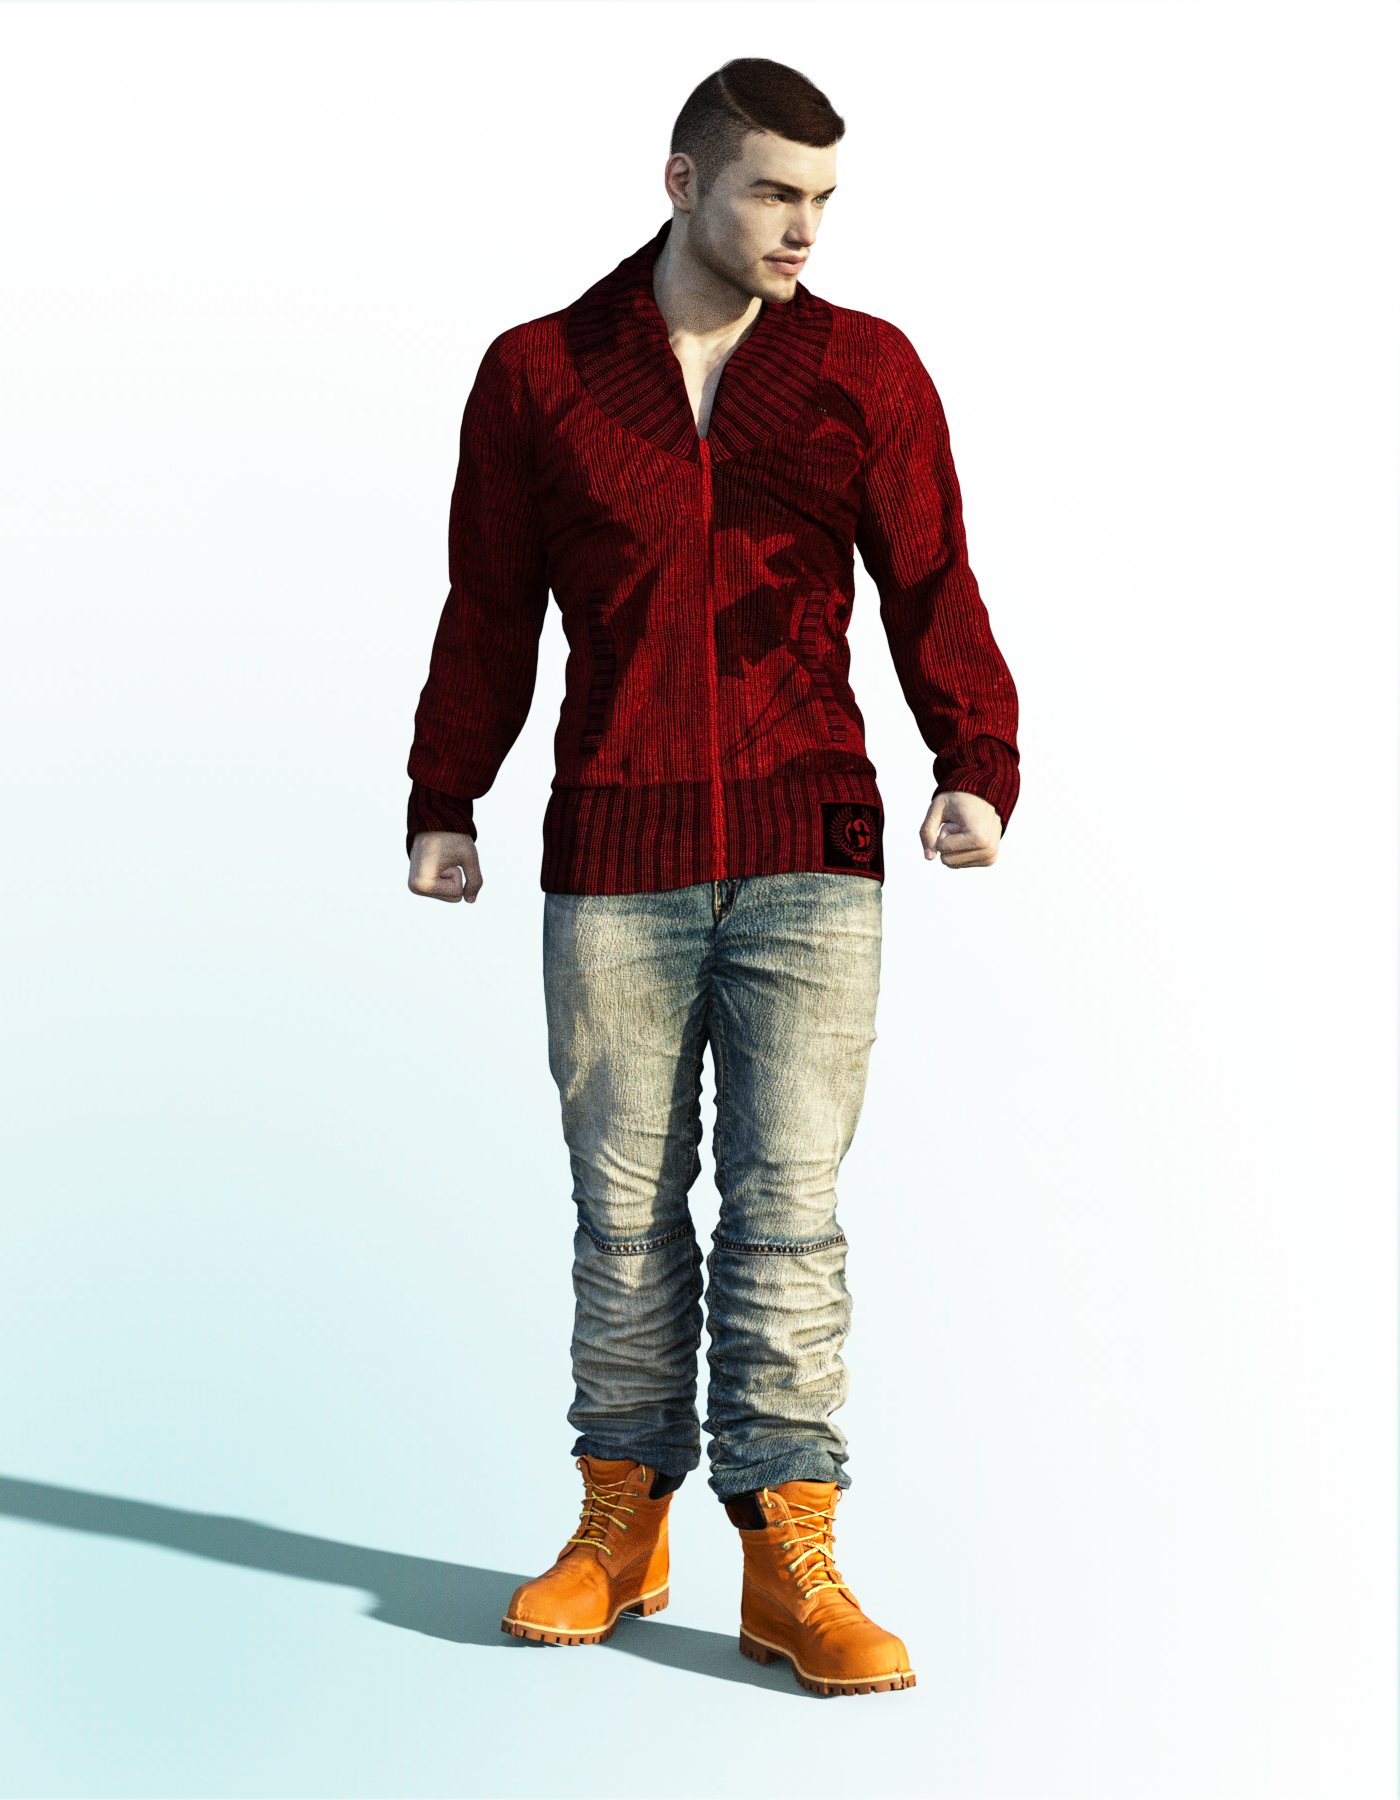
Jumper & Tim
4 pieces, shirt, pants, boots, and jumper. Really nice fit, flattering style and the boots have an 'open morph' The pants are great, and have tons of textures so you can make them look like jeans or work pants. I would grab this set in a hearbeat.
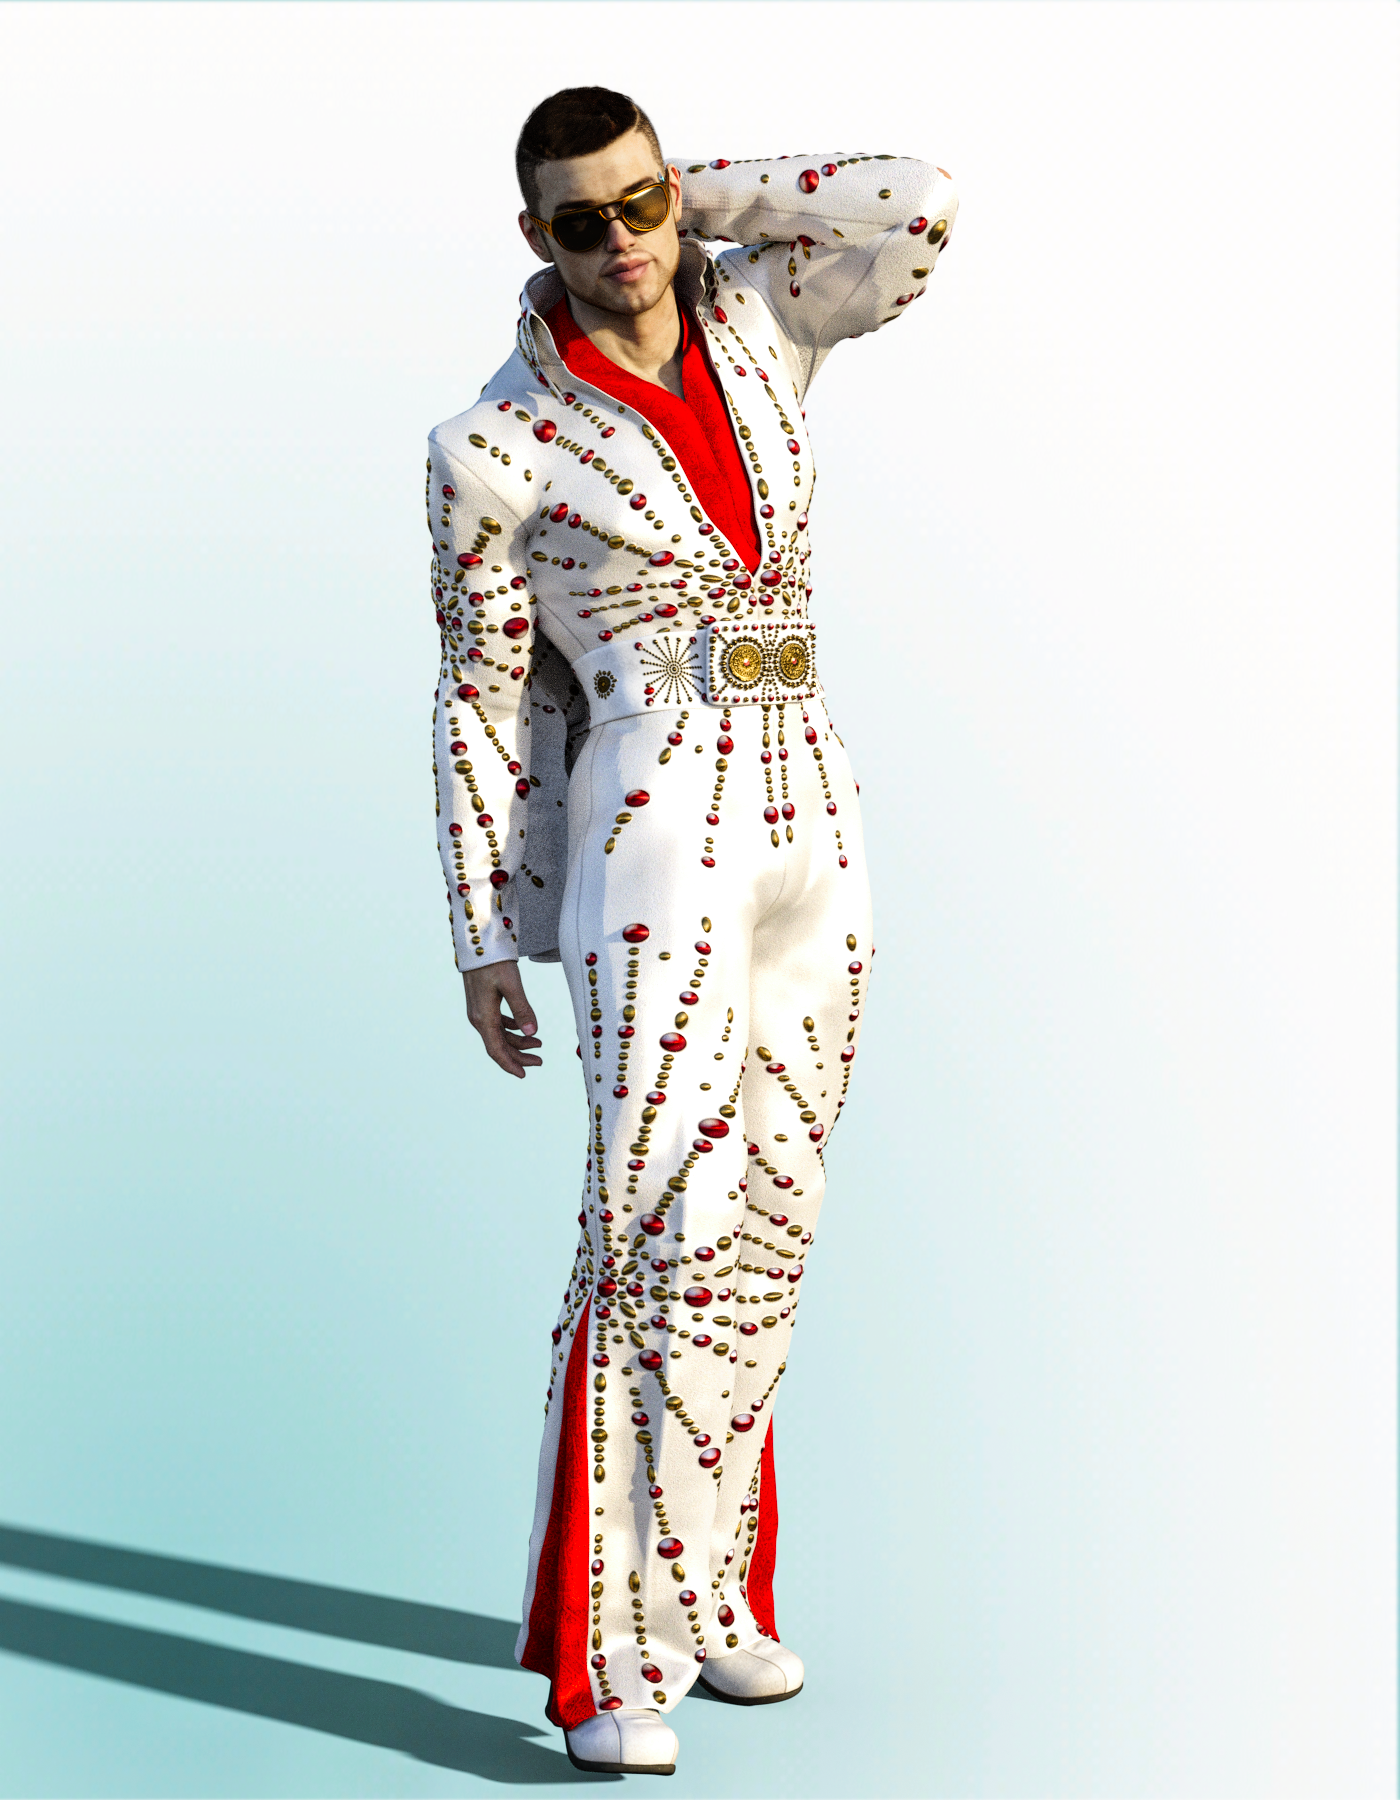
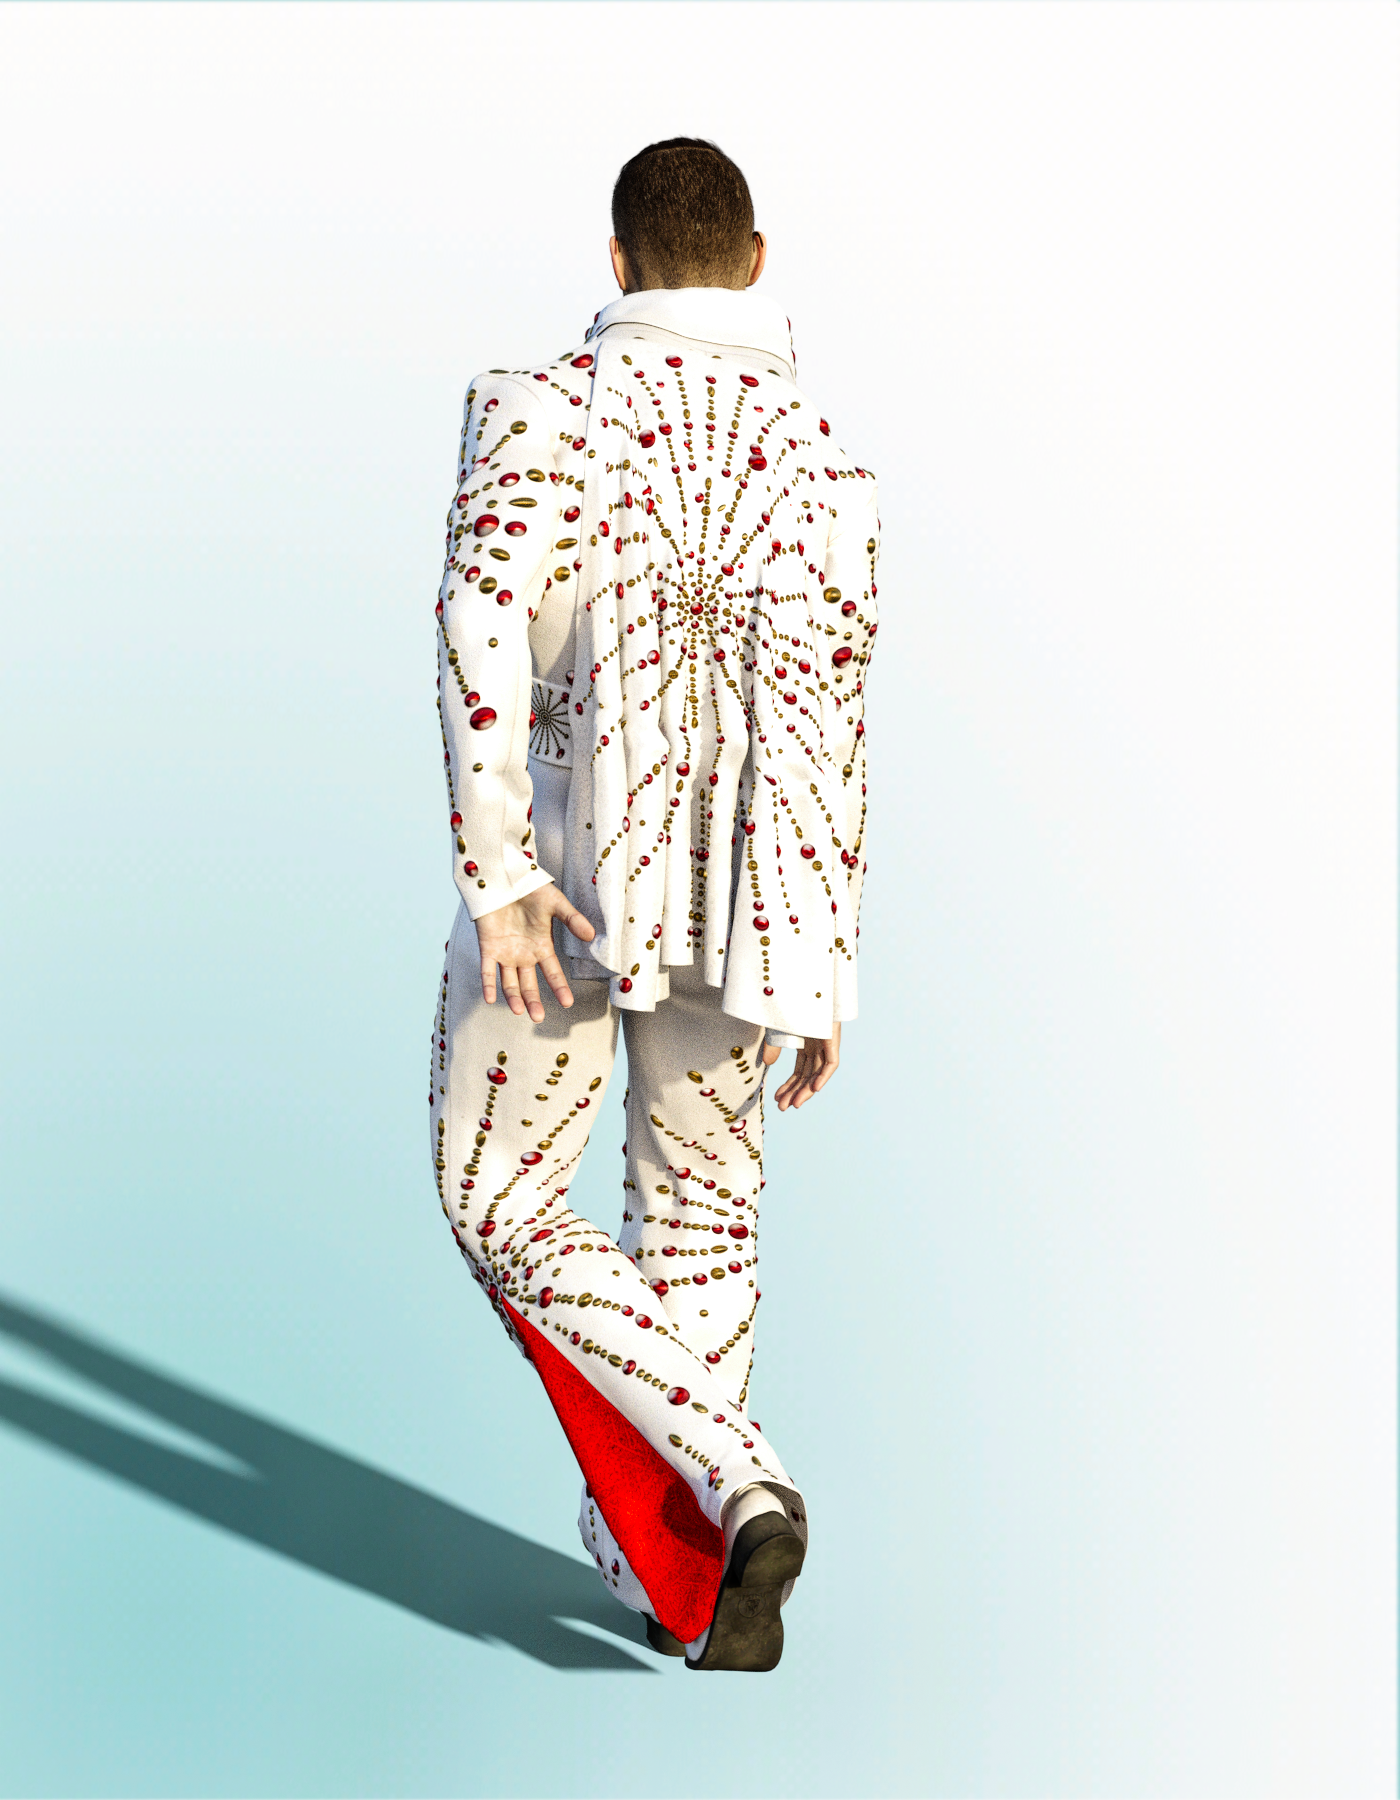
King of Rock and Roll
Not something I would typically purchase, but I love it. Very nicely made. It deforced well, and all the details are really neat. Look at the beads and the cape.The quality of clothing in the Dwayne bundle surpasses my expectations.
Deformers impossible to use accuratelyThere is a way to do all of this easily,from 2001 to 2005 I made series of products for poser magnets that automated this kind of stuff. I'm working on updating my dynamic deformers toolkit for Genesis 8 figures/DAZ studio( hopefully daz will take me back as a PA. I have a feeling they will when they kick the tires ) the goal will be to remove the need for third party sculpting software in most cases, even very small items like eyelids and fingernails or nisch items like fat rolls. About the only thing you won't be able to use deformers for would be things like HD viens or scales or something of that nature. And you will be able to use them while having poses, scales, and morphs active. And you will be able to save them into your own morphs and distribute the morphs. You will also be able to save deformer settings for yourself or others using the toolkit. It will be very easy for beginners.I'm sure there will be a demand for this ... just avoiding the export/import issues would make it worthwhile and being able to work in the same viewport would be excellent. When you say Genesis 8 figures do you mean exclusively or all, including G8? Quite a few people are still using earlier generations extensively, judging by comments in other threads. Finally, if you could include a morph-mirroring funtion, that would be another selling point.
Deformers impossible to use accuratelyThere is a way to do all of this easily,from 2001 to 2005 I made series of products for poser magnets that automated this kind of stuff. I'm working on updating my dynamic deformers toolkit for Genesis 8 figures/DAZ studio( hopefully daz will take me back as a PA. I have a feeling they will when they kick the tires ) the goal will be to remove the need for third party sculpting software in most cases, even very small items like eyelids and fingernails or nisch items like fat rolls. About the only thing you won't be able to use deformers for would be things like HD viens or scales or something of that nature. And you will be able to use them while having poses, scales, and morphs active. And you will be able to save them into your own morphs and distribute the morphs. You will also be able to save deformer settings for yourself or others using the toolkit. It will be very easy for beginners.Sounds like something I'd buy just for the convenience, especially if the active defa set could be saved with a figure as a preset to be transeferred from scene to scene so that the more common flesh eformations soould be saved but alered slightly from render to render without having to create a permanent morph (thinking in terms of things like sitting distortion on uneven surfaces, etc., which I currently tend to cheat using collisions.)
Novica & Forum Members Tips & Product Reviews Pt 11The Grape Xscape Chess Bar (Technical Aspects)
Here's a few behind the scenes tips. This is using the DA Palm Island, Fancy A Game of Chess sets combined, with the Scrappy the Robot, Grapevines, Multi Letters (X) props and Sakura as the character. This was the Not So Fast! Contest combination I rendered.
TIP: When creating a stone/natural floor in the sand, use dFormers to bring sand onto the stone. You are not going to have a nice straight line where the stone meets the sand. You could also do a layer of raised stone as a border- but you STILL have to have irregularities where the sand meets the stone. The wind doesn't always create straight line sand. You can see the dformers in front, by the sign, and behind Scrappy The Robot.TIP: When you create a morph from the dFormer, DO NOT CHOOSE THE OPTION TO DELETE IT. After you name the morph, you can move the dFormer to another location and create another morph.
TIP: Create your own signs by creating a primitive plane and using the Beach Cafe Outdoor Furniture sign.
TIP: Tie in what's on the sign by using the same image on an employee's shirt, menu, poster, etc. (In Surfaces.)TIP: Mask and lighten areas. Use the Magic Wand Tool then add/correct areas with the brush. Old Hagred was too dark so she was masked, then ONLY she was lightened. Next I did her chair, which otherwise would have been totally dark crimson. You can now see the top of the chair, it's a lighter color. Scrappy the Robot was masked and sharpened, love the crisp detail of his face. The chess box was also lightened, it was really dark. You can now see hints of chess pieces in the box.
TIP: Use a Ghost Light for under-umbrella scenes. Those gals were a LOT darker than the surrounding area. There's just one Ghost Light at 100 luminance. Not a lot, but made a nice difference.
TIP: Use the planters from Ancient Temple Courtyard and Y translate to flatten them. They make great tropical/natural serving bowls as they're terra cotta. Look on the counter by Sakura.
TIP: My favorite tip: Embed items in umbrella poles to make tables/ drink holders. I embedded the horse chess piece trophy as the base was square and stuck out, and that's what IceDragonArt's drink is sitting on. (Now if we could just get Old Hagred's pet spider off the horse...)
And of course, the usual tips. Make sure your characters' heads are clearly shown- note Old Hagred's face has a background of white sand, there's no grapevines directly behind her head, etc. The frog in the drink is between Scrappy's legs.
I did a lot of straw thatch postwork- it had weird horizontal lines running through it, like material zones that weren't right. The thatch roof on your left took about an hour.
Enjoy! :)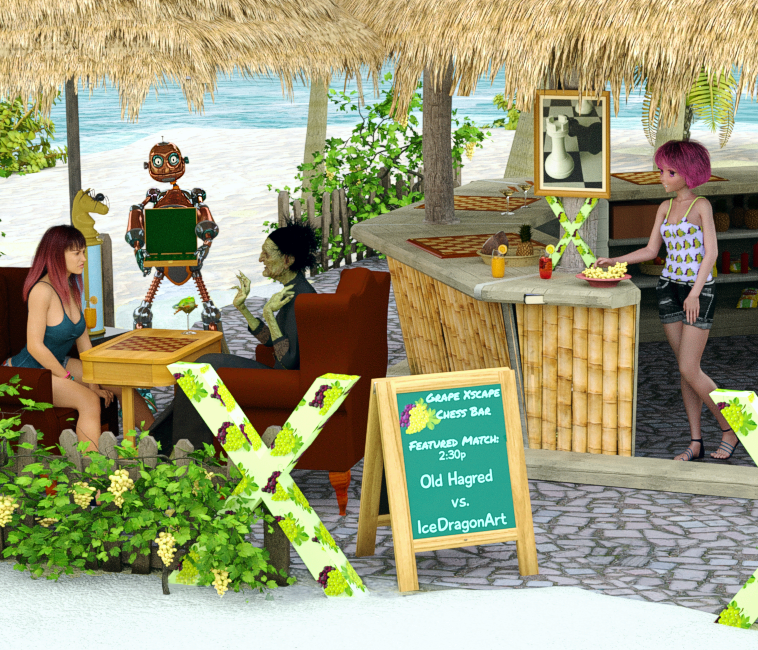
Wow is that a preview of your entry? Good thing you can't win because that is funny & awesome.
Mermaids, Mermen, Merkids, and Merbabieshttps://www.daz3d.com/mermaid-genesis
Just fit this to your model and morph it as a man/woman/kid/baby.

With the right Clone you can use it on every kind of Genesis.
Daz 3D is part of

Connect
DAZ Productions, Inc.
7533 S Center View Ct #4664
West Jordan, UT 84084Licensing Agreement | Terms of Service | Privacy Policy | EULA
© 2026 Daz Productions Inc. All Rights Reserved.