-
Identify model used in promo?
vonHobo said:
Is there any way to convert 8 to 9? I tried one product to do that and it did not work for me.
If you only want the morph, you can follow this tutorial by Jay Versluis:
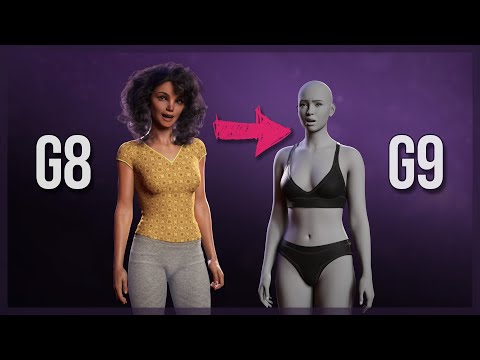
If you want to split the head and body morph, there is another tutorial:

Both tutorials can be done with no additional purchase, using only Daz Studio.
Some additionnal work around the eyes may be necessary, but I think the first tutorial speaks about it a bit.
Daz Studio 4.23[.0.x], General Release!Masterstroke said:
I need some confirmation or disconfirmation about an essential DAZ studio feature, please.
Is it true as reported in other forums, that the feature
"Save As - Support Assets - Morph Assets"
is disabled and only availeble to premier subscribers?
Does that mean, you cannot save your own created morph targets anymore, unless you are a premier subscriber?There was nothing changed from functionality perspective except for the menu Description changed from Morph Asset(s)... to Modifier Asset(s)...
Because Type of Properties in Parameters Pane are all defined as Modifier/xxx (e.g. Modifer/Shape, Modifier/Pose, Modifier/Corrective...) , naming it as Modifier Asset(s)... is more precise than Morph Asset(s)...
Daz Studio 4.23[.0.x], General Release!Masterstroke said:
Leana said:
Masterstroke said:
I need some confirmation or disconfirmation about an essential DAZ studio feature, please.
Is it true as reported in other forums, that the feature
"Save As - Support Assets - Morph Assets"
is disabled and only availeble to premier subscribers?
Does that mean, you cannot save your own created morph targets anymore, unless you are a premier subscriber?No. Saving as morph assets is deprecated and replaced by saving as "Modifier asset", it's still available for everybody.
Thank you, and it works the same way it used to be when you are an unsubscribed free user?
AFAIK it works the same for morphs but can save more than just morphs now.
Daz Studio 4.23[.0.x], General Release!Leana said:
Masterstroke said:
I need some confirmation or disconfirmation about an essential DAZ studio feature, please.
Is it true as reported in other forums, that the feature
"Save As - Support Assets - Morph Assets"
is disabled and only availeble to premier subscribers?
Does that mean, you cannot save your own created morph targets anymore, unless you are a premier subscriber?No. Saving as morph assets is deprecated and replaced by saving as "Modifier asset", it's still available for everybody.
Thank you, and it works the same way it used to be when you are an unsubscribed free user?
Daz Studio 4.23[.0.x], General Release!Masterstroke said:
I need some confirmation or disconfirmation about an essential DAZ studio feature, please.
Is it true as reported in other forums, that the feature
"Save As - Support Assets - Morph Assets"
is disabled and only availeble to premier subscribers?
Does that mean, you cannot save your own created morph targets anymore, unless you are a premier subscriber?No. Saving as morph assets is deprecated and replaced by saving as "Modifier asset", it's still available for everybody.
Daz Studio 4.23[.0.x], General Release!I need some confirmation or disconfirmation about an essential DAZ studio feature, please.
Is it true as reported in other forums, that the feature
"Save As - Support Assets - Morph Assets"
is disabled and only availeble to premier subscribers?
Does that mean, you cannot save your own created morph targets anymore, unless you are a premier subscriber?Is there a way to know at which level an HD morph was sculpted ?Elor said:
If I understand correctly, if a morph was sculpted at level 3, I need to set the Mesh Resolution of the prop/figure/clothing item for which it was made at 3 too. If I set it below 3, I'll lose details from the morph, and I set it higher than 3, I'm likely vasting memory with the added geometry.
That's correct, you will still see an effect of the HD detail at lower subD, but it wont be the full effect.
But how I'm suppose to know at which level a morph was sculpted ?
Some of them will say the level of HD in the morph name. Otherwise if they dont say which SubD level it was sculpted at, then i think there's no way to know. Also, since it is jus in the name, the author could be overstating and say it is at SubD4 when in reality all the detail could be captured at SubD1
But loading Victoria 7 HD preset, the Mesh Resolution is set to 3.
I wouldnt read too much into what resolution is set by an HD preset. SubD3 is a fairly high SubD, perhaps the preset just didnt want to push up the SubD higher to 4 and were leaving that to the user to adjust in parameters.
Victoria 8 HD file are named FBMVictoria8HDLv4.dhdm and FHMVictoria8HDLv4.dhdm but this time Victoria 8 HD loads with a Mesh Resolution set to 4.
Again, wouldnt read too much into that,
Personally I would say just to use your eyeballs and set viewport drawsyle to smooth shaded, look at the screen, and see if increasing SubD higher (in parameters) will change the level of visible detail while an HD morph is dialled in.
Is there a way to know at which level an HD morph was sculpted ?Hello,
HD morphs are still a bit of a mistery to me.
If I understand correctly, if a morph was sculpted at level 3, I need to set the Mesh Resolution of the prop/figure/clothing item for which it was made at 3 too. If I set it below 3, I'll lose details from the morph, and I set it higher than 3, I'm likely vasting memory with the added geometry.
But how I'm suppose to know at which level a morph was sculpted ?
With some products, it's in the name of the slider (like CJ Eden who has a HD3 level morph, so with Mesh Resolution set at 3, I'm good I suppose) but with others, I don't have the first clue.
I thought the name of the files could be a good indication, but looking at some HD Addon I bought for Daz characters, I'm not so sure.
Victoria 7 HD file are named FBMVictoria7HDLv4.dhdm and FHMVictoria7HDLv4.dhdm and I suppose Lv4 is for Level 4. But loading Victoria 7 HD preset, the Mesh Resolution is set to 3.
Victoria 8 HD file are named FBMVictoria8HDLv4.dhdm and FHMVictoria8HDLv4.dhdm but this time Victoria 8 HD loads with a Mesh Resolution set to 4.
Both non HD Victoria 7 and 8 will load with a Mesh Resolution of 2 so at least, there is a difference between the non HD and HD version, which is not always the case.
As an example, Arianna 8.1 and Arianna 8.1 HD both have a Mesh Resolution set to 4, which may not be enough to take advantage of either of them:
- Arianna 8.1 have files called MCMArianna8_1Navel_HDLv5.dhdm, MCMArianna8_1Nipples_HDLv5.dhdm and PHMArianna8_1_Iris_HDLv5.dhdm (so level 5 morphs for her navel, nipples and irises ?)
- Arianna 8.1 HD have FBM and FHM morphs called FBMArianna8_1HDLv5.dhdm and FHMArianna8_1HDLv5.dhdm
I also have at least one clothing item which will have different Mesh Resolution levels, depending on which way I loaded it (the Untamed Warrior Shoulders): if I'm using the whole outfit preset, the Shoulders' Mesh Resolution is set to 1. If I'm loading only the Shoulders, their Mesh Resolution is set to 4.
Two other items of the same outfit also have HD version, but all are loaded with Mesh Resolution set to 1, but to make the situation even messier, the legs will only have their HD Morph (called Legs HD) dialed at 100% if loaded independantly: the version from the outfit is loaded with this Legs HD morph set to 0. And this time, none of the file has a Lv[number] in their name.
So…
Is there a way to know at which level an HD morph was sculpted, preferably one that doesn't required rendering each item at a different Mesh Resolution, then scrutining every details to decide if Mesh Resolution N+1 is more detailled than Mesh Resolution N ?
PowerPose doesn't recognize G9 [SOLVED]Thanks for the qiuck reply! Transferring the morph to a fresh G9 figure worked. That already saves me a lot of time.
Re-installing the G9 Starter Essentials did nothing. And now in my scene I have my original G9, Matt, and a new G9. PowerPose works fine for the new G9 but still doesn't work for the old figure.
It's definitely something with the figure, wish I knew what. Something with the rigging got screwed up maybe? Although I didn't (intentionally) change anything there.
PowerPose doesn't recognize G9 [SOLVED]You've changed the Node Name of this G9 character ? The Node Name has to be Genesis9 otherwise Pose Converter won't work on it, PowerPose won't recognize it either for locating the correct template.
Transfer Active Morphs can only be used on figures prior to Genesis figures, e.g. V4 which is a "parametric figure" ~~
PowerPose doesn't recognize G9 [SOLVED]Morph Transfer is for projecting morphs into fiotted items on older figures, Genesis figures already do this without prompting. it is not related to moving a morph loaded on one figure to another of the same type - Edit>Copy, Edit>Paste>Paste Figure Shape should do that for settings.
For the rest, one possibility is messed up metadata - have you tried reisntalling the Genssi 9 Starter Essentials product, and the Default Templates product too for good measure.
PowerPose doesn't recognize G9 [SOLVED]Hi all.
So I noticed that for all my G9 characters something happens where PowerPose stops recognizing the figure and shows me the generic figure without detailed controlls. (see screenshot)
G8 poses via the pose converter script do not work and I get the error "Please select Genesis 9 figure before running the script". Funny enough, G9 poses work fine. (see screenshot)
I have tried to add the PowerPose maps (templates) I've found here and managed to create 2 sets, one with the original one and one from the forum. That did not change anything. (see screenshot)
Also, I get an error when trying to do a morph tansfer (because I added a fresh figure and wanted to transfer the morphs instead of dialing them one at a time): "You must select a figure built using Parametric Joint Parameters..." (see screenshot).
The figure is 100% a G9, screenshot from the Scene Identification attached.
Any help would be highly appreciated. It gets really frustrating to have to constantly add new figures and dial in the morphs by hand.
Thanks!
Alex
Weird thumb bend on G9Boorsman said:
I don't think it exsisted before now.
When you say you "created a character", what did you mean? You dialled in different presets, or you loaded via morph loader pro. My previous message was assuming you had loaded new character via morph loader pro and adjusted rigging yourself, but now i realise you may have just been creating a custom character from presets...
I would suggest: Load fresh G9. Test the faulty bone (the thumb) by rotating it on each rotation axis. Is it faulty even without your character preset dialled in? Or is it faulty only on specific character?
If faulty on specific character, then one of the character morphs being used for that character may have incorrect rigging orientation. Identify which individual morph causes issue. Then with that morph loaded in you can adjust the orientation of the bones manually with the Joint Editor tool selected, in the Tool Options pane. If you then want to re-do the ERC freeze process that links the rigging to your morph, you can do the following:Perhaps easiest way is in Edit Mode, right click and choose the ERC Bake (Delta add...etc) option. That will unlink the ERC properties, and you can redo ERC Freeze. And can re-save modifier asset.
If that last step about ERC freeze and saving modifier asset is above your head, then perhaps just dont use the faulty morph.
What character is this texture from?The first attached image is a promo for a discontinued G9 character morph at another store, which did not include a texture. Since it's discontinued, because its page hasn't been archived, and because the original vendor apparently hasn't been back to the site in 6 months, I've been unable to learn which texture the artist used. I believe it's the same texture used on the character in the first promo image for "dForce Sand's Enchantress Outfit Texture Add-on", which might be the actual character as well. I do know that the first product was for sale in February 2023, so whatever product it's from had to be available at lest that early.
Gen 2 or 3 male character with muscular armsG2-side, Gianni 6 is pretty buff and Scott 6 is well-defined, but neither are freakishly bulky. G3, I would try https://www.daz3d.com/brahm-for-genesis-3-male ; . He's a.muscle boy, for sure! If you don't have them, I would also recommend Zev0's Vascularity bundles to sell the musculature - https://www.daz3d.com/vascularity-hd-for-genesis-3-female-s-and-genesis-3-male-s . https://www.daz3d.com/vascularity-hd-for-genesis-2-female-s-and-genesis-2-male-s . There are other muscle solutions, such as https://www.daz3d.com/musculature-hd-morphs-for-genesis-3-bundle . The triceps are a bit of a problem on Daz figures. For whatever reason, as arm size increases, the triceps take on a freakish bulge with no accounting for flexing and extension of the arm. AFAIK, the only thing to do is to use a muscle pack with a specific triceps morph and adjust the morph so the arm looks right.
Content GathererYou may be doing nothing wrong and the software is just showing a problem with your asset library.
I'd start by reinstalling the Genesis 8 female starter essentials, and see if that clears the problem.
If that doesn't work, you may have a bigger problem that will require either a complete reinstall of genesis related assets that contain morph data or a file by file review.
It's also possible that something has changed in DS that would require an update to this program.
This is less likely, as i'm using 4.22.0.16 and i'm only getting numbers like yours with a 'normal' scene file(character presets applied, textures, poses, props, clothing, hair, etc).
In regard to your intended use case, speeding up load times, while you may see a benefit, you may be losing that in the time it takes to process the scene for use.
I'd suggest doing some benchmarking before committing.
In one test i did, the orignal scene loads in 70 seconds, the CG processed scene loaded in 43 seconds, for a savings of 27 seconds.
But, it took almost 180 seconds to go through steps in CG, mostly for the zipping process, then unzipping it, then switching directory sets in DS.
Simpler scenes, such as the g8f dev load only, processed faster, but the load times were negligably different.
More complex scenes, just crashed the program when i pushed the analyze button.
Also, most of my tests with CG resulted in unusable scenes, as many assets weren't copied over.
Best of luck.
Geograft it works, but now I'm not able to select anythingzeppers said:
Cyrinadia said:
I had this issue. I found that for some reason all of the polys had been assigned to the Pelvis or Spine (Genesis 9). I used the Geometry Editing Tool to reassign the polys to their respective Face Groups.
To do that: go to Geometry Tool, then the Tool Setting tab. Remove all polys from the incorrect item by selecting the group, Right Clicking the group and selecting Remove Selected Group. This will then open up the ability to select with the Geometry Tool brush. Use the Brush and reselect the polys that you used originally. Right click in viewport, Geometry Assignment> Assign to Face Group, and reselect the appropriate bone from the list. Do this for all the bones. This should make them selectable again. (Yet to test, been redoing my tail ;P )
I tried this but if I reassign the polys to the face group that matches the bone, the polys will assign but I still can't select it in viewport. Do you know how to fix this?
I feel the need to necro this old thread to put the solution to this issue just in case others have issues and come across this during their search for solutions..
It had been a long time since I ran through this tutorial and needed to refresh myself, hence running into the issue as well.
Why this is happening is that the selection groups are lost after you use the transfer utility. Everything in SY's tutorial is fine except there are two steps not mentioned at least in the Part 1 of that tutorial.
To fix this you need to go into your Joint Editor and in the top left you will see "Selection Group". Now in your scene pane select each bone you want to be able to be selected with the node selection tool. You'll notice that the selection group says "none". In the drop down, select the correct corresponding bones you want. Now you can select using the node selection tool which ever bones you wish.There is another part missed, SY corrects this on her deviant art page but I'll put it here. If you follow her tutorial just as it is, you will run into a problem with SubD being applied. This will cause gaps between the Genesis model and your graft. The fix is below.
When doing the graft selections, follow SY's tutorial just as it is but after you set graft faces on the tail and then auto hide faces on G8, you will also need to select the faces OUTSIDE the border of the graft on G8. Once selected you will need to Set Graft Faces For Attachment again just this time on G8 and not the attachment. So when the popup comes up after you have the border selected on G8, you will see the "Tail" in the list this time.Save your figure. Delete the figure you were working on from the scene and reload the figure from where you saved it. Now subd should work perfectly and you should be able to use the node selection tool to select each bone.
CheersRender your buys! Use buys from the current month and the previous month of salesdracorn said:
How the heck did you get the clothes, shoes, etc to fit to the horse's body?
Richard's answer of custom auto-fit clones is close, but I tend to call my fit shapes "anti-clones" because I've reversed the normal method so that I do the mesh shaping on the source figure before it's re-weighted (rather than on the target figure after it's reweighted).
It adds stages to the process, but it considerably improves projection accuracy, which is key for a complex transfer such as this. Even so, the reshaped clothing mesh often needs clean up - or, depending on how lazy I'm being, new holes cut to fit it properly.
richardandtracy said:
The untextured clone model must be a sight to behold, and would have been remarkably difficult to create.
The centaur anti-clone shapes have been through a few refinements, but these days I've got a general method nailed down enough that I can generally create one for a new figure fairly quickly. I had this bunny suit render out within half a day of the rabbits being released.
The clones are indeed a bit of a sight, but then, to be honest, so are centaurs.
Is the atmosphere ruined?(closed)richardandtracy said:
Must admit I have long thought that the only way to test the accuracy of any transformation script is to do a full circle and compare the end with the beginning. This applies equally with language translators, pose transfer scripts and character transfers too. It's one of the reasons why virtually all my pose transfer scripts have bi-directional versions. Except my G8-G9 one where I lost interest in G9 and couldn't be bothered with the G9-G8 one because there was almost no chance I'd have a G9 pose I'd feel worth putting on my favourite G8F character. Regards, Richard.
i remember that... apparently that was the most viewd TV moment of 1986.
Anime Toons and Filatoon Shader Q&ACES3D said:
Leana said:
Mada said:
ArtsyDragon said:
I am at a loss. I read that we can use the shader on anything. That's awesome. I'm wanting to get the skin texture that shows on Aiko 9 and Vickie on a G8 character. Is this possible?
The shader yes, but the skin texture would be using a different uv map. I'm not sure if there is a conversion where you can use G9 textures on G8, someone else might know :)
There's a "Legacy UVs" product to use G9 textures on G8F: https://www.daz3d.com/genesis-9-uvs-for-genesis-8-and-81-female
Not sure how well that would work with the Filatoon settings though.
I've transferred the material from "Genesis 9 Base Anime Feminine" to "Genesis 8 Basic Female" using the "Genesis 9 UVs for Genesis 8 and 8.1 Female".
Due to the unique UV layout of the eyes, eyelashes, and eyebrows in G9 Base Anime, I've adapted the Genesis 9 Toon Anatomy(Attachment) to Genesis 8 using the Auto-Fit feature.@Mada Thank you for kick starting my brain again. I knew that. I just didn't remember when I needed it.
I already have that package. I feel like I should have known this. Thank you all for your patience with me. For the extra tip @Ces3D thank you. :)
In fact, I have all the G9 to (other G figure) packages. Now I'm excited to try this transfer procedure on them too! WOOT! If I can get it to work like decribed, look out world!
Daz 3D is part of

Connect
DAZ Productions, Inc.
7533 S Center View Ct #4664
West Jordan, UT 84084Licensing Agreement | Terms of Service | Privacy Policy | EULA
© 2026 Daz Productions Inc. All Rights Reserved.