-
Genesis 1 Eaten by Hideous Troll
Thanks for the input, sadly no joy, the Editor tab on mine is under shaping and I can use it to dial out the Orc-ness or easier use the Zero option in the pane menu or main EDIT menu. but saving the morph asset does not help, it comes back when I load again.
Checked the logs and the basic female appears to load, then there is a flurry of activity regarding dzassetdaz.cpp loading stuff, and some of it failing, that refers to "GhostofMacbeth" Orc settings, which I have not installed so cannot uninstall. Tried searching for dzassetdaz.cpp which I assume is a C++ file with a view to editing it but comes up nothing found. Also checked the GENESIS.DUF file, but nothing odd in there and no scripts attached in any menu settings I can find.
One thing I cannot explain, I notice when saving the Morph settings it says it is using the ANDREA file, which I have not loaded, my basic Genesis is LANA based.which I assume is standard as I never changed it.
Altering G3 or G8 mesh in BlenderIs there any way that I can export G3 or G8 mesh to blender /Maya and make changes there and import it back to Daz?
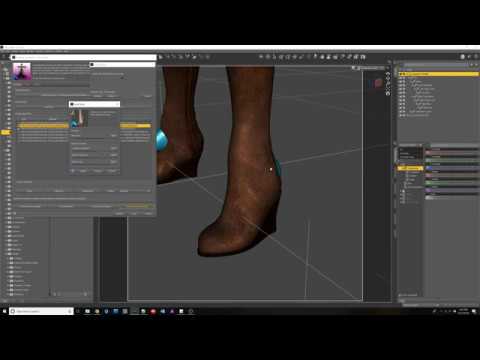
You can export an OBJ file from DS and import it into Blender. There are more detailed explanations available e.g. Youtube videos, other forum posts, so I won't repeat those here, but essentially
- i) Hide everything except the figure in DS.
- ii) Set the figure to Base Resolution if you intend to create a morph later. It will be simpler if the figure is at world centre, has not been scaled, has no morphs applied.
- iii) File->Export, choose a file name and the options you want from the dialog. Take care with the scale: which one you use isn't as important as remembering it, as you will need to use the same when importing back to DS. I set it to Custom and 100%.
- iv) Import the OBJ into Blender. Make sure that the Keep Vertex Order and Polygroups options are checked.
- v) The figure will be huge by Blender standards. Under Display in the N panel, set lines to 200 and scale to 5.
- vi) Make your changes. If you are creating a morph target do not add verts, or change the vertex order. Grab, sculpt, proprtional edit all are fine. (Shape keys are a boon if you are creating numerous morphs for the same figure.)
- vii) Export to OBJ. Check the Polygroups and Keep Vertex Order options on export.
- viii) Import OBJ into Daz as a static object, or use in Morph Loader Pro if you are creating a morph. Specify the same scale you used when exporting from DS.
I understand that you cannot add any new polygons to the base mesh. Is that correct?
If I want to add new poligons to daz base mesh, is there any other way?
Correct. You would have to create a geograft to add new polys, though a parented prop may be good enough in some scenarios.
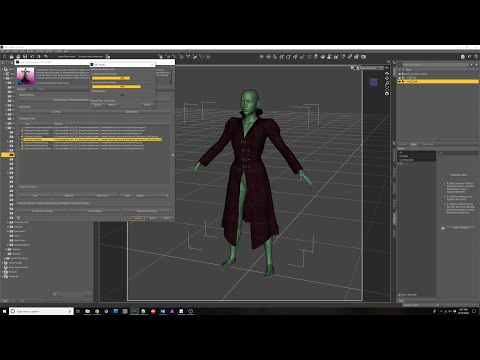
[Released] RSSY Clothing Converter from Genesis to Genesis 8 Male [Commercial] RiverSoft Art and Sickleyield are proud to present the RSSY Clothing Converter from Genesis to Genesis 8 Male! Finally, use your Genesis clothing with your Genesis 8 Male characters! Automatically convert your entire wardrobe of clothes, including high-heels, using the new RSSY Clothing Converter script! The RSSY Clothing Converter from Genesis to Genesis 8 Male has been carefully crafted to handle the different rigging and shapes between Genesis and Genesis 8 Male, even adding special rigs for loincloths, capes and a special dress/tunic rig that adds pose bones to avoid that "sticking to the legs" effect.
The Clothing Converter script provides batch execution for automatically converting your Genesis clothing to Genesis 8 Male clothing in your Library. Easily select the wardrobe items in your Library, select an output directory and execute the script. Even better, icons and categories are copied from your Genesis clothing to the new Genesis 8 Male clothing items.
Your new Genesis 8 Male wardrobe is completely Smart Content aware! They will show up when you select a Genesis 8 Male. Plus, all materials shown in Smart Content for your Genesis item will show for your converted Genesis 8 Male item. Converted clothing, instead of using Auto-Fit, produces vastly less distorted results, especially with high-heels!
The Clothing Converter script does not work with accessories or wearables (e.g., outfits). High-heeled shoes may require a manual step during conversion if the original shoes do not include a foot pose.
The script may not be able to convert all clothing items without issues. Converted items may exhibit poke through. Usually, this can be fixed by adding a smoothing modifier or a push modifier.
- Convert Genesis Clothing items for use by Genesis 8 Male"
- Convert Dresses/Tunics, Pants, Shirts, Skirts, Shoes, Loincloths, Capes, Coats etc.
- Copies icons from Genesis clothing to Genesis 8 clothing for a professional look.
- Automatically convert your entire wardrobe with one operation!
Features
- RSSY Clothing Converter from Genesis to Genesis 8 Male:
- Clothing Converter Script (.DSE)
- Foot Poser Script (.DSE)
- Clothing Converter Manual (.PDF, .DSA)
Promotional video describing all the options and features of the Clothing Converter line of products
How to convert Footwear with Clothing Converter products
Important Fix (11/30/2018)
There is an error in the script, which affects both the female and male versions of the product. The transfer rigging-figure space step is not happening in the script (except for footwear). Fixing this DRAMATICALLY improves gloves, bodysuits, anything on the extremities of the figures. The reason why it's noticable for males compared to the females product is that G8 male has large shoulders and arms, placed higher up, than Genesis. The shape difference with the arms/shoulders of G8 Female is substantially less. Please copy the attached RSGenesisClothingConversionFunctions.dse below to Data/RiverSoft Art/Common directory. There will be an official patch from Daz; this is for immediate use. You will need to reconvert shirts with arms, gloves, and bodysuits. I apologize for the error.
JV's doodlesPoppy!
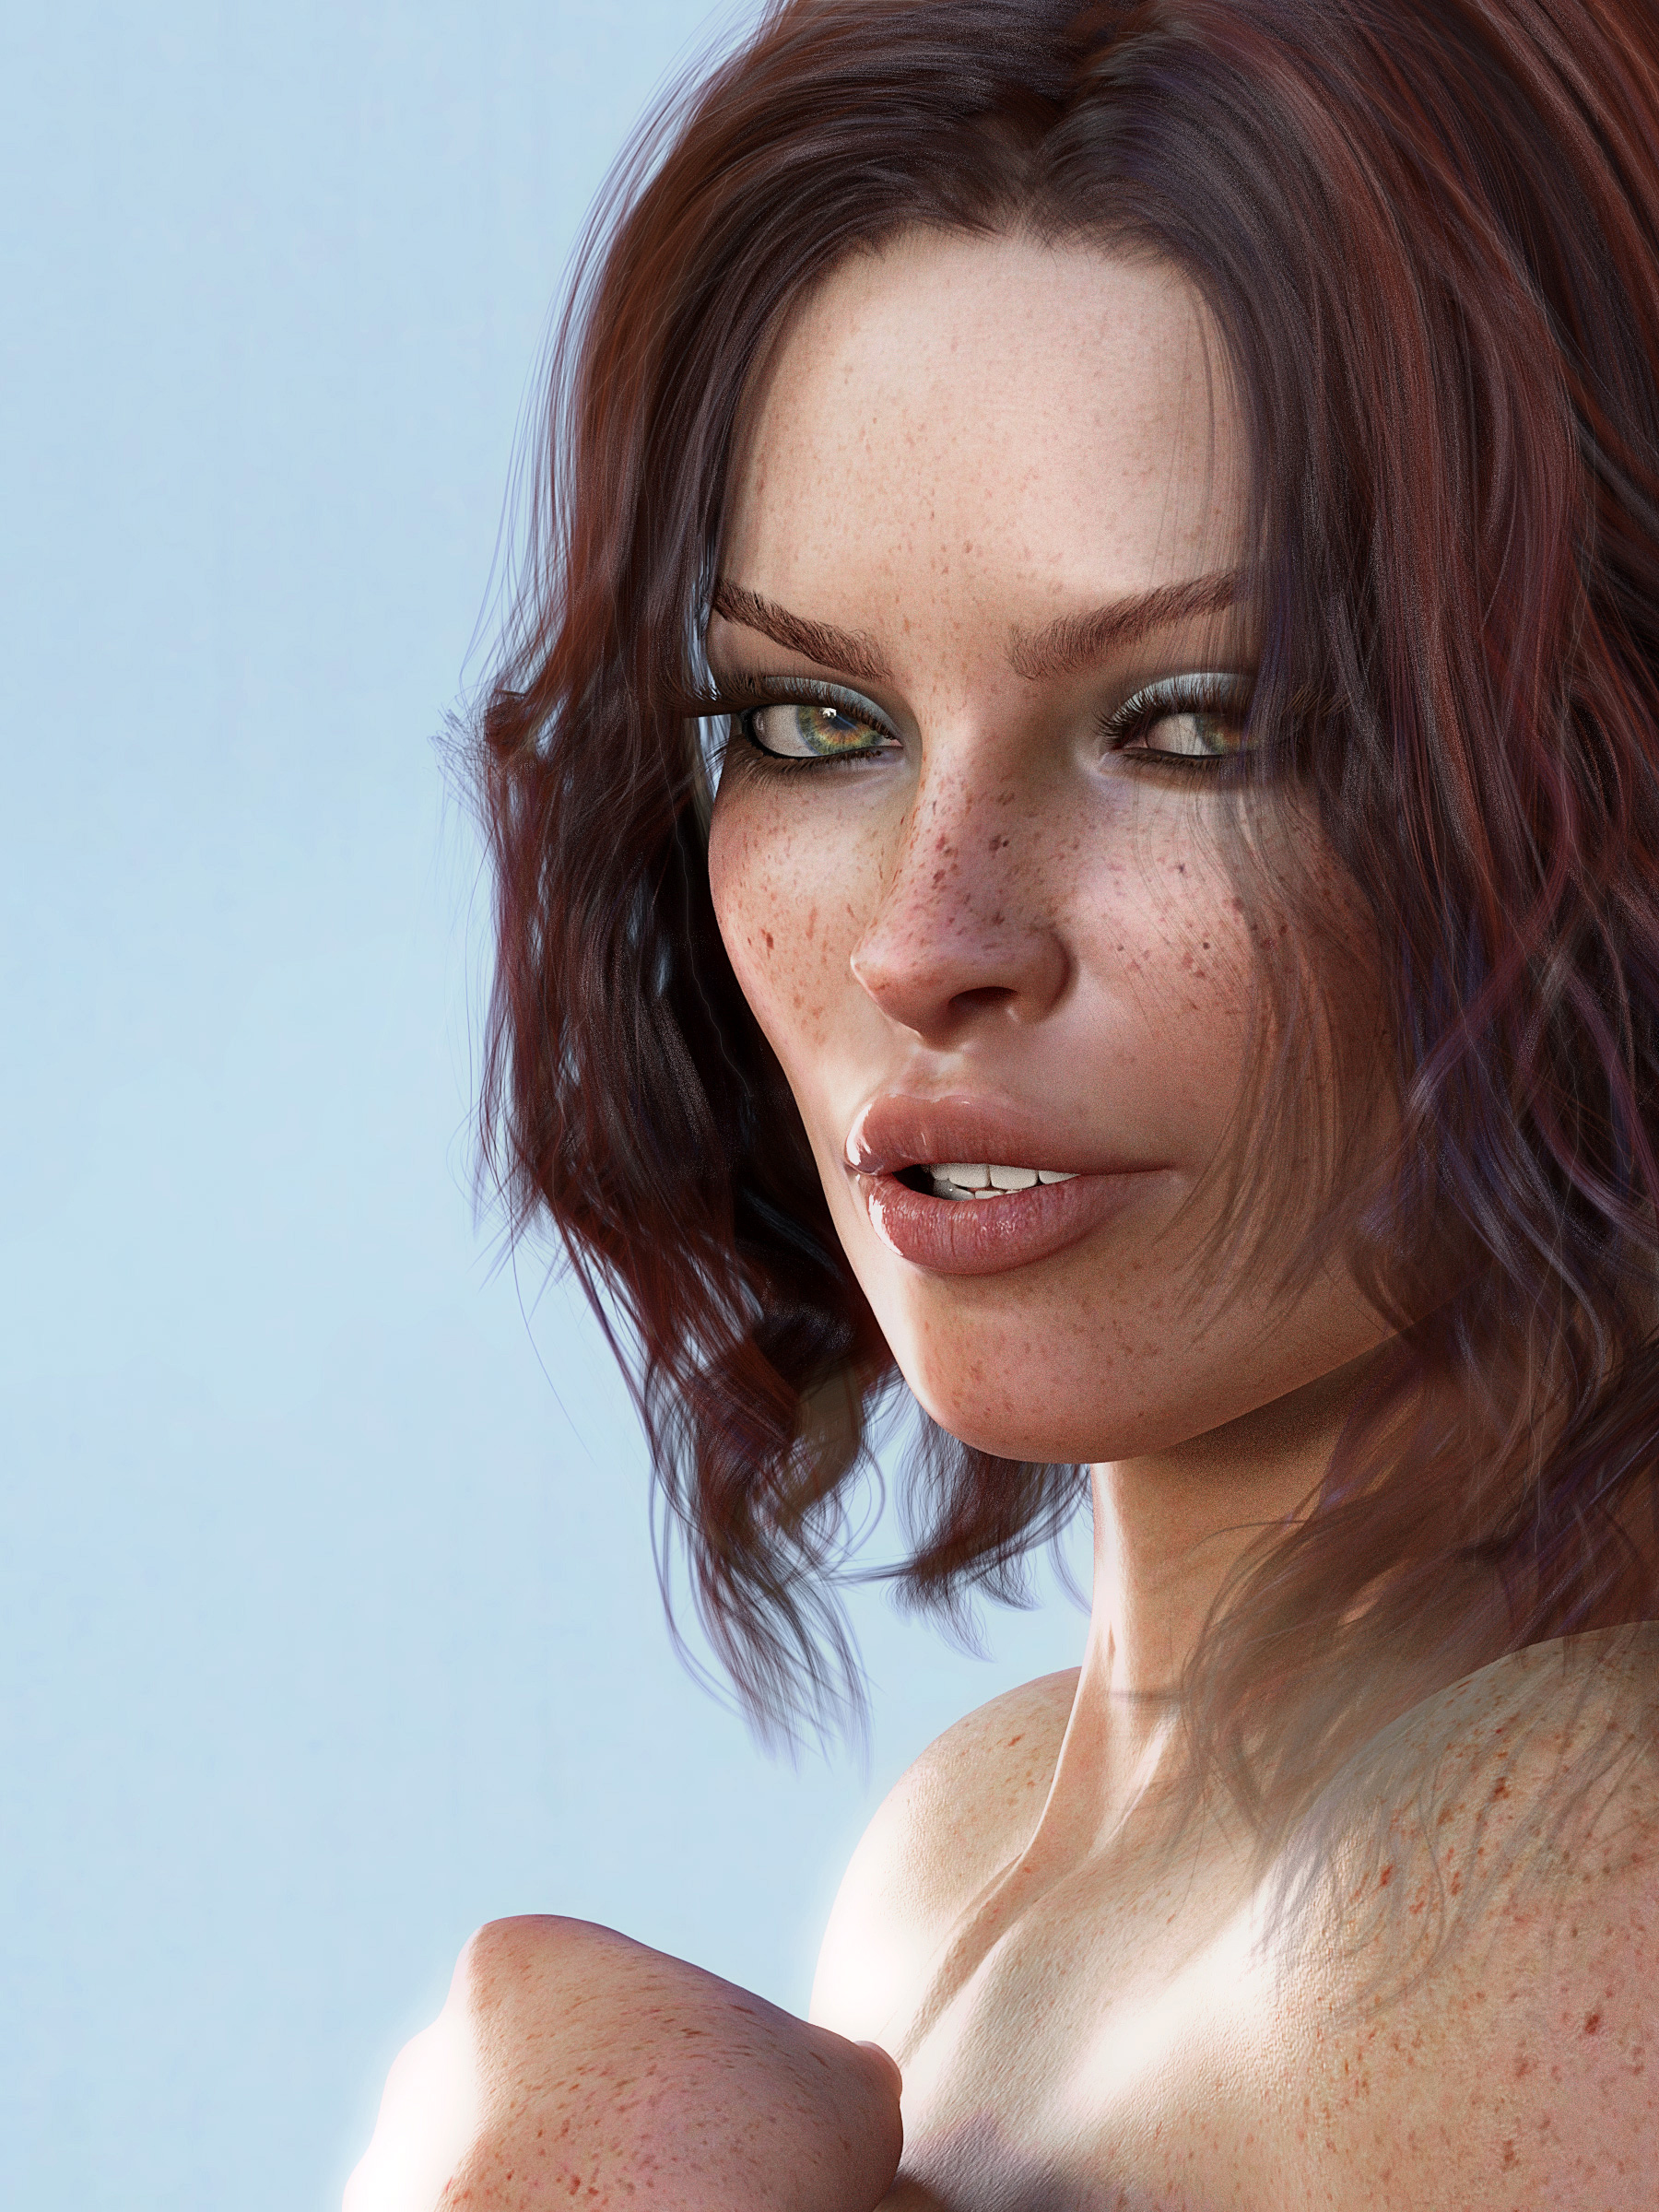
Harper HD morph, Reese HD skin.
 Bones of geograft displaced when character shape applied
Maybe the issue you have now comes from something that went wrong before you have used the Transfer Utility. You have to make shure to you use Memorize Rigging in the Joint Editor before projecting the morphs.
To fix this you could unfit the geograft, then manualy dial in all 'auto generated' morphs and character shapes you have issues with, one by one with the Joint Editor active to see if the bones of the geograft follow the shape or not. I have the suspicion that the only thing you have done wrong is not to save the morphs that where auto-generated or transfered with the Transfer Utility imediatly as Morph Assets. You may have saved a scene file and now that you open it again there are problems with the auto-generated or transfered morphs that no longer include the joint placement properties. Of course this is just my wild speculation of what eventualy went wrong.
Its even easier to see if the joint placement properties are saved with the morph or not. You could set the Parameters pane to Edit Mode, right-click the morph and choose 'Show in Property Hierarchy'. With the Property Hierarchy pane you can expand the the hierarchy tree of the morph and have a look under 1st Stage [Add-Substract] > Sub-Components, if there is a list of bone joint placement properties listed and controled by the morph. Those joint placement properties are all called something like CentrerPoint X Translation, EndPoint Y Translation and so on.
If the bones don't follow the shape, zero the geograft figure and dial in one morph where the bones don't follow the shape. Then switch to the Joint Editor tool and use the "Adjust Rigging to Shape" from the right-click menu on the viewport. Next the bones should fit to the shape but you need to save the 'adjusted' positions into the morph slider that was dialed up. Therfor you right-click on the morph with the Parameters pane in Edit-Mode and choose ERC-Freeze from the menu, make shure only those joint adjustments properties are selected in the ERC-Freeze list, it sometimes shows alot of other things not to save with the morph.
Is it possible to save a hair pose?It depends on the type of the property sliders you have moved to get the desiered pose or hair style idk how you want to define it.
If there has been bones moved around or a controler propertie that moved them those are most likely pose controls. Have a look into the Parameters pane and the morphs you have used maybe some are of type Shape others of type Pose. It can be confusing sometimes but Shapes gets saved as Shape presets. Click the gear icon on some of the sliders an see the property type in the Parameter Settings.
Here is what you could also do:
Actualy if I dial in some character specific shape like hair behind the shoulders, volume, length ect. I tend to create a new control property name it something like Ctrl_hairstyle_01 maybe I add the character name to it and set it to be of type shape. This way the hair style dosn't get reset if you use Reset Figure Pose. You could also pose the hair and create a new control slider for that set it to be Type Pose, then right-click ERC-Freeze.
Now that you have an slider for Ctrl_hairstyle_01 you can even create a new property on the figure with the same name but let it empty, set the one property on the hair to 'Auto Follow' in the Parameter Settings now you have a 'remote' control property. Then link the Ctrl_hairstyle_01 on the figure to the Character shape controler and the perfectly fitting hair style morphs gets automaticly applied if the character morph gets dialed in. Most times I add my own fitting morphs with DFormers and Smoothing modifier collision, thats why I created a controler for all these shapes. At least thats how I've done this several times. Finaly you have to remeber to save all those new properties as Morph Assets.
Is it possible to save a hair pose?It should be possible. It depends whether the morphs are categorized as shapes or poses. (You can check this by examining the morph properties in the property pane, by clicking the cog wheel to the right. If they are shapes, then save as a shaping preset, if poses, then save as a pose preset.
Bones of geograft displaced when character shape appliedI have created a geograft to replace the right hand of Genesis 3 Female. It is rigged with 20+ bones. It is intended to be non-organic, so to avoid it being distorted by projected morphs I have applied rigidity (via a group with participants and refs and a weight map) to all but a couple of rows of polygons where it joins the G3F figure. This all works well with the base G3F figure: geograft bones can be rotated and the geograft posed as desired.
However, when I apply a full body morph e.g. the Height morph or the Victoria 7 shape, whilst the geograft's mesh is unaffected by the morph (except near the join with G3F) the geograft bones all become displaced from their correct positions. As a result, because the bones and mesh no longer line up correctly any rotation of the geograft bones results in the geograft mesh breaking apart. The amount and direction of the displacement varies with the morph applied to G3F. To be clear, the bones are displaced because they are not moving; the mesh is moving but retaining its shape. When I dial the Height morph, for example, the geograft mesh follows the end of the arm; the geograft bones don't, even though they move when the figures right arm is posed. The geograft has a Right Forearm Twist bone, and I used the Transfer Rigging (Figure Space) to 'weld' that to the same bone in G3F. The geograft bones and mesh follow the forearm when posing.
It seems I have made some mistake in creating the geograft, but cannot figure out what I have done or not done in error. I'll be grateful for any suggestions how I can fix this.
Gargoyle for G8M [commercial]If you have a moment, could you tell us a little about the morphs that the wings have and how many material zones they have? Thanks very much.
The wings have 2 material zones, one for the membrane the other for the arms
There are pose controls for Wing Wrap/Left/Right, Flap Up/Left/Right, Flap Down/Left/Right, Bend Fingers/Left/Right, and a morph to change the scale of the wings.
G8F Morph Loader Pro modifications - clothing and eyelashes do not fit after reloadYou need to save your new morph as a morph asset. If it’s only saved in the scene file the autofollow is breaks when you reload the scene.
Thank you Redz, it worked! Countless hours figuring out why it brakes the entire set...resolved with one line of brilliant suggestion. To sum up for somebody who has the same issue:
I loaded G8F, than imported obj via morph loader pro, dialed it to 100%, rigged and erc freezed it, edited morph (name, color, 0-100% etc) and then saved it as morph asset in Actor/Full Body/People/Real World.
And now I can take new G8F and just dial that morph with no fear that all resets itself after character reload...Thank you!
Custom Morph HelpCan't you do just your adjustment morphs, importing the modified shape (made with all scaling reset to 100% if need be) with Reverse Deformations? If you bake all the component morphs into one you lose all ERC links to corrections - adjust the rigging brings that aspect back, but you've still lost corective morphs on joints or other morphs. Doing it with just your chnages as a new morph there's much less to tidy up.
Oh wow - I didn't even know you could change those details in the bottom of the morph loader. That's exactly the sort of thing I was looking for - works perfectly. Thanks!
G8F Morph Loader Pro modifications - clothing and eyelashes do not fit after reloadYou need to save your new morph as a morph asset. If it’s only saved in the scene file the autofollow is breaks when you reload the scene.
G8F Morph Loader Pro modifications - clothing and eyelashes do not fit after reloadI loaded g8f, change to base mesh resolution, subdev level 0, delete eyelashes, export to wavefront (obj) with all appropriate settings.
I modify character in blender, make legs and neck longer, body slimer, and export to wavefront (obj) with all appropriate settings.
I load g8f in Daz3d, open Morph Loader Pro, apply my morph with positive confirmations (no errors and geometry mismatches), crank it up to 100%, rigg it, apply ERC freeze, so far so good, no problems.
I load a few garmets, check eyelashes, all fit perfectly: eyelashes are hugging eyes on elongated neck, shorts are hugging waist and legs, all perfect, save it as scene or subset.
PROBLEM: reload character from scene/subset, eyelashes are not fitting, clothing is not fitting to the new figure with 100% dialed morph (everything fits original g8f shape, see picture attached) Please help!
Thank you, Linday!Me too! I was so thrilled to see an update to the horse in general that I put it in the cart first and *then read the description, Lol! What an excellent HD morph and texture set. So yes, Thank you to the vendor!!!
How do I avoid "Topology has changed..." trying to GoZ back to Daz Studio?The "Topology has changed..." message also can be an indicator for an issue with the geometry itself.
Just want to mention that there is a possible but rare case that the Daz Studio base mesh of the item you want to send over to ZBrush with GoZ containes loose geometry or so called 'floating vertices'. Actualy its usless geometry junk that can remain from the creation process in an geometry editor that not get cleaned up properly.
In this case there is a bug with the GoZ Plugin that it deletes all loose vertecies without any notification. Then you wonder why no matter what you try you can't create a morph target to load it into DazStudio with GoZ back.
You can use another workflow with exporting OBJs and load them into ZBrush because in this case a warning message shows up in case of 'floating vertices' and you can choose to ignore them instead of deleting. ZBrush can't edit loose edges or vertices and thats why there is a message by importing to delete those. On the other hand Daz Studio also ignores the 'floating vertices' and gives no message about them becasue they can not be displayed directly.
Genesis 1 Eaten by Hideous TrollWhatever the shape it is loading with is, it has been (re)saved with a non-zero default value. Look in the Editor tab of the Parameters pane, under Curently Used, and you should find the culprit - if it's a third-party morph try reinstalling, if not (or if that doesn't help) click the gear icon on the slider>Parameter Settings, set the Default value to 0, and use File>Save As>Support Assets>Morph Asset to resave just that morph (with its default settings).
Custom Morph HelpCan't you do just your adjustment morphs, importing the modified shape (made with all scaling reset to 100% if need be) with Reverse Deformations? If you bake all the component morphs into one you lose all ERC links to corrections - adjust the rigging brings that aspect back, but you've still lost corective morphs on joints or other morphs. Doing it with just your chnages as a new morph there's much less to tidy up.
The Material Zone~ Geometry Tool Tutorial & Shaders@ carrie58
Shure keep in mind that those changes you make to the items in the scene only gets saved with the scene file. There are other options to save those customized items to your content library, like save a scene Subset to 'merge' it into other scenes. A Wearable Preset would also save the 'fitted' item in its current customized state and automaticly gets fitted to the selected figure by loading it from the library.
Another thing you could use is the Update Base Geometry to load any changes you made to the UV-map (in case you want to update the 'default' UV map), the Face Groups (Poly Groups) and the Surface Groups (Material Zones) from an exported Wavefron OBJ file onto the current item in the scene. Of course the most obvious usage scenario for Update Base Geometry would be to change the Base Shape, but you could keep the base shape untouched and update the other base geometry characteristics instead.
Be careful while using, unlike the manual changes that only gets saved to the current scene file the Update Base Geometry command will 'update' the actual content files in your content library to have all morphs targets on the figure refer to the new base shape instantly. Try this restart Daz Studio, load the item into a new scene and see if the update had changed the content itself.
[Quote] Possible to import new material zones for clothing
Try the action Edit > Figure > Update Base Geometry and in the Update Operation choose Update Full Geometry instead of the default Update Vertex Position.
Next you will see the OBJ Import Options dialouge with the various options at the bottom.
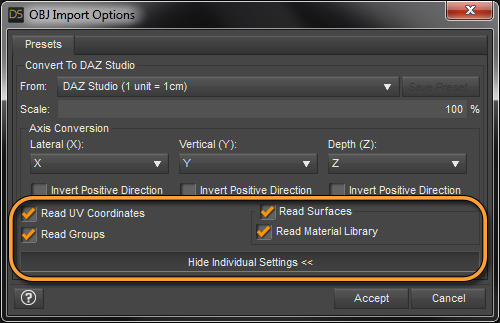
I'm not 100 percent shure about that but this should read in any changes to the UV-map, the Face Groups (Poly Groups) and the Surface Groups (Material Zones).
The Vertex Count & Order should keep the same as the original otherwise it refuses to update or you will get an exploding mesh I guess.
[PS] I don't think the Material Zones are related to the UV-Coordinates.
@ Novica
Nice tutorial instant bookmarked a while ago, even I didn't read thru the entire workflow in the given very detailed example. Thanks for that your threads are always full of in depth information - your work is inspiering.
Its more like to have this thread in my list of bookmarks to post it as reference for others.
The Geometry Editor can be a useful tool if you know how to work with it. There are even more handy options build in for morph editing, deleting geometry and such.
Please let me suggest some minor improvments to things that catch my eyes as I just had a second look at this thread.
Its the thing with the technical terminology how I would call it. I read "Material Zone" in the thread title and thats how its called in Hexagon but in Daz Studio in the "Geometry Editor" tool those are called Surface Groups. So the opening post should make clear that this tutorial is for Daz Studio and not for Hexagon. Also maybe add some definition and initial explanation of what you mean with Material Zone in the opening post as well. I see you added this What is a material zone? in a post after the tutorial that is much to scroll thrug.
Also an initial summary of what you will doing in the step 1 to 20 would help maybe add some more headlines like in setp 4-8 we will do this step 9-14 is about this and so on. Maybe this is the point that holds me back from reading every step by step. I just quickly read over the first sentences then I realise ok this I know already, next step... again a big text block, I read thrug well maybe its more meant as a follow along tutorial for beginners. I mean you realy need to be concentrated and focused to not loose the overview by all this explanations. The red and blue text colors already help to highlight some but maybe consider to also use the text formating Heading 3 for example for headlines.
Links to Anchor Points
A quick tip from me is to create an index with Anchor Points that you can click and the browser jumps to the desired anchor point in the other post. It can improve the structure of a thread and ease up navigation.
I recently discovered how to do that: First highlight a headline or something with the text cursor, then press Ctrl+C to copy, next click the edit forum post button on top with the flag icon and paste the Anchor Point name with Ctrl+V, hit OK. Now the text looks like a link with blue color and gets underlined with mouseover.
Now you need a link to this Anchor Point, for this highlight another text, click on the edit forum post button "Link" and in the popup instead of the default Link Type: "URL" choose "Link to Anchor in the text" and select the Anchor Point that gets listed if its exists in the same post.
Example:
1. Edit Opening Post - add the text line "What is a material zone?" two times - the second line becomes the Anchor point with the red flag in front - the first line becomes the link to the anchor with Link Type: Link to Anchor in the text.
2. Cut and paste the Anchor Point from the OP to some other desired post in the thread. With the Opening Post Edit mode select the Anchor Point with the red flag and press Ctrl+X cut out text - hit Save Comment - scroll to the other post down in the thread - press Edit Post and paste the Anchor Point there with Ctrl+V - Save Comment done. Next time you click the Link in the OP the browser will jump to the Anchor Point in the other post even it is no longer found in the OP.
I've used this method with Anchor Points to an extend in my latest thread see here [Freebie] Collection Nature: vegetation, plants, ground, textures, landscape, 3D scans.
Toonify character shapes morph?Can Cartoonized for gensis 8 be used on other gensis 8 characters or just the base genisis?
There are other cartoon morph characters and they can all be mixed with realistic characters for the same generation of Genesis.
Custom Morph HelpLooking for some advice on creating a custom morph:
I want to make some small adjustment morphs (just for personal use) to fix up a character created from a bunch of different morphs. Normally what I'd do is export it dialed in, make the adjustments, then bring it back as a single new morph, adjust the skeleton, and be done. However I'm using Sakura 8 for this one, and the separate eyes + brows are not on board with this.
I've tried dialling in the morphs without Sakura's head, making the changes, then adding her head later, adding her head before making the changes, completely unmorphing the head before adjusting the body, and basically every other configuration I could think of. From what I can tell, her eyes are bound to the skeleton in some way I couldn't really adjust - but could see changing when I adapted the rigging to the new shape. Pretty much any changes to the rigging (even autofitting after minor changes) seems to instantly send the eyes into revolt, and my custom shape has a lot of changes to it, leaving the eyes somewhere inside the head.
Ideally I'm guessing the solution would be to make the morph using solely G8F, but I can't do that because it's an adjustment to a load of other morphs, and without seeing them, I can't model the fixes. I tried dialling Sakura's head out and even as a -100%, but as soon as I do the adjust rigging to shape, her eyes go walkabout. I can only imagine the problem will get worse when I want to add custom fixes to the head itself.
Any suggestions?
Daz 3D is part of

Connect
DAZ Productions, Inc.
7533 S Center View Ct #4664
West Jordan, UT 84084Licensing Agreement | Terms of Service | Privacy Policy | EULA
© 2026 Daz Productions Inc. All Rights Reserved.