-
Pose conversion (genesis 2 to 8)
Convert to G3, then to G8
Once converted to G3, fix any issues. It's a straigtforward conversion as a rule from G3 to G8, but better to fix issues before the additional transfer as smaller errors can become compounded.
I like Zev0's tools for conversion.
Just be aware that there are more issues from G2 to G3
How to I import Marvelous Designer clothes into Daz and fit them?So I wanted to play with making some leggings for G3. I used Marvelous Designer to create and fit them using a base G3 avatar imported as .obj. I made the leggings quad meshes and exported as .obj with welds, single object. Next I imported the .obj to Daz, giving this:

Then I used the transfer utility with these settings:

Giving this:

So my question is, what did I do wrong? There's definitely some important step I'm missing here...
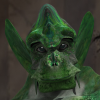
Creature Creator - a disappointment!it is a Carrara not seeing autofollow issue that will need fixing in DAZ studio
you need to load the clock on the figure there and dial down the ears and then save that morph as a support asset morph so Carrara will see it
Help identifying a couple of promo characters? (OOT and Blue Rabbit)It's Charlene, maybe with a little tweak in the face morph: https://www.daz3d.com/ry-charlene-hd-for-victoria-8
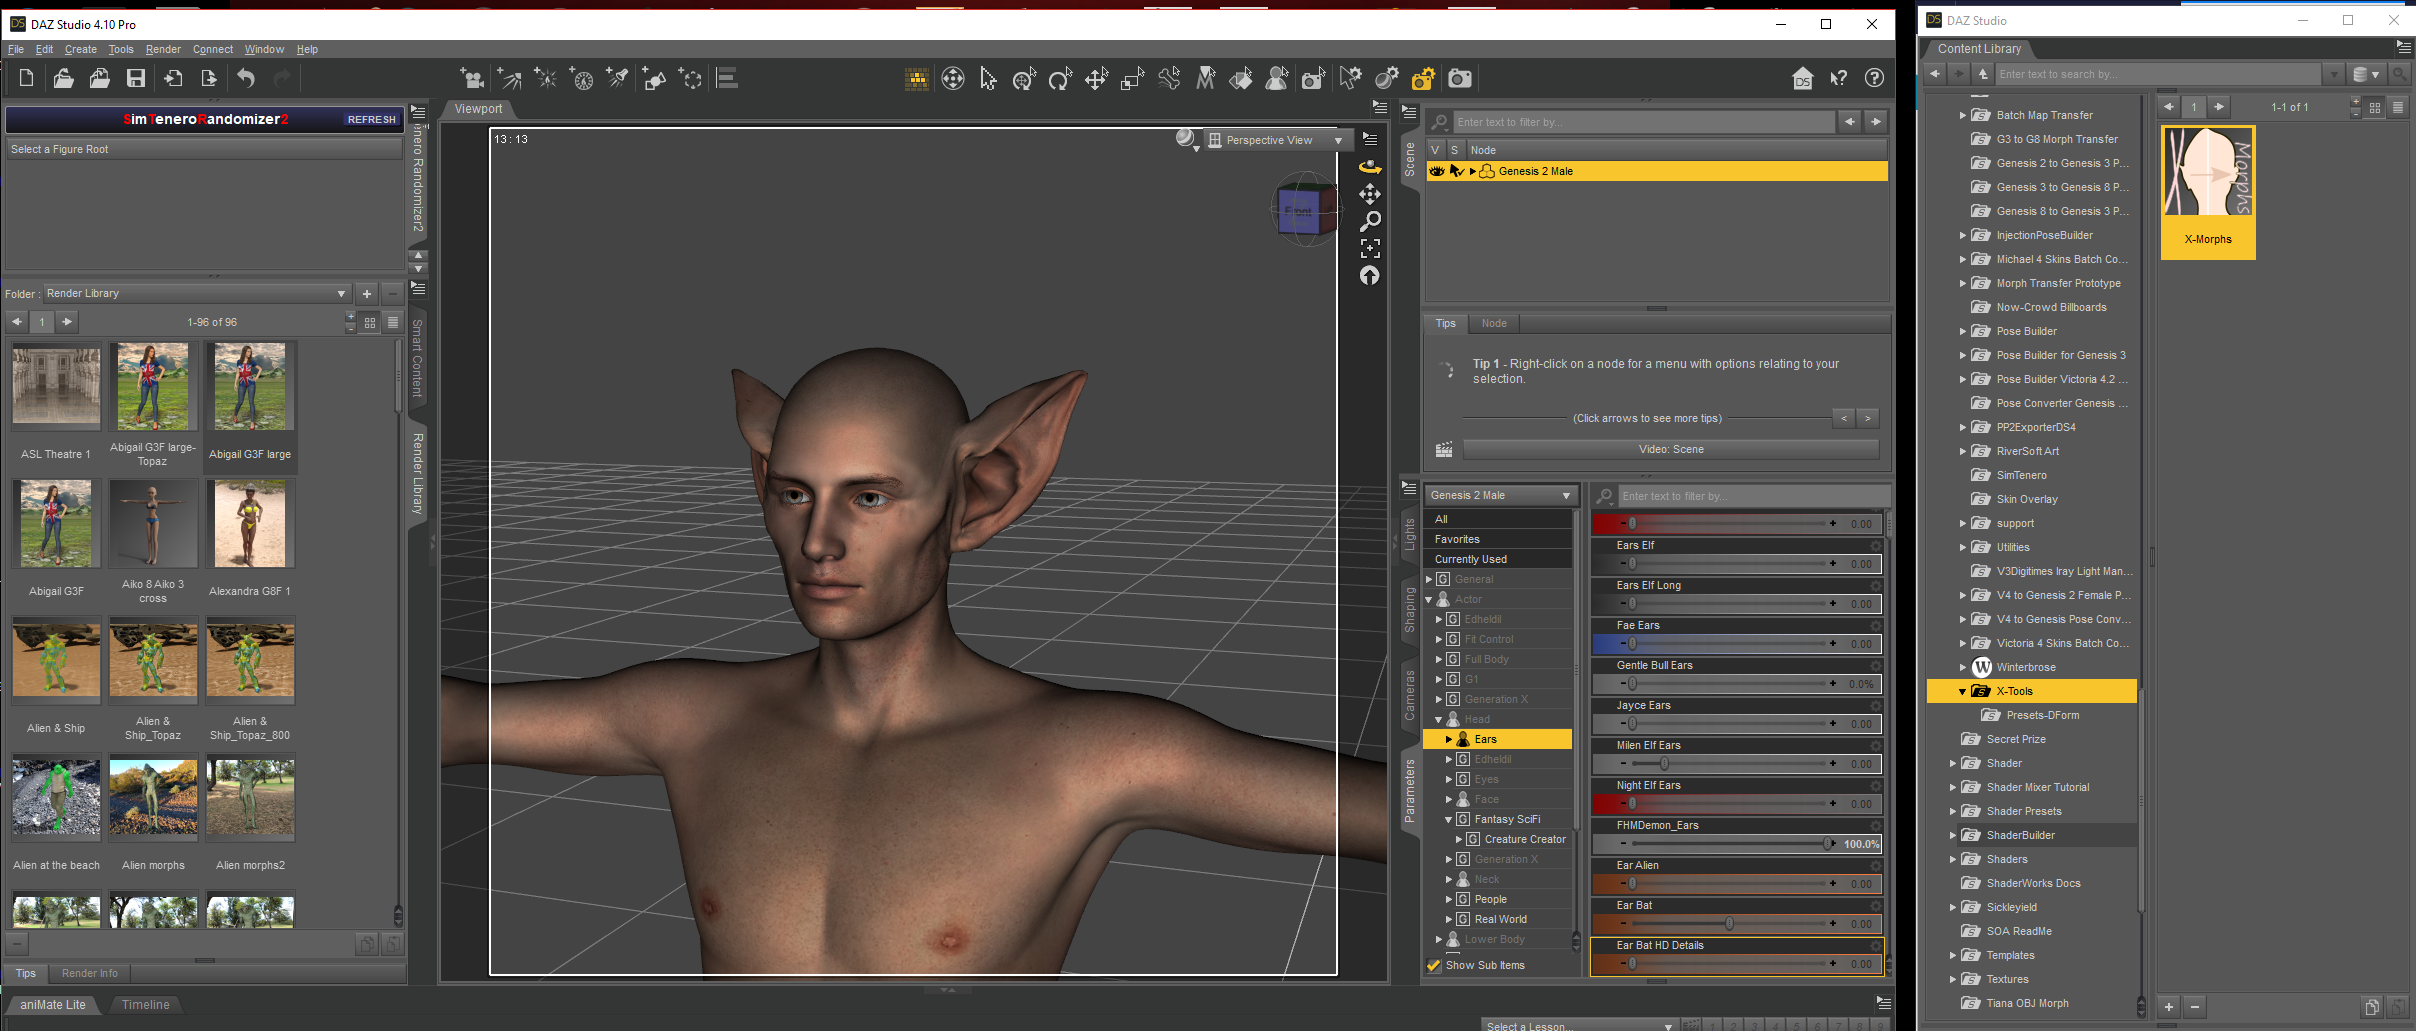
Creature Creator - a disappointment!Plan B - Do you have X-Morphs for DAZ Studio by any chance ?
With X-Morphs you can create a seperate ear morph from the Demon head, then adjust the parameters to -100%, so when dialed together with the Demon head morph you end up with normal ears.
I will keep X-Morphs as a last resort if all else fails, thanks. I don;'t want to pay unnecessarily for a Daz Studio plugin if I;'m not really using it.
Daz Install Manager (DIM) 1.2.0.6, Now Available!Also, do have User Account Control turned off entirely?
You asked me that already. I told you UAC is off.
And have you tried switching it On then?
Yes! I already told you that as well. lol.
Numerous people have posted, with various questions, to this thread - giving a summary of what has already been covered, rather than simply restating the original topic, would make it easier to avoid recovering previous ground. At the risk of revisting another previous question, have you checked that you can access the DIM folders without needing elevated privileges (try with UAC on so you get an alert if not)?
As far as I am aware nothing absolutely requires DIM - plug-ins and applications haev stand-alone isntallers, content can be installed manually or, in most cases, through Connect.
Also, do have User Account Control turned off entirely?
You asked me that already. I told you UAC is off.
And have you tried switching it On then?
Yes! I already told you that as well. lol.
Numerous people have posted, with various questions, to this thread - giving a summary of what has already been covered, rather than simply restating the original topic, would make it easier to avoid recovering previous ground. At the risk of revisting another previous question, have you checked that you can access the DIM folders without needing elevated privileges (try with UAC on so you get an alert if not)?
As far as I am aware nothing absolutely requires DIM - plug-ins and applications haev stand-alone isntallers, content can be installed manually or, in most cases, through Connect.
I do have access to all of the folders. If i can do everything through Connect then i'll do it that way. Thanks for that info.
Not everything - plug-ins, and anything else that isntalls "as software" can't be Connect installed and, as I noted above, some plug-ins don't have a stand-alone installer (though I'm not sure which). The fourth-generation Daz Figures (Victoria 4 etc.) need their bases and ExP morph expansions in the same folder, not in separate folders per product as Connect does behind the scenes, though a manual install will work for that.
Creature Creator - a disappointment!that said hoods are generally a PITA over hairs too, I usually end up chopping bits off or hiding by creating extra surfaces but yes you need to stop the autofollow on the hood with the ears, if its a full body morph the whole morph needs to be in fact dialled out, I will look when I can, got something rendering at moment.
Creature Creator - a disappointment!turn the morph for the ears down on the hair, hood etc
How do I do this? The hood does not seem to have the sme morphs. And the figure has no hair atached?
odd, anything dialed up should appear listed in parameters in the hood too, look under actor/model as well as head etcI have the Hooded Cloak, am having the same problems, only morphs found in the Hood are the pre-existing hood cloak morphs. Have not been able to get a workaround if the hood is fitted to G2M.
Creature Creator - a disappointment!turn the morph for the ears down on the hair, hood etc
How do I do this? The hood does not seem to have the sme morphs. And the figure has no hair atached?
odd, anything dialed up should appear listed in parameters in the hood too, look under actor/model as well as head etcCreature Creator - a disappointment!Plan B - Do you have X-Morphs for DAZ Studio by any chance ?
With X-Morphs you can create a seperate ear morph from the Demon head, then adjust the parameters to -100%, so when dialed together with the Demon head morph you end up with normal ears.
 Newbie questions about ERC freeze
I did discover the drag and drop feature yesterday from an old Rbtwhiz video. He was using Property Editor which no longer exists, so it took me a while to figure out that I could drag properties from the paramaters tab like you said. Both methods are about the same to me. The drag and drop method is faster at first, but then I have to set the scalar so the morph control (-1 to 1) matches the translation (-20 to 20). Overall, I can't complain, it's still a pretty easy process compared to doing everything by hand.
That "weld to parent" concept is interesting and also depressing at the same time. It just reminds me that every time I think I've got a handle on this stuff, there's always more stuff that I don't know. Rigging isn't terribly complicated, but I am recording videos of what I'm doing so I can refer back to them later. I've bookmarked most of the relevant Youtube vids, but some of them are out of date, using a different interface or I have to scan through the whole video to get the part I'm looking for.
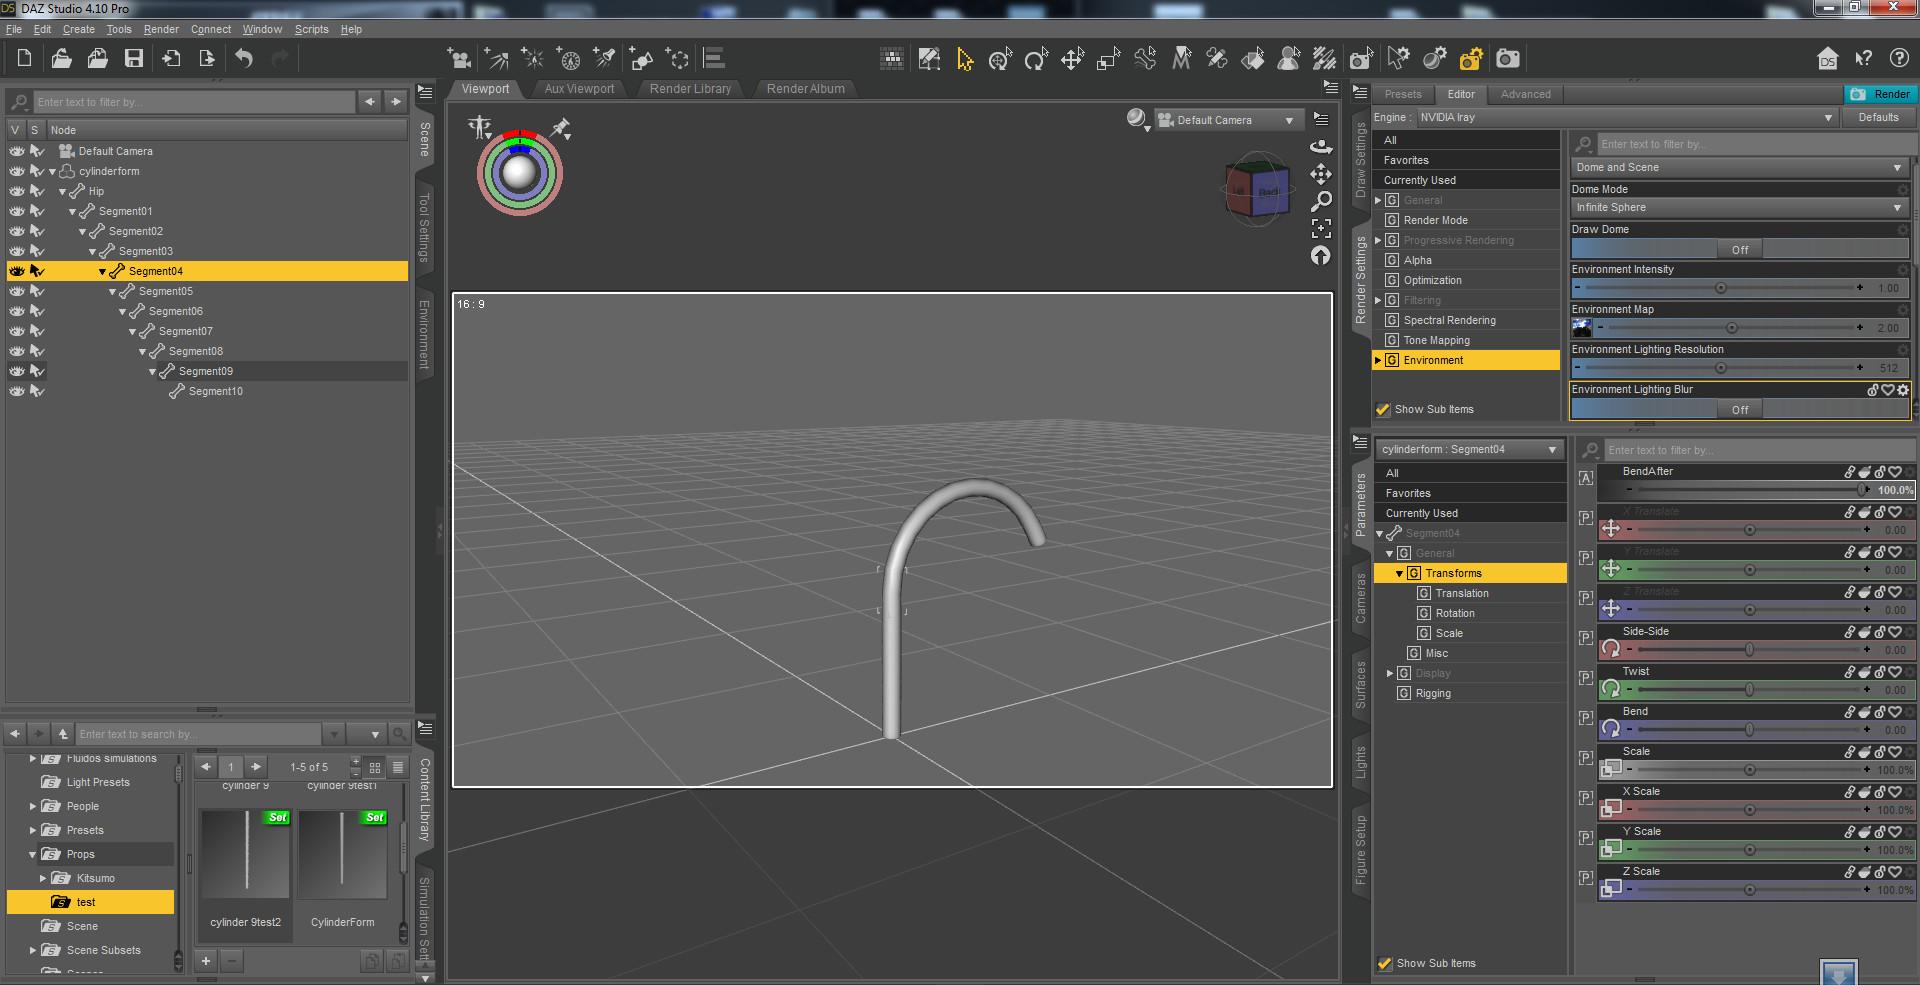
Anyway, I think I have enough info to accomplish what I'm trying to do. It's going to be a multi-purpose cable. Just a simple cable, but then you can fit or parent different connectors on the ends of it, so it can be a power cord, an ethernet cable, a usb cable or whatever the user needs. I need that for the real project I'm working on.
I also considered using inverse kinematics, but I think it would take too much work on the user's part to make the cord drape realistically. Then I thought about dforce, maybe turning off the dynamic strength for the two ends and letting the cable segments drop to the floor or whatever in the middle. I'm just going to go with normal rigging for now. Thanks for the help.
Edit: Looking through my product library, most of the cables I see are props, no movement whatsoever. I guess they think users don't want/need poseable cables. Maybe they're right and I'm just being pedantic. Maybe the average user doesn't care about posing cables. Plus there's the fact that most settings don't even have wall outlets.
I just found SY's Christmas lights in my library, and those just have the basic rigging, no easy pose controls, so that's what I'm going with.
Creature Creator - a disappointment!turn the morph for the ears down on the hair, hood etc
How do I do this? The hood does not seem to have the sme morphs. And the figure has no hair atached?
Which hood are you using, if I have it I will take a look for you ?
Creature Creator - a disappointment!turn the morph for the ears down on the hair, hood etc
How do I do this? The hood does not seem to have the sme morphs. And the figure has no hair atached?
Performance Issue With Vyria for Arabella 7Check the display mesh resolution of the character in the parameters tab. The figure has an HD morph, so maybe it loads by default with the display subd turned up too high. Unless you really need to see fine details in the viewport, you can turn the display subd level to 1, and the render subd to 3 or 4.
Scott's World of Junk -- Real Junk at Incredibly Low Prices!Hi Scott.
Nice Martini Girl looks good so far.
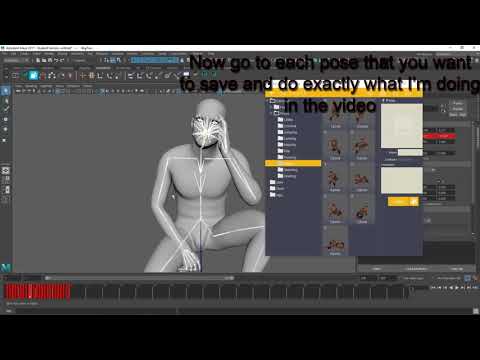
Beside of posing if I look close on the reference image there is also some subtile expression on her face like how you call it grim look?
Maybe some inner brows down, raise outer brows, brow compression but very low values there. And her mouth needs some more expression like bottom lip down, mouth corners back, also it looks like she raises her right upper lip a bit while the right corner is pulled back more. And finaly the squinted eyes especaly the bottom eyelids are raised at the inside.
You don't have to use expression presets or the default expression sliders, depending on the figure you are using Genesis 3 or 8 you have more or less options in the Power Pose pane for to manipulate individual face rig bones.
In case you don't know see this thread here How to get the new powerpose view for Victoria 8?
With Genesis 3 you can do similar things by switching to the joint editor tool to select the individual bones and manualy transform the face rig bones with the sliders in the Parameters pane.
[Quote] Not seeing the need for all those dots
As I understand it the face rig includes all these litttle bones with a smale infuence radius defined by the weightmap, so that they can get driven in a specific combination and in relation to eachother by the expression pose controler properties. I haven't palyed much with the genesis 8 facerig yet but I have currently inspected its capabilities. And I think its nice to have the control over every face bone individualy without the need to select them in the joint editor first like with genesis 3. With this you could create a completly new expression or finetune some existing expression, maybe if there is something that dosn't look quiet right with a character morph applied to the head.
I've attached a screenshot of what I did to genesis 8 female after playing with the PowerPose tool for about 5 minutes. You see she is super exited about the face template in PowerPose LOL. Seriously expressions can still get quiet scary if you want to, but all bones have their translation and rotation limits. For example I've also raised Eyelid Lower Inner. Also recently I found that some of the Daz original Face Morphs actualy drive some face bones to shape the head.
BTW I tweked a face bone on one side then I hit Shift+Y to get the pose Symmetry and Alt+Click resets the bone as usual with properties.
GTX 1080 Ti and GT 730 Driver incompatibilityPutting a GPU into a x4 slot would mean it would take a little longer to load the scene onto the card but we're talking very very little more time.PCIE gen 3 can transfer just under a gigabit per second per lane so a x4 slot can transfer about 3.6 gigabits a second or something close to 450 Mb/s. So to transfer an entire 11 Gb scene over a x4 connection would take just over 20 seconds plus whatever housekeeping was involved versus roughly 5 seconds on a x16 connection. I guess if you were running a really massive batch render that difference could add up but...
GTX 1080 Ti and GT 730 Driver incompatibilityPCIe has no effect on rendering at all. Puget Systems tested this by running cards in x8 and x16 and saw no difference. I don't believe x4 makes a difference either. So don't worry about that. It makes a difference in games and perhaps some other software, but Iray plays by different rules.
You could even plug a 1080 into a PCIe 2.0 on very old motherboards and still get the same rendering speed as you would on a PCIe 3.0.
I don't know exactly why, but I believe it is because of how Iray loads the entire scene onto the GPU. Once the scene is loaded, there is little real data transfer going on as the GPU runs its calculations. Even in multiple GPU systems the PCIe made little to no difference. In multiple GPU systems the trend indicated that more CPU cores made rendering faster by a small amount. For example, a high core Xeon machine could render faster than a i7 with same multiple GPUs. Again, this was only when multiple GPUs are used in rendering, which you are not doing.
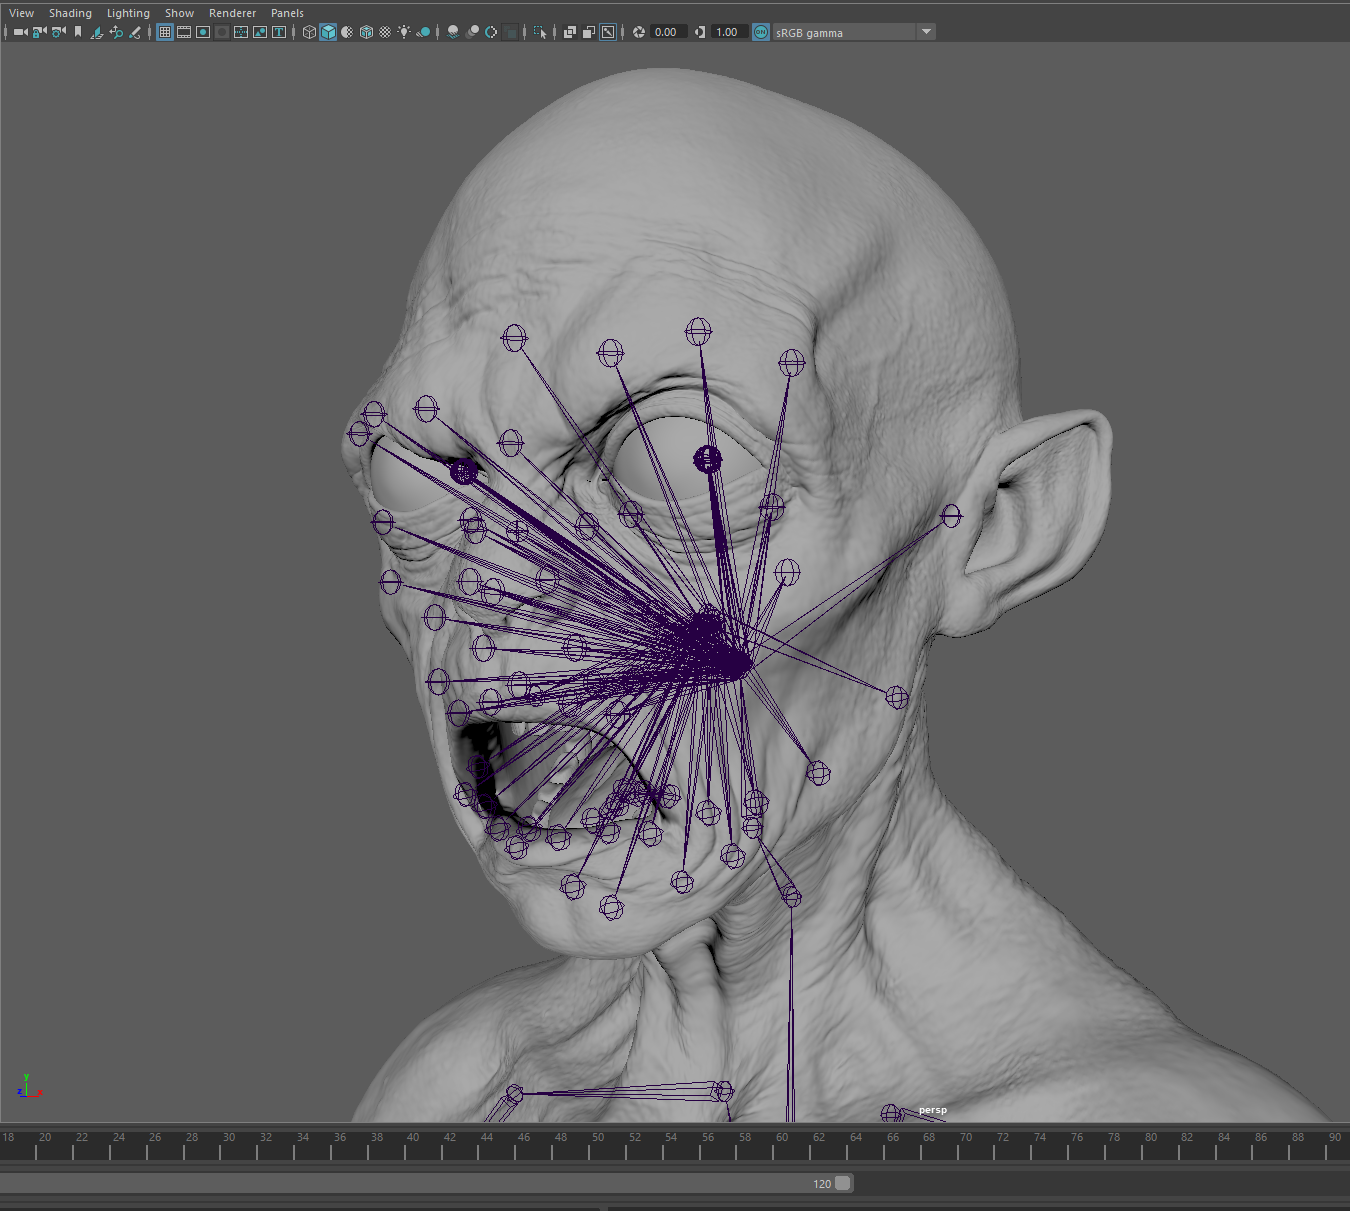
Can an expert give a final word on Catmark Subdiv and How To in Maya?Wow, there are certainly some strong opinions in this thread.
I'm one of the people who "claim to have managed" to utilize HD characters in Maya, and hope I can clear up some misconceptions. I won't be providing a full step by step workflow in this comment but I can point you in the right direction.
When it comes to plugins/scripts, in my opinion Genesis 8 for Maya (https://www.daz3d.com/genesis-8-for-maya) is more complete than Daz to Maya (https://www.daz3d.com/daz-to-maya). Daz to Maya does have an option to convert the shaders to other render engines, but considering all the textures aren't exported by Daz Studio as default I prefer to set them up from scratch anyway. You can always save it as a material in Maya to apply to any other import and simply swap the textures, or script it rather easily.
The "all manner of scripted trickery and nerdy McNerd technobabble" the scripts perform IS using the native Maya tools to emulate the Daz Studio behaviour, but why is that a bad thing? It's simply setting up joints to control JCM's and facial morphs to work in tandem where needed, exactly what Daz Studio is doing internally. By the point that you're exporting a character to Maya for animation you are likely to have made final decisions on their appearance, so losing the ability to completely change the character isn't a big deal. That's not to say it isn't possible though, as the Dex (DSON Exchange) plugin for Maya shows (https://www.daz3d.com/forums/discussion/278111/dex-dson-exchange-plugin-for-maya/p1).
Poses can be used in Maya
Clothing and hair can also be used, with different options depending on your desired results:
- Use the joints and weighting imported from the FBX
- Set up clothing with a wrap deformer or cvwrap for extra speed (https://github.com/chadmv/cvwrap)
- Use nCloth to add dynamics to clothing and transmapped hair with much more control and less issues than dForce
- Convert hair planes to curves with GHM2 (https://thundercloud-studio.com/product/gmh2/) and simulate with nHair for added realisim.
The issue then is HD morphs, and how to get those out of Daz Studio and into Maya.
When exporting an FBX file from Daz Studio, you get everything you need including morphs. But Daz only exports at the base resolution mesh. You can override this behaviour by locking the SubDivision Level in the Parameters Pane to whatever resolution you’d like to have in Maya.
Be careful though, as this can take some time and produce large files because Daz Studio is exporting a HD mesh for each morph target and JCM you select. The weight maps are also broken due to changes in vertex count, but that can be rectified.
To match Daz SubD in Maya as close as I can I use the following settings:

Set the Division Levels to be the same as whatever you exported your HD mesh from Daz Studio.
There may still be very slight differences in vertex position in some areas after applying the smooth. The important thing here is that the UV’s should match the HD version now, which gives a lot of flexibly for transferring data between the meshes.
A quick tip here is to use Transfer Attributes (Vertex Position: On, Sample Space: UV). This will make your smoothed base mesh match your HD mesh exactly.
Then, you transfer the skin weights from the rigged base mesh to the HD base mesh and hook up your JCM’s and pJCM’s.
So that’s the basics of it, although there are a lot of smaller things in between. But the end result is a rigged Daz model in Maya with HD morphs and JCMS, and the ability to use poses, hair, clothing and textures.
If you don’t care as much about having exact matching HD morphs and JCM’s, you could go the simpler route of simply smoothing and matching the rigged base mesh to a HD export static obj from Daz Studio. Then use seUVBlendshape or similar tools to move the HD mesh based on the UV’s of the smoothed rigged base mesh.
And finally, I wouldn’t say you need to go above matching the subd1 export from Daz Studio for animation use. It’s a good balance between having enough geometry to allow for smooth weightmaps and bending, but not so heavy that it will be a chore to try and animate.
You can then bake displacement and normal maps for the rest of the fine detail if needed. This will give you significantly better results than using just a smoothed base mesh default FBX export, even with displacement and normal maps.
The point is, all of this can be scripted and automated to make the process of going from Daz Studio to Maya pretty seamless. No one has released a complete product yet, but that doesn’t mean it isn’t possible.
I suppose it’s all about the final result you want to obtain. The MDD or Alembic workflow is a perfectly valid one too, but personally I cannot go from the freedom of animating in Maya to the much more restricted method of animating in Daz Studio.
Daz Studio won’t gain much traction in other industries such as Game Dev and Film without the ability to seamlessly move assets between programs. Whether that is something Daz and the community would want to cater to, I can’t say. But that is where my focus lies.
Personally, I’m going to continue on my “truly pointless endeavour” and help others along where I can.
Cheers,
Daniel
Creature Creator - a disappointment!turn the morph for the ears down on the hair, hood etc
Newbie questions about ERC freezeOk, so I'm trying to learn chain rigging. I'm not a newbie to the forums, but I'm new at this. I've got the rigging done and I'm setting up morphs to make it more user friendly. I want to have a Bend After morph that bends all segments after the selected point. It's relatively easy to set up, just use ERC freeze to set BendAfter to control the next segment's Bend and BendAfter properties.
My question is: Is there a way to automate this process so I don't have to repeat it manually for all segments? I'm only practicing with a 10 segment figure, but to make anything useful (rope, chain, snake, garden hose, etc) it would need 20 or more segments and to make a morph for BendAft, TwistAft, SideBendAft, BendFore...etc, it could get out of hand quickly. I'm thinking there has to be a simple way of copying paramaters from one segment to the next. I tried setting up the first few, then going into the .duf file in a text editor and copying all the properties to the following segments, but it didn't work, I probably missed something. I guess I could use Daz Script to alter the needed properties then ERC Freeze the control for them, but I'd have to learn Daz Script first.
Yes, I know there's a product in the store that covers this, but I've already learned most of this from Youtube. I don't want to have to buy the whole tutorial just to learn this last bit (plus I'm broke), and I certainly don't want any purchasers to reveal what's in the tutorial, that wouldn't be right. But if there's a feature in Daz Studio that covers this, I think it should be freely documented. If there isn't such a feature, there needs to be, it would really be helpful.
Daz 3D is part of

Connect
DAZ Productions, Inc.
7533 S Center View Ct #4664
West Jordan, UT 84084Licensing Agreement | Terms of Service | Privacy Policy | EULA
© 2026 Daz Productions Inc. All Rights Reserved.