-
How to make a single dial from a mixture of morphs, which then available as an asset?
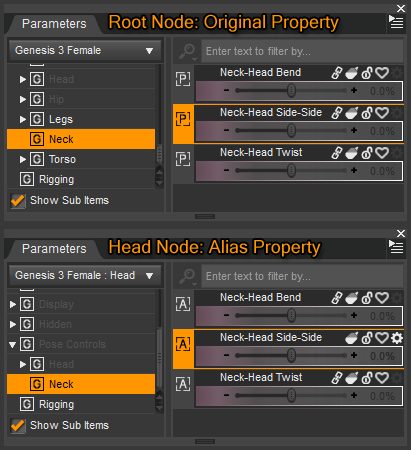
Are you shure you had selected the genesis figure root node and not the head bone while creating the new property?
If you can't find your new property in the parameters pane on a fresh loaded original genesis figure I can't tell whats gone wrong.
The only thing I guess you can do now is search the morph file on disk in some of your Content Directories with a file browser. Whichever was selected on top of the Morph Asset Save dialog while saving.
more references I found regarding creating aliases for expressions on the head node and saving control properties to another figure node / bone than the root node:
How to change morphs location?
How To Create A Shortcut To Expressions
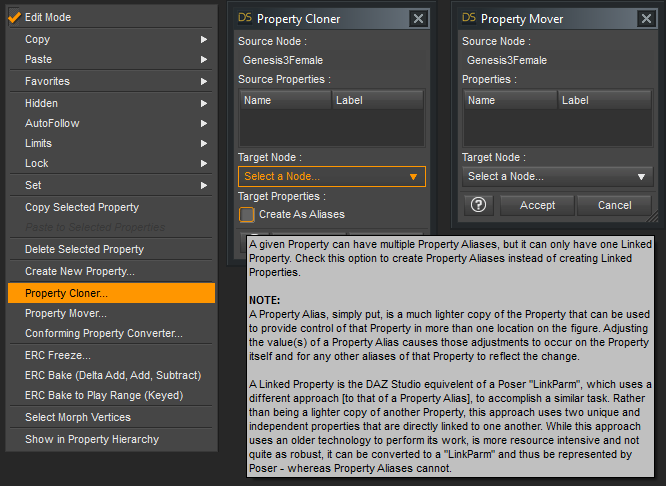
I've written more on that Property Cloner / Mover but I can't find in which thread I posted these screenshots anymore.
 I Forgot What My Complaint Was - Complaint Thread
in the old days the clothes needed a support morph fit. thought these days is all auto transferred.
if you talking old V4, there used to be magnet sets to add support morps. check lyrra store
TUTORIAL: Import FBX animation to DAZ studio Pro & copy it to the G3 characterThank you so much for this script! Just discovered it and it works perfectly!!
Now I'm able to transfer animations between Unreal and Daz :)
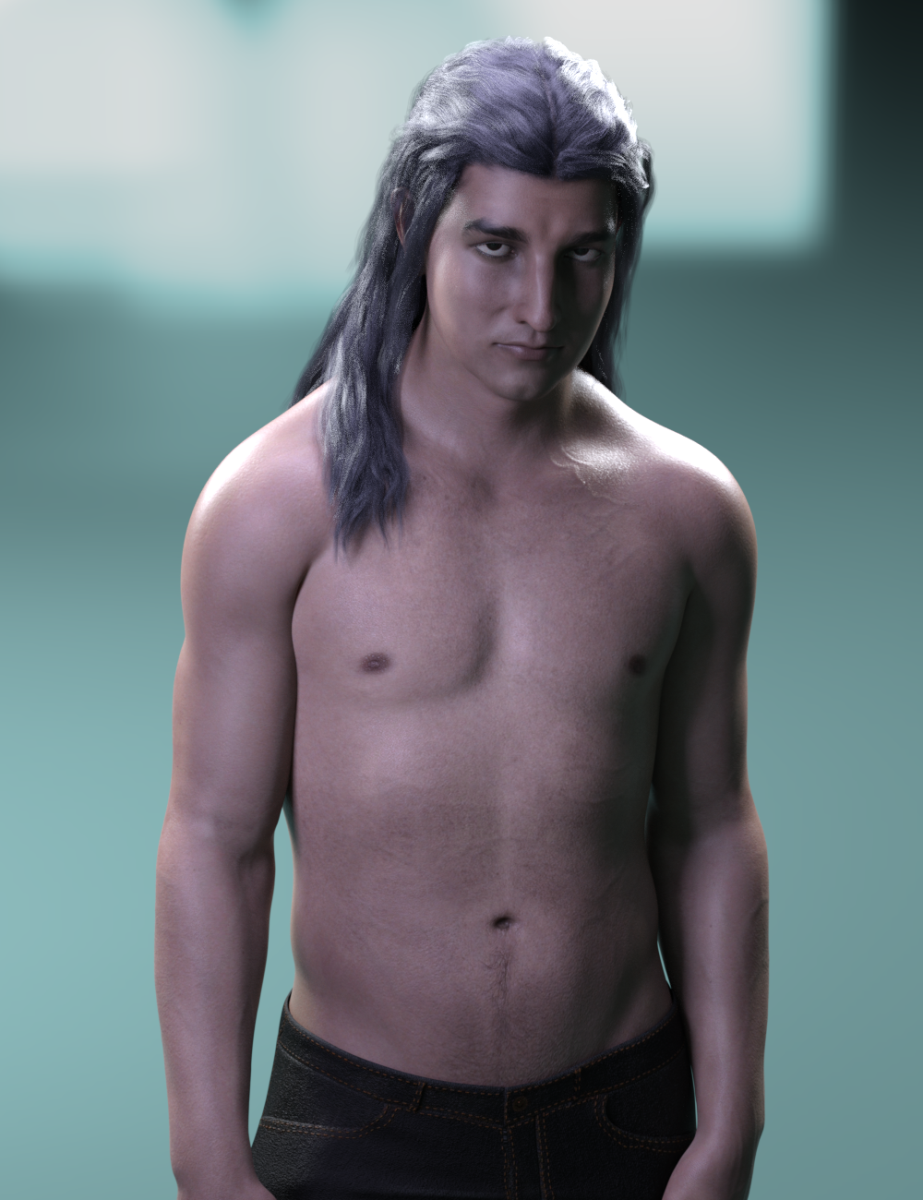
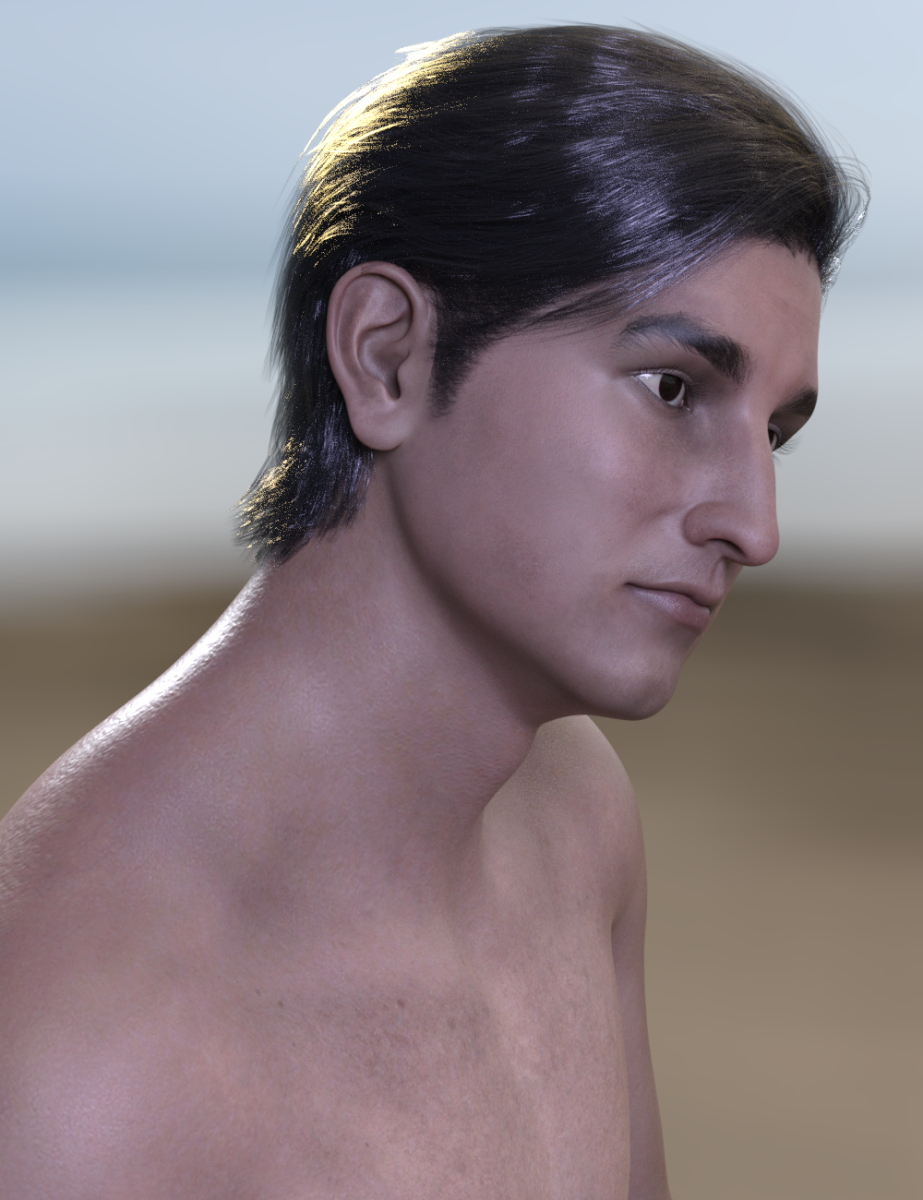
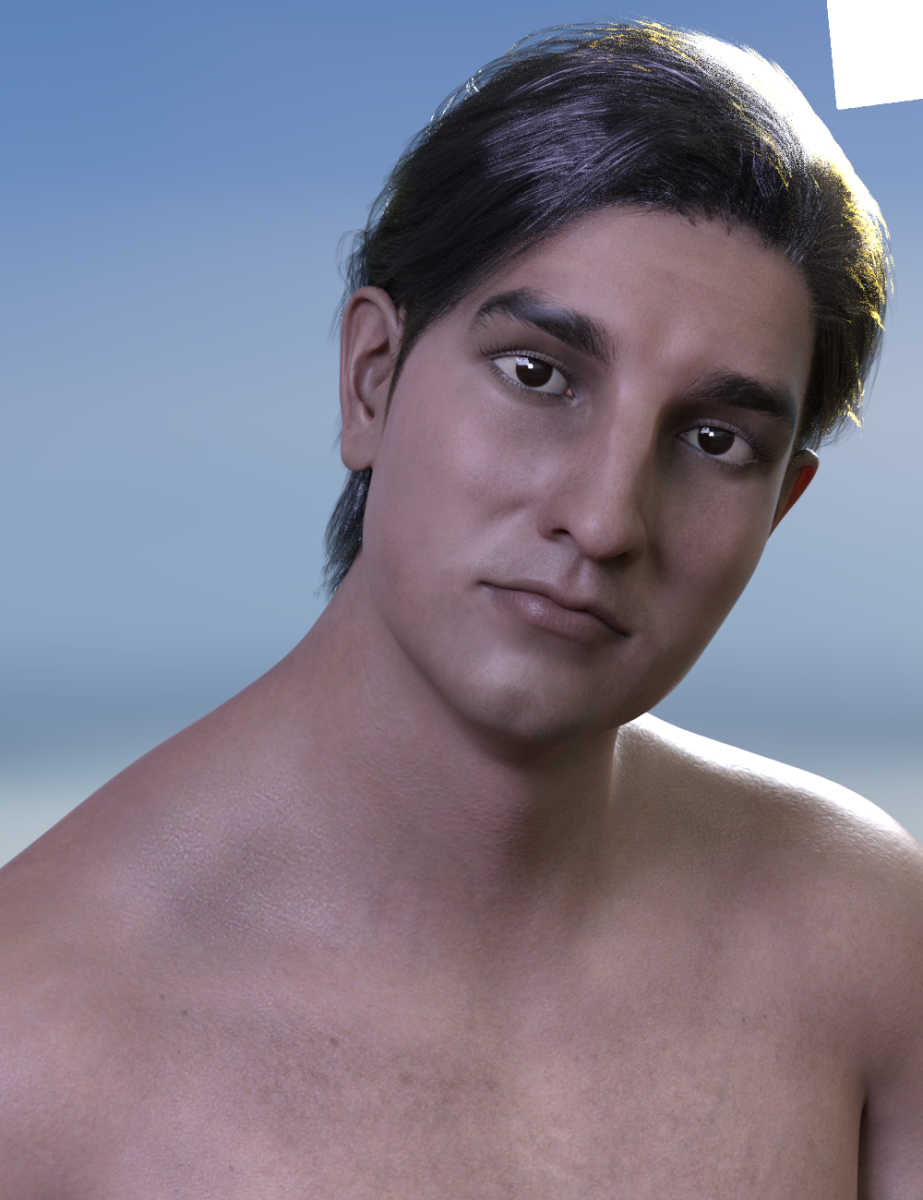
Darwins' Schtuff Pt DeuxSo- this is Jacov (Yah-Kohv), based off of Chaim Topol's younger photos that I could find. I am going to take the body morph into zbrush or hexagon again to work on his chest more so it suits the body type I've used (Going for a natural, strong body rather than sculpted 'pretty' body type). I'll also render him with a beard to see how he looks with that. He's wearing my Dh'morra's base skin with medium translucency settings for these renders.
 AIUTO...CHI CONOSCE L’ITALIANO? PARTE DODICI
Non capisco perchè ti fissi sul Autofollow che con DForce non serve a nulla.

Segui le isctruzioni dello Zio Imago che ne sa e ne ha fatte!

Dunque, con quella posa, per avere un risultato eccellente ci sono da fare un paio di passaggi.
Prima di tutto nascondi nella scena tutto tranne i vestiti del vegliardo. Ora esporta come OBJ mantenendo tutti i gruppi e le UV Map, seleziona "Collect maps", ti permette di mantenere le textures inalterate. Se poi usi dei materiali IRay specifici li dovrai riapplicare, ma è meglio farlo dopo.
Elimina i vestiti del nonno e il nonno stesso.
Ora importa gli abiti OBJ (appariranno nella stessa posizione iniziale) e la pupattola e mettila nella stessa identica posa della cariatide e cerca di posizionarla nel mezzo dei vestiti, in modo che abbia spazio intorno al corpo. Vedo che non ci sono parti accavallate, è più semplice in questo caso.
Adesso applica "Dynamic Surface" agli abiti.
Siccome le braccia e le gambe dei vestiti saranno di sicuro più lunghe degli arti della pulzella, dovrai agire sulle lunghezza di gambe e braccia e forse anche del busto. Dovrebbero esserci dei morph "Arm Length", "Torso Lenght" e "Legs Length", fai in modo che piedi e mani spuntino abbastanza. Non oltreppassare le spalle del maglione o il fondo dei pantaloni.Ora la parte divertente!
 Dovrai fare una animazione!
Per far cadere correttamente gli abiti dovrai rivisualizzare il divano e posizionarlo più in basso dei vestiti, non troppo, basta che non li sfiori. Potrebbe essere necessario fare la stessa cosa ol pavimento. Dopodiche vai nel tab Surfaces dei vestiti OBJ e porta a 0.30 il Collision Offset. Ricordati di questo parametro se ci sono troppi poke.
Abbiamo il setup completo. Ora, sulla Timeline, imposta 45 fotogrammi totali e poi vai al fotogramma 30 e azzera i morph della lunghezza di corpo, gambe e braccia, riportandole alla loro lunghezza normale. Poi riposiziona il divano esattamente dove era. Usa il puppetteer per la precisone massima. Se hai spostato anche il pavimento, riposizionalo.
A questo punto vai alla impostazioni del DForce e imposta "Initialization time" a 0.50 e disattiva "Start from memorized pose". Metti "Animated use timeline range" nel parametro Frames to simulate. Regola il resto come preferisci per una maggiore precisione o velocità ma dovrebbe funzionare correttamente con i default.
Per finire pigia sul tasto "Simulate" e goditi lo spettacolo.

Se tutto è stato impostato correttemente, i vestiti dovrebbero cadere sulla ragazza fin ad adattarsi a lei, poi il divano salirà pian piano e le pupattola tornerà alla sua forma naturale e gli abiti si riposizioneranno seguendola.
A scriverlo è più lungo che farlo, te lo assicuro.
Facci sapere se ti funge!

Ma sei un (i)mago! :D (Scusa la battuta xD)
Innanzitutto grazie mille per avermi dedicato del tempo, sei molto gentile!
Vedo che ho diverse cose da imparare per farlo, ma dato che non ci sono altre soluzioni, pur di fare il salto di qualità mi sembra un buon investimento di tempo!
Quindi più tardi proverò di sicuro (ora devo studiare), grazie ancora! :D
AIUTO...CHI CONOSCE L’ITALIANO? PARTE DODICINon capisco perchè ti fissi sul Autofollow che con DForce non serve a nulla.
Segui le isctruzioni dello Zio Imago che ne sa e ne ha fatte!
Dunque, con quella posa, per avere un risultato eccellente ci sono da fare un paio di passaggi.
Prima di tutto nascondi nella scena tutto tranne i vestiti del vegliardo. Ora esporta come OBJ mantenendo tutti i gruppi e le UV Map, seleziona "Collect maps", ti permette di mantenere le textures inalterate. Se poi usi dei materiali IRay specifici li dovrai riapplicare, ma è meglio farlo dopo.
Elimina i vestiti del nonno e il nonno stesso.
Ora importa gli abiti OBJ (appariranno nella stessa posizione iniziale) e la pupattola e mettila nella stessa identica posa della cariatide e cerca di posizionarla nel mezzo dei vestiti, in modo che abbia spazio intorno al corpo. Vedo che non ci sono parti accavallate, è più semplice in questo caso.
Adesso applica "Dynamic Surface" agli abiti.
Siccome le braccia e le gambe dei vestiti saranno di sicuro più lunghe degli arti della pulzella, dovrai agire sulle lunghezza di gambe e braccia e forse anche del busto. Dovrebbero esserci dei morph "Arm Length", "Torso Lenght" e "Legs Length", fai in modo che piedi e mani spuntino abbastanza. Non oltreppassare le spalle del maglione o il fondo dei pantaloni.Ora la parte divertente!
Dovrai fare una animazione!Per far cadere correttamente gli abiti dovrai rivisualizzare il divano e posizionarlo più in basso dei vestiti, non troppo, basta che non li sfiori. Potrebbe essere necessario fare la stessa cosa ol pavimento. Dopodiche vai nel tab Surfaces dei vestiti OBJ e porta a 0.30 il Collision Offset. Ricordati di questo parametro se ci sono troppi poke.
Abbiamo il setup completo. Ora, sulla Timeline, imposta 45 fotogrammi totali e poi vai al fotogramma 30 e azzera i morph della lunghezza di corpo, gambe e braccia, riportandole alla loro lunghezza normale. Poi riposiziona il divano esattamente dove era. Usa il puppetteer per la precisone massima. Se hai spostato anche il pavimento, riposizionalo.
A questo punto vai alla impostazioni del DForce e imposta "Initialization time" a 0.50 e disattiva "Start from memorized pose". Metti "Animated use timeline range" nel parametro Frames to simulate. Regola il resto come preferisci per una maggiore precisione o velocità ma dovrebbe funzionare correttamente con i default.
Per finire pigia sul tasto "Simulate" e goditi lo spettacolo.
Se tutto è stato impostato correttemente, i vestiti dovrebbero cadere sulla ragazza fin ad adattarsi a lei, poi il divano salirà pian piano e le pupattola tornerà alla sua forma naturale e gli abiti si riposizioneranno seguendola.
A scriverlo è più lungo che farlo, te lo assicuro.
Facci sapere se ti funge!
about golden palace g8f & blenderi loaded g8base female and base mat all.then i loaded genital and shell,run mat copy script.what should i do next?how to blend genital shell texture with skin texture?
and i have another problem. what is best way to import figure with genital and morph?i used daz importer ver1.3 but it doesn't work ,when i import figure with genital shell.
i also tried convert to fbx ,but exported fbx doesn't include any shapekeys.
im sorry for my poor English.
The difference between rendering now and 15 years agoToday you spend a damn week tweaking every single morph and texture and shader and light until you just give up.
The you come back to it after a week or two... spend time revisiting what annoyed you and the frustrations you had to overcome... and then spend more damn time on it.
But there's all these fantastic 3rd party fixes and utilities that make you able to use any Vicki before on any Vicki now. The promise lures you in. It promises dreams being fulfilled.
Every DAZ advance is two steps forward and one step back. You have to read a book in work arounds and then look further for other brainiacs who figured even better work arounds.
The difference is 15 years ago you rendered for fun. Every single render today is a pain in the derriere even though it looks better. It's making rethink if the old approach isn't just the better approach overall for sanity.
AIUTO...CHI CONOSCE L’ITALIANO? PARTE DODICICon quella posa ci sono un po di passaggi da fare...
Ora sono sul tablet, mi viene male scrivere ma ti spiego tutto domani mattina!
Non è difficile ma è un po laborioso e richiede un pizzico di pazienza.
Grazie mille! :D
Ho smanettato qualche ora e ho imparato queste cose, ma il risultato non è perfetto...
- Seleziono la 2a figura, show hidden parameters, edit mode, ctrl+a, autofollow, disable
- Geometry editor sui vestiti, vertex selection, geometry selection, select all, create rigidity group from selection
- Metto la 2a figura nella stessa posizione e le affido i vestiti, che mantengono su per giù la forma iniziale
- Fit control per togliere quante più compenetrazioni possibili
- Uso dForce
Il problema è che a volte esplode, e poi ci sono davvero un sacco di poke-through. Va bene il petto, che posso risolvere evitando di togliere l'autofollow a quei morph, ma non so come togliere le compenetrazioni a mani e piedi, che però ci sono anche se assegno quei particolari vestiti direttamente.
Anyone else seeing a change in hair buying decisions since 4.11?Now if there was a way to import guide curves into DAZ SBH that might be something. I've asked twice and not gotten an answer on if it is currently technically possible or not.
FBX supports splines/curves ; it's one way to transfer across 3D applications
But DS FBX support is quite limited...
Also, you would need a tool or some way to convert the splines back to the native hair system
Darwins' Schtuff Pt DeuxThank you! Very much! Working on Lead Make Morph set 2; and forgot what I was gonna name him. My mind.
The squirells went to the rave again. *sigh*
looking for female Sasquatchno..there are no textures for the female because the geografted female parts will not fit on the male
and I make anatomical element textures for almost every character I make male and female
With all that fur I am terrified about what sort of renders people are intending doing with the female morph, not that I should judge just the mind boggles
https://www.amazon.com/gp/product/B00US9H36W/ref=dbs_a_def_rwt_hsch_vapi_tkin_p2_i5
LMAO! scares me to know how you knew to go there and post that link, LOL.
Believe it or not, I only know about Bigfoot erotica because I'm a politics junkie and a sitting US congressman got involved in a mini-scandal about it!
I Forgot What My Complaint Was - Complaint ThreadComplaint : When you morph a figure and clothes made for that figure won't fit it ........and you can't let them run around nekked
looking for female Sasquatchno..there are no textures for the female because the geografted female parts will not fit on the male
and I make anatomical element textures for almost every character I make male and female
With all that fur I am terrified about what sort of renders people are intending doing with the female morph, not that I should judge just the mind boggles
https://www.amazon.com/gp/product/B00US9H36W/ref=dbs_a_def_rwt_hsch_vapi_tkin_p2_i5
LMAO! scares me to know how you knew to go there and post that link, LOL.
looking for female Sasquatchno..there are no textures for the female because the geografted female parts will not fit on the male
and I make anatomical element textures for almost every character I make male and female
With all that fur I am terrified about what sort of renders people are intending doing with the female morph, not that I should judge just the mind boggles
https://www.amazon.com/gp/product/B00US9H36W/ref=dbs_a_def_rwt_hsch_vapi_tkin_p2_i5
oh my...
transfer utility problems, Help!Another question of the same topic. Even it is doing a lot better than before I get yet some pinching. Any solution for this?
I have set the source as morph, choosen the correct morph and then set the reverse source shape from target
I basically would expect that the shape should not change at all when doing the transfer utility, and afte that it can follow the poses. Not sure why deforms in this way, even a lot less than before.
looking for female Sasquatchno..there are no textures for the female because the geografted female parts will not fit on the male
and I make anatomical element textures for almost every character I make male and female
With all that fur I am terrified about what sort of renders people are intending doing with the female morph, not that I should judge just the mind boggles
https://www.amazon.com/gp/product/B00US9H36W/ref=dbs_a_def_rwt_hsch_vapi_tkin_p2_i5
How to apply altered model from hexagon to daz?That sounds as if a different scale is being applied - or possibly as if there is scalimg baked into the morph. Was the figure scaled when you sent the clothing to Hexagon? If so try setting the scale to 100% and try again.
How to apply altered model from hexagon to daz?I'm new to daz. I have read maybe all of the question related to morph in hex to daz but that didnt work. I have clothes model that overlap with each other in specific area on gen 8 female. I want to alter one of the clothes model mesh so it looks a bit bigger. I select the clothes model and click file -> send to hexagon. I made one simple manipulation, I altered one of the face using soft selection with radius to translate in x-direction so it looks bigger. I click send to daz studio. The morph loader pop up and I click accept. I found my morph on the parameter with 0 value. When i increase the value, it is not alter the specific area in the model like the one I edit in hex but all of it surface become bigger. My question is how to apply the altered model in hex to daz?
SimTenero Randomizer Characters Showcase Thread Everyone WelcomeI have a ton of morphs but I tend to use only a few normally but using the Randomizer allows me to use more of the morphs to acheive different looks .I'll start with a full character then play with the Randomizer to change the look then throw in Cartoonizer or Toon Generations to Toonify it . Fun Fun I've made the presets for whole morph set then broke them down into individual sub groups you can use higher percentages with the sub groups ....
Daz 3D is part of

Connect
DAZ Productions, Inc.
7533 S Center View Ct #4664
West Jordan, UT 84084Licensing Agreement | Terms of Service | Privacy Policy | EULA
© 2026 Daz Productions Inc. All Rights Reserved.