-
Reversing a morph
If you're creating morphs that you are planning to distribute, then I concede that it makes sense.
However, you weren't specific that was the problem, and given that it would be fairly unusual to create a morph that did the opposite of what was desired, I'm evidently not the only person who misinterpreted the question as relating to pre-existing morphs. And yes, I have dealt with similar genuine questions from people before, so it wasn't so thoroughly weird that it tripped alarm bells in my head.
Under those circumstances, if you cannot reverse the morph in your original modelling tool (I cannot speak for all modelling tools, but it's certainly possible in Blender), then Zev0's answer of using Daz itself to export and reexport the inverted OBJ shape is valid.
Reversing a morphIt seems an unnecessary effort, but you could put the parameters pane in Edit Mode, via right-click, then right-click in the desired group to create a new property, set that to 100%, set the one you want to reverse to -100%, right-cllck on the new proeprty and select ERC Freeze, and (making sure only the morph you want to reverse is selected in the list of Sub-Components, click Accept. Optioanlly you could then go to the proeprty-to-be-reversed, click the gear icon on the slider>Parameter Settings and check hidden so that you see only your new property (assuming you don't have Show Hidden Properties enabled).
Thanks Richard I'd forgotten about that option. I didn't think I needed I would have to explain why I didn't want to have a morph dial into the negative, but I will.
1, I don't think it's very common to buy an item and have a morph set to '0' and have the option to dial it either way when one way does one thing and the other gives an option for something unrelated. A customer will need instructions. So,
2. I want to avoid having to provide instructions for something as simple as dialing in a morph. Good design is intuitive design. I don't want to be that idiot designer that has to put instructions on a door saying 'Lift handle to exit'.
Reversing a morphIt seems an unnecessary effort, but you could put the parameters pane in Edit Mode, via right-click, then right-click in the desired group to create a new property, set that to 100%, set the one you want to reverse to -100%, right-cllck on the new proeprty and select ERC Freeze, and (making sure only the morph you want to reverse is selected in the list of Sub-Components, click Accept. Optioanlly you could then go to the proeprty-to-be-reversed, click the gear icon on the slider>Parameter Settings and check hidden so that you see only your new property (assuming you don't have Show Hidden Properties enabled).
this is helpful info.
4.12 Beta IK setupDo you do the rough out of the animation using FK first or IK first? Thanks.
Hi it depends on what type of animation you are doing
what application you are using, and personal preference really.I prefer to get all of any IK foot & hand contact recorded first as a"base layer" in my realtime program.
I then export that as BVH to Daz studio with IK baked to FK
I then Carefully add secondary FK body & limb motion with with the graphMate editor& Parameter dials after culling down the BVH keyframes to a managable number with a vital free script from Mcasual.I do ALL of my lipsynch with either mimic Live or mimic Pro3 .
facial animation (including eye blinks)are done manually in Daz studiosince I will be exporting my fullly dressed& animated Genesis 1,2 or 3 Characters as MDD to C4D for final lighting& rendering.I have no use for genesis 8 as my custom.on off clothing creation pipeline is based on the T-pose and transfer utility of Daz studio version 4.8.
Victoria 4 in Carrara?Nothing is fool proof because fools are so ingenious.
TCY - sorry for your frustration. I've been there. I've been there in Poser, in Daz Studio, in Carrara, in Bryce, and in Blender. Nothing just works. Thus my tag line in my forum signature. Aaaargh. Happy to try to help you diagnose and solve your problems.
Victoria 4 and Michael 4 work seamlessly for me in Carrara. What I mean is that Carrara reads their rigging correctly (uses CR2 fles) without any plugin. Carrara loads their mesh correctly, applies their morphs correctly, and applies their poses correctly. I don't like the blue tint multiplied to the diffuse maps by default, but I can't really call it an error. So, some shader tweaking is required. The conforming clothing/hair figures and smart props designed for V4 and M4 work seamlessly for me in Carrara.
Currently, I use the Genesis 2 figures (or my own custom rigged figures) for the vast majority my projects. However, I use V4, M4, or even earlier on occasion. I also use the Poser 4-7 figures regularly.
At the moment, I can't reproduce the bad results you are getting with generic references to V4. My V4 stuff works on my system with my installation. So, perhaps if you post the exact content you are using with V4 maybe I can try to use it on my system and see if there is a problem. Remember, V4/M4, the Poser figures, etc., do not have the auto-morph projections that the genesis figures have. The V4 conforming clothing figures have to have matching morphs (or be adjusted).
I know it sounds annoying. If you still have any patience left, tell us the specifics. Here is an example of why. Do the V4 pants found in the "V4 Morphing Clothing" runtime subfolder work with V4? Although the answer is yes, it is easy to demonstrate an example that appears like they don't work. Here we go.
- I started a new Carrara scene.
- I loaded V4 from my Runtime \ Library \ Figures \ Daz People subfolder. ( I also applied a Carrara skin shader and loaded some hair but ignore that for now).
- From the Runtime \ Library \ Poses \ Daz's Victoria 4 \ Morph Injections subfolder, I dragged and dropped the + injection files for Basic, Morph++, Elite, and Aiko 4 on to my V4 figure to load them.
- From my Figures \ V4 Morphing Clothing subfolder, I loaded the JYTop and the V4Pants. Please load those specific ones for his demonstration.
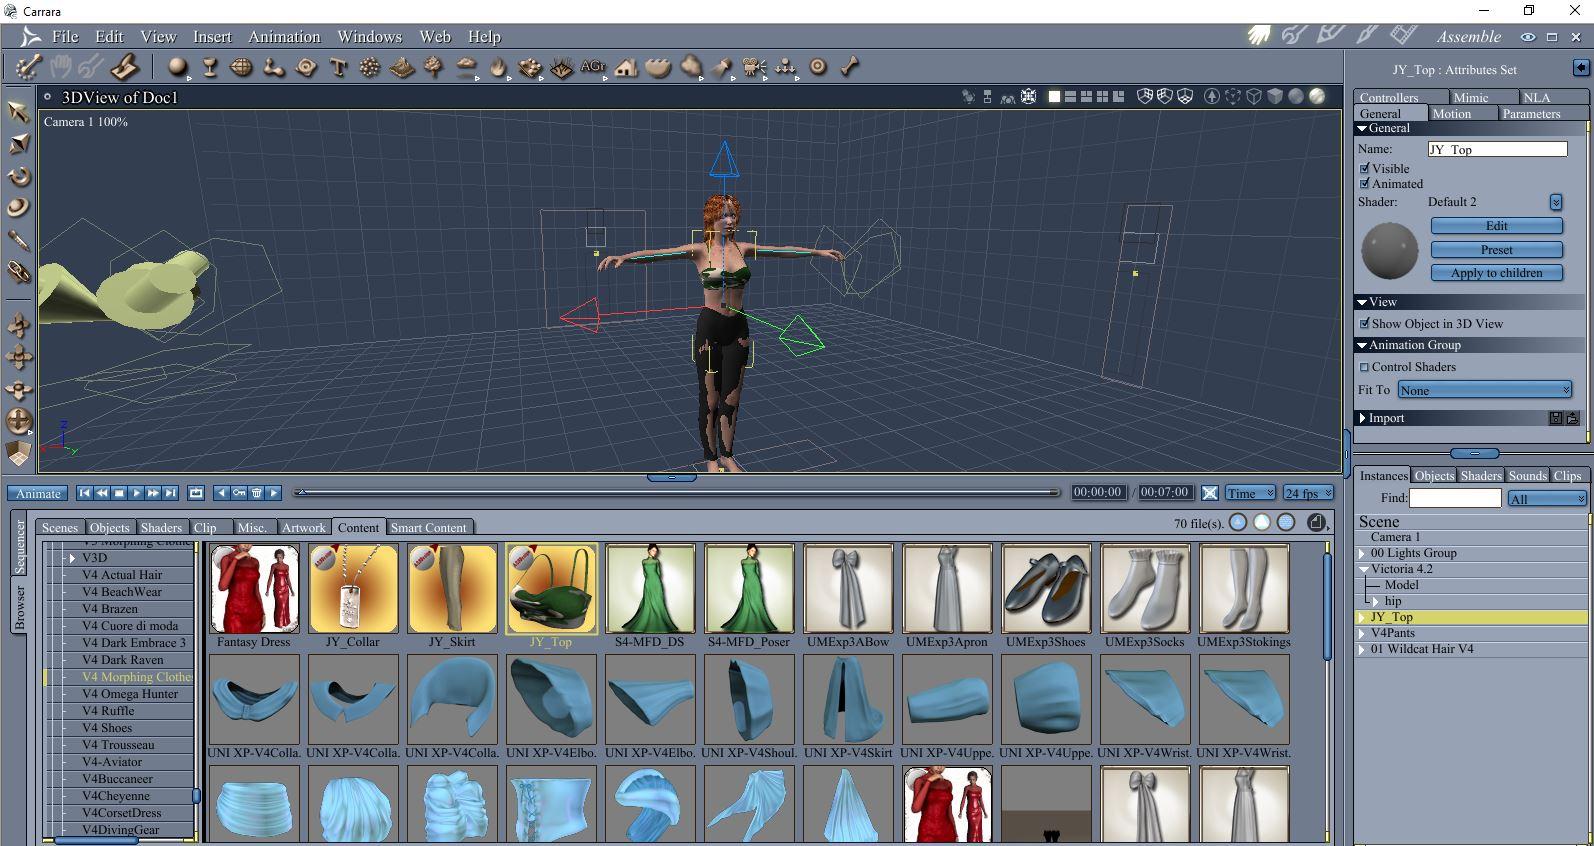
*** I loaded these two clothing items independently. For now, I did NOT drag and drop them on V4 or double click them with V4 selected. They are NOT fitted to V4 yet ***
- With V4 selected, I went to the parameters tab to see a list of morphs. I dialed Aiko 4 to 1. I also selected the V4 right thigh and rotated the thigh forward and up. You can see that neither the top nor the pants look correct.
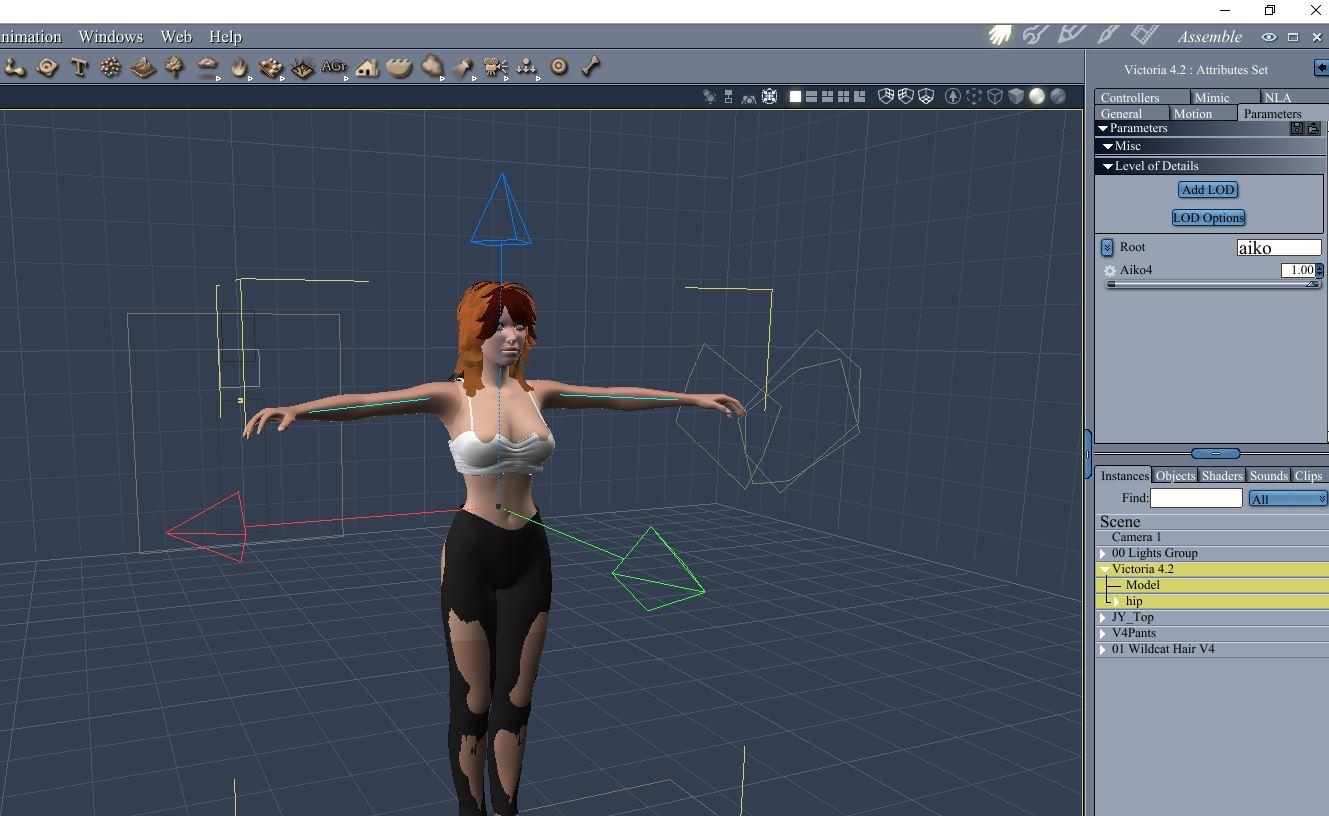
- I selected the top and used fit to V4, and selected the pants and used fit to V4. See that the top now fits fine. The pants conform to the pose but do not seem to fit the shape.
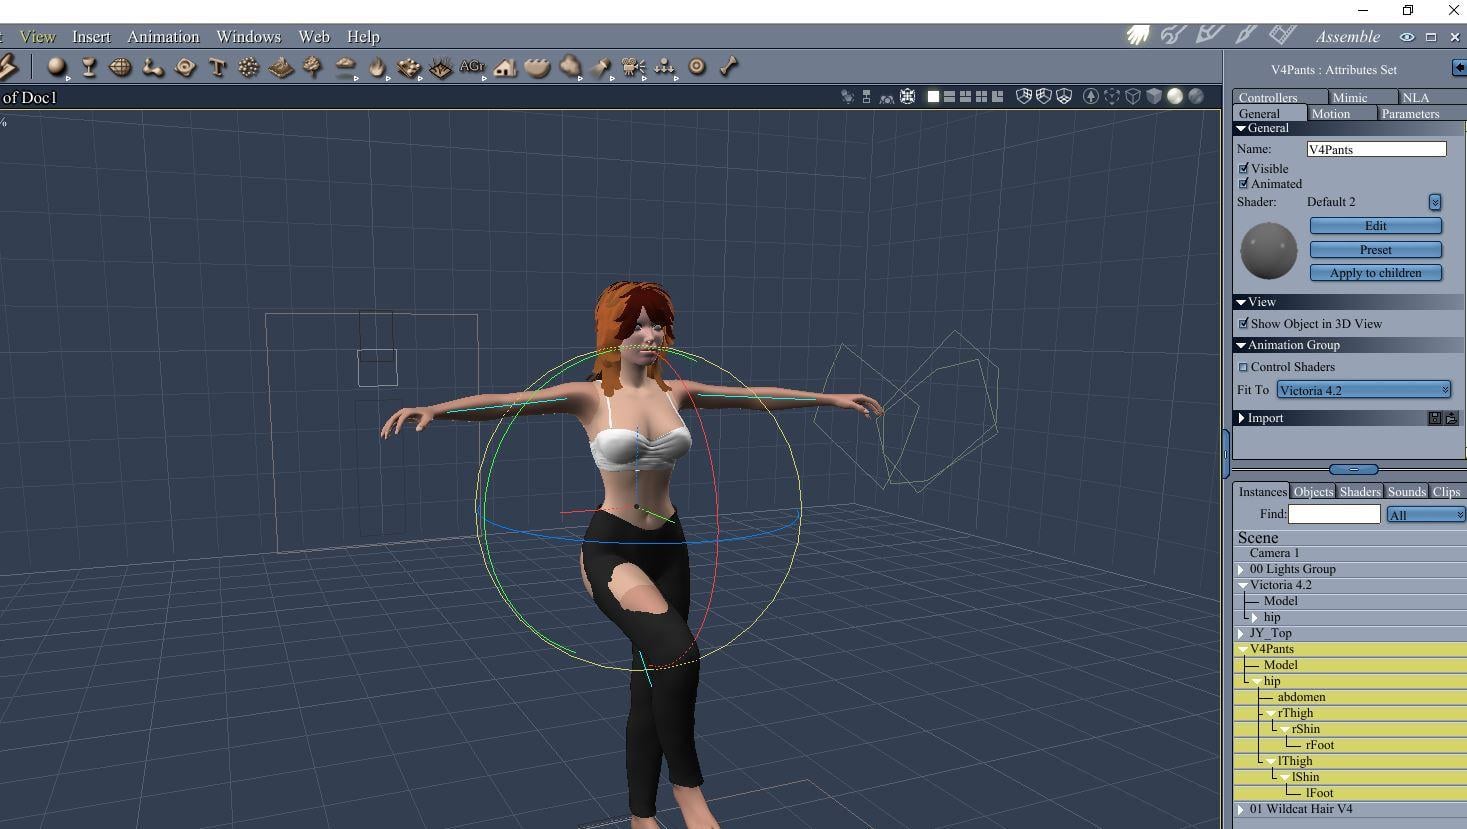
- Looking closely at the JYTTop figure parameters, notice it as an Aiko4 morph and it has automatically dialed to 1 to match the V4 figure morph.
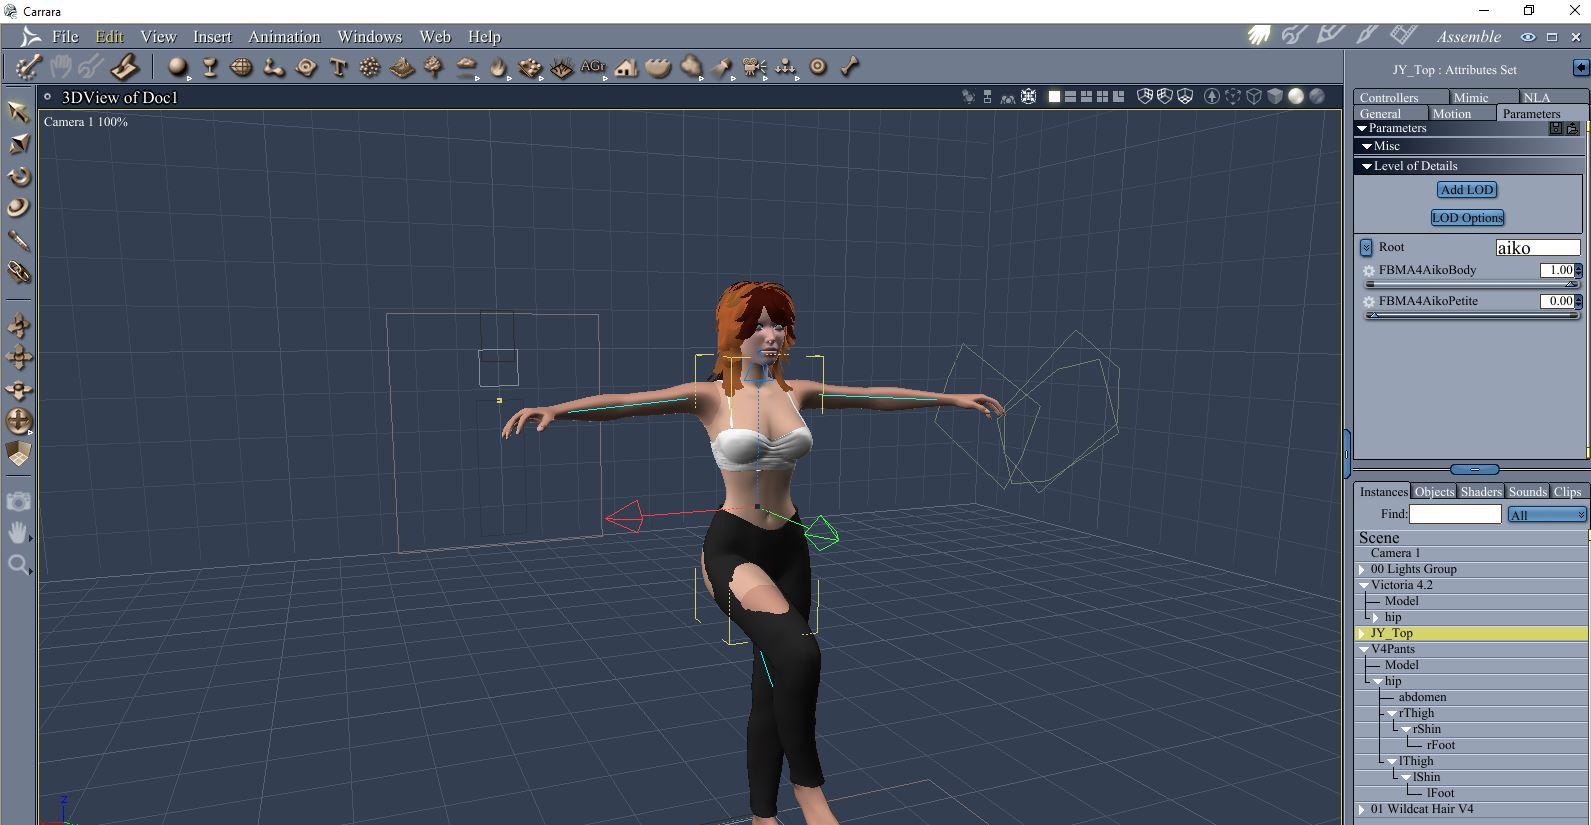
- In contrast to the top, choosing the pants parameters, there is no Aiko 4 morph present in the pants. That is why the shape looks wrong (and also a tweak for the thigh bend to a lesser degree).
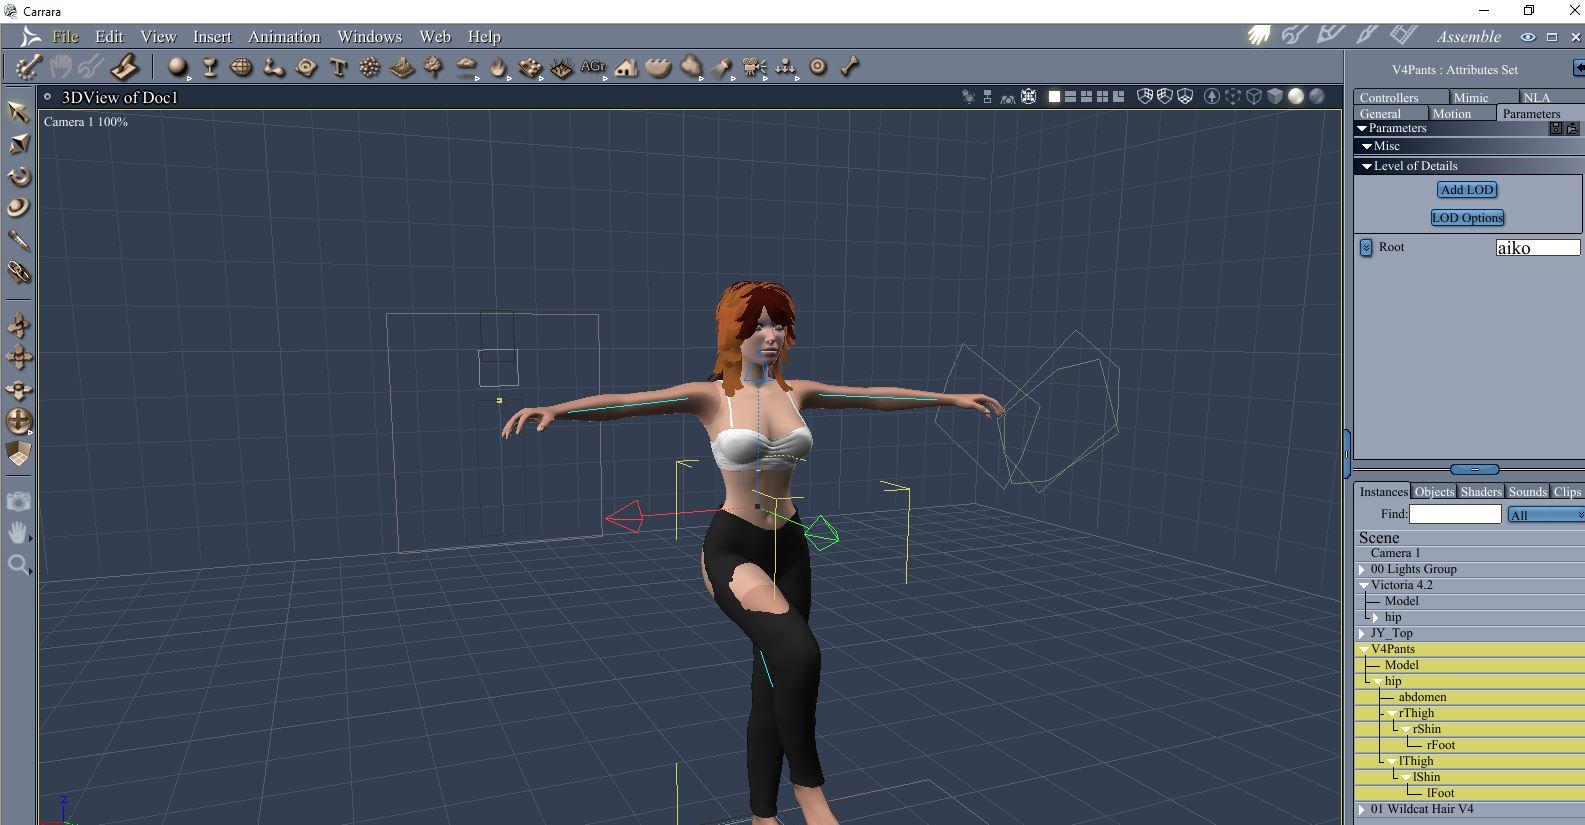
- Looking more closely at the pants parameters, there are a whole bunch of morphs present, jut not Aiko 4.
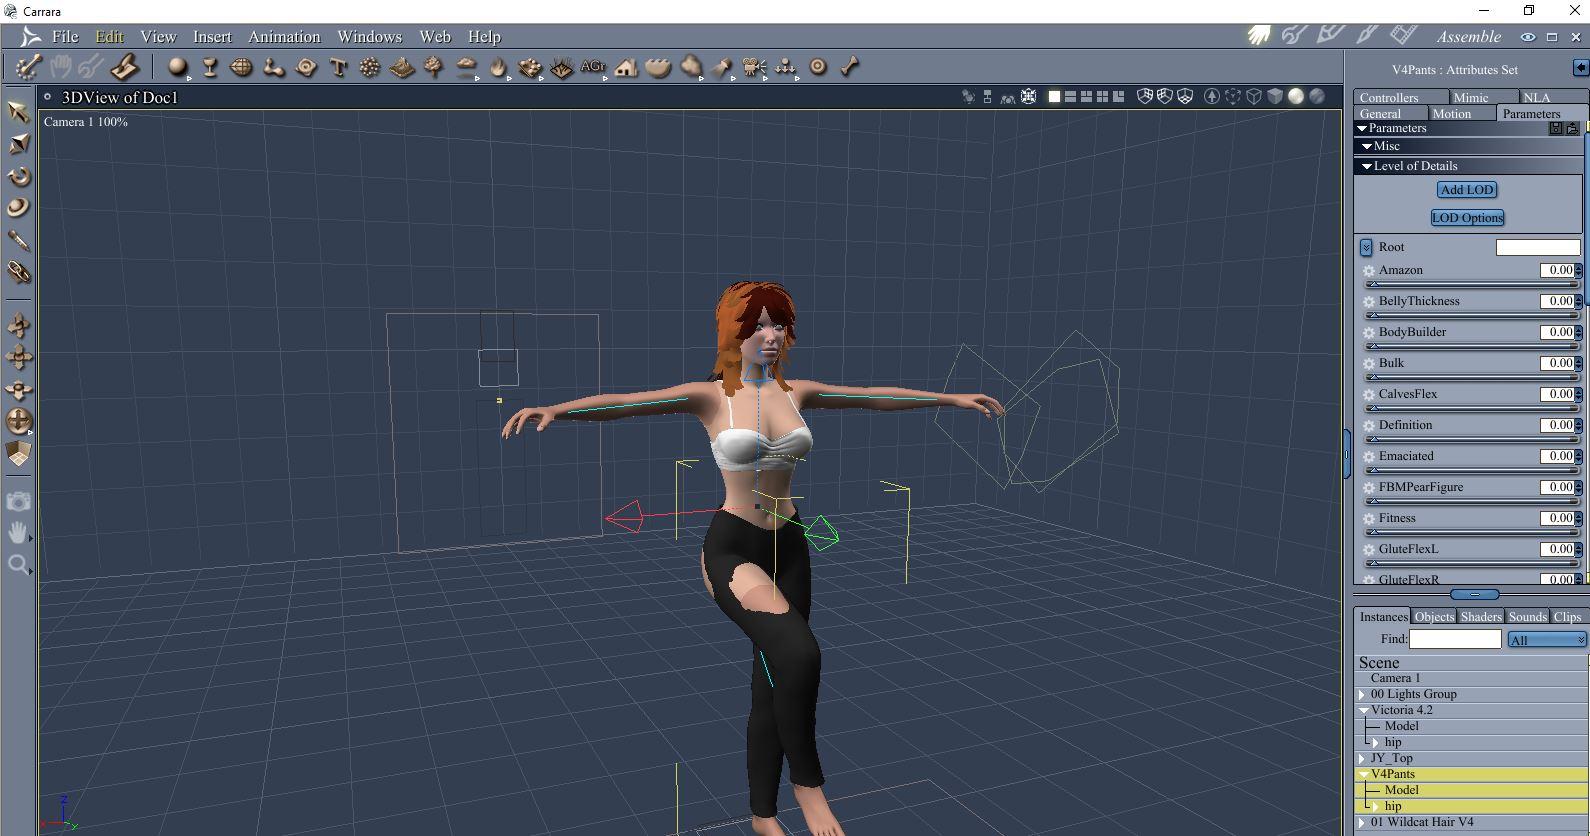
- To test, I selected V4 again, dialed Aiko 4 morph back to 0, but dialed bodybuilder up to 1.
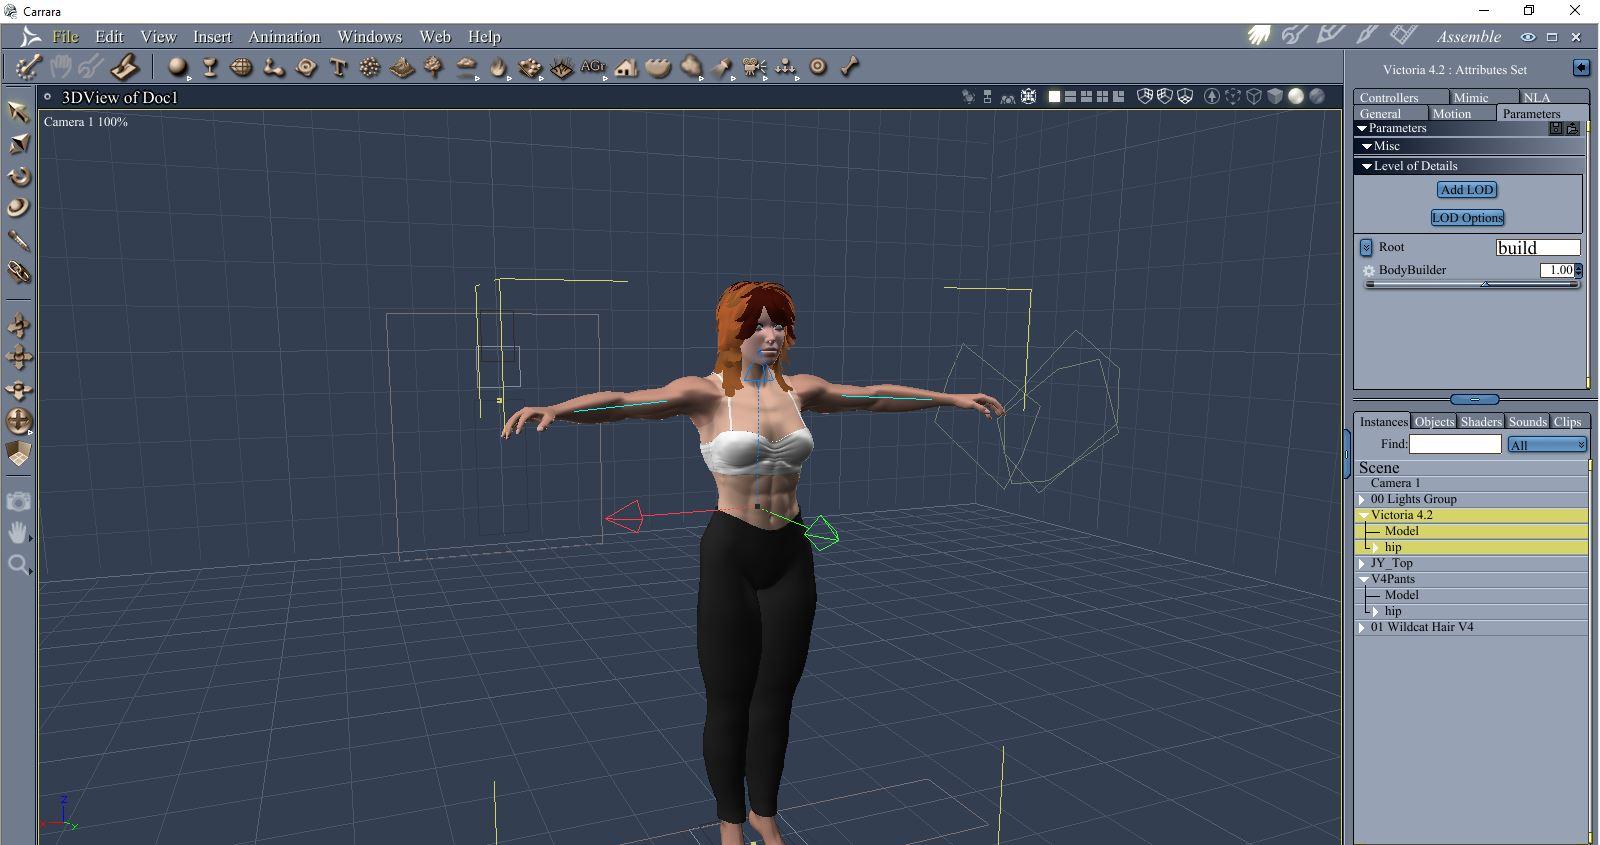
- The pants match the V4 morph because there IS a bodybuilder morph in the pants.
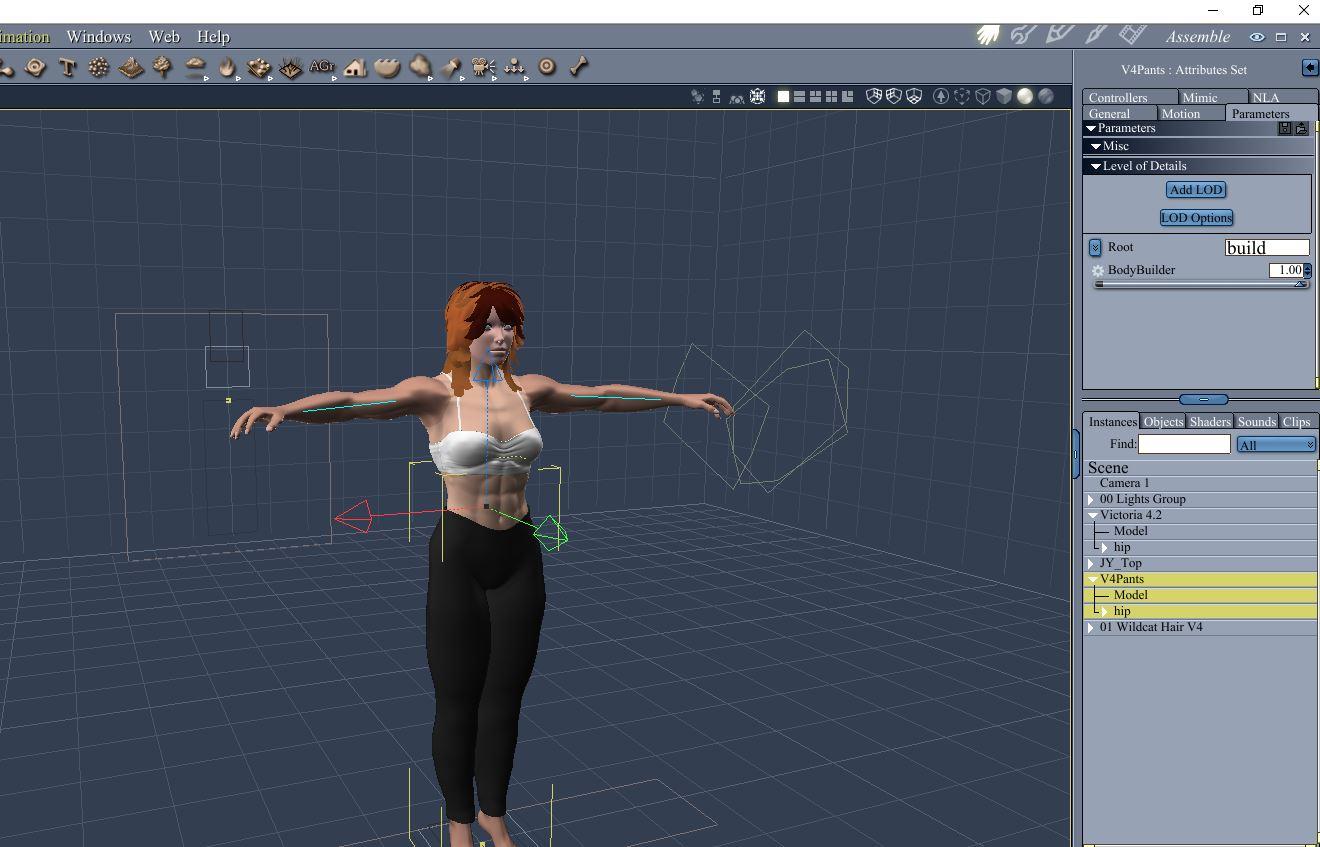
*** Although it appears that the V4 morphing pants didn't work with my first test of V4, that wasn't true. The pants don't happen to have Aiko4 morphs. The JYTop does.
Victoria 4 in Carrara?Yeah, someone in a previous comment mentioned that they have to be brought in as Runtime. I tried that, and it brought them in, but things still didn't work correctly. It's fine, though. I'm perfectly happy using 5 for the time being.
The part about using morphs and unimesh... -whoosh- lol. That's right over my head. I've just now found a way to reliably get figures into Carrara lol. Figuring out how to morph and such can wait for now. Just figuring out how to apply different hair color to Stalker Girl hair at the moment. Doesn't seem to want to update, so I'm looking for some kind of instructions.
Was Genesis support sorta cobbled in to Carrara when DAZ bought it (IIRC it was originally made by a different company), and that explains why there's - seemingly - so many different factors and things to consider and account for when importing and using stuff? Like, why is Victoria 5 importing just fine as Content, and previous stuff imports fine as Content.. for Victoria 4 needs to be Runtime. Does DAZ like to just try random things from one figure to the next?
Part of my frustration in learning this (importing/using Genesis characters) has been that there doesn't seem to be any kind of clear, clean and consistent workflow for it. Seems the process changes, becoming more or less complicated, depending on what you're trying to use. That's really unusual compared to pretty much any other program I've ever used. Most cases, using an installer/manager, you select the content, select "install", and the installer sets everything up for you and you're good to go. You don't even have to know how it's being set up. Manual installations are generally as straight-forward as just downloading and unzipping into a specific addons/plugins/etc folder. Then you restart the program, or click a "rescan addons" option, and the program does the rest. Other programs have the ability to install from zip file right from within the program, which places everything where it needs to be. And so on. In all cases, the user doesn't need to worry about the nuances or particulars of where/how/why. They just need to install and go. Carrara's the first program where it doesn't seem to (consistently) work like that. I'm rather curious why that's the case.Aging Face Details HD....any renders? opinions?Got the bundle yesterday. Don't regret it.
Will need to get the Aging morph bundle for G8, until then I'll use the G3 ones I own.
A few quick renders :
G8F with Aging face details only (no other morphs except cornea bulge) with Charlotte 8 skin
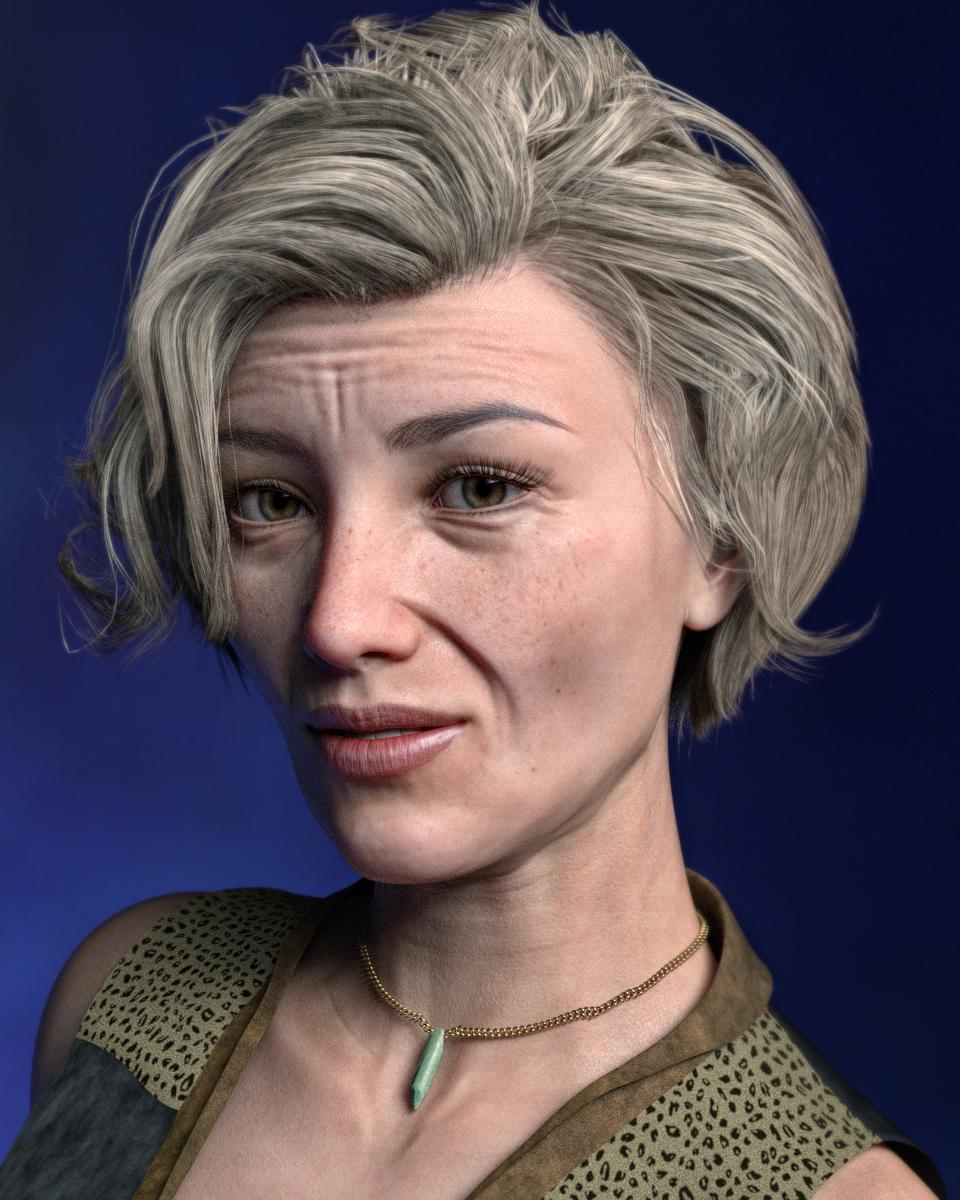
G3F with aging morphs and aging face details (no other morphs except cornea bulge) with Rune 7 skin
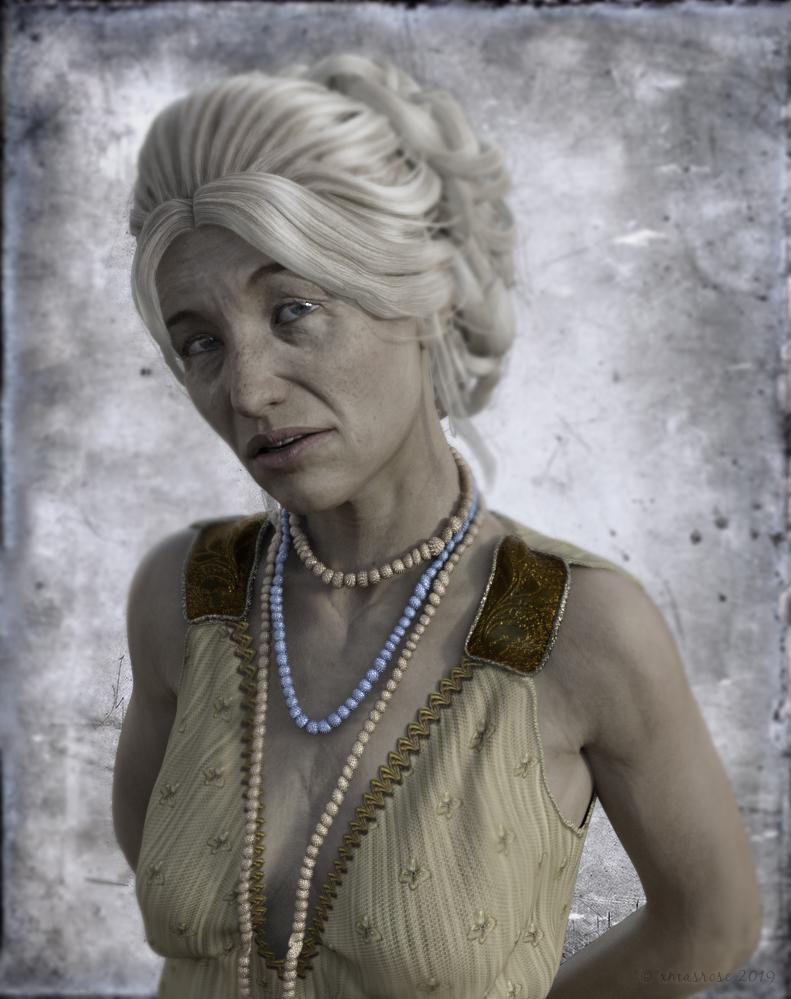 Aging Face Details HD....any renders? opinions?
Cool. Just play with these settings. If you set Subdivision level to 3 you can see all the morph details in viewport before rendering.
[Released] RSSY Hair Converter from Michael 4 to Genesis 8 Male [Commercial]Just working on the hair I have to manually add - and I am getting some of the Head Shinkage problem mentioned but I'm not finding the "Head Size Correction" morph in the pdf. If I reduce the Converter Morph it does raise them, but moves them back (see Glyn attached). One question - do we have use the Head Size morph each time (when I find it) with that hair, and adjust it the characters? I'm guessing yes.
Asian Face for G3FHello,
Sorry for the delay in replying. I was too busy last week.
I did tried to search for some asian faces in the web but i couldnt find same face from different angles. So i attach here several faces i used for reference.
Also i did try to a new asian face based on the images i post but also tried to make it younger looking.
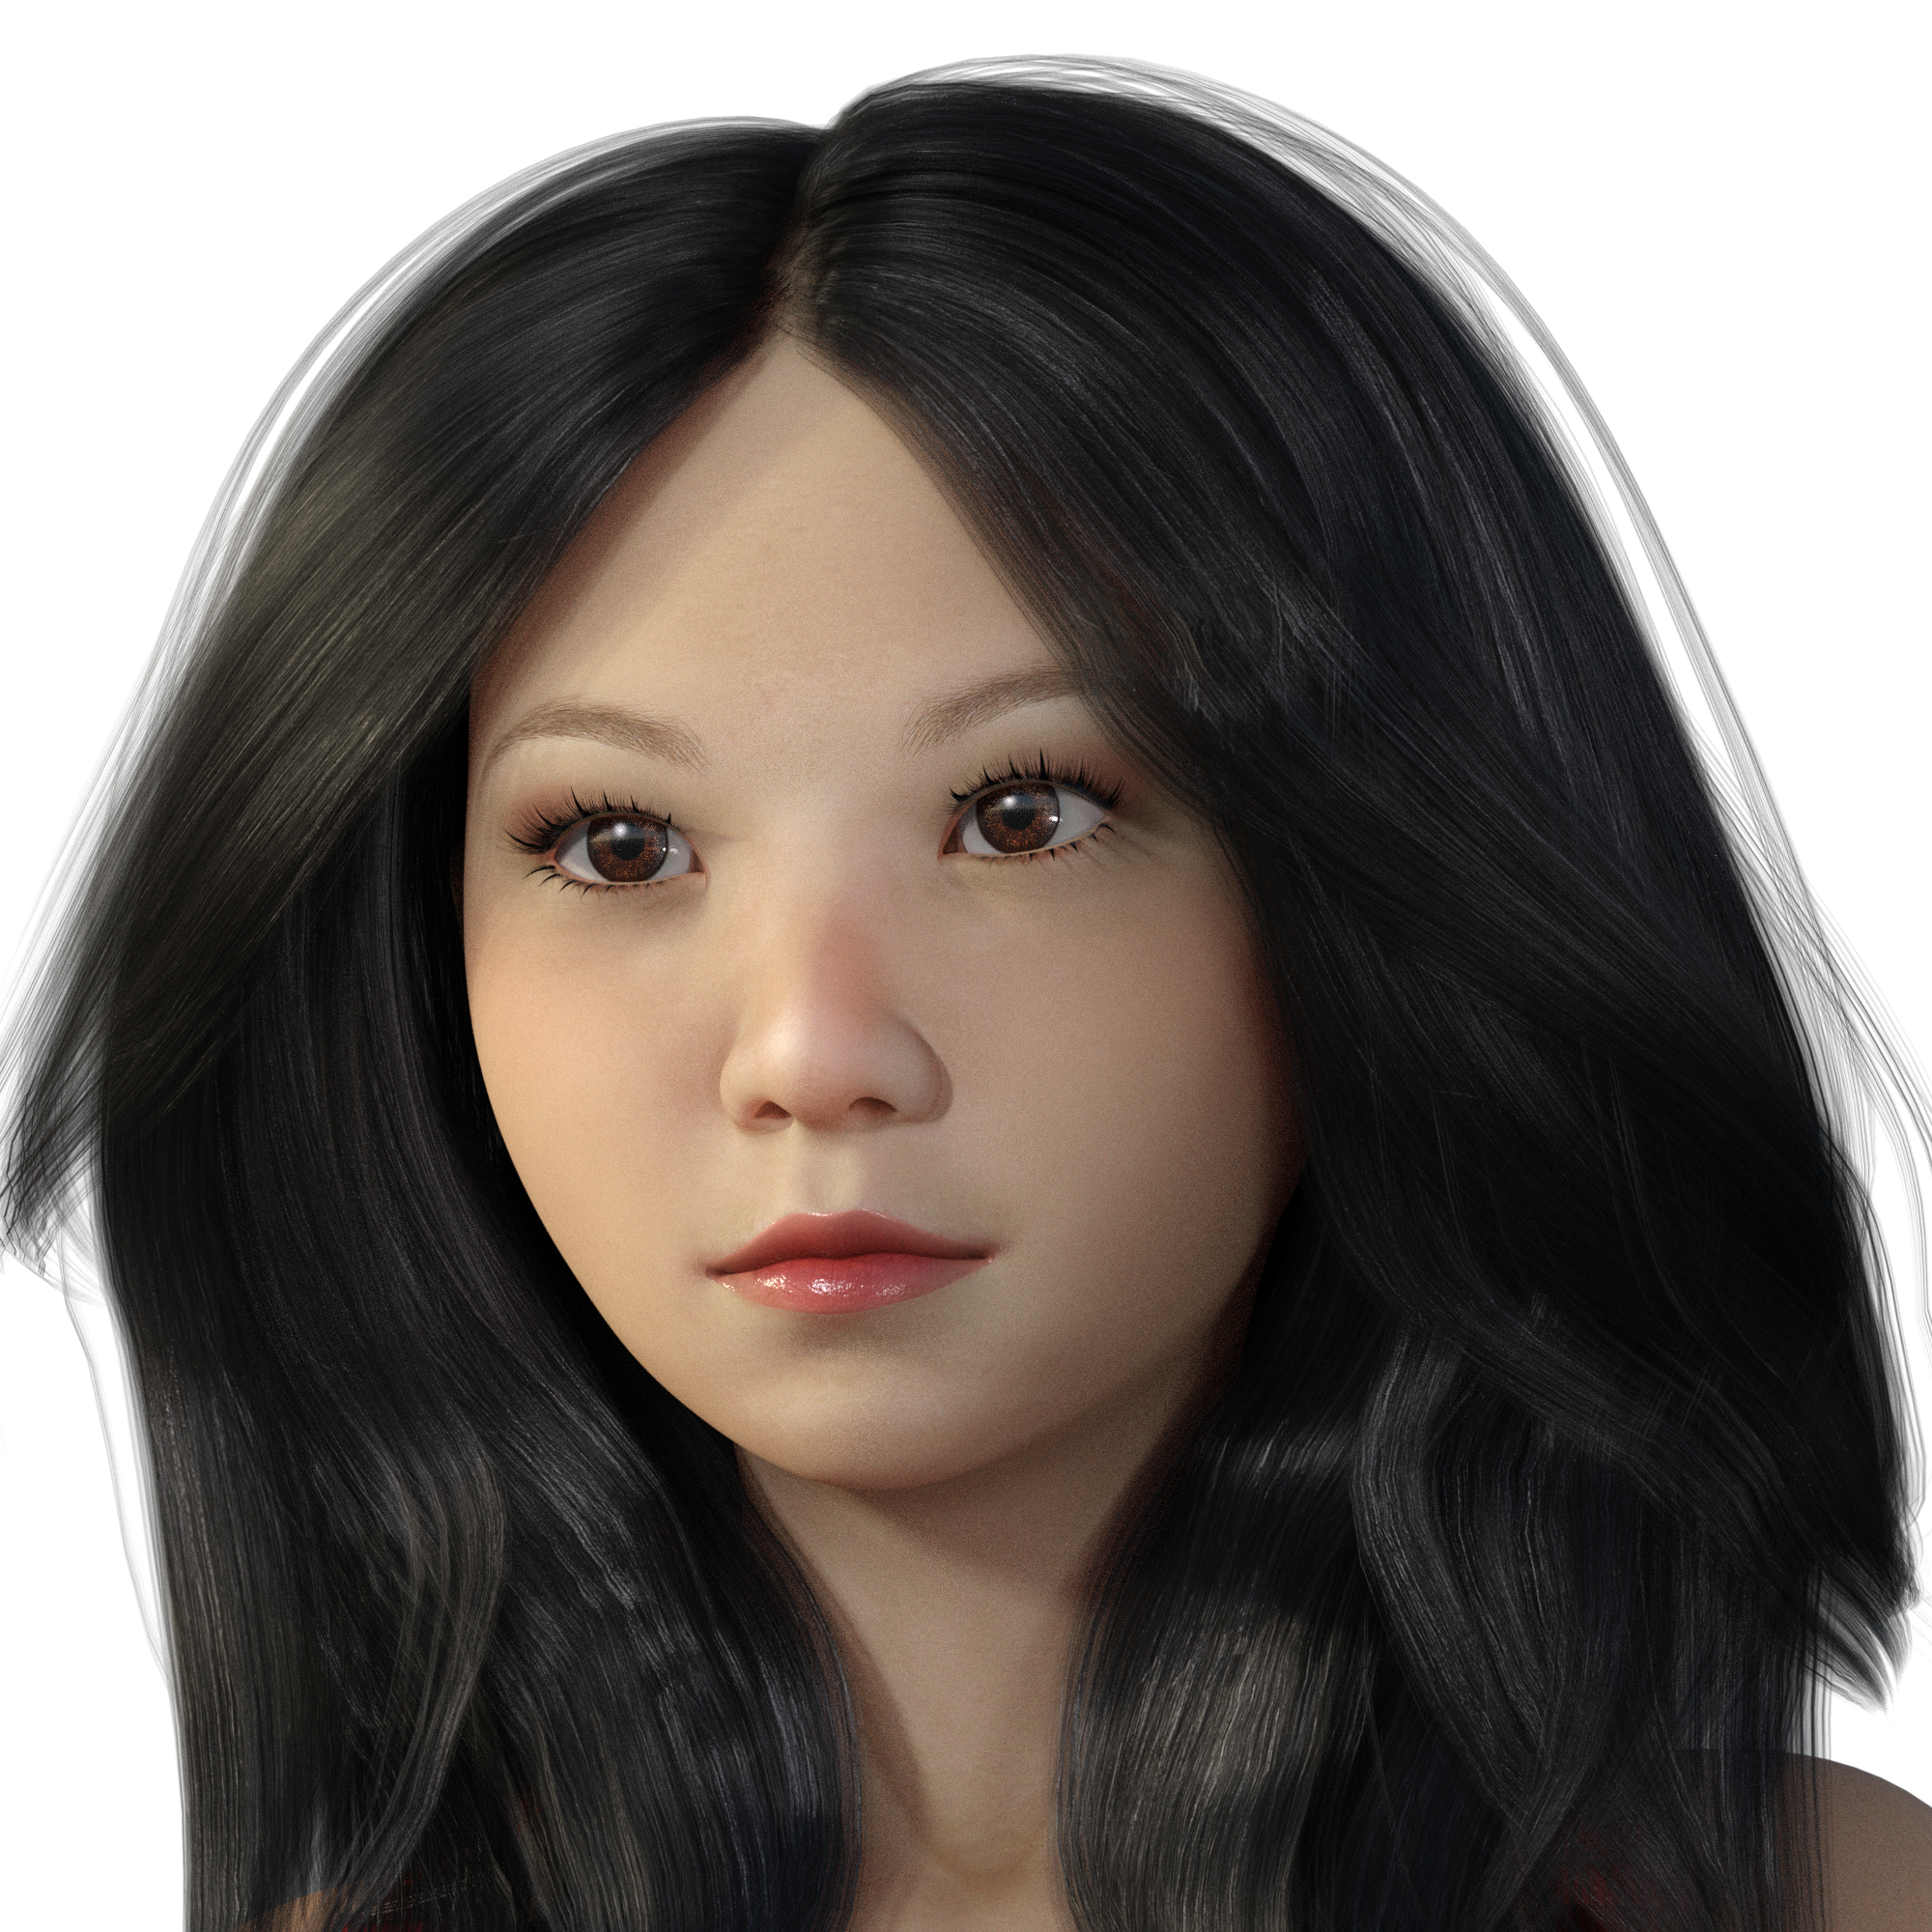
Since i cant afford to have ZBrush for morphing i use some G3F morph packs, deformers and Blender for some custom morphs. However morphing with Blender is too dificult it seems. So if you can recommend me some other tool i will appretiate it. (as you can see the base figure is Genesis 3 Female)
It does take a little getting used to, but I prefer Blender to Hexagon now I've got used to transfering the items; there is a 30 day trial on Zbrush - I didn't like it, but 30 days, is not enough imo.
She is believable; and she does look youngish, but that is a caucasian looking at her; I feel their are subtleties that we misinterpret. They eyebrow colour looks wrong btw; my understanding is their hair is invariable dark?
Hello. Thank you for your oppinion. However about hair color i must disagree. Not all asians have raven dark hair. However you are right about eyebrow color it is lighter than the hair. But the colors of hair parts of the character are variable since girls can color them ;)
Also about the caucasian look well it depends to which part of the asia you want the face to look like. If you want chinese face... i agree this one doesnt look like it. However if you want east asian face like Korean or Japanese they look like more caucasian than chinese for example. So it depends what you want from it. Doesnt you agree with me about this?
Yeah i am aware of 30 day trial of ZBrush... however as you stated 30 days are not enough for develop a face morph since sculpting process is generaly long. Thats why i was searching for alternatives. Since i am new to Blender it look way too dificult to do morphs there. I cant understand how to do smothened morph and to see the result in the moment i am morphing it (something similar to Poser morphing tool and Hexagon morphing tool). If you can point me on some tutorial for this i will appretiate it.
Eye brows are a pain to get them looking the way I want them to. I'm hoping later on down the road Daz implements some kind of morphable/moveable base mesh for this part of the face where you can set the hair density(i.e. 2x, 5x, 10x hairs per "arbitrary unit" of the morphable base mesh), thickness, length, tapering option/direction, color, etc. Currently all of the brows I've seen are either painted on or various fibermeshes with set shapes.
What features would you like to see appear in dazstudio 5?I would like to have the possibility to use GoZ with several instances of DS. Presently the bridge is linked only with the first instance you open. If you send a figure of the 2nd instance to ZBrush and morph it you cannot reimport the morph in DS.
Linked a bridge to each instance of DS would be useful to make a morph in an instance while rendering in the other for example.
Asian Face for G3FIf I want to change the position of the eye (on the face) which dial do I use for Genesis 3 characters? If, for example, I think that the eyes are too wide apart, how do I move them closer together?
If you have, for example, the Genesis 3 Female Morph Pack, click on the Genesis 3 Female in the Scene tab pane, then below that in the Edit tab pane, click on the Shaping tab to the left of it and select the Eyes. You might have to expand it from Genesis 3 Female --> Face --> Eyes. In there you should be able to find the morph called Eyes Width. Other morph packs might call it Eyes Separation.
Asian Face for G3FHello,
Before several months i did post another thread regarding mixed asian face that i morphed for G3F.
Currently i know there is MeiLin7 for G3F and some shapes based on her.
However i do think the majority of the Asian faces available for G3F look not so realistic and sometimes even like alien or not exactly asian. Only MeiLin has some sort of reality in the shape.
What do you think people?
Also since i had some free time recently i did another try to make asian shaped face. However i also do think that it looks like a bit not realistic...What do you think?

Just as any other ethnic group, Asian faces can vary greatly, not to mention the fact that the same face's appearance can look a bit different from one photo to the next where the lighting is different. I've included 2 renders I did of a character and one of the reference photos I used of Fan Bingbing(Chinese actor). I started with the G8 female base and only used morphs to shape the character(i.e. no character injections or other character morph mixtures) in Daz. For the skin, I used Hinako for Mei Lin 8; and for the eyes, I used Juniper for G8F. It took me about 2 weeks spending a couple of hours per day shaping & test rendering.
Its too bad there's no way for me to shape this kind of stuff with integral calculus.
 Reversing a morph
You can also export the morph at -100, re-import it as delta's only to update the existing morph slider (make sure name is the same), and then resave it. You might need to update rigging as well if there is any changes to that.
Reversing a morphIt seems an unnecessary effort, but you could put the parameters pane in Edit Mode, via right-click, then right-click in the desired group to create a new property, set that to 100%, set the one you want to reverse to -100%, right-cllck on the new proeprty and select ERC Freeze, and (making sure only the morph you want to reverse is selected in the list of Sub-Components, click Accept. Optioanlly you could then go to the proeprty-to-be-reversed, click the gear icon on the slider>Parameter Settings and check hidden so that you see only your new property (assuming you don't have Show Hidden Properties enabled).
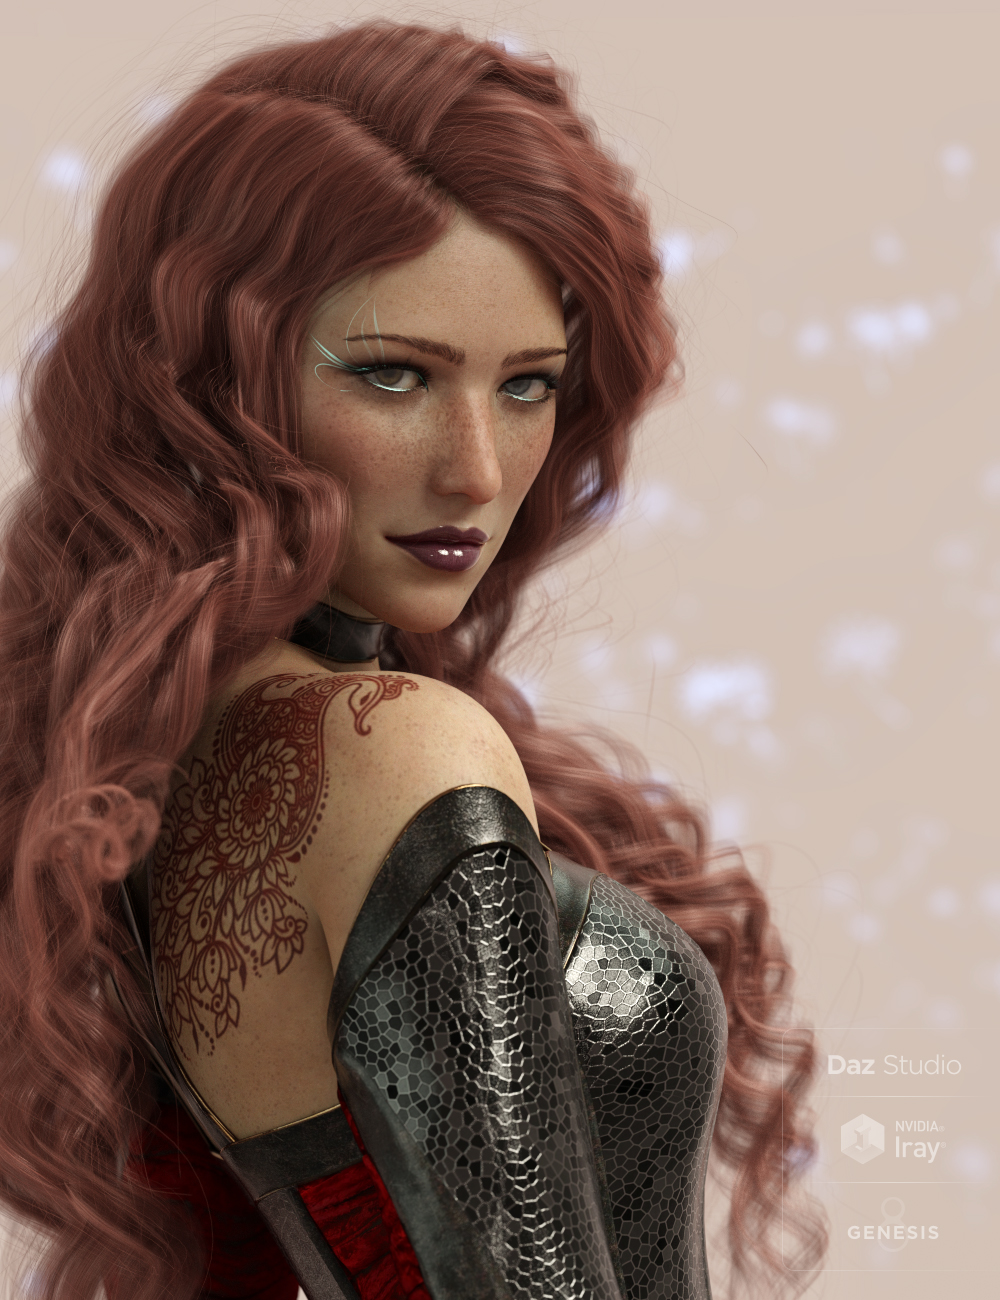
Released! Ascelin for Genesis 8 Female (Commercial)Ascelin is a character set for the Genesis 8 Female. With a willowy frame and a sweet face, she can be contemporary, modern, or fantasy/sci-fi with a change of an outfit!
With facial features, nails, and navel sculpted in Zbrush and Hexagon with help from various merchant resources and her body morph is made up from Hexagon and merchant resources, there is no need for additional morph packs for use.
Various make ups (LIE and Diffuse Overlay Presets), glitter materials for the eyeliner and eye shadow materials (although be aware you can only use one at a time with the set up provided), tattoos, nail polishes and skin settings create a versatile pack for your Genesis 8 Females.
She has the traditional transmapped eyelashes, as well as fibermesh eyebrows and eyelashes with several colors that match the transmapped versions, along with two glitter material presets for the transmapped set.
Anatomic Element materials are included.
Materials are Iray only.
Speaking of outfits!
The Mosaic Outfit was built with versatility in mind. The individual pieces can be used as interchangeable modules. They will fit into fashion renders, fantasy and even contemporary scenes. This product also comes with a variety of utility poses which allow for easy customization. With their eight different texture sets it covers a wide variety of looks and styles. If you want even more mix and match options, be sure to take a look at our addon for this outfit!
The product is made for dForce but works well in most poses as conforming.
 Reversing a morphSometimes the negative part of a morph will do the job but rather than have to dial the morph backwards which seems counter intuitive
Morphs are just vertex (and sometimes bone) vectors, and there's nothing unusual about applying vectors in reverse.
Is there any practical issue you're having other than a dislike of moving the slider to the left rather than the right?
Reversing a morphHi,
is it possible to reverse the action of a morph. That is change the positive direction to a negative? Sometimes the negative part of a morph will do the job but, rather than have to dial the morph backwards which, seems counter intuitive, can it the slider action be reversed? All I can find is Reverse Deformation which is something else.
Thanks
[Released] RSSY Clothing Converter from Genesis 2 Female to Genesis 8 Female [Commercial]Ok, for the Add Directorty, what is tripping you up is the Does Daz Version Exist check:
2019-09-05 22:45:25.842 DEBUG: Looking to see if Daz File "G:/DAZ 3D/Studio3/content/People/Genesis 8 Female/Clothing/SI Fantasy Cloth Wrap/Thigh Wrap.duf" exists: true
2019-09-05 22:45:25.842 DEBUG: SKIPPING, Daz Version already exists: G:/DAZ 3D/Studio3/content/People/Genesis 2 Female/Clothing/SI Fantasy Cloth Wrap/Thigh Wrap.dufThe script thinks the input file is in the Daz managed directories. So it replaces the "Genesis 2 Female" part with "Genesis 8 Female" and looks to see if the file exists, which it does. This is one reason why it is HIGHLY RECOMMENDED to not mix your input directories (that Daz installs) and your OUTPUT directories (where the script creates new content). On my system, Daz content is in "D:\Documents\My DAZ 3D Library\People\Genesis 2 Female\Clothing" and my content that I create or have scripts create is in "D:\Documents\DAZ 3D\Studio\My Library\People\Genesis 8 Female\Clothing"
This mixing of the directories is also probably why you have had issues. Something was unintentionally overwritten.
First, I did discover what's going on with the wraps, although it's nothing I can do anything about. I reinstalled the G2F version to make sure that everything was where Studio expected it to be, deleted everything the script had made before, and redid the transfer. For the body wrap, there are a bunch of custom bones hanging off the Right Thigh and Left Collar bones on the G2F original, the Movement group. For whatever reason, instead of preserving those bones when the transfer is made, the script is simply stripping them right out of the item -- it's effectively acting like Autofit. The Movement morphs are designed to act on those custom bones, so without them, the wrap goes dead. Is there any reason you know that it would do that?
There are some other morphs that don't depend on the custom bones -- the Style group. Those survive the process just fine. I hadn't looked at them before because it was the motion morphs I was most wanting to use.
As far as the Add Directory thing goes ... OK, I'm very confused. The input file necessarily HAS to be in the Daz managed directories. Where else would it come from?
That said: if I'm understanding things correctly, it's refusing to allow the input directory to be added for a second try at the conversion because the output directory -- which the script itself created -- already exists. Is that correct? If so, then it absolutely doesn't matter where the output directory is; as long as it already exists, the script will prevent the user from using Add Directory to do a replace/overwrite, deliberate or otherwise.
THAT said, if I'm understanding what you said correctly, it seems like the script is doing the following process:
1) check to see if destination directory exists
2) destination directory exists; refuse to overwrite ... but without clearly telling the user exactly why the operation fails at the point/time of failure
-- It's probably a bit late, but for this sort of thing in the future, since this seems to be intentional, it would probably be good to have a script explicitly signal that for an Add Directory operation, if the destination directory already exists, the script cannot proceed; pick a new directory or delete the currently selected destination and restart the script. As it stands, the user explicitly tells the script "Ignore that anything to do with this exists, and do it over", and the script is basically saying "Nope!" ... but without telling the user why, and showing the user an error message that it should not show under those circumstances. The Daz log file message as it stands is uninformative for the user. You know what it means because you wrote the script; the user can only look at it and say, "OK, so the source G2F file exists. Why is that an issue?"Am I completely misunderstanding what you were saying about that?
The input directory is not the problem. The output directory, that you set the first time you ran the script, is. The first time you ran the script, you clicked the output directory button and set it. (It is not set by the script. It just remembers your selection) As the manual states:
Click Set Clothing Output Directory... button to define the output directory where the converted clothing items will be saved. This should be the top-level directory, such as /People/Genesis 3/Female/Clothing (for G2F to G3F) or /People/Genesis 3/Male/Clothing (for G2M to G3M). It is HIGHLY RECOMMENDED that you select the DAZ 3D/Studio/My Library and create a Genesis 3/Female/Clothing or Genesis 3/Male/Clothing folder. You could use the My DAZ 3D Library path; however, the clothing converter could overwrite vendor created content.
The script should not try and change the directory as it could put stuff where you wouldn't find it.
Extremely long figure load times - ways to fix?I might refresh this thread as my G8F load times are now even worse then ever. OK, I have all Pro Bundles, zillions of figures and most morph products available so that might be the reason. Also I transferred already over quite some G3-morphs. Any ideas to optimize the situation? And no, connect is no option. I install everything from DAZ via DIM and from other stores manually.
Regarding my runtime I have one which DIM takes care for and a second one for manual installs. Both are on an external HDD connected via USB 3 directly.
Daz 3D is part of

Connect
DAZ Productions, Inc.
7533 S Center View Ct #4664
West Jordan, UT 84084Licensing Agreement | Terms of Service | Privacy Policy | EULA
© 2026 Daz Productions Inc. All Rights Reserved.