-
Help understanding Geometry Switching
Ahh. So the bool makes surfaces visible instead of making bones visible with 1), and 2) just switches morph settings on/off. Makes it less complicated if you don't need rigging.
Thanks for that, Crosswind. Hope I'll remember when I want to try it out.
Regards,
Richard
Turning a Morph Parameter into an On-Off Buttonstitlown said:
Picking up on this as a possible alternative to my "geometry switching" question elsewhere ... I can see Richard's suggestion works, but it requires the underlying morph to be preserved. Is there a similar work flow that effectively transfers the morph deltas in the 100% state only to a new parameter, or a means to take the morph and somehow convert it to a 0% /100% binary only??
Cheers, Lx
The above is a typical way of using a Boolean property as a Control dial plus a Morph. As for your requirement, you have to use Conditional Graft modifier plus Surfaces.
Turning a Morph Parameter into an On-Off ButtonPicking up on this as a possible alternative to my "geometry switching" question elsewhere ... I can see Richard's suggestion works, but it requires the underlying morph to be preserved. Is there a similar work flow that effectively transfers the morph deltas in the 100% state only to a new parameter, or a means to take the morph and somehow convert it to a 0% /100% binary only??
Cheers, Lx
Dial Fusion G9 Edition (Commercial)SpookieLilOne said:
Hi, I used this product and it seemed to work wonderfully, then I looked and none of the morphs I used were "baked" in. I then tried baking them in the only way I know how. Export >Wave Front Object> Edit>Figure>Shape>Morph Loader Pro, but now when I run the script with my morphs saved into one dial I get the error. Am I doing something wrong?
You shouldn't need to do any of that, I don't think. There's a "Save Options" panel in Dial Fusion that controls how and where the sliders that combine the pre-existing morphs are saved. (It doesn't create the morphs or shapes, just combines the sliders into head, body, and control sliders.)
That said, when did you purchase/download Dial Fusion? Both the G8 and G9 versions were updated in June 2024 to deal with an incompatibility with the Studio 4.2X series. Before the update, Dial Fusion acted like it was saving the morph sliders but didn't necessarily do anything, or it saved them in the scene instead of the morphs directory, or saved them in the morphs directory but they didn't work.
Dial Fusion G9 Edition (Commercial)Hi, I used this product and it seemed to work wonderfully, then I looked and none of the morphs I used were "baked" in. I then tried baking them in the only way I know how. Export >Wave Front Object> Edit>Figure>Shape>Morph Loader Pro, but now when I run the script with my morphs saved into one dial I get the error. Am I doing something wrong?
Render your buys! Use buys from the current month and the previous month of salesBringing this thread back ...
I sadly haven't had a lot of time play with Daz lately, but I do have some time today. I'm pretty happy with the new Charlie 9 bundle items which I'm just starting to test.

https://www.daz3d.com/xi-war-damaged-street
https://www.daz3d.com/dforce-army-greens-outfit-for-genesis-9
https://www.daz3d.com/dforce-army-greens-outfit-texture-add-on-2And, even though he's ultimately a Face Transfer 2 character, there's a fair amount Charlie in there - my textures, on the underlying Charlie 9 materials, with a significant amount of Charlie 9 Foxtrot shape (and tiny bits of some other shapes) dialed in.
https://www.daz3d.com/charlie-9
https://www.daz3d.com/charlie-9-foxtrot-hd-shape-add-onYellow Prompts DiscussionMy first test of the Yellow AI Morph Creator thingy-ma-kig.
Prompt: A 36 year old dignified female starship captain of filipino decent, 168 cm tall with a 75D bust size, a 61cm waist and 91cm hips. Her facial features are graceful and regal while her body is lithe and toned but not over muscular.
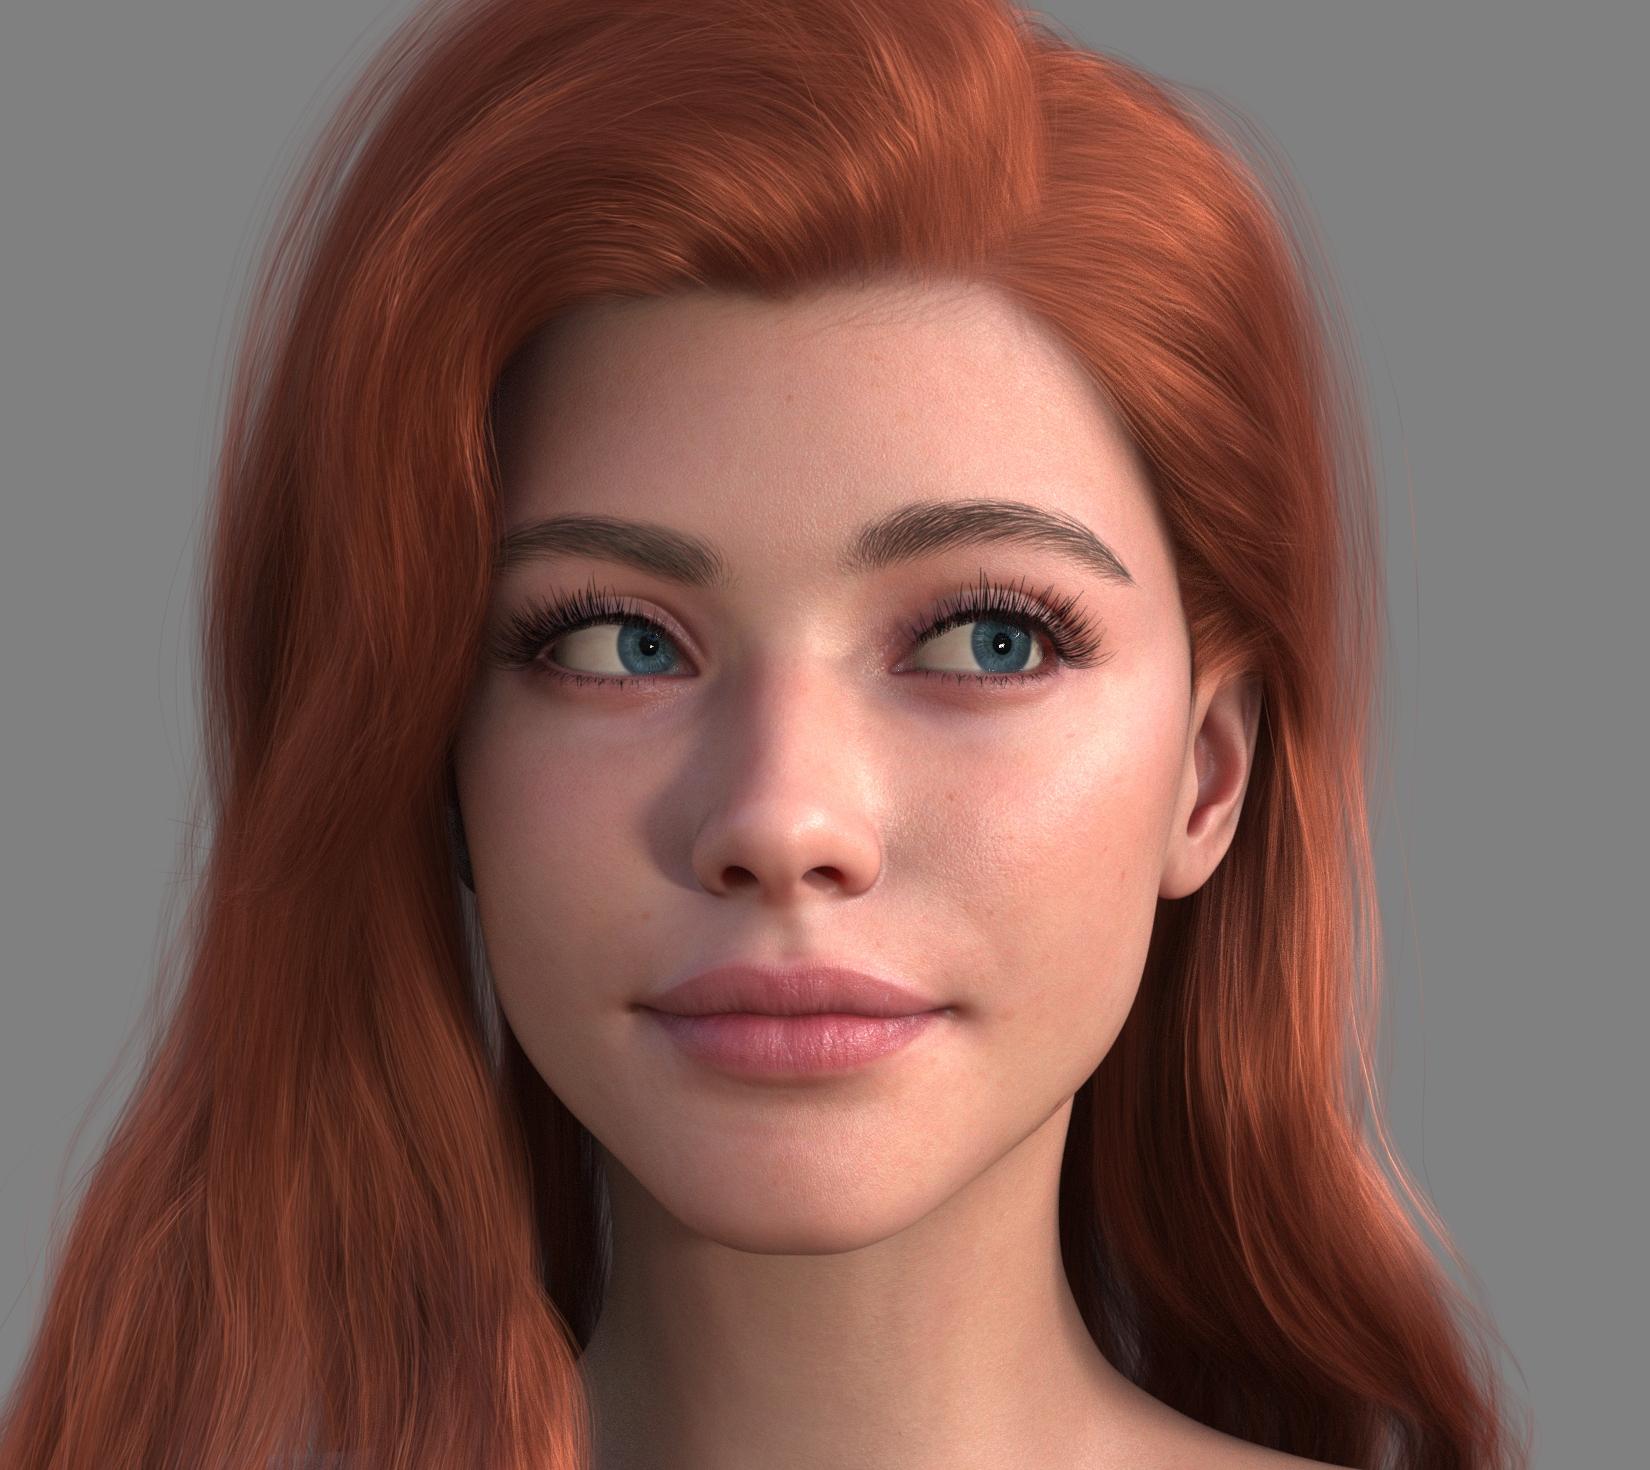
 Anybody recognize this character (Girl from Rita Hair)
Good question. We will use different characters to render our products in the future. I hope you can recognize the correct result. Because that may use many different character deformers.

NetherFalcon said:
I gave a shot to create her and I think it came out okay. Not perfect, but it this version didn't take a lot of time. This one is a combination of Artemis and CJ's Mercia. She has Artemis's skin. In case you're curious, the morph percentages: 62% Base Feminine and Artemis and 38.6% Mercia. I didn't realize until I checked that changing the slider for Artemis also did the Base Feminine, so when I just changed Base Feminine to 100%, the lips became larger, but face a little smaller, so this result was the better of the two.
Sadly I don't have the hair, but this one is FeSoul's Alysa Hair. Funny enough, FeSoul almost always uses the G9 Daz Original models for the promo images. Never a question about who they are! In that one, it's Victoria and then an unmorphed G9 female.
 Geometry did not match, failed to create morph.
I exported an OBJ file using DAZ Studio 4.23, then attempted to reimport it into DAZ Studio 4.23 without changing any options, but the reimport failed. It displayed:
Geometry did not match, failed to create morph.
-----------------I did not make any modifications to the file.
Is there arm pit hair for genesis 9I have a character on various stores that comes with armpit hair, and a corresponding length morph.
With said that, you can quite easily make lip, chin, armpit hair yourself using the free SBH Editor within Daz Studio. So will not need to buy anything if you can invest maybe an hour or so learning to use it.
Map Transfer doesn't transfer the tilingsyuyu.atem said:
Oh, crap! In this case, how do you create a texture add-on for a special cloth from a shader? Isn't any way to transfer the maps from the shader, with the tilings, to an UV map?

Daz Studio is only able to bake shader on a surface with 3Delight engine rather than Iray engine. Why do you want to bake the shader with tiling ? I think you just need to save a Shader Preset for that surface.
how to copy/paste a morph between left and right(mirror morphs)?m300 said:
crosswind said:
Sure thing. Pls follow the steps as below:
1) Go to the folder: your Daz Library\data\DAZ 3D\Genesis 8\Male\Morphs\RawArt\Reject, there's a file Raw_Reject-HD.dsf.(You can back it up to another place...) Open Raw_Reject-HD.dsf with Notepad++. Go to the line 24594, delete the code of HD morph link (ss 1~2). Ctrl + S to save.
2) Load a G8M or G8.1M Dev Load. Dial Raw Reject HD morph. Now you have a non-HD Reject character. (ss 3) But suggest you directly open the attached Reject.duf in which I've already created Selection Sets. If you want to know how to create Selection Sets for this case, refer to this video: https://mega.nz/file/CbRTELiA#Oy6SCPLB4-c7dWA9C23vuEnq_rDDkoMKOUP5MR19w4M
3) Select the figure, set its Resolution Level to Base, export the figure to OBJ file (name it as Reject.obj) via: File > Export....(ss4)
4) Import OBJ file with Morph Loader Pro with the settings in (ss5) Or, refer to this video: https://mega.nz/file/nD5RkKoD#ThMsX5dVKMABNCGfdWehhoY1TBF8Cm4eya4hXaLGE6A
5) As usual, Adjust Rigging to Shape, ERC Freeze, then Save Morph assets. Done ~Edit: Be noted, Adjust Rigging and ERC Freeze for the morphs have been done in the attached Reject.duf.
WOW!, this is amazing such a detailed and easy to understand explanation and you even shared already made duf file for me!.
thank you so very much i now understand how to do it again myself and the videos you made are great i saved them and your instructions just in case. again thank you so much :)
You're welcome ~ Have fun ! :)
Yellow Prompts DiscussionSerene Night said:
Its not following the prompts. I asked it to make a superman, clark kent figure, with a cleft chin, bulging muscles, etc. It came up with a rather middle-of-the-road heavy-lifter guy.
It wasn't really able to interpret facial features to the extent that common words didn't seem to be interpreted well
I'm thinking why, and they state this,the models data is said to be "ethically sourced from only DAZ models" and so, the data for variance isn't even available for the AI to choose from. I think the only solution for Yellow is to get a caricature scultpting specialist and methodically morph DAZ models through a comprehensive set of caricatures and feed the data to their AIs without regard to whether they find the caricatures attractive or realistic. Then that data will be available to their AI. That's a lot of time and money to do that though.
Also, I think Yellow AI cannot do HD morphs, hindering it's ability to differentiate it's generations of morphs.
Map Transfer doesn't transfer the tilingsOh, [bother]! In this case, how do you create a texture add-on for a special cloth from a shader? Isn't any way to transfer the maps from the shader, with the tilings, to an UV map?
Edit: I also tried to send it to Blender by using the Daz to Blender Bridge, but the bridge ignore tilings too...
how to copy/paste a morph between left and right(mirror morphs)?crosswind said:
Sure thing. Pls follow the steps as below:
1) Go to the folder: your Daz Library\data\DAZ 3D\Genesis 8\Male\Morphs\RawArt\Reject, there's a file Raw_Reject-HD.dsf.(You can back it up to another place...) Open Raw_Reject-HD.dsf with Notepad++. Go to the line 24594, delete the code of HD morph link (ss 1~2). Ctrl + S to save.
2) Load a G8M or G8.1M Dev Load. Dial Raw Reject HD morph. Now you have a non-HD Reject character. (ss 3) But suggest you directly open the attached Reject.duf in which I've already created Selection Sets. If you want to know how to create Selection Sets for this case, refer to this video: https://mega.nz/file/CbRTELiA#Oy6SCPLB4-c7dWA9C23vuEnq_rDDkoMKOUP5MR19w4M
3) Select the figure, set its Resolution Level to Base, export the figure to OBJ file (name it as Reject.obj) via: File > Export....(ss4)
4) Import OBJ file with Morph Loader Pro with the settings in (ss5) Or, refer to this video: https://mega.nz/file/nD5RkKoD#ThMsX5dVKMABNCGfdWehhoY1TBF8Cm4eya4hXaLGE6A
5) As usual, Adjust Rigging to Shape, ERC Freeze, then Save Morph assets. Done ~Edit: Be noted, Adjust Rigging and ERC Freeze for the morphs have been done in the attached Reject.duf.
WOW!, this is amazing such a detailed and easy to understand explanation and you even shared already made duf file for me!.
thank you so very much i now understand how to do it again myself and the videos you made are great i saved them and your instructions just in case. again thank you so much :)
Yellow plug-in general discussionI tried this plug-in, but I have some doubts about how it works that I share here with you.
I also had the same experience as others: I wrote the text, nothing appeared, I rewrote it and so I (maybe) wasted a token. I created two characters with the same prompt. I also did not find the button that allows changes, before applying and saving. The result that I attach seems rather disappointing to me, compared to expectations and the prompt.
In image 1 the basic result, to which I then applied texture, hair and clothes. In the other images the result after resizing, since it was supposed to be a 6-year-old girl.
The character on the left is the first attempt, the one on the right the second. In the middle G9 base. In the first character you can see the deformation of the hands by posing, which is not there in the second.* In both the thigh muscles deform with the pose, but in the first more than in the second. (maybe the second token is not so wasted)
It is not possible to enlarge just the head a little (for the proportions of a child), because it deforms horribly.
They are too muscular, with adult proportions, especially the hands. Also there is something strange in the eyes. The addition of the term "chibi" was supposed to give cartoon proportions, with a big head, big eyes, a tender appearance. The result is instead a character that can be pleasant, but it looks more like a dwarf or a gnome than a cartoon-style child.
I probably need to learn to write the prompt better, maybe I didn't write it correctly now, but if I have to make a thousand attempts to get something that comes close to what I'm trying to get, maybe I can save money if I buy the characters and addons I need in the store, where I can have the support of the authors if something doesn't work. I leave this tool to more experienced people. Attached are the files of the attempts.* (I will try to follow the advice found in the forum. To save as a morph should I save as a character preset or as a shape preset?)
Map Transfer doesn't transfer the tilingsMap Transfer is used for converting texture maps across different UV sets... and it has nothing to do with Tile settings. I'm afraid you misused the function of Map Transfer ~~
Map Transfer doesn't transfer the tilingsHi! I used diffuse and normal maps on a cloth with a surface tiling of 3x3 and a normal map instance tiling of 4x4; then I used the Map Transfer, hoping that the tiling would be "saved" in the tranfered maps. I mean I tought that the pattern on the final diffuse map would be repeated 3x3 times, since I used a surface tiling of 3x3 before transferring, and the "detail" on the normal map would be repeated 12x12 times, since I used a 4x4 instance tiling for the normal map...
Then, I loaded the same cloth but without tiling, and applied my transferred maps, thinking to obtain exactly the same thing as on the cloth from which i transferred, but everything appear like if I used a 1x1 tiling before the transfer. So, it seems that tiling was ignored by the Map Transfer... Is there a way to make Map Tranfer transferring the tiling effects too?
I used these settings for the transfer:
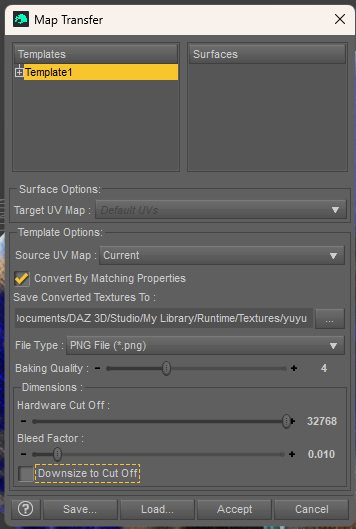
I am trying to create a texture add-on for a cloth by using a pattern shader that I created, that is why I would like to use the Map Transfer, to get maps specificly for this cloth...
Thank you in advance for your help!
Yellow Prompts DiscussionWonderland said:
What would be cool is if we could take images from Midjourney or any photo, upload it and have Daz Studio create a 3D Daz character, hair, clothes and lighting based on the image we upload.
I've used the DA site's generative AI to take photos of people and generate portraits of them, often as a 3d version or some such, Then I take the best of the portraits into Facegen and from that create a face morph. That's worked for me with some success if I can get a relatively good pic. I also have an AI that will take a photo that isn't full front and correct it to be facing front and that's helped too. So AI "can" be useful, in a roundabout way.
how to copy/paste a morph between left and right(mirror morphs)?Sure thing. Pls follow the steps as below:
1) Go to the folder: your Daz Library\data\DAZ 3D\Genesis 8\Male\Morphs\RawArt\Reject, there's a file Raw_Reject-HD.dsf.(You can back it up to another place...) Open Raw_Reject-HD.dsf with Notepad++. Go to the line 24594, delete the code of HD morph link (ss 1~2). Ctrl + S to save.
2) Load a G8M or G8.1M Dev Load. Dial Raw Reject HD morph. Now you have a non-HD Reject character. (ss 3) But suggest you directly open the attached Reject.duf in which I've already created Selection Sets. If you want to know how to create Selection Sets for this case, refer to this video: https://mega.nz/file/CbRTELiA#Oy6SCPLB4-c7dWA9C23vuEnq_rDDkoMKOUP5MR19w4M
3) Select the figure, set its Resolution Level to Base, export the figure to OBJ file (name it as Reject.obj) via: File > Export....(ss4)
4) Import OBJ file with Morph Loader Pro with the settings in (ss5) Or, refer to this video: https://mega.nz/file/nD5RkKoD#ThMsX5dVKMABNCGfdWehhoY1TBF8Cm4eya4hXaLGE6A
5) As usual, Adjust Rigging to Shape, ERC Freeze, then Save Morph assets. Done ~Edit: Be noted, Adjust Rigging and ERC Freeze for the morphs have been done in the attached Reject.duf.
Daz 3D is part of

Connect
DAZ Productions, Inc.
7533 S Center View Ct #4664
West Jordan, UT 84084Licensing Agreement | Terms of Service | Privacy Policy | EULA
© 2026 Daz Productions Inc. All Rights Reserved.