-
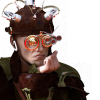
Rakshasa new "feline"He could always do a morph collection. Female Rakshasa, with female pug, and female otter. Optional textures because of UV swap. Just a thought.3D Art Freebie Challenge-May 2020-"Flowers" -Main Thread Only
So I may be stepping over my boundaries but I checked
Okay then, I'll try this one.
3D Art Freebie Challenge - May 2020 - Flowers
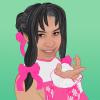
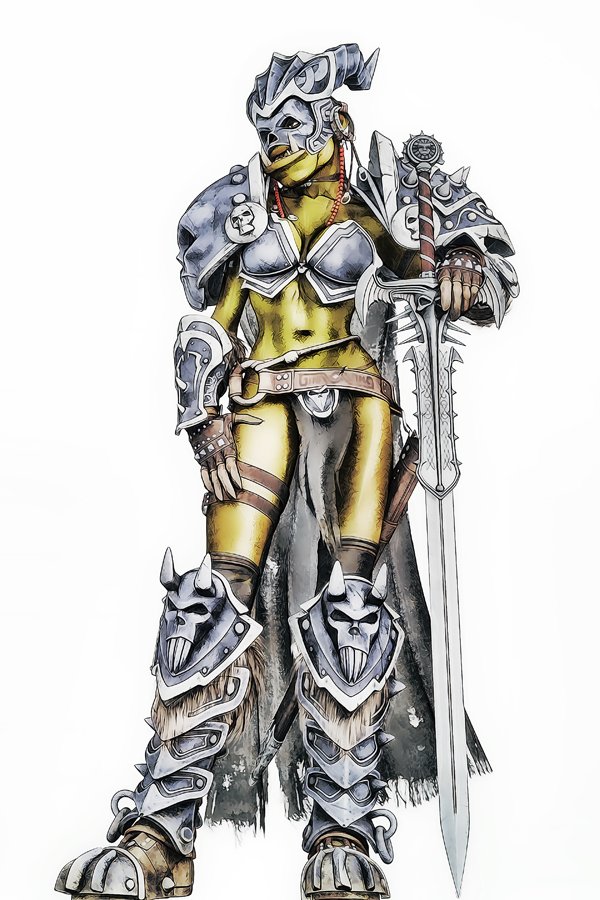
Title: Floral Dispute
Rendered in: DAZ Studio/3Delight
No postworkPaid items:
None
No count items:
Genesis 8 Female - Starter Essentials
Toulouse Hair - Starter Essentials
Custom G8F characterFree content used:
1. Asiatic Lily (Registration required)
https://hivewire3d.com/shop/stay-home-spread-hope/asiatic-lily.html2. Black-Eyed Susan (Registration required)
https://hivewire3d.com/shop/stay-home-spread-hope/black-eyed-susan.html3. A3 Tink dress (Registration required)
https://www.sharecg.com/v/81538/related/11/Poser/A3-Tink-dress4. LooseTop for G2F (Registration required)
https://www.renderosity.com/mod/freestuff/loosetop-for-g2f/764545. Daylily (Registration required)
https://hivewire3d.com/shop/stay-home-spread-hope/daylily.html6. Anime Style Elf Ears Morph for G8F
https://www.deviantart.com/tritiumcg/art/Anime-Style-Elf-Ears-Morph-for-G8F-8416879317. DOA 6 Marie Rose - Head and Body Morphs for G8F
https://www.deviantart.com/tritiumcg/art/DOA-6-Marie-Rose-Head-and-Body-Morphs-for-G8F-8252367308. Subtle Shade Skies (Registration required)
https://hivewire3d.com/shop/stay-home-spread-hope/subtle-shade-skies.html9. Chaos Hair - Gen2F (Registration required)
https://www.sharecg.com/v/83385/browse/21/DAZ-Studio/Chaos-Hair-Gen2F10. Beach Volleyball Bikini for Genesis 8 Female
https://www.deviantart.com/amyaimei/art/Beach-Volleyball-Bikini-for-Genesis-8-Female-70481678811, Faerie Wings I for ALL figures (Registration required)
https://www.renderosity.com/mod/freestuff/faerie-wings-i-for-all-figures/5978312. Easy Pose Rope (Registration required)
https://www.sharecg.com/v/54282/gallery/11/Poser/Easy-Pose-Rope
(for antennae)Edit: I didn't really like the "sky" in my original render - it looked more like a blue wall and overly saturated. So, I tweaked the surface settings for the background image to make it a little softer and less jarring., then re-rendered the image. Better, I think?

All freebie links checked and are valid
Daz Studio 4.12 Pro, General Release! (*UPDATED*)I downloaded DAZStudio_4.12.1.117_Win64. I have encounter an issue which causes some morph not to save as "scene" properly during an animation scene. Example: I made an animation scene from 1 to 30 frames. In frame 0 his stomach is flat, frame 15 his stomach is inflated, and in from 30 his stomach is flat again. Next I goto File- Save or File- Save as- Scene. Stomach morph does not appear when I load scene. I install previous DAZStudio_4.12.0.86_Win64. I dont have this problem. Has this been an issue for anyone else?
Computer everything uptodate and specs: Windows 10 (64 bit) Primary Display Resolution: 3840 x 2160
AMD Custom Ryzen 7 1700 Eight-Core Processor At 3.4Ghz
Custom Radeon RX Vega 56 Graphics 8Gb Memory: RAM 24GbWhen you saved the scene, which key in the timeline was selected?
For the stomach inflation animation, I selected Frame 0 "Belly size" 0, Frame 15 "Belly size" 100, Frame 30 "Belly size" 0. I can play the loop animation fine. But the problem is that the animation morph for stomach was not saved. Rest of animation was saved fine when loaded back into a new scene. Is this a bug or glitch?
I'm not sure, but the question may have been about what was selected in the Timeline pane rather than which properties were used.
Correct.
Reload the original scene, make sure that the animation is working. Now select the Frame 0 key and save. Reload and see if the animation is still working.
Oh, my bad. I get it. When I saved scenes, I always select frame 0 and then save or save as. In this animation scene I am using a Genesis 3 character, the Girl 7. Let me download DAZStudio_4.12.1.117_Win64 again. I Tested it again, belly morph is not saved. When I go to previous DAZStudio_4.12.0.86_Win64, this problem does not exist. I can save animation with no problem in version DAZStudio_4.12.0.86_Win64.
IRAY Photorealism?thanks tirenzi3d, though it doesnt seem to be working when I open the eyelids..
This area is pretty anal. Try transferring from the G8F eyelids instead of G8F. That way you make use of whatever Daz had to do to make the default eyelids not distort like crazy.
I transferred from the eyelashes (i assume thats what you meant) and it didnt work the first time, but for some reason when I transfer twice it worked. Thanks a lot BlueJaunte.
The other thing to do is have their base shape be just dots at the eyeline and then their actual shape be a morph (this is to some extent what the daz eyelashes do, thats why when you zero them they get small). So, since the initial shape is just dots all the verts for any individual lash all get painted the same weight and get morphs projected on them the same since all their vertices are in the same location
Mind you this method is dependent on whatever method you're using to create your eyelashes being able to scale down to the root. I use blender's particle instances, which has this option right there, curves in blender should also be able to do the same
I don't actually know if it works better or worse than using the lashes mind you
Also...
Congratulations Jeff! You know you're good when people start creating conspiracy theories about you
Algovincian Non-Photorealistic Rendering (NPR) 2019/2020Diva - the Partial Morph Sculpting scripts I wrote years ago were used in conjunction with GenX2 to span generations and gender.
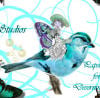
Still working on gathering all the figures/props/environments necessary, and running them through the algos, tweaking textures, etc. Here's Wormlip:
Once all of the assets are gathered and prepped, the work can begin on laying out the individual panels. This time spent setting up should be more than worth it when doing a multi-panel sequence, a complete book, or entire series using the same characters.
- Greg
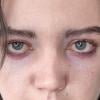
Upping the Render SubD Results in... This...Out of boredom, I threw a photo into face transfer and applied a material from an Isourcetextures model (along with the HD details). I added a few lights, made sure G8F was at render SubD level 4 and hit render. It resulted in the attached pic, which makes for great abstract art, but isn't much of a pin-up ;)
It's something to do with SubD, as Level 3 and below result in a normal image. No errors in the log and one model (even with geo at lvl 4) is well within the limits of what my 2080 can handle... Thoughts?
[Released] RSSY Hair Converter from Victoria 4 to Genesis 8 Female [Commercial]I'm having a hard time. I picked up G3 to G8, and M4V4 to G8 converters. I also picked up the ZippityDo hair, and its not working.
First, with the G3 hair, it works, but its inside the skull just a little bit which needs to be tweaked. (Honestly wish you guys tossed in a few extra clean up morphs like 'Expand All' at minimum.) This issue is a concern for me since I use Octane, and intersecting planes cause black lines everywhere.
Is this only for the G3 hair or for M4Vr hair. From the manual: Hair Shrinkage error on certain Prop or HR2 Hairs. On some, but not all prop or .hr2 hairs, such as the Cuffed Tail 2, an error in Daz Studio's Prop to Figure process can occur. Sometimes when the prop is converted to a figure, the hair shrinks down suddenly and does not fit even after conversion. If this happens, a morph has been included to fix it. Your converter hair contains a morph called "Head Size Correction." After conforming your hair to Genesis 8, dial in the Head Size Correction morph from the Actor/Converter Morphs group in your Parameters tab until the hair is the correct size and in the correct position again.
If I attempt to convert the V4 ZippityDo Hair I get empty files that don't do anything.
18:19:25 GMT-0600 (Mountain Daylight Time): WARNING: Forcing Conversion of Hair Items
18:19:25 GMT-0600 (Mountain Daylight Time): Executing Script
18:19:25 GMT-0600 (Mountain Daylight Time): Selecting Preset: D:/Daz 3D/My Library/Runtime/libraries/Hair/V4 - ZippityDo Hair/ZippityDo Hair.hr2
18:19:25 GMT-0600 (Mountain Daylight Time): Converting hair from D:/Daz 3D/My Library/Runtime/libraries/Hair/V4 - ZippityDo Hair/ZippityDo Hair.hr2 to D:/Daz 3D/My Library/People/Genesis 8 Female/Hair/!Victoria 4/V4 - ZippityDo Hair/ZippityDo Hair.duf
18:19:40 GMT-0600 (Mountain Daylight Time): Copy Icons from D:/Daz 3D/My Library/Runtime/libraries/Hair/V4 - ZippityDo Hair/ZippityDo Hair.hr2 to D:/Daz 3D/My Library/People/Genesis 8 Female/Hair/!Victoria 4/V4 - ZippityDo Hair/ZippityDo Hair.duf
18:19:40 GMT-0600 (Mountain Daylight Time): Copy Categories from D:/Daz 3D/My Library/Runtime/libraries/Hair/V4 - ZippityDo Hair/ZippityDo Hair.hr2 to D:/Daz 3D/My Library/People/Genesis 8 Female/Hair/!Victoria 4/V4 - ZippityDo Hair/ZippityDo Hair.duf
18:19:40 GMT-0600 (Mountain Daylight Time): Cannot find assets for old preset /Runtime/libraries/Hair/V4 - ZippityDo Hair/ZippityDo Hair.hr2
18:19:46 GMT-0600 (Mountain Daylight Time): Execution Complete.
I can send you the duf file, I do suspect that Octane may be interfering, but the G3F conversion worked so I'm curious to know why and what I can do about it.
Could you post the Daz Log with extra information? Perhaps that will tell me what is happening.
Product Cross Gender/Transgender -Transfer morphs (feature suggestions)Great to know. In my case, the main reason I would like such a tool is to have both genders of creatures only done in one gender, like finally having a male equivalent of Sakura 8 or almost any of Rawart's characters. Just being able to transfer the morphs would already be awesome, but having the chance to use the geographs that are so often essential to monstrous characters would really make this beyond useful. Regarding the character UVs, while I have Sloshwerk's product, there are some characters (like many of Joequick's creations) that have their own UVs which obviously only work on the figure they were made for, so maybe including a small script that automated the map transfer utility to generate a material preset with the chosen UV and the old material's settings would really help with transferring those characters from one gender to another. It would also be indispensable to anyone using various geographs which only work on the native figure's UVs.
Of course, I don't know how hard that would be to implement, so just take it as a very hopeful suggestion rather than a must-have feature. It may even be worth it as its own product.
DELETEThe difference hair can make just boggles my mind.
In the evolutionary scheme, the owner's choice of hair - either as a reflection of the owners appreciation/intelligence, or the obliviousness of owner, thinking it doesn't really matter, is interestingly different from the other 'assets' one might be born with, that really aren't a choice - body shapes, types, eye/hair color, etc.
I believe these characteristics are 'seen' by *most* as being the same, and I'm feeling more certain over time that these two elements of species attraction are decidely not as similar as it may seem. How you present is as important as what you are given to present. Some live at the mercy of their physiques, others are the masters of it.
To the original poster, I also see a certain level of homogeniety (sp?) in both the barrage of new faces that appear the the store each day, and I also notice that the 'face morph packs' that are rendered in clay are almot meaninglessly indistiguishable to me - in contrast with the occasional face that just jumps out at me as being 'wow' for no apparent reason.
My theories as to why these jump out include:
- celebrity, or similar familiarity with a liked or respected figure from anywhere in the viewer's history
- 5th grade girl/boy-friend similarity - sort of forgotten, but oddly familar and 'warmed' by time.
- genetic programming - we're pre-wired to gravitate to a certain genetic match that's evident to our 'gut', but not our intellect?
Others - probably.
Add to this posture, makeup, clothes, etc. and the whole art of self-marketting that makes our species so much fun, and such a mess at the same time :), adds spice and speculation to life.
To aliens or the hungry mountain-lion, we humans have two viewing ports, a food port, sound ports, four appendages of note, etc. I'm sure the subtlety of emotion, make-up, race, gender aren't really as meaningful as they browse the available selection.
cheers,
--ms
Face Transfer...could be worseI don't have FaceGen so I can't give ya an answer on that ;). I can tell ya that Face Transfer doesn't have much in the way of tweaking before it makes the morph. You get what you get. Anything you want changed you have to do after the fact with morphs that you've got. Some pictures just aren't good enough to get a decent transfer. Without the Face Transfer Shapes, the profile looks really, REALLY bad and will take a lot of adjusting.
Laurie
Fit Control for Genesis 8 (Commercial)I think what Hookflash is talking about is the unfortunate glitch that happens when a morph pushes the mesh beyond the bone it's assigned to, such as, for instance, lowering the pants of a figure and then posing that figure leaning forwards. The waist of the pants, which could be at the thigh bones, will still react to the movement of the waist, making a very weird curve that renders it unusable. Same thing happens when moving a strap to the arm and then posing said arm. I normally get around this by using dforce after using the morphs on the zero pose and then animating the transition (said he, as if he was productive enough to "normally" do anything) but having the rigging automatically fixed would indeed be a very nice feature, like Aeon Soul has done in some outfits with different versions (not that the outfit automatically adjusts to the fitting morphs, just that there are are two pants to load, one normally worn and one halfway down GF8's leg, for example).
... I swear I don't spend an inordinate amount of time and mental effort to strip my virtual dolls. Emphasis on "inordinate."
Ah ok. Ye best solution is to adjust clothes when figure is roughly in it's final pose. No way around that regarding the bones.
Fit Control for Genesis 8 (Commercial)I think what Hookflash is talking about is the unfortunate glitch that happens when a morph pushes the mesh beyond the bone it's assigned to, such as, for instance, lowering the pants of a figure and then posing that figure leaning forwards. The waist of the pants, which could be at the thigh bones, will still react to the movement of the waist, making a very weird curve that renders it unusable. Same thing happens when moving a strap to the arm and then posing said arm. I normally get around this by using dforce after using the morphs on the zero pose and then animating the transition (said he, as if he was productive enough to "normally" do anything) but having the rigging automatically fixed would indeed be a very nice feature, like Aeon Soul has done in some outfits with different versions (not that the outfit automatically adjusts to the fitting morphs, just that there are are two pants to load, one normally worn and one halfway down GF8's leg, for example).
... I swear I don't spend an inordinate amount of time and mental effort to strip my virtual dolls. Emphasis on "inordinate."
IRAY Photorealism?thanks tirenzi3d, though it doesnt seem to be working when I open the eyelids..
This area is pretty anal. Try transferring from the G8F eyelids instead of G8F. That way you make use of whatever Daz had to do to make the default eyelids not distort like crazy.
I transferred from the eyelashes (i assume thats what you meant) and it didnt work the first time, but for some reason when I transfer twice it worked. Thanks a lot BlueJaunte.
Fit Control for Genesis 8 (Commercial)This is a great product, but there's one thing that I'm struggling with (not just with Fit Control, but with clothing morphs in general): What's the best method for dealing with the fact that, with certain extreme morphs -- e.g., raising the bottom of a dress or a shirt significantly -- the clothing no longer follows the figure properly when posing? Do I need to update the morphed clothing's weights with the Transfer Utility or something? It would be amazing if Fit Control would include the ability to do this automatically, but I'm not sure how feasible that would be.
Show Us Your Iray Renders. Part VIILove your animation Ivy. Very well done although I think the flight through "King's Pass" would have give any passenger a bit of a fright! If you don't mind me asking, what did you use for the back grounds other that the King's Pass and a couple of the Flipmode products? I am particularly interested in the shot where the plane lands on the lake at the end. How did you create the environment there
Thank you for watching. and great questions.
 Alaskan Pond hoppers fly really close to the mountains so they have enough room to land in small ponds. its not for the faint of heart. I learned that doing research for this animation..
This film is a kit bash of so many set i had to go hunt them down...lol
The Viking Village Bundle https://www.daz3d.com/viking-village-bundle is where I used the sky dome you asked about I just deleted everything else & converted it over the sky part to Iray and made the skydome emissive I think it took like 35,000 lumens. & I added fludios water pane https://www.daz3d.com/fluidos-presets-water-planes as a over lay for the water ripple effrect
The rest of the sky domes were Iray world sky domes https://www.daz3d.com/iray-worlds-skydome High Peaks Skydome HDRi https://www.daz3d.com/high-peaks-skydome-and-hdri. for the clouds I use Above the clouds https://www.daz3d.com/above-the-clouds-for-iray-nimbostratus and just warped and morph them into the keyframes
The character I bought at a different store and the SeaPlane was PW Amphibious Plane Vera https://www.daz3d.com/pw-amphibious-plane-vera
Plus a few flat panes I created my self like the prop blur and reflections panes. I also removed all normal maps from everything and reworked every texture to make them work for animation. I render this in Iray with 19 scenes totaling 39,793 keyframes running at 30fkps the scene and the rendering was all done in Daz Studio 4.12.0.35 with 2-1080ti's and Adobe Premiere cs6 for the film editor to put all the png's series together. It took 7 days from start to finish to created and render
Face Transfer...could be worseThose turned out really nice. Good stuff. If you start out with ideal reference images, this thing seems to work okay. How are the profiles?
I got the Face Transfer Shapes by PhilW (I think...forgive me if I 'm wrong) when I bought Face Shapes yesterday and one click and it fixes the profiles. BOOM!...fixed :). The profiles look good. :)
Laurie
Face Shapes? Is that a new one for use with Face Transfer?
It's new-ish I think, but not super new. And it's the Face Transfer Shapes, not Face Shapes.
Laurie
Face Transfer...could be worsehttps://www.daz3d.com/face-transfer-shapes-for-genesis-8
or
https://www.daz3d.com/face-shapes-for-genesis-8-female
Carrara Challenge # 52 - Carrara Cryptids Entry Thread--Voting Closed--WINNERS ANNOUNCEDEntry #2
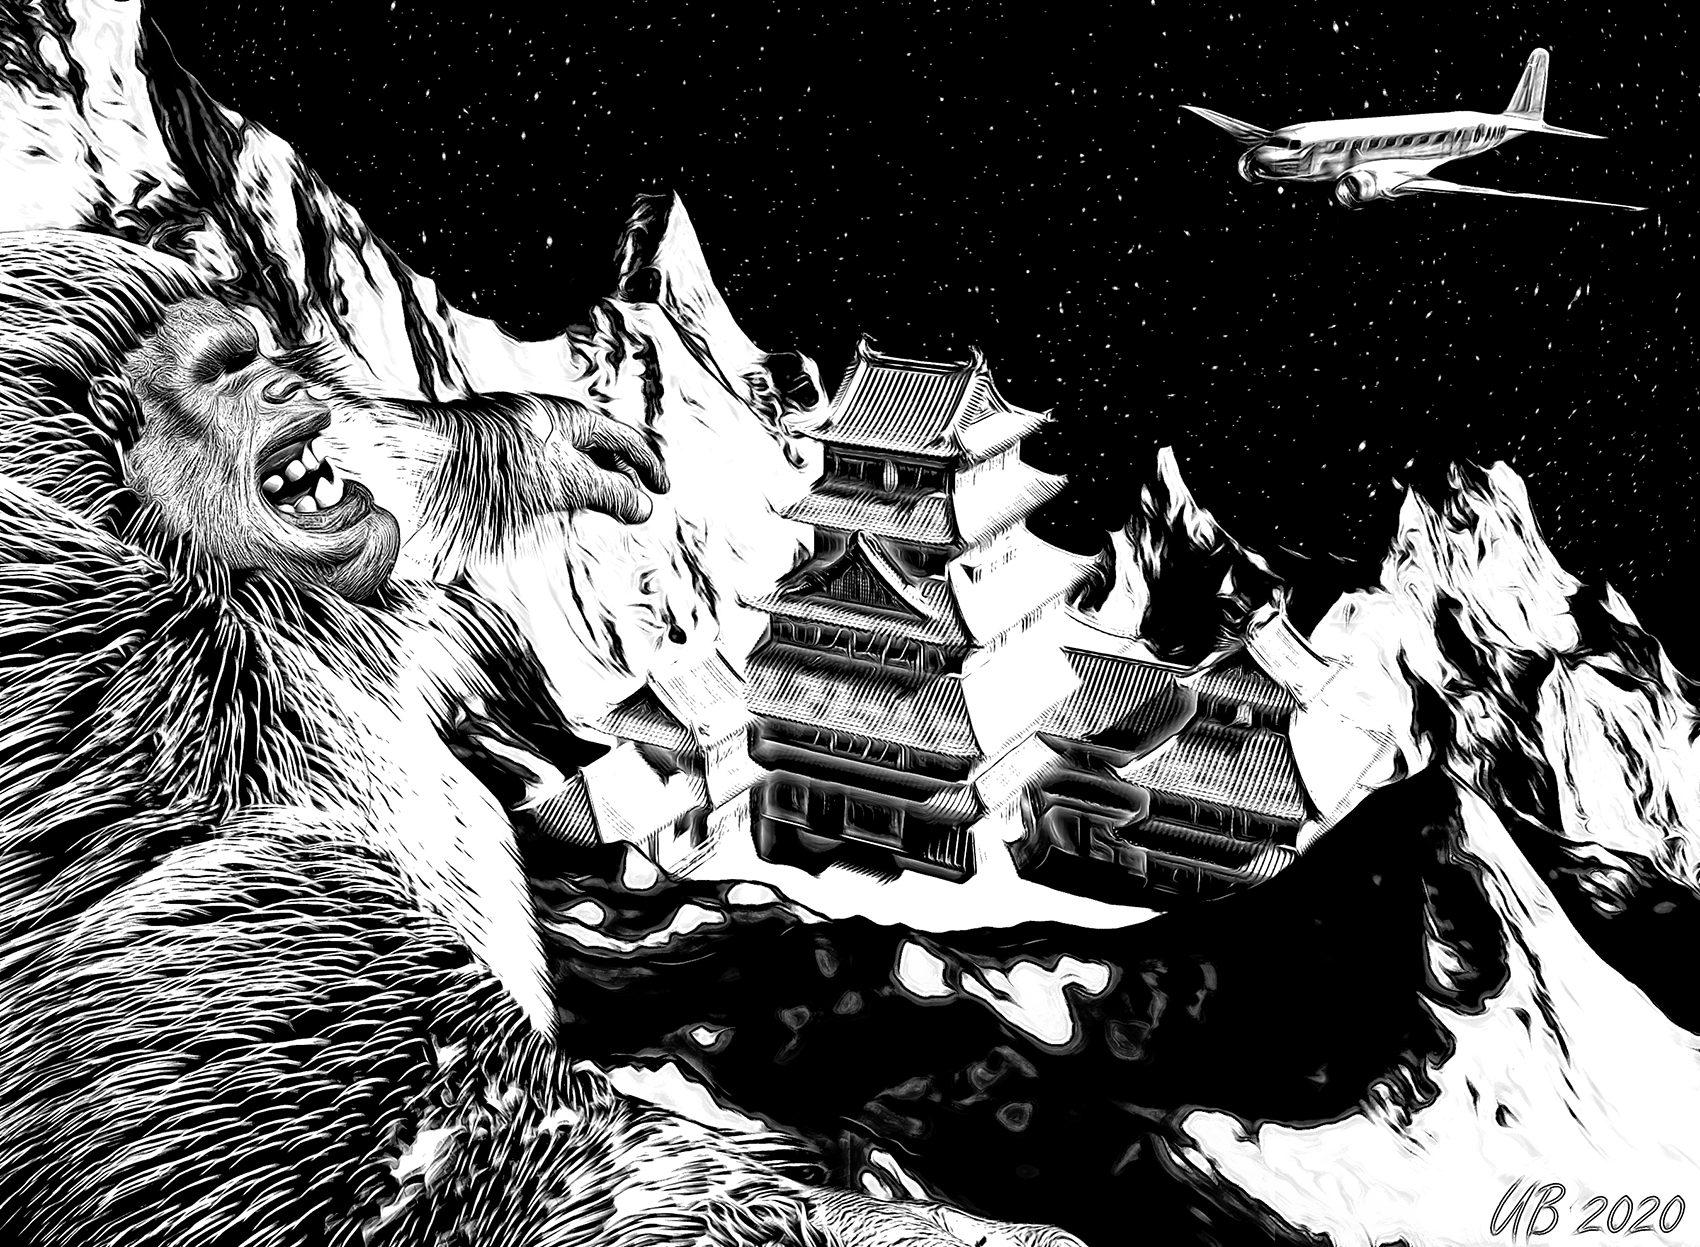
Title: Lost Horizon
Artist: UnifiedBrain
Links to WIP thread: https://www.daz3d.com/forums/discussion/comment/5552361/#Comment_5552361
Discussion: The title refers (loosely) to the classic 1937 movie with Ronald Coleman. There was no Yeti in the movie, but there should have been. :) The oriental structure is Matsumoto Castle by sugatak. The plane is a DC-2, same as in the movie. It was a freebie at sharecg. The Yeti is Abominable for Genesis (the product is a morph without any hair or textures). The starry BG is Dart's freebie texture map applied to a transparent sphere. Carrara processes include terrain, hair. and aura. The GMIC/filter stack was Color>Basic Adjustments, Toon 3, LyleJK, Freaky Details, and Black & White.No postwork.
Newcomer/Returnee Category (N)
 Face Transfer...could be worse
Those turned out really nice. Good stuff. If you start out with ideal reference images, this thing seems to work okay. How are the profiles?
I got the Face Transfer Shapes by PhilW (I think...forgive me if I 'm wrong) when I bought Face Shapes yesterday and one click and it fixes the profiles. BOOM!...fixed :). The profiles look good. :)
Laurie
Face Shapes? Is that a new one for use with Face Transfer?
Distorted mesh of a custom Victoria 4.2++I'm going to try to explain my problem in English (but I don't know English !!)
I still use DAZ Studio 4.6.0.18 Pro Edition (64-bit) on Windows 10.
I have been using the Victoria 4.2 ++ figure and many other items for DAZ and Poser for years without significant problems. The only problems I have had until recently were related to the performance of my PC.
Now, for no apparent cause, I'm having trouble with V4.2 custom figures some of which when I load the scene (or scene subset, it's the same) show some distorted parts of their mesh.
In some cases I have been able to correct the distortion by injecting again the INJ Base V4 and INJ Morphs ++ morphs, found in content/Runtime/Libraries/Pose/DAZ's Victoria 4/Morph Injections, so I could continue working with the scene and render ( but when opening the scene after saving it, figure V4.2 showed the distortion again).
In another case I was able to correct the distortion by applying a duf file previously saved in content/Presents/Shaping.
Now the problem occurs to me with V4.2 figures that have never given me problems. And the most frustrating thing is that none of the other "solutions" works. I can't find a way for the figure to display correctly.
Do you know or remember what generates this distortion and how can I correct it?
Daz 3D is part of

Connect
DAZ Productions, Inc.
7533 S Center View Ct #4664
West Jordan, UT 84084Licensing Agreement | Terms of Service | Privacy Policy | EULA
© 2026 Daz Productions Inc. All Rights Reserved.