-
[Released] Bette for Genesis 8 Female (I'm back!) [Commercial}
Its Live!
I'm back with a product after a looooooooooooooooong hiatus.
I've made toony morphs going back to Genesis 2 (though back then it was mostly morph dialing) But finally I did a complete version with things like textures and JCMs (lots of JCMs)
Introducing Bette!

Inspired by some classic and modern cartoon ladies as well as some classic 20s and 30s actresses. Hopefully she can fill your toon needs from Pinup to Fairytale to Modern.
I generally hate advertise-y writeups and am pretty terrible at them - so I'll focus on some fun stuff that might not be completely evident from the promos
There is a mysterious icon/dial called "Bette Cleavage Fixer" If you dial it in on an unclothed figure you might be confused when nothing happens. This is an optional projection morph that will popagate on clothing as a fairly stylized morph The autofollow morphs generated on clothing have some nasty distortion the cleavage fixer morph will--- fix this. you won't want it on tight fitting clothing (things like bras) but for anything loose It will definitely help It was used in all the promos where she wasn't in a bikini. None of the clothing in the promos have custom fits - its all the fixer morph + some smoothing.
I've included some nice MCMs:
I wanted to make sure she could easily me morphed into different styles so If you dial "Upper Eyelid Height" "Eyelids Fold Down" "Lips Thin" "Breasts Small", "Breasts Gone", "Hips Size" or "Glutes Size" from the main DAZ Morph sets there are some nice custom morphs that will also dial in under the hood to make these morphs work better. My goal was a character that could easily blend between Tex Avery, Fleischer Studios, and Disney-esque (though I dont think she hits quite the degree of stickbug with googly eyes that is modern disney). She's very easy to de-pinup (or make even more pinup-y if thats your thing)
She also has plenty of JCMs I'm particularly proud of the ones on her knees I realized. I didnt actually ever get around to a promo that actually demontsrated this so made a really quick crappy one just for this thread

Maybe its just me who gets excited when cg thighs and calves interact with mimimal intersection and as much volume preservation as possible but this makes me happy
edit:
Also the Toon eyelashes, Toon eyebrows and, Natural Brows include some extra morphs controling size and thickness
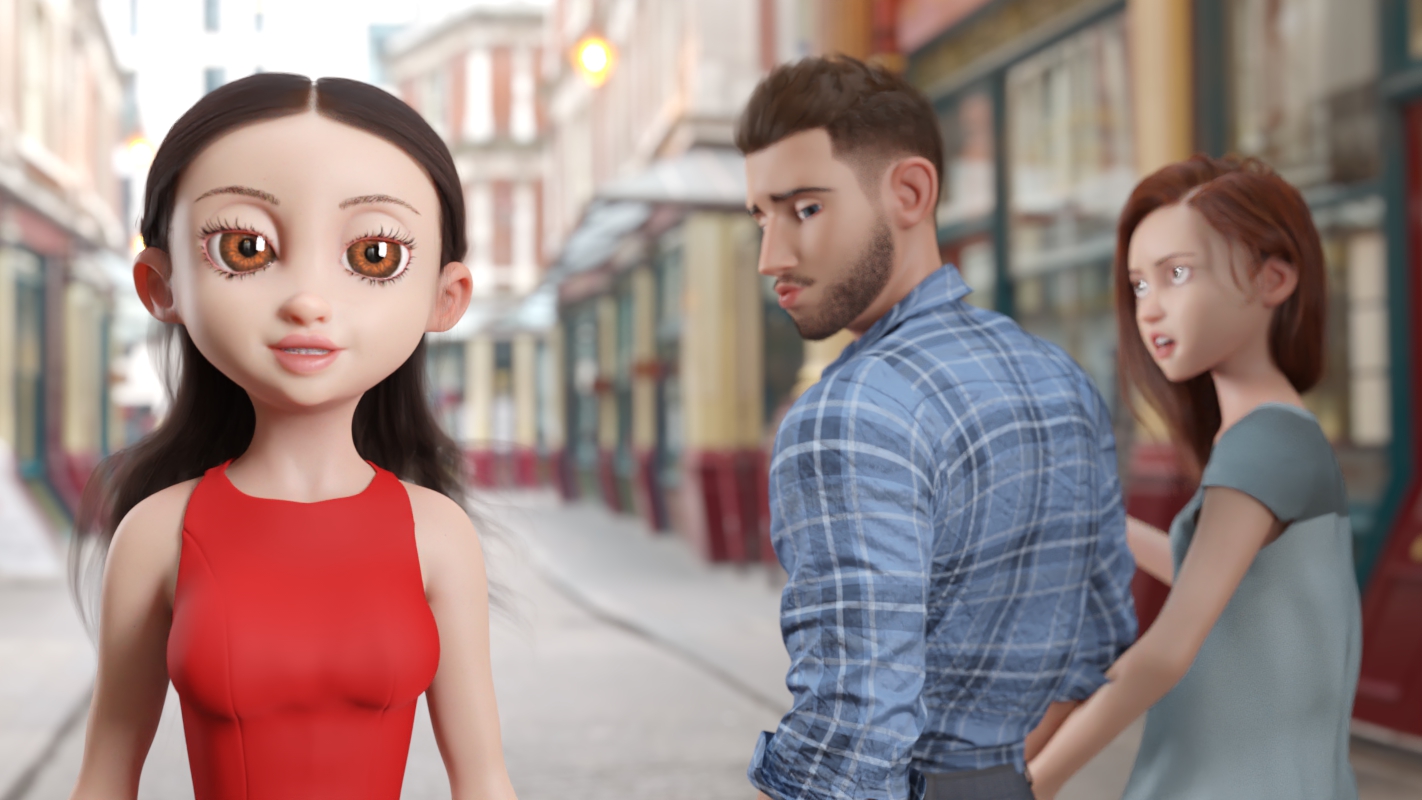
I'm not going to reinclude all the promos here since they're right on the page in the store but I am going to reinclude this one, because I really like it

Now some of you might be thinking "she seems kind of lonely" and while Bette does want me to mention that thats a little heteronormative, Her male counterpart is absolutely on the way! He would have been here sooner but well... I'm not saying it was sabotage but Bette does need to explain why I have this photo in which she appears to be sticking her leg out right as he trips
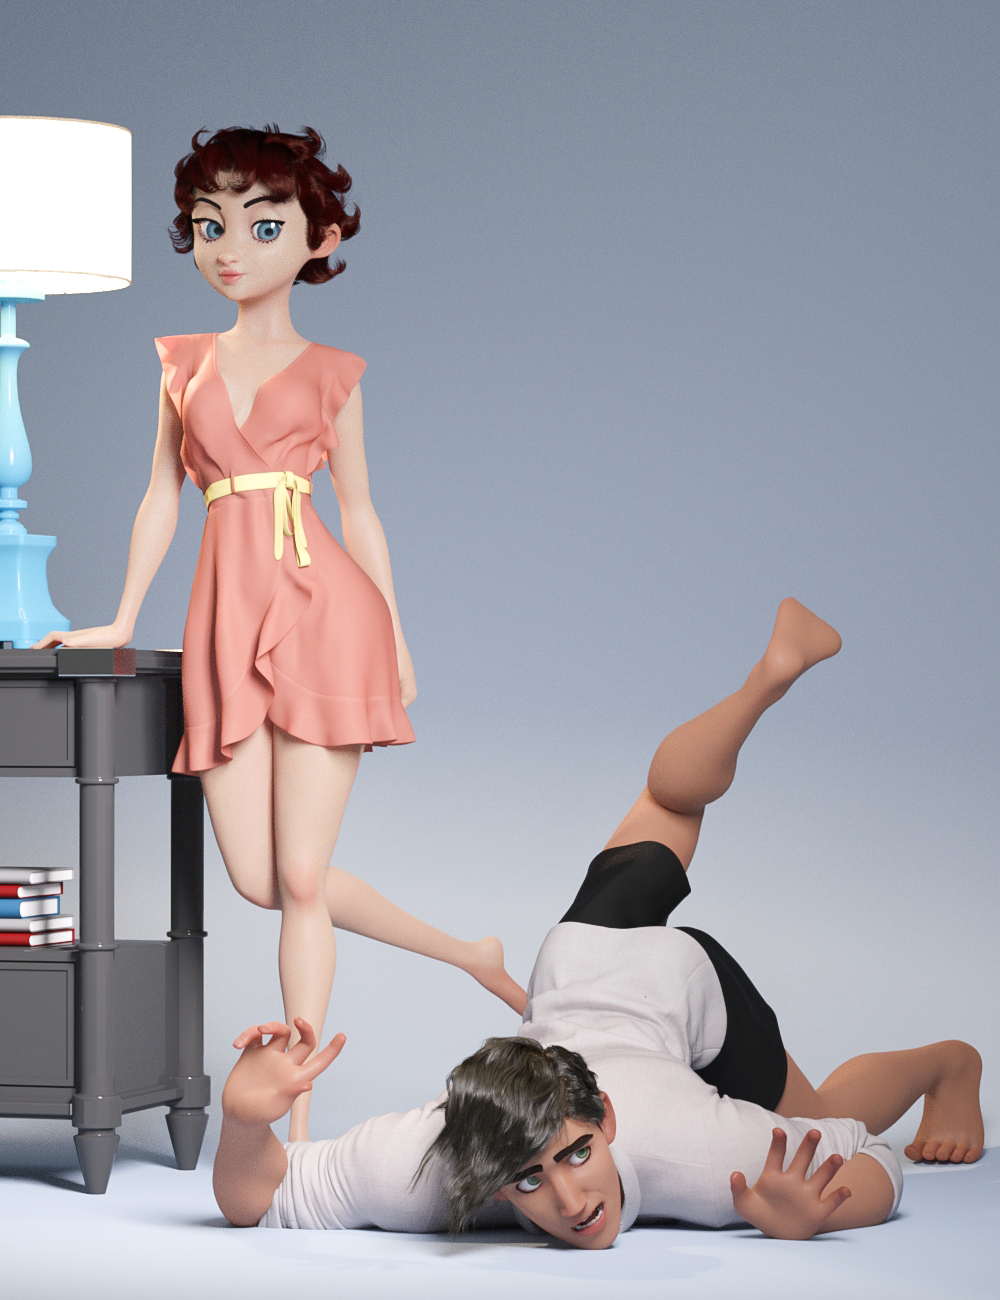
(if you think this is dumb its got nothing on this one)
 Anyone use Studio and Iclone7?
I was wondering how well things transfer between the 2 programs with pipeline. Reallusion was saying that it will ALL transfer, but I'ld like confirmation from someone who has used it. Do the morphs and animations transfer reliably? Is the animation capability worth it? How is the renderer speed and looks?
Gus
Product Cross Gender/Transgender -Transfer morphs (feature suggestions)I also eagerly await this product! In fact it can't come soon enough for me, since the scifi project I'm currently working on requires me to make opposite gender versions of alien characters which were only released for one gender base. As has been mentioned before, the ability to transfer associated geografts would also be rather critical for me, since the characters I'm hoping to expand into a more-than-one-sex-species all have geografts which are highly distinctive and defining for their appearance. Currently I'm trying to make do by using transgender morphs and/or transfering the texture over and parenting the geografts to the "wrong" base without autofit, to maintain the bones and other needed features in the graft, but this still leaves a lot to be wanting. I'd also use a product like this to transfer morph kits that were only released for one gender to expand my shaping options equally to both genders; usually that'd mean F->M morph transfer, so a script or optional additional morph adjusting for the different nipple placement would be most helpful too.
I'm in the same hoverboat as Jeylien: I look at various space-alien characters for sale and notice there's only the female version or only the male version made of a given alien race, but I want to have an entire family of them. Husband and wife alien, and their school-age son and daughter aliens, or maybe just one of the kids.
I look forward to seeing this product come out.
what is the 'correct' order when it comes to creating Daz characters?I THINK what you're trying to ask is: "What is the Blender to Daz Studio workflow for creating Genesis 8 Characters?"
I wish I could help though, I don't know how to use Blender. I do know that people who create characters often have their own preferred way of doing things, as some PAs like to create the textures FIRST and then create the morphs, others prefer to create the morphs first and then create the textures. It really comes down to personal preference and just what YOU, personally, find works best for you. I think it also depends on what type of character you're creating. I think when it comes to people, the order doesn't matter QUITE so much, but with creatures, you're probably more likely to have an easier time if you do the morphs first and then create the textures based on the morph.
Can an expert give a final word on Catmark Subdiv and How To in Maya?The "details" are just the subdiv on the base cage in Daz. For render there are other shader-based things that can be applied (but depend upon materials), such as bump, normal/heightmap, to get the detail. As far as I know there's no way to export a rigged high resolution mesh from Daz into Maya. It just doesn't work that way and none of the tools you can buy do it either. The way to do it in Maya is import the base cage fbx (subdiv 0) and then apply smoothing (x1 or x2, whatever). Unfortunately if you do that you then have to go and paint weights, usually around the lips/mouth/teeth (hammering vertices often works on this) in order to clean it up. I made a script to do the import part but it's not really sharable. There's no script that can do the weight painting, though I believe the chap who did the Unreal Engine exporter was working on it (I'm not sure if he succeeded in making his algorithm work).
So what you see there alex, is the subdiv mesh but only the base cage mesh vertices have weights. You need to transfer the weights from the base mesh in his method, but when you do they won't be quite correct most times (a point skipped in the tutorial above, or rather the phrase is "there are a lot of smaller things in between", i.e. a bit of a rabbit hole).
I will try to dig out my script to see what I did but it's not just a question of applying the smoothing. Things like selecting nodes in the Maya hierarchy and deleting non-deformer history and so on, is required. I think I can get a character through Daz into Maya and on into Unreal Engine with subdiv 2 with a couple of hours work (not including materials). There's still lots to do to a character after that, such as hair. You really don't want to export a model with hair from Daz as the vertex count explodes, as does the time it takes Maya to do the smoothing.
3D Comic Book Tips And Pictures
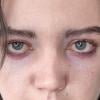
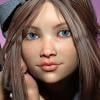
If you notice - her shape and style has changed too. Some of the morphs I originally used for her were on a drive that failed. It made me have to rework her shape, so I thought I'd go a tad less stylized with her this time. I think she looks a little older too, which is probably good since some of the story changes added some more "adult-ish"/more mature types of scenes to the script.
Very cool being able to control the rimlight color the way you are. It's not hard to imagine how that ability could be used creatively in a million different ways.
The evolution of your character makes me think of one of the main advantages of a 3D workflow. When you change the shape, textures, etc. on a character, it is relatively easy to make those changes rippple in backwards time. Of course you have to re-render, but opening up the saved scenes, applying the new morph or whatever, starting the render and walking away to grab a coffee isn't all that bad!
- Greg
I'm really excited about the rim lighting possibilities. I'm worried that it might be a bit "much" for every panel though. I hope once I have the first two pages done we'll be able to get a better idea on if the style will work for an entire comic (or series of comics *crosses fingers*) or not.
I totally agree about the advantages of the 3D workflow for comics too. It's SO MUCH easier to go back and make changes if needed than with traditional comics. As long as you save every scene and keep everything labled correctly, it's so easy to go back and make adjustments and rerender the scene.
I'm finding that making sure that my renders are labelled EXACTLY the same as my scenes and scene subsets makes things much easier. I find that even if I just change the camera angle or make some other subtle changes, saving it with a new scene name that matches exactly the name of the render is extremely helpful and can save a lot of time later. I may end up liking "version a" better than "version b" but wanted to make one small adjustment to "a", going back and finding that exact scene is WAY easy when I've labelled the scene with the exact same name as what I named the render.
I'm certain that your organization and consistent file naming conventions will pay off. Similar concepts have played a huge role in the development of my NPR algos over the years.
- Greg
3D Comic Book Tips And PicturesIf you notice - her shape and style has changed too. Some of the morphs I originally used for her were on a drive that failed. It made me have to rework her shape, so I thought I'd go a tad less stylized with her this time. I think she looks a little older too, which is probably good since some of the story changes added some more "adult-ish"/more mature types of scenes to the script.
Very cool being able to control the rimlight color the way you are. It's not hard to imagine how that ability could be used creatively in a million different ways.
The evolution of your character makes me think of one of the main advantages of a 3D workflow. When you change the shape, textures, etc. on a character, it is relatively easy to make those changes rippple in backwards time. Of course you have to re-render, but opening up the saved scenes, applying the new morph or whatever, starting the render and walking away to grab a coffee isn't all that bad!
- Greg
I'm really excited about the rim lighting possibilities. I'm worried that it might be a bit "much" for every panel though. I hope once I have the first two pages done we'll be able to get a better idea on if the style will work for an entire comic (or series of comics *crosses fingers*) or not.
I totally agree about the advantages of the 3D workflow for comics too. It's SO MUCH easier to go back and make changes if needed than with traditional comics. As long as you save every scene and keep everything labled correctly, it's so easy to go back and make adjustments and rerender the scene.
I'm finding that making sure that my renders are labelled EXACTLY the same as my scenes and scene subsets makes things much easier. I find that even if I just change the camera angle or make some other subtle changes, saving it with a new scene name that matches exactly the name of the render is extremely helpful and can save a lot of time later. I may end up liking "version a" better than "version b" but wanted to make one small adjustment to "a", going back and finding that exact scene is WAY easy when I've labelled the scene with the exact same name as what I named the render.
3D Comic Book Tips And PicturesIf you notice - her shape and style has changed too. Some of the morphs I originally used for her were on a drive that failed. It made me have to rework her shape, so I thought I'd go a tad less stylized with her this time. I think she looks a little older too, which is probably good since some of the story changes added some more "adult-ish"/more mature types of scenes to the script.
Very cool being able to control the rimlight color the way you are. It's not hard to imagine how that ability could be used creatively in a million different ways.
The evolution of your character makes me think of one of the main advantages of a 3D workflow. When you change the shape, textures, etc. on a character, it is relatively easy to make those changes rippple in backwards time. Of course you have to re-render, but opening up the saved scenes, applying the new morph or whatever, starting the render and walking away to grab a coffee isn't all that bad!
- Greg
Blendshapes don't maintain negative morph rotation values, only positiveHi,
After exporting a character into Maya, I've noticed that any morphs I export along don't maintain full functionality as blendshapes. A very simple example: eyes side-side, or mouth side-side. The blend shape slider goes from 0 to +1, whereas in Daz they go from -1 to +1, allowing the morph to make eyes look left to right or make the mouth go left to right. In the shapes editor, I can only make them move one way or return them to the central position. At first I didn't see the problem because I thought I could just put in the negative values manually, but that reveals that the surrounding geometry actually doesn't play ball at all. In the case of the eyes, turning them positively moves the eyelids and eyelashes along with the rotation. Turning them negatively causes them to bulge out of their sockets as they expand in size.
I have no idea how to get around this problem. Who can help?
Can an expert give a final word on Catmark Subdiv and How To in Maya?Hi,
It might be a long shot after two years but I've got this issue.
When I export a FBX with high resolution subdiv locked to 1, the mesh arrive in Maya in A pose with the rig in T pose. It create a mess (attached picture).
I can't find how to correct it. If anyone has any idea?? It works fine when I export it with base resolution but I need it to transfer the details as described by @InTheFlesh.
Khemsit 8...Well, so far I'm dissapointed. The eye makeuo and lipstick load together (I pulled a different lip color from files), no fibermesh brows and as usual, I had to make the eyelashes longer with other PA morphs. But what really surprised me was that the Nirv hair looks nothing like the promos! Instead of a morph for length, there are style morphs and just combining the morph for curliness with a style morph that makes it longer, it gets all jaggedy! I haven't tried a smoothing modifier yet, but this looks like really old hair! Going to play with everything more to see if I can make things look decent, but I'm not happy with it so far.
Yes, I've always wondered why I have to rely on other PA's Eyelash Morphs in order to curl or lengthen, why is this please?

 Morphing bra
CJ-Studio's bras usually have morphs that undo them at the back, this one for example: Underwear for Genesis 3 Females
Outoftouch tends to include such a morph for their bras too, eg: Tessa Lingerie for Genesis 8 Females or Topmodel Lingerie for Genesis 3 Females
Once the bra is off, you can swap to use Laundry Day Mega Set or Messy Laundry Mega Set depending on how tidy your undressing lady is.
Face TransferCan you save the face out as a morph and apply it to a figure already posed in the scene? I don't want to add it to anything other than the base genesis 8 as a morph, it's just I created it for a scene I already have that is dressed, posed etc, and I don't want to start over with the new figure. I thought maybe I needed to save scene subset as shape, but that didn't seem to load anything. Also, is there a way to save just the face texture? I'm really not great at the surface tabs knowing what to change, but I'd in the end like to load whatever body texture I want and then use just the face texture I created.
I made a little tutorial when Face Transfer first came out. Forum Post.
I used the save inside of Face Transfer. Covers making a morph from it, finding the textures, etc.
FBM Expand does nothingI generally just ignore those 'expand all' morphs. They tend to have started existence from an autogenerated morph when first made. There are a couple of other morphs that can end up in packages too. Same deal. I tend to remove them before redistributing my files.
Sometimes you will find morphs that do 'nothing' and they must be kept because they are really doing something. They are preventing the clothing from making a change when a morph by the same name is used in the figure. That is what NorthOf45 was explaining.
I don't have that product.
One day maybe you will decide to try Hexagon again ;-)
{Have just the figure and the socks and shoes, socks and shoes parented to the figure, send the figure over the bridge to Hexagon. Then in D/S select the socks. In Hexagon 'freeze/lock' the figure and the shoes. Select the socks, then select the faces of the sock that you want brought out of the figure. {helps to toggle on transparency so can select through all mesh} Have soft select on {just a little bit}. And use the resizer cube [centre of the manipulator] and stretch them larger. Then with the socks selected send it back over the bridge to D/S and make the morph [reverse deformations]. If like, save morph: File > Save As > Support Asset > morph.}
How to transfer customized menuRegarding the customized menu I have made, does anybody know what folders I must go into and what all needs to be transfered from one Studio installation (the one with the customized menu) to another (the new) Studio installation? Of particular interest to me is to save time redoing all the (huge number) of script shortcuts I have in the customized menu. I imagine the same scripts need to be installed in the new script folder, but what else needs too be copied and transferred? Does the layout setting also have to be transferred? Anybody done this before?
data/daz 3d/genesis2/base/genesis2.dsf?The first thing that jumped out from you log was 6 lines of "Nested directory encountered while adding a Poser folder:"... This may have something to do with you problems. You need to fix your content libraries so that there is no nesting (Same content available via different content libraries)
Also in regards to the reference to "Genesis2.duf"... That may come from a product that exists for both, the Genesis and Genesis 2. I see references to Deepsea EVE in your log, and that one does have versions for every Genesis generation.
The Julie issue sounds odd... You could install Genesis Starter essentials again, if by some change Julie has somehow been activated in the *.duf that loads the Genesis base character, the procedure that I gave corrects problems inside the morph files which is a different thing.
Will get off work soon. If something comes to mind, I'll get back later.
data/daz 3d/genesis2/base/genesis2.dsf?I was expecting complete, unedited log...
It doesn't matter, what morphs are activated on a character. Every character including the base character reads each and every morph-file that has been installed for the associated base figure (Genesis)
Loading the base figure is necessary to eliminate any and all morphs that are intentionally activated for the loaded character.From the information you posted, I would start looking for the "Genesis2" reference in the files that "Andrei for Freak 5" has installed into Genesis, it has had problems to start with. (https://www.daz3d.com/forums/discussion/17347/not-a-good-job-daz)
To fix Julie beeing activated for the base figure;
1. Load your base figure (Genesis base).
2. Select "Show Hidden" in the Parameters-Tab, drop down menu (right-click)
3. Zero the figure (Found in Parameters-Tab, drop down menu)
4. Memorize the figure (Found in Parameters-Tab, drop down menu)
5. File->Save As->Support Asset->Save Modified AssetsThis procedure will zero the default value in the ill-behaving morph/morphs, and while saving DS also shows you a list of the morphs it is changing.
data/daz 3d/genesis2/base/genesis2.dsf?when I first had the issues with julie and genesis.. I downloaded and installed the genesis base stuff.
didn't make a difference.
1) load genesis
2) daz says no morphs
3) but it lies they are used
4) and even if you dial julie out .. one of her breast shape morphs is active (my male cat characters tended to get upset over this)
5) but even dialed out they show as currently used.
---
here is the log... it loads some strange pings..
-------
I loaded genesis and got the missing genesis2 message
told daz New and still got the message
---
I'm wondering what and where thesrc\sdksource\fileinput\dzassetdaz.cpp(4930): Could not find parent for modifier: PBM3duSadieHead, things are .. don't appear to be in the library or the program folder (didn't come up in a search.)
but I'm guessing they're data files that daz creates
---
this wouldn't be much of a problem etc the cats are still genesis based because the head morphs only work with genesis.
----
oh, I did load a genesis base into a new screen .. it's says can't locate file genesis2.dsf
so it's right there in the genesis figure. Which also insists on loading with the julie shaping morph on.
>>>>>> A FIX ON PART<<<<
I took the genesis figure that loaded as julie.. set the julie and julie breast morphs to zero and locked them
Renamed the original Gensis duf to Genesisold then saved the zeroed genesis figure to that folder as a scene file under the name Genesis
I can now load that genesis figure and have it merge without being Julie
big question maybe what happens if something else calls the genesis duf2020-09-20 22:53:17.369 WARNING: ..\..\..\..\..\src\sdksource\fileinput\dzassetdaz.cpp(5759): Could not
find output property for formula: Genesis:/data/DAZ
%203D/Genesis/Base/Morphs/Mallenlane/Hitomi/PHMHitomiRealisticNose.dsf#PHMHitomiRealisticNose?value in
file : /data/DAZ%203D/Genesis/Base/Morphs/Morris/Andrei/CTRLAndrei.dsf
2020-09-20 22:53:17.378 WARNING: ..\..\..\..\..\src\sdksource\fileinput\dzassetdaz.cpp(5759): Could notfind output property for formula: Genesis:/data/DAZ%203D/Genesis/Base/Morphs/DAZ%203D/The%20Girl
%204/FBMTheGirl4.dsf#FBMTheGirl4?value in file : /data/DAZ%203D/Genesis/Base/Morphs/JK/BLC/JKBlanca.dsf
2020-09-20 22:53:20.302 File loaded in 0 min 8.2 sec.
2020-09-20 22:53:20.303 Loaded file: Genesis.duf
2020-09-20 22:53:21.650 Could not resolve : "/data/DAZ 3D/Genesis2/Base/Genesis2.dsf"
2020-09-20 22:53:21.928 Loaded Morph Deltas in 0 min 0.0 sec.
2020-09-20 22:53:21.935 Loaded file: PBMJulieBreastsShape2.dsf
2020-09-20 22:53:21.965 Loaded Morph Deltas in 0 min 0.0 sec.
2020-09-20 22:53:21.965 Loaded file: FBMJulie.dsf
2020-09-20 22:54:55.680 Loaded image Twig.png
2020-09-20 22:54:55.681 Loaded image Twig.png
2020-09-20 22:54:55.710 Loaded image CWFJagCard.png
2020-09-20 22:54:55.711 Loaded image CWFJagCard.png
2020-09-20 22:54:55.717 Loaded image Cat_Female_Card.png
2020-09-20 22:54:55.718 Loaded image Cat_Female_Card.png
2020-09-20 22:54:55.721 Loaded image CWFPantherCard.png
2020-09-20 22:54:55.730 Loaded image CWFPantherCard.png
2020-09-20 22:54:55.731 Loaded image CWFTigerCard.png
2020-09-20 22:54:55.732 Loaded image CWFTigerCard.png
2020-09-20 22:54:55.734 Loaded image DarkElf-NoEars.png
2020-09-20 22:54:55.735 Loaded image DarkElf-NoEars.png
2020-09-20 22:54:55.737 Loaded image FBMFaerie.png
2020-09-20 22:54:55.738 Loaded image FBMFaerie.png
2020-09-20 22:54:55.739 Loaded image FBMHag.png
2020-09-20 22:54:55.741 Loaded image FBMHag.png
2020-09-20 22:54:55.816 Loaded image FBMBasicFemale.png
2020-09-20 22:54:55.825 Loaded image FBMBasicFemale.png
2020-09-20 22:55:00.164 Loaded image FBMVoluptuous.png
2020-09-20 22:55:00.166 Loaded image FBMVoluptuous.png
2020-09-20 22:55:00.188 Loaded image JKBlanca.png
2020-09-20 22:55:00.189 Loaded image JKBlanca.png
2020-09-20 22:55:00.192 Loaded image Deepsea Eve.png
2020-09-20 22:55:00.193 Loaded image Deepsea Eve.png
2020-09-20 22:55:00.197 Loaded image Deepsea Eve HD Details.png
2020-09-20 22:55:00.198 Loaded image Deepsea Eve HD Details.png
2020-09-20 22:55:00.201 Loaded image FBMJulie.png
2020-09-20 22:55:00.209 Loaded image FBMJulie.png
2020-09-20 22:55:00.211 Loaded image FBMSAPG1Body01.png
2020-09-20 22:55:00.212 Loaded image FBMSAPG1Body01.png
2020-09-20 22:55:00.213 Loaded image FBMSAPG1Body02.png
2020-09-20 22:55:00.214 Loaded image FBMSAPG1Body02.png
2020-09-20 22:55:00.215 Loaded image FBMSAPG1BodyBase.png
2020-09-20 22:55:00.216 Loaded image FBMSAPG1BodyBase.png
2020-09-20 22:55:00.217 Loaded image StalkerGirl.png
2020-09-20 22:55:00.218 Loaded image StalkerGirl.png
2020-09-20 22:55:00.220 Loaded image FBMStephanie3.png
2020-09-20 22:55:00.228 Loaded image FBMStephanie3.png
2020-09-20 22:55:00.230 Loaded image FBMStephanie5.png
2020-09-20 22:55:00.231 Loaded image FBMStephanie5.png
2020-09-20 22:55:00.232 Loaded image FBMStephanie5CurvyBody.png
2020-09-20 22:55:00.233 Loaded image FBMStephanie5CurvyBody.png
2020-09-20 22:55:00.234 Loaded image FBMStephanie5ModelBody.png
2020-09-20 22:55:00.236 Loaded image FBMStephanie5ModelBody.png
2020-09-20 22:55:00.237 Loaded image FBMTJMJulieBody01.png
2020-09-20 22:55:00.238 Loaded image FBMTJMJulieBody01.png
2020-09-20 22:55:00.246 Loaded image FBMTJMJulieBody01.png
2020-09-20 22:55:00.247 Loaded image FBMTJMJulieBody01.png
2020-09-20 22:56:49.245 Loaded image FBMJulie.png
2020-09-20 22:56:49.246 Loaded image FBMJulie.png
2020-09-20 23:00:45.476 Loaded image FBMJulie.png
2020-09-20 23:00:45.477 Loaded image FBMJulie.png
2020-09-20 23:01:04.282 *** Scene Cleared ***
>>>told Daz new <<<<<<<<<<<<<<<<<<<<<<<
2020-09-20 23:01:14.733 *** Scene Cleared ***
2020-09-20 23:01:18.894 WARNING: ..\..\..\..\..\src\sdksource\fileinput\dzassetdaz.cpp(4930): Could notfind parent for modifier: PBM3duSadieHead.
2020-09-20 23:01:18.894 WARNING: ..\..\..\..\..\src\sdksource\fileinput\dzassetdaz.cpp(1431): Failed toprepare modifier: PBM3duSadieHead!
2020-09-20 23:01:18.967 WARNING: ..\..\..\..\..\src\sdksource\fileinput\dzassetdaz.cpp(1442): Failed tocreate modifier: PBM3duSadieHead!
2020-09-20 23:01:20.071 WARNING: ..\..\..\..\..\src\sdksource\fileinput\dzassetdaz.cpp(5759): Could notfind output property for formula: Genesis:/data/DAZ
%203D/Genesis/Base/Morphs/Mallenlane/Hitomi/PHMHitomiRealisticNose.dsf#PHMHitomiRealisticNose?value in
file : /data/DAZ%203D/Genesis/Base/Morphs/Morris/Andrei/CTRLAndrei.dsf
2020-09-20 23:01:20.073 WARNING: ..\..\..\..\..\src\sdksource\fileinput\dzassetdaz.cpp(5759): Could notfind output property for formula: Genesis:/data/DAZ%203D/Genesis/Base/Morphs/DAZ%203D/The%20Girl
%204/FBMTheGirl4.dsf#FBMTheGirl4?value in file : /data/DAZ%203D/Genesis/Base/Morphs/JK/BLC/JKBlanca.dsf
2020-09-20 23:01:23.063 File loaded in 0 min 8.3 sec.
2020-09-20 23:01:23.063 Loaded file: Genesis.duf
2020-09-20 23:01:24.278 Could not resolve : "/data/DAZ 3D/Genesis2/Base/Genesis2.dsf"
2020-09-20 23:01:24.452 Loaded Morph Deltas in 0 min 0.0 sec.
2020-09-20 23:01:24.452 Loaded file: PBMJulieBreastsShape2.dsf
2020-09-20 23:01:24.481 Loaded Morph Deltas in 0 min 0.0 sec.
2020-09-20 23:01:24.482 Loaded file: FBMJulie.dsf
>>>> guess it didn't load the pings again because they were already in the shaping menu
Bubble Suit questionThe realism is probably down to the shaders used. You could possibly use this product and transfer the shader/s to them. Like in eveything else, your scene lighting will ultimately determine how good they look.
Thanks. I did what you suggested and it worked!
I had two different DAZ magic products with crystal balls, so I just applied the shaders to the crystal balls and presto!
The crystal balls are in the foreground, and the Bubble Suit standalone prop (many bubbles) is in further back in the render. I can't tell them apart. :)
https://www.daz3d.com/z-wicked-sorcery--prop-poses-and-expressions-for-genesis-8-female-and-mabel-8
https://www.daz3d.com/it-s-magicBubble Suit questionThe realism is probably down to the shaders used. You could possibly use this product and transfer the shader/s to them. Like in eveything else, your scene lighting will ultimately determine how good they look.
Daz 3D is part of

Connect
DAZ Productions, Inc.
7533 S Center View Ct #4664
West Jordan, UT 84084Licensing Agreement | Terms of Service | Privacy Policy | EULA
© 2026 Daz Productions Inc. All Rights Reserved.