-
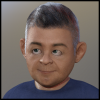
Brows that actually follow the bone shape
@ alex86fire :
Sorry about that, I should have mentioned that the auto-follow morphs were in the 'hidden' category (thank you, SpottedKitty!).
Also, I mispoke -- I meant to tell you that you needed to set your auto-follow morph's 'min' parameter (Parameter Settings) to -1.00 (-100%), and dial your AF morph to -1 to counteract the compounded morph.
Going to just zero (0.0 / 0%) only negates half the compound morph -- Hence, why it was still raised.
Did you get your brows the way you wanted them?
Did you create a universal fitting kit?
I created mine a long time ago for Genesis 1 -- A universal brow with hundreds of correction morphs that works for NPR renders, and serves as a base for fibermesh brows.
I hope you were able to achieve something like this with Blender for your brows.
* I know this thread is old, but even if you are beyond this help, it might serve another struggling with this if they find this thread...
(First Clothing Attempt) Bikini BottomsThey look nice, but there is a gap between them and the body. That kills believability imo; ok for a distant shot, but it doesn't need to be that close to tell.
I'd add a morph - if you don't want to make them fit closer - that the user can use to dial closer or further away.
It's great that they have depth - cloth does - which is missing from many bought products.
A morph is a great idea. I'll see if I can figure out how to do that :-D
Well, whatever you modelled it in, load up the file. In blender for example, you could create the morph using a non-destructive technique. It that is where you model and you're unfamiliar, I can give a quick breakdown if you need.
Iray in DAZ or migrating to Blender?DAZ Bridges is a Plan B in case Nvidia is abondoning Iray (which is quite possible) The Blender GUI has improved greatly in the past couple of releases. However it's still a proverbial pain in the a55. I keep trying to migrate to Blender but keep leaving out of frustration.
It's a matter of perspective; I've like Blender's UI since 2.50; I don't like Studio's. I can work with it, but I don't like it.
Yes, I have asked before but I have not been able to grasp the idea of .blend files with respect to a content library. I'm still finding it difficult to understand the logic of doing it the Blender way but, having watched a few more videos I can see how it is done. As I said, if that new Asset Management system is adopted in the standard release, I will be much more comfortable if it works they way it is shown in that video.
There's still one thing that is unclear to me. If you first need to put your assets into a .blend file (or multiple .blend files) does that mean that you can't have a library of installed assets (as we have with DAZ Studio) without first having loaded each and every one into a .blend file and stored it somewhere? So I could not, for instance, purchase an asset from somewhere or grab one from my DAZ Studio Content Library and have it available to Blender without having first loaded it into a .blend file in order to be able to append it into any other .blend file? Then the further question arises - how do I get it into the first .blend file if it already needs to be in a .blend file in order to append it? I have to admit that the only way I have imported objects into Blender so far is from DAZ Studio, either by .OBJ import or by Diffeomorphic.
Of course not.
Just like Studio assets need creating - which PAs do for most people, Blender files also need creating. However, we can also create our own Studio assets. They can be morph assets, pose assets and others. Now, there are Blend files available from Daz, but last time I checked they were broken - wrong scale and wrong position; materials also weren't the best. Diffeo does a brilliant job.
Blender works differently, I usually suggest folks stop thinking about how it's done in Studio, and learn how it is done in Blender; then they can look at corrolations to help them better transfer and manage assets.
If you want to create a blender asset; load up something - pick something relatively simple as a learning process.
Load it Studio; export using Diffeo plugin (remembering to run the script).
Import into Blender using the Diffeo plugin.
Optionally make any adjustments you feel would be useful including making sure all items are in a Collection and that the Collection has a name.
... Then save as a Blend file. You can then append the collection as I describe.
EDIT:
My advice is don't save local textures or pack them into the blend file; use the original location.
If you create any custom textures, have those in a custom folder, which I also have accessible by Studio.
Well, it does seem to me that, despite staring with "Of course not ..." you go on to confirm what I suggested - that assets need to be loaded into Blender and saved as .blend files. I understand that Blender works differently to DAZ Studio, I just wanted confirmation that the way I described it was they way to do it. I'm like all the others who find Blender somewhat confusing - I'm just trying to learn its idiosyncrasies.
By the way, someone else mentioned "save and pack" in another post and I spent a good while trying to figure out what "pack" meant. I eventually found it and what it does:
https://docs.blender.org/manual/en/latest/files/blend/packed_data.html
Best Method of Posing Human Figures?So has anyone tried the “AI posing from photographs” feature of Clip Studio Paint? As with Design Doll, I don’t think there’s a way to transfer poses from CSP’s 3D mannequins to Daz Studio, but it would be great if somebody could come up with a plug-in for DS that would take a reference photo as input and output a corresponding figure pose. So instead of mo-cap from video, it would be pose-cap from image ????
It doesn’t even have to be exact – something that got you pretty close to the final pose could be a real time saver.
pJCM Poses - For Clothing Creators - QuestionsI have not purchased this product yet but did decide to see what I could learn about how to make a pJCM.
This product AFAIK is JUST poses. One needs the poses [whether purchased or made from scratch] in order to make the clothing morphs. Reading how some take a few hours to make a pose [granted it those were full body poses, I hope] - purchasing this product would certainly be a time saver. [which I think was the whole idea].
All by myself I figured out how to get the new pJCM to take - be careful which item is selected - rename the generated morph on the Parameters Tab. I give them simple names like "delete this" ... but if there are more than one {some have 2} then be sure the "delete this" is not repeated ... have a series of "delete this 2" etc. because one cannot have 2 morphs with the same name. Then bring in the morphed item to replace the generated morph, naming it exactly the same as the generated morph was. Zero and save the good morph. Delete the clothing from the scene, load a fresh clothing ... check the work. [this makes all the unrequired morphs vanish - generated morphs are not auto-saved.]
Reading and watching ... to get 2 pJCMs to play nicely, can take a third morph. Not sure if anybody has mastered that one though.
For those with too much information in their pJCMs ... there may be hope. There is a video from a couple of years back showing how to put morphs in favourites and then deselect the polygons not to be included. The examples include showing how to split head/body morphs from a full body morph :-)
https://www.youtube.com/watch?v=dY6eJ0Awg9Q
The Complete Beauty Collection is out! [Commercial]This massive bundle includes many make-up props, accompanied by poses and a boudoir. I tried to cover a wide range of make-up all with their own poses and many, many texture options!
https://www.daz3d.com/complete-beauty-collection-bundle
For the boudoir I wanted it to be a fully out-of-the-box scene, with lights, camera's and working parts. Such as a functioning door that opens in a hallway so you don't have a void.
Here's what included with the boudoir:
- moving parts: door, doorhandle, window, window lock, clock hands, all the drawers of the vanity, curtains can individually be opened and closed and the bottle has liquid morphs
- many, many material options
- lights included are: natural sunlight, 2 ghostlight settings and all the lamps have 2 separate illumation settings
- 7 camera's
- all the walls, including the ceiling can be easily hidden with presets
- 2 base poses for the chair and sofa
The make-up set includes a wide range of every day make-up items and lots of material options. The make-up includes:
- textures to make the make-up look as if it's been used
- a vanity with fully functioning drawers
- tons of texture options
- a make-up bag in two variations: open and closed. There is also a preset to load the make-up bag filled with make-up
- all lids can be opened and closed, the liquids have full/empty morphs and the lipstick has a "used" morph and a up/down morph
All the make-up comes with their own poses:
- 27 poses
- "load props in hand" poses are also included
I hope this bundle makes a great addition to your runtime!Iray in DAZ or migrating to Blender?DAZ Bridges is a Plan B in case Nvidia is abondoning Iray (which is quite possible) The Blender GUI has improved greatly in the past couple of releases. However it's still a proverbial pain in the a55. I keep trying to migrate to Blender but keep leaving out of frustration.
It's a matter of perspective; I've like Blender's UI since 2.50; I don't like Studio's. I can work with it, but I don't like it.
Yes, I have asked before but I have not been able to grasp the idea of .blend files with respect to a content library. I'm still finding it difficult to understand the logic of doing it the Blender way but, having watched a few more videos I can see how it is done. As I said, if that new Asset Management system is adopted in the standard release, I will be much more comfortable if it works they way it is shown in that video.
There's still one thing that is unclear to me. If you first need to put your assets into a .blend file (or multiple .blend files) does that mean that you can't have a library of installed assets (as we have with DAZ Studio) without first having loaded each and every one into a .blend file and stored it somewhere? So I could not, for instance, purchase an asset from somewhere or grab one from my DAZ Studio Content Library and have it available to Blender without having first loaded it into a .blend file in order to be able to append it into any other .blend file? Then the further question arises - how do I get it into the first .blend file if it already needs to be in a .blend file in order to append it? I have to admit that the only way I have imported objects into Blender so far is from DAZ Studio, either by .OBJ import or by Diffeomorphic.
Of course not.
Just like Studio assets need creating - which PAs do for most people, Blender files also need creating. However, we can also create our own Studio assets. They can be morph assets, pose assets and others. Now, there are Blend files available from Daz, but last time I checked they were broken - wrong scale and wrong position; materials also weren't the best. Diffeo does a brilliant job.
Blender works differently, I usually suggest folks stop thinking about how it's done in Studio, and learn how it is done in Blender; then they can look at corrolations to help them better transfer and manage assets.
If you want to create a blender asset; load up something - pick something relatively simple as a learning process.
Load it Studio; export using Diffeo plugin (remembering to run the script).
Import into Blender using the Diffeo plugin.
Optionally make any adjustments you feel would be useful including making sure all items are in a Collection and that the Collection has a name.
... Then save as a Blend file. You can then append the collection as I describe.
EDIT:
My advice is don't save local textures or pack them into the blend file; use the original location.
If you create any custom textures, have those in a custom folder, which I also have accessible by Studio.
[Released] Character Converter from Genesis 2 Female to Genesis 8 Female [Commercial]I've been trying to convert Giselle 6. I've messed with the tolerance (moved it up and down) but I keep getting these hour glass eyes. Kind of warped.
Any thoughts?
I find the best results are using the 2020 method in options. Make sure Hide Eyes is UNCHECKED. Turn down the tolerance (0.0005). Close DS, delete the FHM morph for Giselle, restart DS and the script and immediately convert.
Hi!
First, thank you so much for your reply!
I've got a question...sorry if I missed it somehow but how do you delete the FHM morph? I checked the location listed in the PDF but I couldn't find one.
Are you still able to load the G8F with Giselle morphs (even if bad)? If not, maybe you already deleted it?
The converted morphs go in data/DAZ 3D/Genesis 8/Female/Morphs under the FIRST directory for Daz Studio Formats specified in the Content Directory Manager (F2->"Content" tab->"Content Directory Manager..." button)
Wow, I didn't know about that window. Thank you!
Unfortunately, while I did find the FHM morphs and followed the directions, the eyes still come out as I showed in the screenshot above. They're just pinched into hour glasses.
I attempted to reinstall Giselle 6. I've tried converting just the head with an even lower tolerance. Same results.
Any other ideas?
Thank you!
I forgot. You can try deleting the clone too first.
Also, this user has a suggestion for some iris problems in the eyes: https://www.daz3d.com/forums/discussion/comment/5482716/#Comment_5482716 ;
[Released] Character Converter from Genesis 2 Female to Genesis 8 Female [Commercial]I've been trying to convert Giselle 6. I've messed with the tolerance (moved it up and down) but I keep getting these hour glass eyes. Kind of warped.
Any thoughts?
I find the best results are using the 2020 method in options. Make sure Hide Eyes is UNCHECKED. Turn down the tolerance (0.0005). Close DS, delete the FHM morph for Giselle, restart DS and the script and immediately convert.
Hi!
First, thank you so much for your reply!
I've got a question...sorry if I missed it somehow but how do you delete the FHM morph? I checked the location listed in the PDF but I couldn't find one.
Are you still able to load the G8F with Giselle morphs (even if bad)? If not, maybe you already deleted it?
The converted morphs go in data/DAZ 3D/Genesis 8/Female/Morphs under the FIRST directory for Daz Studio Formats specified in the Content Directory Manager (F2->"Content" tab->"Content Directory Manager..." button)
Wow, I didn't know about that window. Thank you!
Unfortunately, while I did find the FHM morphs and followed the directions, the eyes still come out as I showed in the screenshot above. They're just pinched into hour glasses.
I attempted to reinstall Giselle 6. I've tried converting just the head with an even lower tolerance. Same results.
Any other ideas?
Thank you!
Character Mixer ProblemUse the Head Propagating Scale morph to adjust the head size after using the character mixer.
Where would I find that?
The same place other G8 head morphs are located. https://www.daz3d.com/forums/discussion/comment/4608901/#Comment_4608901
Character Mixer ProblemUse the Head Propagating Scale morph to adjust the head size after using the character mixer.
Where would I find that?
Character Mixer ProblemHi. I don't know really if this is the right thread, but for example- When I choose a generic body shape morph for Genesis 8 and then use a Genesis 8 actor head shape morph on it, I'm getting a head which is rearely the right size for the body I chose. When I try to select every head bone and adjust the scale, everything just goes screwy. There's an implied age similarity between the generic body and the actor, so I'm not sure why there's such a significant disparity in head size to begin with. Does anybody know how to deal with this?
Thanks!
Use the Head Propagating Scale morph to adjust the head size after using the character mixer.
How about an advanced search function for the forums?With the sheer number of posts you have in here, in all categories, a one-line search is woefully inadequate. It would be really nice to specifically choose which forums to search and in which categories and a context search (so that if you for example need to search for "generic body morph problems", you don't get, say, every post which contains "morph", of which there are probably thousands. That's just simply too much to read when there exists methods to order a more pertinent search. And you don't need to change any revision level on anything either because what I'm suggesting probably already exists in your forum software. Perfect!!!
Character Mixer ProblemHi. I don't know really if this is the right thread, but for example- When I choose a generic body shape morph for Genesis 8 and then use a Genesis 8 actor head shape morph on it, I'm getting a head which is rearely the right size for the body I chose. When I try to select every head bone and adjust the scale, everything just goes screwy. There's an implied age similarity between the generic body and the actor, so I'm not sure why there's such a significant disparity in head size to begin with. Does anybody know how to deal with this?
Thanks!
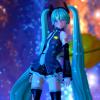
Welcome to Hatsune Miku Anime Manga Cafe ☕Funny you should post April O'Neal in the anime section.
People who worked on the 1987 TMNT cartoon heavily borrowed design elements from Fujiko Mine for her.
Yea well I used her because I use the clothes she wear for the morph convertor, her clothes as you can see are well adjusted.
I think we've all gotten a lot of use out of Dimension3D's tools. Shame Ralph ain't with us any more.
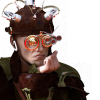
Auto Muscle Enhancer HD [Commercial]Here is a quick one I dialed up using Cromwell as a base. He has a great body I just wished his head morph was separate.
Wonderful models, Sigurd.
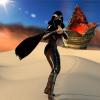
SY Merfolk Genesis 8 (Commercial)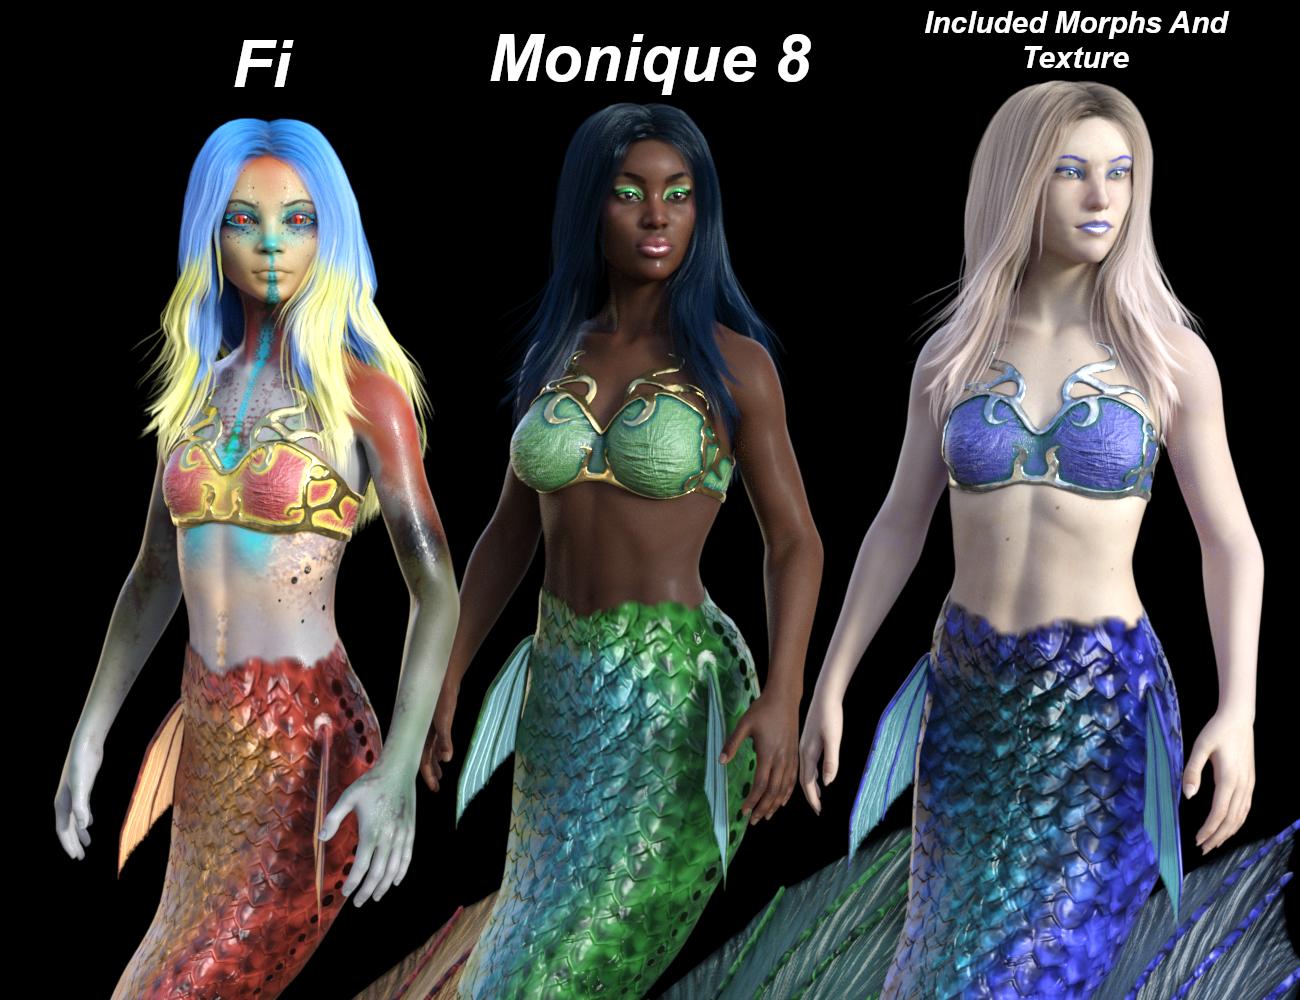 This product is now available in my store!
I don't do these threads much nowadays, but someone asked me a question on deviantart that I thought people might have here, too. The answer is that you can use the tail and bits with any skin texture and character morph. I just included my own because I wanted to assure these exact makeup options. :)
Here is a bonus promo on the females! You can also see that the included makeups work fine on Monique 8 (the makeups and lips are geoshells so they are super versatile).
Welcome to Hatsune Miku Anime Manga Cafe ☕Funny you should post April O'Neal in the anime section.
People who worked on the 1987 TMNT cartoon heavily borrowed design elements from Fujiko Mine for her.
Yea well I used her because I use the clothes she wear for the morph convertor, her clothes as you can see are well adjusted.
Welcome to Hatsune Miku Anime Manga Cafe ☕Aiko 3 on Kururu clothes by crossdresser covertor
Also I use https://www.daz3d.com/clothes-converter-4-0 is a clothes convertor and I add the morph using the previously mentioned program above. Crossdresser by Evil innocence for the figures not supported .
Welcome to Hatsune Miku Anime Manga Cafe ☕Also I use https://www.daz3d.com/clothes-converter-4-0 is a clothes convertor and I add the morph using the previously mentioned program above. Crossdresser by Evil innocence for the figures not supported .
Daz 3D is part of

Connect
DAZ Productions, Inc.
7533 S Center View Ct #4664
West Jordan, UT 84084Licensing Agreement | Terms of Service | Privacy Policy | EULA
© 2026 Daz Productions Inc. All Rights Reserved.