-
Considering M4 Mac Mini
Ostadan said:
Actually, I have a Windows box with a (now somewhat obsolete) graphics card, as well as my iMac, so setting up and test-rendering at low res on the Mac and transferring to the Windows box is what I used to do before some hardware issues made that less practical. It's a snap to keep the Studio assets on both systems and just transfer the finished scene (and local assets like home-edited textures).
I just want to make sure nothing will break, and that Studio will run without annoying problems.
How do you like the mini mac? I'm thinking of getting this set up.
Mac mini
Hide product details
Hardware
- Apple M4 Pro chip with 14‑core CPU, 20‑core GPU, 16-core Neural Engine
- 64GB unified memory
- 8TB SSD storage
Walk Designer for Genesis 9wolf359 said:
Watching the demo video, I'm not overly keen on some of the results as-is. But I'm confident that those results are incredibly similar (improved even) to those of Mimic Pro, and that with additional "Attention to detail" work after the fact should produce excellent results.
@Dartanbeck
I have Anilip 2 the default results are pretty robotic as there are no automatic eye blinks or slight head movement that we had at minimum with Mimic pro 3.Also if you look at the MIMIC pro 3 interface image I posted you see there were also expression tracks inside the program that you could insert in the linear timeline at any point to match the emotional context of the audio.
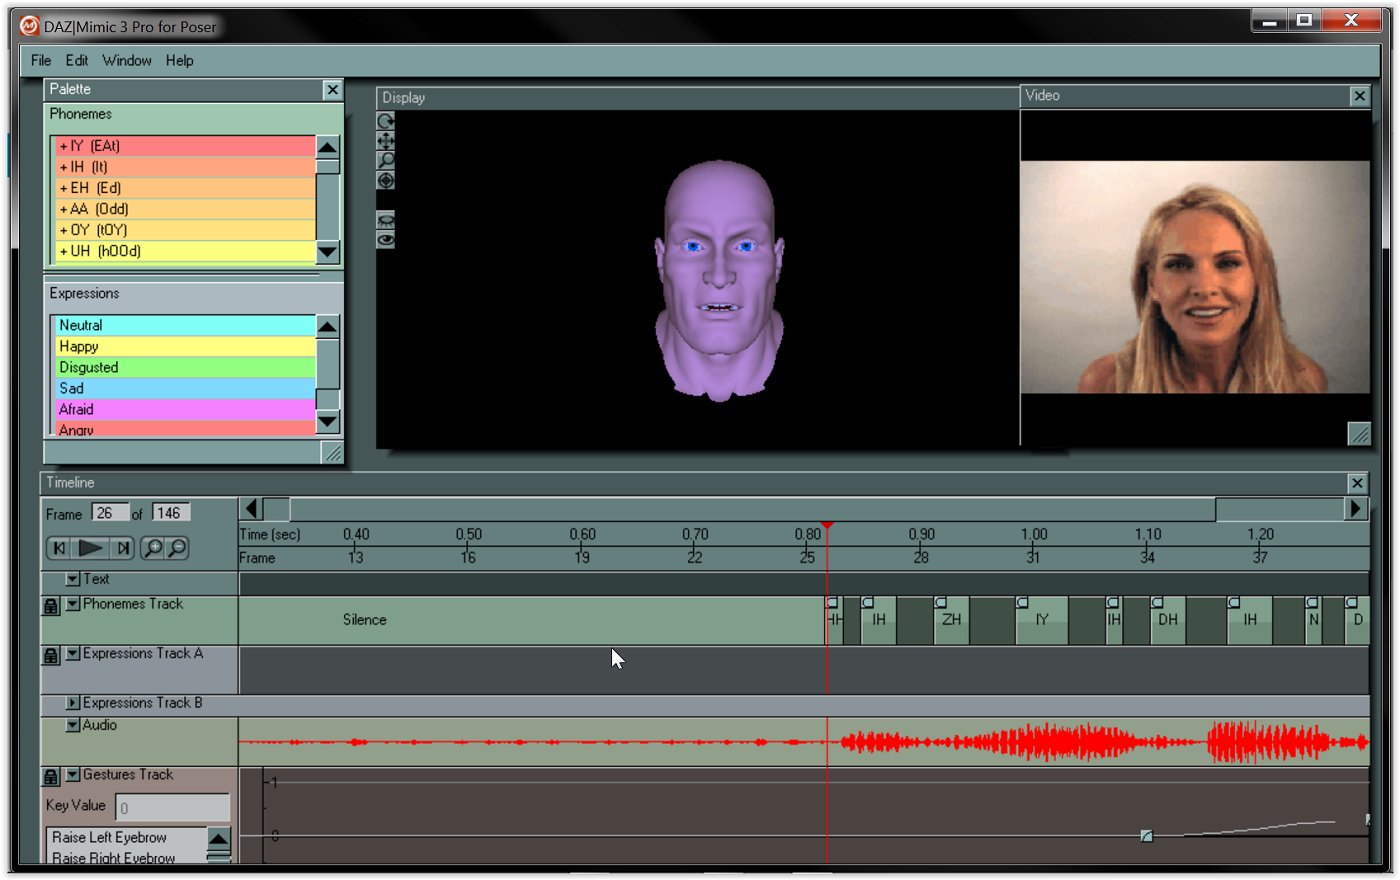
With Anilip2 any additional facial animation must be done manually with morph sliders or you could just layer on some facial expressions with facial expression aniblocks if you have them for your figure generation.
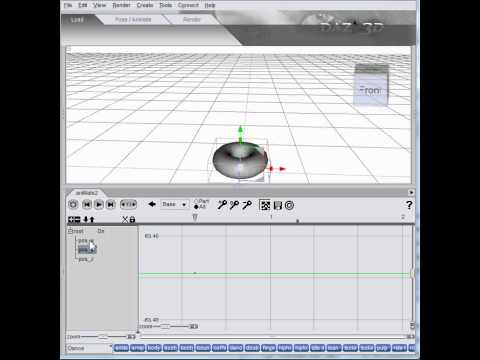
But what really interested me is that, in the video they show a graph editor tweener spline curve example - and it appears to me that they've unlocked the missing tweener that is in Daz Studio, but there is no user-facing access to it. I think that it may have been added to Daz Studio via GoFigure's aniMate 2, since that tweener is demonstrated in a GoFigure "New to aniMate 2" video, which might also help to explain why it never became a user-facing choice amongst the selection of interpolation methods.(second thing he demonstrates - "Cubic Interpolation" - I wish that we had access to that for other animation interpolations!!!)
There is no “missing cubic tweener” being “unlocked” by Anilip2.Not really sure what is being mocked up in that demo image you are showing.

Additionally that old animate video you have posted before, is showing GoFigure’s own basic spline graph editor for fine tuning aniblocks as no such feature existed in Daz studio
way back in Daz studio version 2.6 when Animate ‘basic" and "Animate + " was released.
This basic spline graph is ,of course, still available in Animate2 today and it has only ONE interpolation type.
“Cubic” to ,prevent overshoot, but
(as I explain below) you already have a superior form of “cubic” in the main Daz studio Graph Editor and Dope sheet.
The Daz studio timeline and graph editor gives you access to every animated parameter in your scene including the animation Data track created by an Anilip2 lipsinc animation.
Look at this screenshot of an Anilip 2 animation
exposed in the Daz studio graph editor& Dope sheet
Note the areas I have circled in RED
you see all of the animated visemes in the Dope sheet (top)
and their corresponding spline key frames in the spline graph editor (bottom)
These are custom visemes that install with the Anilip 2 product.Also note the three spline interpolation types
from which you can choose (at the lower right.)
TCB ,Linear , ConstantTCB is actually the same as “cubic” interpolation in that they both clamp any key to its maximum value
(preventing spline over shoot), but with even more fine tuning controls of the curve as “TCB means “Tension Continuity & Bias”
So again nothing is “missing” from Daz studio graph editorThese are the same industry standard keyframe interpolation types we have in Maya, Max Blender, C4D, Iclone.
The main difference being we have many spline filtering effects options in the big pro apps like jitter, oscillation and key frame reduction tools to make mocap editing managable in your spline graph editor.
Cascadeure’s powerful
“unbaking mocap” feature is vital to editing spline graph animation from motion captured data
or motion clips like aniblocks
MCJ’s key reduction script serve a similar purpose for Daz studio
https://sites.google.com/site/mcasualsdazscripts/mcjdecimate-for-ds-12-3
Aslo Daz studio animators can easily add such spline filters as well with MCJ’s FREE “cycler” utility for automaticaly creating a HUGE variety of effects such as bouncing balls, auto Rotating helicopter blades or vehicle tires or animation of body morphs to create the appearance of soft body simulation (Fat Jiggles)

Other than a proper IK/FK foot/hand contact solver/switcher (like you have seen in cascaduer)
Daz studio has everything you would need to make some decent FK body animation however, IMHO, the facial animation system just needs a modern day functional equivalent of the Mimic Pro 3 for G8-9.
so if 3DU can pull that off he will make a fortune!!!Hey Wolf359! Quick question, how did you get your TCB to not overshoot? Is that something that Daz has changed in a new version? Mine has always overshot and I could never figure out how to stop that other than adding another keyframe or two between the stop and start and setting those keys to constant.
Is the Bridge changing the initial mesh during the CD4 creationI have a new computer and had with a new install of DAZ3D and the latest Bridge and have a problem I didn't have before using the same version of Cinema 4D V21.
When the Bridge creates a new Cinema 4D file, the Genesis 8 Female is created with no errors and the JCM morphs work. The new problem I'm having is if I export a FBX from the exact same file in DAZ3D that the Bridge used except with a face or body morph and add it to the Cinema4D morph tag, the entire Genesis 8 Female mesh has other deformations such as the teeth, ears, etc.
Even if I export the Genesis 8 Female with no morphs applied at all, within Cinema 4D the same Genesis 8 Female mesh deformations occur.
If I do the same thing manually not using the Bridge (meaning I don't get the benefit of Bridge JCM creation tools) I do not get the Genesis 8 Female mesh deformations. This implies the Bridge is some how making small mesh changes during exporting process it didn't do before.
Walk Designer for Genesis 9Watching the demo video, I'm not overly keen on some of the results as-is. But I'm confident that those results are incredibly similar (improved even) to those of Mimic Pro, and that with additional "Attention to detail" work after the fact should produce excellent results.
@Dartanbeck
I have Anilip 2 the default results are pretty robotic as there are no automatic eye blinks or slight head movement that we had at minimum with Mimic pro 3.Also if you look at the MIMIC pro 3 interface image I posted you see there were also expression tracks inside the program that you could insert in the linear timeline at any point to match the emotional context of the audio.
With Anilip2 any additional facial animation must be done manually with morph sliders or you could just layer on some facial expressions with facial expression aniblocks if you have them for your figure generation.
But what really interested me is that, in the video they show a graph editor tweener spline curve example - and it appears to me that they've unlocked the missing tweener that is in Daz Studio, but there is no user-facing access to it. I think that it may have been added to Daz Studio via GoFigure's aniMate 2, since that tweener is demonstrated in a GoFigure "New to aniMate 2" video, which might also help to explain why it never became a user-facing choice amongst the selection of interpolation methods.(second thing he demonstrates - "Cubic Interpolation" - I wish that we had access to that for other animation interpolations!!!)
There is no “missing cubic tweener” being “unlocked” by Anilip2.Not really sure what is being mocked up in that demo image you are showing.
Additionally that old animate video you have posted before, is showing GoFigure’s own basic spline graph editor for fine tuning aniblocks as no such feature existed in Daz studio
way back in Daz studio version 2.6 when Animate ‘basic" and "Animate + " was released.This basic spline graph is ,of course, still available in Animate2 today and it has only ONE interpolation type.
“Cubic” to ,prevent overshoot, but
(as I explain below) you already have a superior form of “cubic” in the main Daz studio Graph Editor and Dope sheet.
The Daz studio timeline and graph editor gives you access to every animated parameter in your scene including the animation Data track created by an Anilip2 lipsinc animation.
Look at this screenshot of an Anilip 2 animation
exposed in the Daz studio graph editor& Dope sheetNote the areas I have circled in RED
you see all of the animated visemes in the Dope sheet (top)
and their corresponding spline key frames in the spline graph editor (bottom)
These are custom visemes that install with the Anilip 2 product.Also note the three spline interpolation types
from which you can choose (at the lower right.)
TCB ,Linear , ConstantTCB is actually the same as “cubic” interpolation in that they both clamp any key to its maximum value
(preventing spline over shoot), but with even more fine tuning controls of the curve as “TCB means “Tension Continuity & Bias”
So again nothing is “missing” from Daz studio graph editorThese are the same industry standard keyframe interpolation types we have in Maya, Max Blender, C4D, Iclone.
The main difference being we have many spline filtering effects options in the big pro apps like jitter, oscillation and key frame reduction tools to make mocap editing managable in your spline graph editor.
Cascadeure’s powerful
“unbaking mocap” feature is vital to editing spline graph animation from motion captured data
or motion clips like aniblocksMCJ’s key reduction script serve a similar purpose for Daz studio
https://sites.google.com/site/mcasualsdazscripts/mcjdecimate-for-ds-12-3
Aslo Daz studio animators can easily add such spline filters as well with MCJ’s FREE “cycler” utility for automaticaly creating a HUGE variety of effects such as bouncing balls, auto Rotating helicopter blades or vehicle tires or animation of body morphs to create the appearance of soft body simulation (Fat Jiggles)Other than a proper IK/FK foot/hand contact solver/switcher (like you have seen in cascaduer)
Daz studio has everything you would need to make some decent FK body animation however, IMHO, the facial animation system just needs a modern day functional equivalent of the Mimic Pro 3 for G8-9.
so if 3DU can pull that off he will make a fortune!!!more....Wacky Modelling ~ In Carrara ~great to see all your interpretations


something different today on 'Mad Monday'
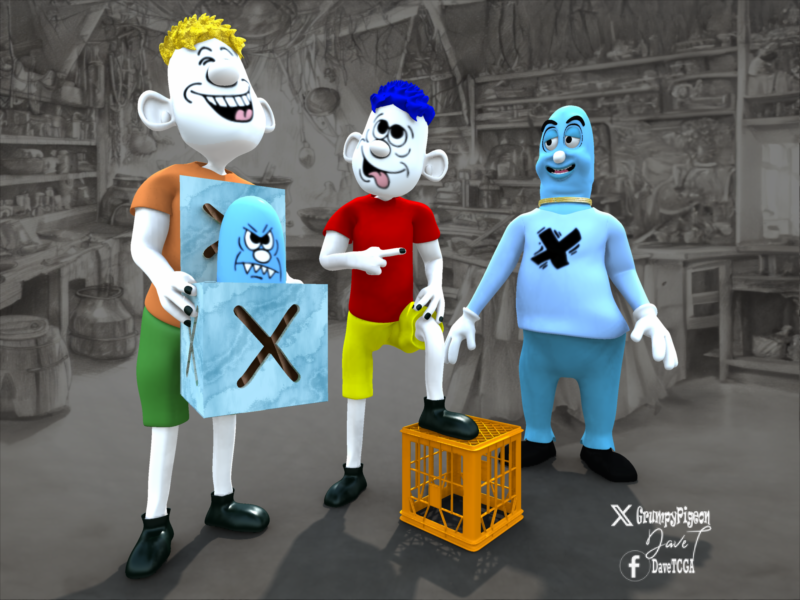
I modelled a fun bod from the cube and boned it and added a morph... but then using Co-Pilot in MS Edge I asked it to toon my render.
Here is the result ..original render and CoPilot imagining

 Marahzen's Musings on Creating Characters (and other matters)
I've finally circled back to something that I spent a lot of time studying years ago, before I wandered off down the path of creating "insta people" for product tests. Yes, my "insta people" are very satisfying: by definition, they are quick and easy to make, and many of them are pretty nice and close to what I had in mind for those characters. Ultimately, it really doesn't matter if I continue to create my own personal characters that way for motivational illustrations that no one but me will ever see. But it was high time that I took a minute to look under the hood of what went into the creation of the characters that I'm borrowing and slapping my Face Transfer 2/FaceGen textures on. That was my excuse for buying all of these characters - to analyze their textures and configurations to see what I like and then create my own.
I set up a simple scene and then created more than a half-dozen versions of Tai, my story's main character, with varying PA/Daz core characters underneath. I rendered the same view and took note of all of the skin settings.
Behind the scenes, there's a lot of similarity. In this test, I specifically picked numerous commercial characters from different PAs as well as a couple of Daz core G9s. There were some PAs that I didn't study here: CynderBlue comes to mind first. I love the CB characters and literally have all of the G9 ones, but none of them work well with Tai. I found out early on that a character doesn't have to be a dead ringer for my character in order to apply that character's mat files and replace with my textures, and get something that doesn't look weird, but if there's a significant difference in skin tone or age, I can assume it's going to be a bad match.
I'm not going to share any sort of proprietary info about commercial characters, but I will say that SC Isla, whom I picked up a couple of weeks ago, was significantly different in construction than the others that I tested in this particular round of research.
Having analyzed all of surface settings, I sat down and did texture editing on Tai's FT2-generated texture for ... well, for about the first time in years: removing eyebrows, fixing glitched eyelids (which both FaceGen and Face Transfer do) and retouching face stains a bit, which even FT2 still does to some extent. Luckily, I had notes for doing all this in Photoshop; it's been a long time. Also with Photoshop, I created an SSS version of fixed diffuse texture. I then gave Materialize a go and created, to the best of my first-time-I-really-sat-down-and-tried-to-use-it ability, a full set of height, roughness, specular, normal and AOs. This created a bunch of mat files that are way below professional caliber, but one has to start somewhere.
This is the original render using CS Isla, with my original diffuse textures from FT2:

This version uses all of the configurations, while replacing all of the CS Isla map files (except for a couple of Detail maps) with the ones I created with Materialize from my character's fixed texture:

I went as far as doing head, body and arm files. Here's a render I did looking for obvious ugly seams, at least up here where those come together:
 Transferring G8 morphs to G9
...I think I'll wait until Zev0 comes out with an updated XTransfer utility. The really nice thing about the G8 version is it also accommodates any morphs through other morph kits and plugins (including GenX/GenX2) as well Hence I have G1 and G2 available to use with G8 as well.
Makes for one heck of a huge "gene pool" to work with for character design..
Celebrity Look-a-Likes for 3D figures Part 4bigoskar00 said:
does anyone know if it exist an Allison Harvard look alike out there?

I bet if you start with a Wednesday Addams/Jenna Ortega character and mix in some morphs from a face morph kit you could get pretty close. They have a really similar look.
Walk Designer for Genesis 9Anilip 2 looks like it has a very Mimic Pro-like system with a Ton of tools for post-processing the results of the automated lip sync.
Along with the added controls I was mentioning above, I intend to start working with Anilip 2 very soon here. I don't really do dialog in my videos, but I'm going to (finally) try Anilip 2 just to see how it all works - because it looks like they've put a lot of heart and soul into the project.
If you watch as I mess with my facial musculature controls in my videos, you'll notice that I have a set of purple viseme dials. Those came with Anilip 2 - Augmented Visemes for Genesis 8, and I love using them for helping to shape the lower section (jaw, lips, etc.,) of the face. I love that they go past the boundaries of the standard viseme set as well as separating the lip portion of the morph from the jaw control as individual dials - very handy for "individualizing" facial characteristics.
Example: I use "K - Lips Only" augmented viseme for several of Rosie's facial musculature dials because of how it shapes the lips - one dial that does a lot of what I was trying to perform using many others in the Mouth section - so it saves time and I like the results better.

AA - Jaw Only is also an excellent dial for opeing and closing the mouth.


Another note that feels important to me about Anilip 2:
Watching the demo video, I'm not overly keen on some of the results as-is. But I'm confident that those results are incredibly similar (improved even) to those of Mimic Pro, and that with additional "Attention to detail" work after the fact should produce excellent results.
 But what really interested me is that, in the video they show a graph editor tweener spline curve example - and it appears to me that they've unlocked the missing tweener that is in Daz Studio, but there is no user-facing access to it. I think that it may have been added to Daz Studio via GoFigure's aniMate 2, since that tweener is demonstrated in a GoFigure "New to aniMate 2" video, which might also help to explain why it never became a user-facing choice amongst the selection of interpolation methods.
(second thing he demonstrates - "Cubic Interpolation" - I wish that we had access to that for other animation interpolations!!!)
 How to use face transfer head with MDL body?
I started with Victoria 8 body and applied face transfer along with FTS fix. This changes all the textures on the body and it looks very flat and bad. I think it creates everything as RSL? I thought of just going in and changing the surfaces of the body back to Victoria 8 ones, but the drop down doesn't list the ones that were in use before the application of face transfer. MDL options can also no longer be found in smart content -> materials.
I thought of using File->Save As->Shaping Preset to save just the face tranfer head, then double-clicking what I saved while having a standard Victoria 8 loaded, but the resulting head looks nothing like the source head. I do want to try and blend in the face transfer textures as well, which wouldn't happen loading a shaping preset I guess.
How can I get this to work? Convert the face transfer textures to MDL? How? And then how do I enable the ability to choose MDL options from smart content materials?
Weird fingernails after OS reinstallDoes it show in the default A pose?
Anyway, in Parameters enable 'Show hidden' and click 'currently used'. One of the shown morph should be the culprit.
Weird fingernails after OS reinstallHey,
I'm using a character with long nails and I'm getting this weird issue where it looks like she's growing fingers out of her nails. I've tried to set everything in use to 0, restart to a default pose and tried to default her nails but each time I make them bigger using any type of long nail morph, it grows fingers out of them. I've no idea what could be causing it. I had to reinstall my OS but I kept my daz folder where it was and just reinstalled daz. It most be some sort of setting that got changed during the reinstall.
Weird nails on the left, normal nails on the right. It only effects this one character
Walk Designer for Genesis 9COMIXIANT said:
@Dartanbeck
Reading your post gave me an idea, because using that partial system you describe, perhaps it would be possible to build-up a library of 'Viseme Partials' so that we can pull them from the library at will and just drop them onto the aniMate timeline, sliding them around and adjusting their length until they fit the speech!
So now I'm going to suggest a purpose-designed viseme sequencing system from 3DU.
I don't care how much of this stuff we ask of him, just as long as it makes him rich!
Yes, you can. When creating the aniBlocks, make sure that no other part of the figure is animated (unless you want it included with your viseme) and that you check the bottom box "Transfer Morphs" or something like that. I show that check box the first time I make an aniBlock in the video above.
So a great wat to do it would be to sculpt actual sound shapes. Like P-S-T, "Woe", Way, Tee, Laa, Ra, Ro... etc.,
I'm rather lucky in that regard for still using Genesis 8. The Face Controls for Genesis 3 & 8 product comes with rather lengthy FACS performance captures as example animations. I've converted those into aniBlocks and stored them, then also cut those into smaller chunks (and still make new ones) that I can blend together in aniMate 2 on the actual Face Control rig, which is completely separate from Genesis 3 & 8's actual face contorl morphs - it works really well for 'Mock Speach"
Daz Studio 4.24[.0.x], General Release!V8 Infinite said:
I noticed a bug with clothing subdivision in the viewport.
Load a garment with subdivision to a character, place it on a wireframe, and render.
When closing the render window, take a close look at the garment's subdivision in the viewport; it disappears from the viewport.
The garment still has its "high resolution" setting, but it appears unsubdivided. If you touch a morph or a parameter, the subdivision reappears.
When re-rendering with the bug in the viewport, the garment appears subdivided regardless (fortunately).
Note that the garment has a basic subdivision applied when it is loaded.
This phenomenon occurs on all the items in my possession.
(I posted an image of the bug in question after a render.)
If it helps.
The “view SubD Level” setting is “1” in your settings, -and also the “Render SubD Level (minimum)” is set to “1”, I suggest move the slider of your “view SubD Level” a little up and down and you will see the effect. I always had the “view SubD Level” on one but move the “Render SubD Level (minimum)” to “3” or higher if needed.
Daz Studio 4.24[.0.x], General Release!I noticed a bug with clothing subdivision in the viewport.
Load a garment with subdivision to a character, place it on a wireframe, and render.
When closing the render window, take a close look at the garment's subdivision in the viewport; it disappears from the viewport.
The garment still has its "high resolution" setting, but it appears unsubdivided. If you touch a morph or a parameter, the subdivision reappears.
When re-rendering with the bug in the viewport, the garment appears subdivided regardless (fortunately).
Note that the garment has a basic subdivision applied when it is loaded.
This phenomenon occurs on all the items in my possession.
(I posted an image of the bug in question after a render.)
If it helps.
Yellow plug-in general discussionBeen playing around with Yellow now for a while. I think it's a funny tool, prompts aren't that expensive. While AI is everywhere painting, why shouldn't it sculpt too? The idea seems obvious regarding modelling and maybe DAZ Studio ist not the ideal place and in tools like z-Brush sculpting AI would fit even better. "Make me a plane" - and the AI does a plane.
The results in no way can compete with the work of experiencend artists. Basically, no matter what you prompt is, Yellow gives you something. Something intersting, something suprising, something completely different - but never a finished product you can put some textures on and you're done.
Imo - the big advantage of Yellow is - you haven't to start from scratch. Yellow can give you a point where to start your own creation. I found it helpfull to get the "Yellow-version" of my idea, give me an example where to start. When I load the base figure into studio, often I don't know where to start with those hundreds of sliders. Yellow gives you a new starting point, a little bit further on in the process, save you some hours of straying through the sliders.
And that's all.
Creators really shouldn't worry about Yellow. Most people think of AI as a solution for problems, a tool for resolving tasks. It's a new technology, we are just at the beginning, everyone wants to ride the train, everyone wants to use it - everyone wants to ask ChatGPT a childish question.
Of course not everything will be usefull, of course not every expectation will be fullfilled. And the more AI-works you see the more you know, AI isnt't the supernova of creativity, she's an artists amongs others, often repeating herself.
All the wars and all the bickering goes on and no one listens to the main intelligence of the planet, saying "stop, make love". At the end - if it comes to opinion and belief and needs and hedonism everyone will go for his own opinion and well being and happiness and not giving a penny to what the AI is saying. It's just an opinion amongst many, many others. Maybe, in some sense AI is like a priest in church. Preaching facts and truth - an authority. But people want to have their own thing, they won't like to suffer just because AI telling so. People and authorities ... doesn't change if authority is stupid or intelligent.
So yes - as said by others above - AI must find it's place as assisting tool, not as a "solution-tool", not for paternalism but as a helping hand.
Yellow can give you some sketches but no finished characters. Also - by now - the model seems not trained well enough, tends to repeat itself and giving quite generic output. Slight variations of the prompt - alt least to me - change nothing in the result Yellow and Face Transfer are just explorations towards the same ground of new creation tools. It won't stop there. One day AI tools will doing characters, think of a story and animate them. But still AI will be like one creator among many others. My five cents.

Yellow + Face Transfer + still a lot of manual work on both, modell and texture. Prompt: "female actor daryl hannah at the age of 24".
Realistic Domesticated GoatI second this, we got a great Daz Sheep 2, I was hoping maybe they would make a morph for it to create a goat. There are sooooo many different kinds of sheep and goats, I would love to see more options!!! A new llama would be amazing, as well, but that might be easier to make as a horse morph.
Help How to create Translucency Maps & Substance Painter to Daz3d Workflow?Hello everyone! I'm making this post asking for help because I couldn’t find any information about this anywhere, so here’s my case...
Last week, I embarked on an adventure to create a custom character and custom skin for Daz. I used Blender for modeling and created the normals, etc.
Then I used Substance Painter to paint the skin from scratch for the model.
As for my progress: the modeling is already done. I changed the Genesis 8 figure to my liking and successfully created the morph in Daz.
And the skin? Also a great success! I created it in Substance Painter. It’s not the greatest ever, but I’m happy with it — especially for a first try.
So what's the problem, you ask? Looks like everything’s done, right? I WISH! The easiest part, or so I thought, turned out to be where I got stuck: transferring the textures exported from Substance Painter into Daz3D surfaces.
First, the textures look very different when I just plug in the maps — which is kind of expected, I guess? Different render engines give different results, right?
So here are my two questions, and I’d be incredibly grateful if someone more experienced could help me out:
First, does anyone know some good surface setting tweaks in Daz to make it look closer to how it appears in Substance Painter?
Second (and more importantly) — how do I create the Translucency Map?
I swear I’ve searched everywhere, and the only answer I found was a single comment from three years ago. It said that the translucency map is basically the base color map, but lighted. And I get that — it makes sense looking at other people skins! But how do I light the base map? How much should I light it to get good results, and where should I do this? Photoshop? Somewhere else? I’m honestly really confused about this map
If someone could share their workflow for creating a translucency map, I’d be very, very, very thankful!
Thanks for taking the time to read my little rant and cry for help
 Also, here’s the model and skin I made — it’s my first try, so I’m sure there’s lots of room for improvement!DAZ to Metahuman?
for metahuman head, there has already been mesh to metahuman workflow for years.
For metahuman body you would need to import your body morphs on a metahuman topology, so can use faceform wrap to create this, or a metahuman topology with genesis clone shapes on it to transfer daz figure morphs to via the transfer utility tool (transferring favorited morphs). Note: faceform wrap can also transfer textures to new topology too. But metahuman already has hundreds of textures anyway, so not sure texture transfer is really necessary.
Transferring G8 morphs to G9
Click on the word "Morph Targets" to select it.So, I'm trying the Process above, But I don't have anything in the field "Extended Options." Am I missing something?
Daz 3D is part of

Connect
DAZ Productions, Inc.
7533 S Center View Ct #4664
West Jordan, UT 84084Licensing Agreement | Terms of Service | Privacy Policy | EULA
© 2026 Daz Productions Inc. All Rights Reserved.