-
MetaHuman Creator - an Insane Level of Competition...
This is potentially "bad news" for anyone who's business model included being a 3D character resource for the unreal engine.
Daz Morph3d MCS,Morph ID, Oasis, Tafi and the latest Unity/UE export plugins are all efforts to be the go to 3D Character provider for the gaming industry.
Just as Reallusion CC3 aspired to be.
Epic will soon make those efforts Moot.
At least Reallusion has a commercial software eco system
,at various tier levels, from $199 USD up to several hundred dollars
including a very good 2D cartoon program that that even has a Mac OS version.
The future is in animated/filmaking.
People already in the UE eco-system will now have a native resource for high quality 3D Avatars.
We will have to wait and see how well they export to other 3DCC's Like Blender,Maya Houdidni etc.
MetaHuman Creator - an Insane Level of Competition...RTX card and and Iphone for facial mocap??
Good on Epic for being on the cutting edge in
developing their own high quality Character eco system.Once rolled out, IMHO there will likely be little reason for UE5 users to bother
with Iclone/CC3 or Daz Studio/genesis.Most people prefer to stay within one Eco-system
As a content creator ,I think they need to have a cloth weighting system that is as easy as the one-two click system of Reallusion CC3 pipeline or the Daz transfer utility.
I personally have no reason to use any game engine
,which is essentially just a play back tool, where I still have to create my
Character clothing and environmental sets& props externally and import them and adapt to the engine's shader system.
I need to build entire virtual civilizations and
Although I use Iclone/CC3 for Base layer animation creation& export
I am fully emersed in the Blender eco-system where I have invested in many powerful add-ons like Hard Ops/box cutter,Decal machine and likely soon flip fluids,
and of course I have the EEVEE realtime engine.I am a sci-fi guy and dont need more naked people no matter the quality/realism
if I have to migrate to a different eco-system& pipeline to access them fully.The competition going forward will be between entire eco-systems
not just pretty human figures because everyone has them now.Genesis: The Early YearsI will confess I mostly missed out on G1-G3. The PC I had until 2019 was a 2002 vintage XP machine with 2Gb of RAM and a small hdd. The onboard graphics card was seriously loaded by V3 and the move to DS0.9 and V4 took my render times to 26+ hours, and I gave up until 2019 when I got my 2013 vintage work machine when it was retired. A quick graphics card replacement and I had a moderately capable rendering machine - but there was G8, and G3 to play with. Anyway a couple of weeks ago I did my first render with a G2 character, to illustrate a freebie pose transfer script from G2F to V4 that I was aked to do (with the V4 character that so competently killed my XP rendering machine in 2006 rendering with 3Delight, rendered in iRay in 2 minutes with a bigger image size. How things have changed.).
The thing that struck me was the bones in the character. Two carpals with two fingers off each, no metatarsals, a lower & upper abdomen but no lower & upper chest/neck, individual toes. Looks like a half-hearted attempt to get to G3 but they lost their nerve along the way, not liking to give too many new bones in one go. After this one use there is no question in my mind, though, that G2 is a vastly superior figure to V4. Just don't understand why the V4 stuff is still being generated & used. There is a huge archive available, so why not move it to more modern characters. From the script transfer image above, the abdomen & neck twists are so much less strained in G2. Ahh well.
Regards,
Richard
Really getting discouraged these daysno not with GenX and Genesis 3&8 you cannot even use the DAZ studio map transfer, there are geograft solutions or use another texture baking method, I use Ultimate Unwrap3d repaint or Zprojection in Zbrush but Blender can do it too.
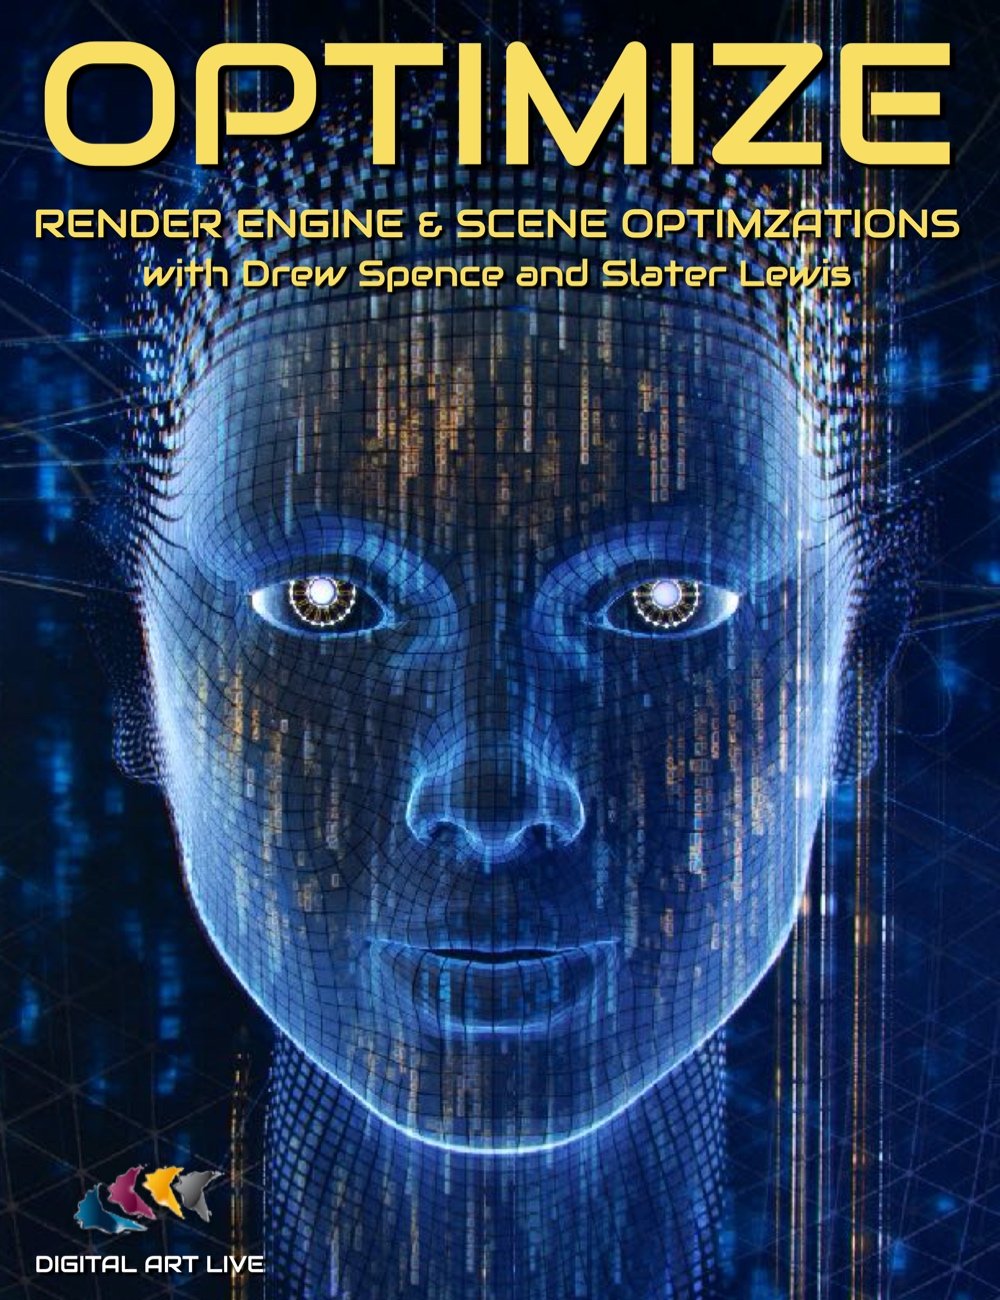
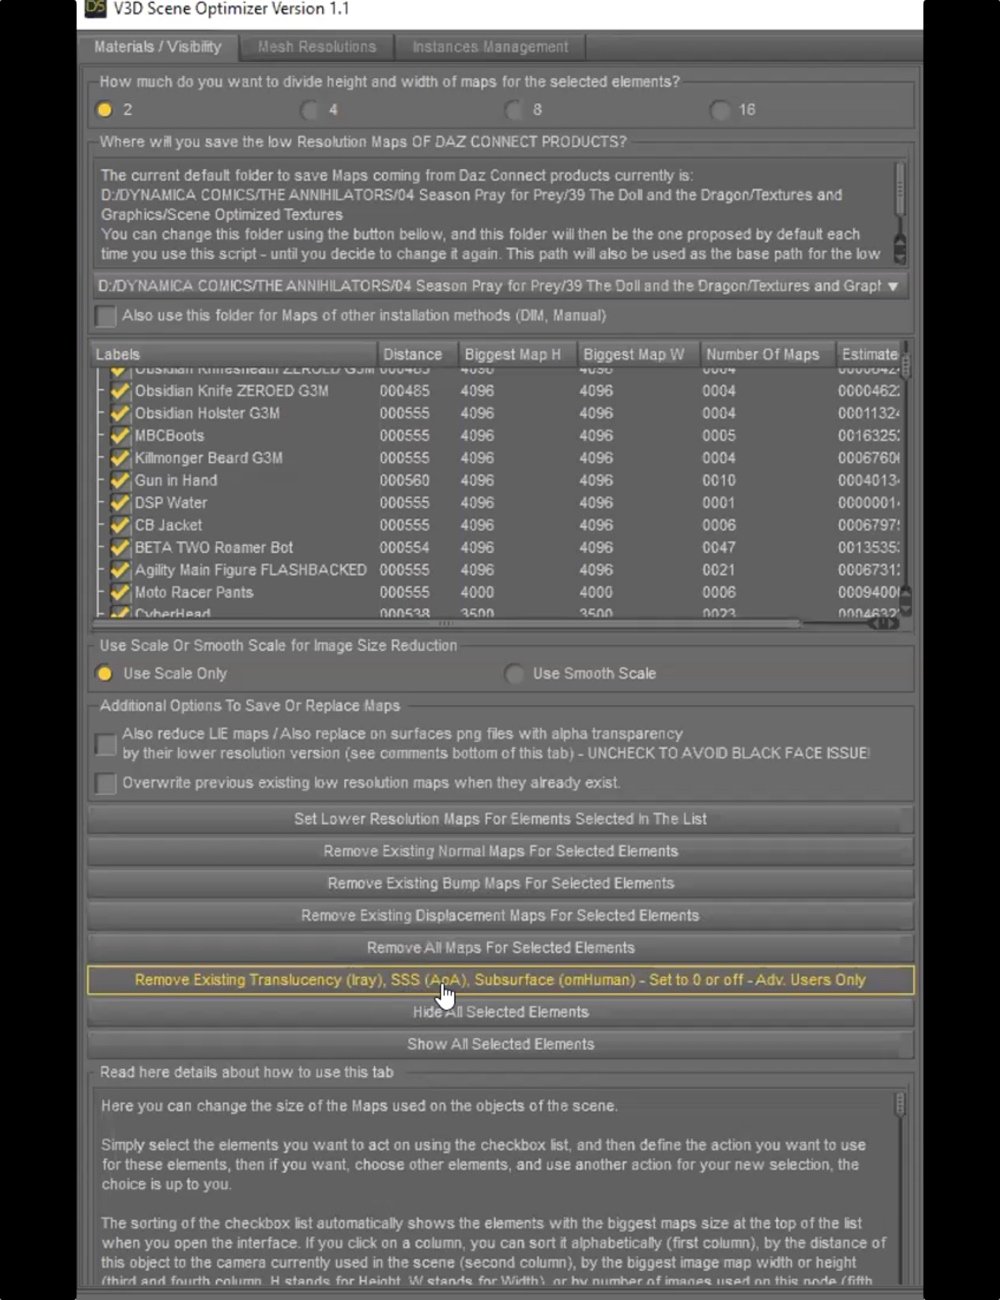
Digital Art Live & Drew Spence + Daz Store [Commercial]Take the OPTIMIZE: Render Engine and Scene Optimizations Tutorial.
If you are running DAZ Studio on an older machine or one that doesn’t have many resources (CPU processor speed, RAM, and graphics card memory), then it becomes crucial to learn how to quicken your render times!
Two approaches to this problem are to optimize your render settings and be efficient with setting up your 3D scene in the first place.
This 2-hour tutorial has two artists discuss both of these approaches. Slater Lewis (Tugpsx) and Drew Spence (Griffin Avid).
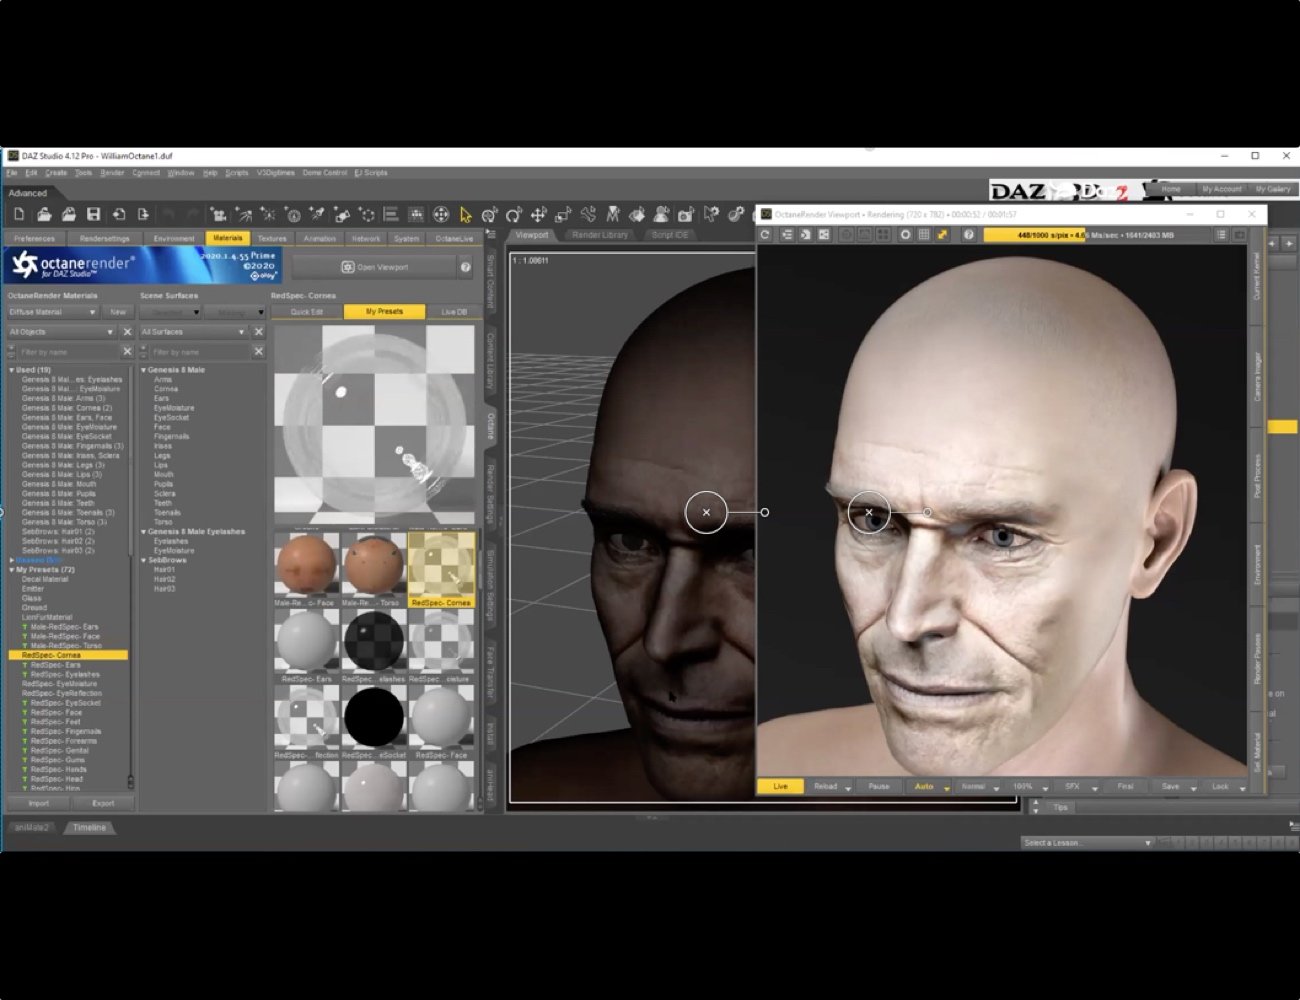
Various render engines are examined by Slater including iRay, 3Delight, Reality, and Octane. Slater has been heavily involved with render engine beta testing in the past, so he has a good understanding of what works for render settings. He includes a PDF document of tips and tricks for Iray. The irony is that Slater uses quite an old machine for his DAZ Studio artwork (8 years old), so he is motivated to find optimizations for his own work!
Drew Spence talks about the question “Should art be limited by hardware?” and addresses how we can get around those confinements with several direct tips, as well as recommended DAZ Store products. Drew uses a variety of these suggested products on a mass basis for his graphic novel “Force 6 Annihilators”, where he creates hundreds of scenes to render for the artwork.
About the Presenter: Drew Spence
Drew Spence is a graphic comic writer and illustrator from the United States. He creates under the title of The Dynamic Universe. He has combined his music and video into several works, including Mark of the Griffin, which is both a graphic novel and web series. He is part of the instrumental group Fallout Shelter, which provides the soundtrack. The other band members are Domino Grey, Dynamics Plus, and Xodus Phoenix.
Drew Spence is a graduate of Stony Brook University with a Bachelor of Arts degree in Fine Art and holds various certificates from graphic arts to web design. Drew Spence was the CEO and Editor-in-chief of Producer’s Edge magazine, a quarterly publication dedicated to all aspects of music production. The magazine was packaged with a DVD which included sound samples, instructional videos, and software. He currently lives on Long Island, New York and produces his work from the aptly named Fallout Shelter Studios, where he creates crafty and clever comics using CGI and photorealistic image manipulation.
What’s Included and Features
- This Bundle Includes:
- OPTIMIZE: Render Engine and Scene Optimizations Tutorial
- Optimize video : 2 hours in length.
- Slater’s Iray tips : PDF document
- Video Content : Time Index
- Part 1 : Slater Lewis
- 00:01 Using Face Transfer to create a custom character based on
- Willem Dafoe!
- 00:02 Slater is working on an older 8 year old machine, with just a 3Gb RAM graphics card
- 00:03 Recommendations if you have an i7 processor
- 00:03 About textures
- 00:04 Know your Iray sections
- 00:06 Using a wet/moist skin shader for a character’s skin.
- 00:09 3rd party software recommendations to tweak shader maps and generate bump maps
- 00:12 Hunting down the cause of Firefly problems
- 00:14 About tone mapping with film ISO settings and aperture shutter speeds
- 00:15 The tone mapping gamma setting.
- 00:18 About the Reality plugin
- 00:19 Between 3DL and Iray : how to choose which render engine as an artist
- 00:20 Render Settings : render engines available.
- 00:22 Octane render engine : large materials library
- 00:24 Preset shaders for skin in Octane
- 00:31 A reminder that you can still use Iray with just your CPU.
- 00:34 Using two GPUs
- 00:36 Use a main and an auxiliary viewpoint
- 00:37 Draw settings on the Viewport
- 00:41 Top three Iray settings for optimisation
- 00:43 Remember to render to a new window
- 00:45 The number of iterations for Iray – where to set
- 00:50 The Environment map and replace the default HDR lighting for your project
- 00:53 IRay render engine sections
- Objects
- 01:19 Billboards
- 01:20 Composite rendering
- 01:21 Billboard products overview
- 01:24 A DAZ scene with several ideas to optimise the scene.
- 01:26 Past hardware limitations for creating your storyworlds
- 01:28 Canvases
- 01:30 Resource Saver Shaders Collection product : cuts down the render time of shaders
- 01:32 Tools for convert Iray shaders to 3Delight or vice-versa
- 01:34 The Scene Optimiser product
- 01:38 Settings in Scene Optimiser
- 01:43 Example of using Scene Optimiser
- 01:47 Fractal generator for creating backgrounds
- 01:57 Capture the information of how long a render takes
- 01:59 The DAZ Studio log file
https://www.daz3d.com/optimize-render-engine-and-scene-optimizations-tutorial
Genesis 8.1 presets(8.5.1.19) & other presetsmebbe increase the max value on the morph limit?
Genesis 8.1 presets(8.5.1.19) & other presetsDid a little trial with G8F to get clothing that does not work when applied.
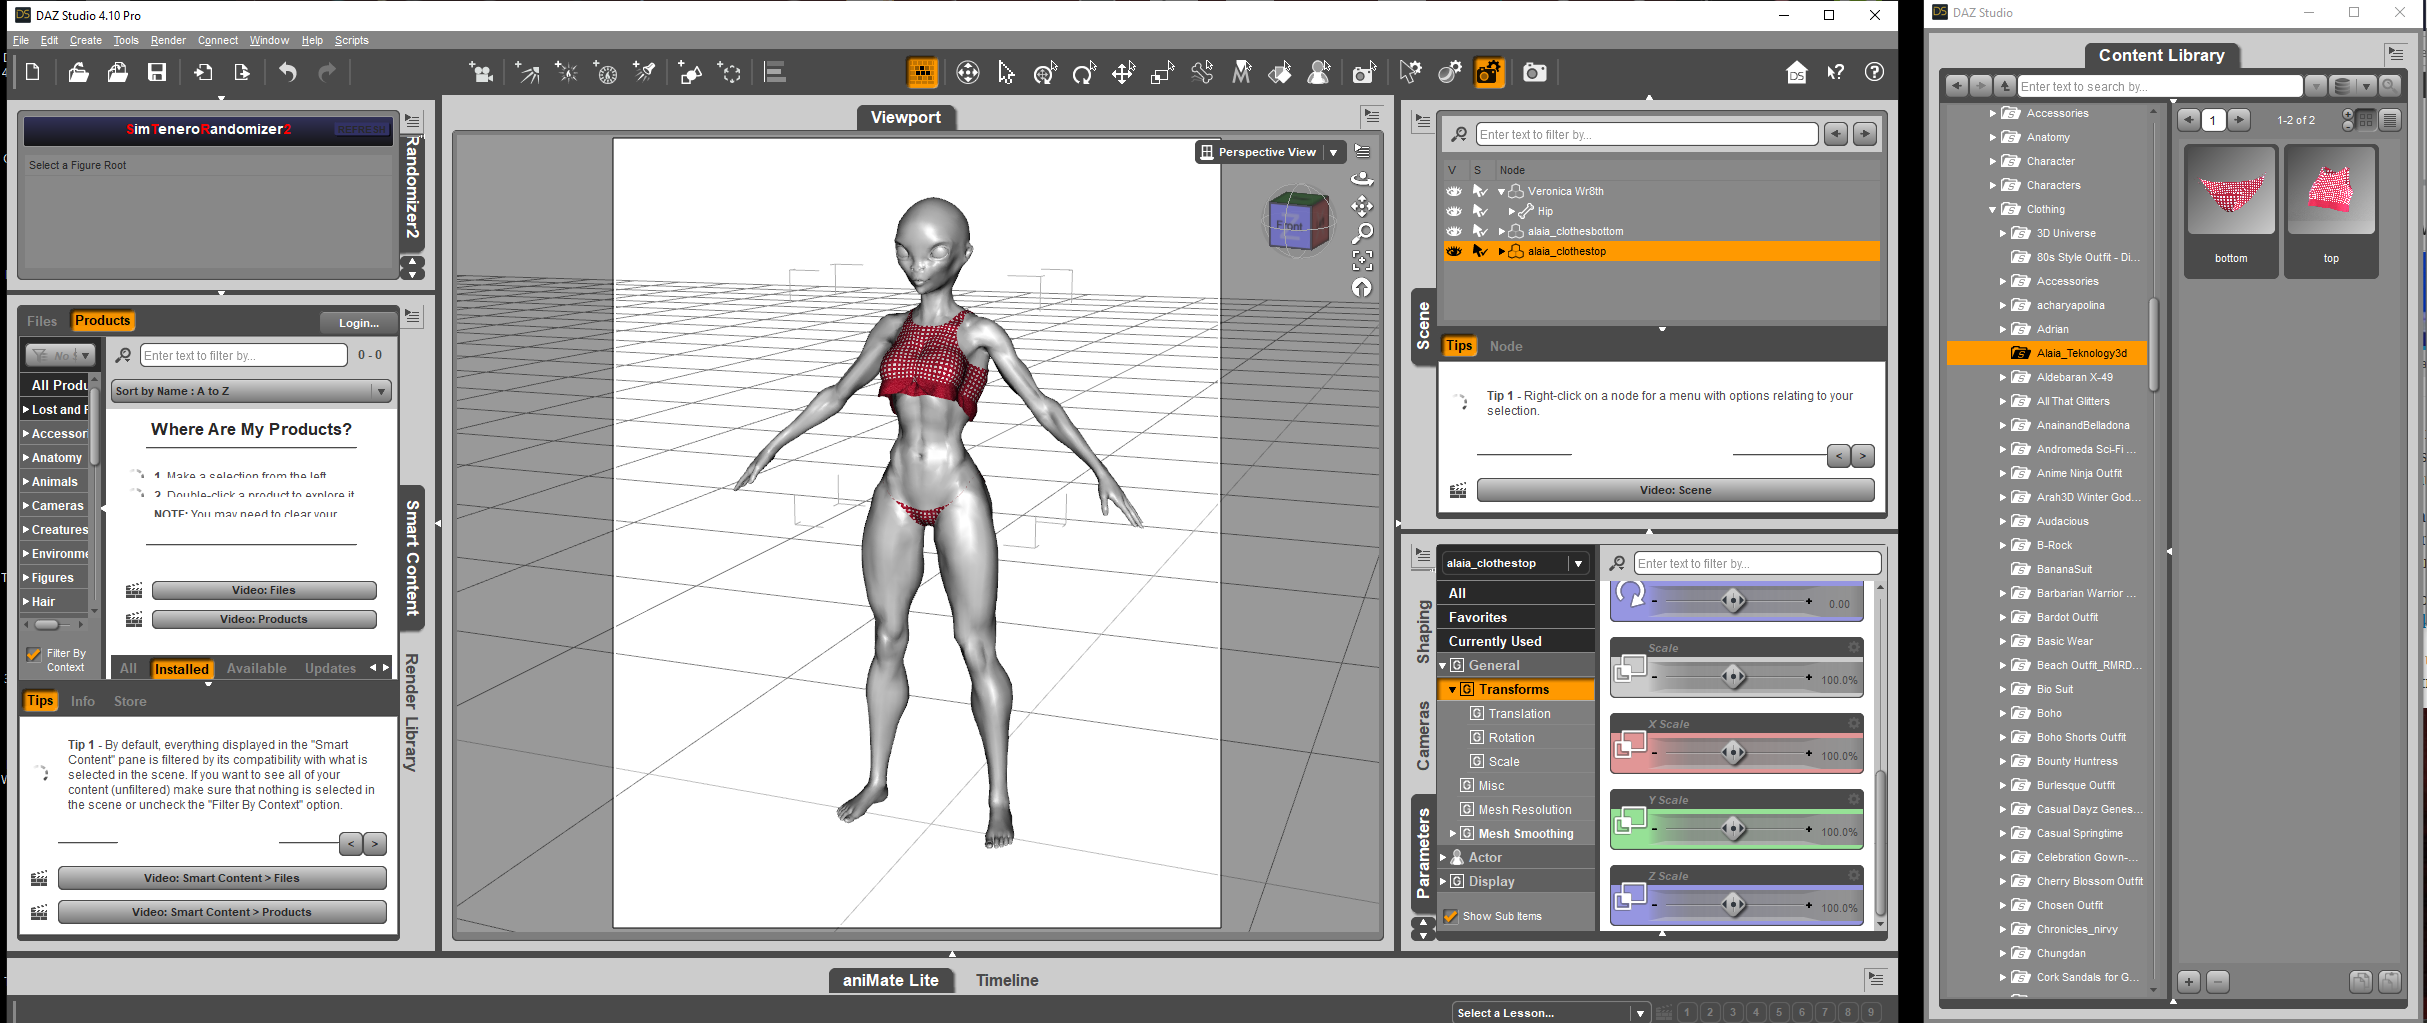
Made a combination Alien morph (Talyn & Xeloria) for G8F in DAZ Studio, saved as a Shaping Preset. Applied some cothes in DAZ Studio, saved as a blended weight Scene Subset (each item)

Opened Misty's preset in Carrara, applied the Shape Preset, then fitted the blended weight clothing. The Bikini bottom worked okay, but the top is suffering pokethrough, which if I was going to fix would be to open the top in the Model room and fiddle with the mesh.
Like Diomede I am not sure why the FBM's don't work as intended, but I do know that some clothing fits while others don't.
Legacy Fun!Nybras!!
 he inspired a character in my novel. had to write him into the story
one of the things i love about gen1 is it takes the v4/m4 maps.
how fabulout it is!! then even made an aiko3 shape for it. and david3
the only real sadness there, they didnt do the aiko3 realistic head morph, nor did they do the 4 she freak shapes.
the only way i could find to use the geograft creatures was to delete the geograft info from the geograft dsf file and use it as a conforming part. if there was a way to strip out the geograft data inside the plugin, i never found it.
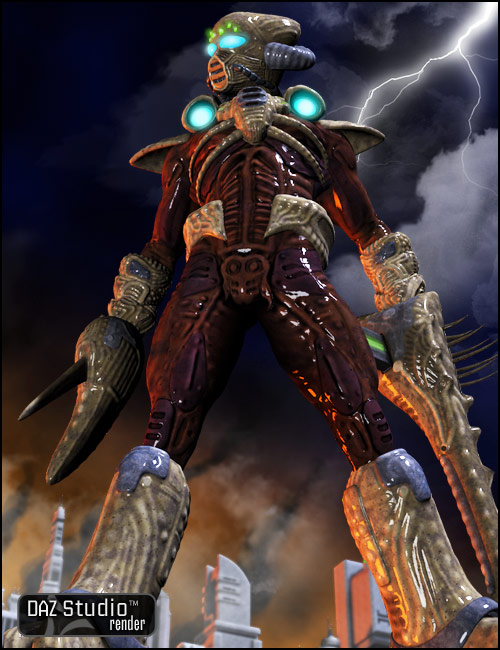
Legacy Fun!Remember this guy? I got him in the Christmas Sale 2016. I remember seeing this crazy-awesome demon back when I was just starting out - but I didn't realize that he can morph into a freaking Dragon! I'll have to shoot a render of him like that!
He's a great demon beast though! Nybras!

And he's still quite useable today! He comes with a wealth of texture maps to tweak those shaders into something Cool (I mean Hot)!!!
Genesis 8.1 presets(8.5.1.19) & other presetsif its an outfit i really really want to use, i autofit in the plugin, hten export the fit and import it back in as a morph, i usually do it for bikini straps and strings. sometimes i convert scaling to morphs, cuz once the thing is conformed in rara, the scaling has fits. lol
i have lil bit of a fetish for the strappy skimpy wearables. i love cross dressing them on the dudes. i put poor david5 in aiko 3 mech suit lol
for older poser stuff, i used the lyrra magnets and saved those fits as morphs in the outfits. had to do that to put clothes on she freak. i remember the first time i saw her, was during the pc sale month, she was such a beauty my jaw actually literally dropped. jaw dropping is a real thing, like the polar vortex.
waitin on my tax refund to get the 3d coat. i just hope the interface isnt too tiny to see.
Dial Fusion for Genesis 2 to 8.1 (Commercial)"So, basically it is like creating a new control property, adjust figure to shape, ERC freeze and save as new morph asset the comfortable way (and without zeroing your figure)?"
In a nutshell yes. But, this does not adjust rigging. That has to be done prior to any morph you decide to include in your dial.
"Or, the other way round it will keep (and rely) on the other morph dials and these will be then "X-transferred"
Yes to that too. Anything linked to the created dial will be transferred as well.
"i'd like to see this geared up with X-transfer so it will create just a single dial on the new character. is that something that could happen down the road?"
Not going to do that because you will break jcm's etc if everything is baked into one dial. If a used morph relies on jcm's etc it is best that morphs function is preserved as well as its jcm's. So yes you can get one dial that relies on nothing, but don't expect it to function remotely the same, and all you will have is a shape that looks the same but the minute you pose it it will not work as the source.
Also a few resources prohibites the baking of morphs into a single dial.
Dial Fusion for Genesis 2 to 8.1 (Commercial)So, basically it is like creating a new control property, adjust figure to shape, ERC freeze and save as new morph asset the comfortable way (and without zeroing your figure)?
Or, the other way round it will keep (and rely) on the other morph dials and these will be then "X-transferred"
Reason I'm asking is that I ran into losing JCMs when exporting using Morph Loader Pro, which put some nasty spokes in my X-Transfering G3 to G8 project wheel. I did the above way, but this will create additional morphs into my G8 morph folder, and we all know by now what more morph sliders will affect load/save times. i'd like to see this geared up with X-transfer so it will create just a single dial on the new character. is that something that could happen down the road?I have a problem please helpThanks for taking the time to help me with this situation so let me explain. I stopped for a while using daz the last update I had was 4.12 and this was back in june of last year. I came back to it last night and updated it to 4.15 and I also updated G8 Female to 8.1. Upon using her I went to add a morph to her and her nose got all ugly and it extended through the middle bridge but I cannot seem to fix it or if there is a way to fix this I dont know where. I never had this problem with the 4.12 update. So I dont know if this is a update problem with 4.15 or with G8.1 or not please explain to me how to fix this I have provided images thanks for your time
Looking for Log CabinFirstBastion said:
Chimneys certainly should be on the inside to transfer and retain the radiant heat.Wood stoves work well in that regard too.
Exactly... Having it outside the walls is the same as having your plumbing outside too "because it's easier to thaw that way"...
dForce animation conundrumCatherine3678ab said:
I certainly have not mastered simulations but I hardly think of it as half-baked. There are ways to make what you want done happen I'm sure because I often have things draping off and falling to the floor - except that wasn't what I was trying to do at the time so did not keep records on how to do that.
What I recall even making a tutorial about, was how to make a morph from a simulation. This procedure could address your secondary desire. After you have made and saved the morph for the draped item [which itself has to be a saved item, i.e. not just a plane, but a plane that has been saved as a figure/prop] - then you reload the scene, apply the morph, then do the second drape.
Ok, I don't mean to be dismissive of dForce (which is free, after all) but it does have some serious limitations which is why I said half-baked. Not being able to manipluate the cloth while draping is one. Having to save to a morph do sort-of achieve what I described above (secondary point) is another. I do know how to save as a morph, by the way.
Yes, I too have cloth sliding off when I don't want it to but that is not the object of the exercise. All I want to do is to move the cloth during the drape. Sliding off was the initial goal but the simple action of moving the cloth during an animation and animating it while moving seems impossible. It should be trivial. If you can come up with a way, I would be very glad of the information but I seriously doubt it.
Try it with the sphere and the plane - a few minutes should tell you that what I'm saying is true - you can't move the cloth and drape it at the same time.
Looking for Log CabinChimneys certainly should be on the inside to transfer and retain the radiant heat.Wood stoves work well in that regard too.
dForce animation conundrummarble said:
Richard Haseltine said:
marble said:
By the way, a second (just as confusing) problem is that, at the start of every simulation, the cloth resets so it is not possible to start the simulation with the cloth resting on the sphere. I tried draping first with "current frame" and then the animation but the cloth still resets at the start of the animation. I then tried having an initialisation period which seem to help but I don't really want the cloth to reset at all.
Turn off start from memorised pose, or memorise the object (Edit>Object>Memorise>Memorise Selected Node(s) )
Again - I am not using Start from Memorized ... as I said, I am using the animation option. No matter what I do, the cloth resets at the start of the drape just like it does if "Clear" had been clicked. There seems to be no way to drape cloth from an already draped state.
Still, this is secondary to the main issue as described above.
Oh, I see - yes, starting a simulation will clear any existing simulation data on items that haven't been frozen - if you want to take a simulation as a starting point for anothe you have to turn it into a morph, currently by exporting as OBJ and loading back in through a Morph Loader.
Start From Memorised Pose is available regardless of whether it's a single frame animation or play range, however.
Genesis 8.1 presets(8.5.1.19) & other presetsClarification of what seems to be going wrong in the example I posted above.
The FBMs that are not being triggered in the clothing are the shaping FBMs, not the joint control morphs. These shaping FBMs should be recognized through the transfer utility even if the PA does nothing. Many PAs will create a limited set of shaping FBMs for specific characters and substitute their custom for the generic one created through the transfer utility. But no shape FBM is being created in my example, whether generic default from transfer utility or custom created by a PA.
In this case. the figure shapes I used were a mixture of FBMs for the FBMIsla, FBMElizabeth, and FBMJackie. None of these shape morphs are being projected from the figure to the clothing. Not sure why.
The issue is not a pose morph like a joint correction in the armpit for rotating the shoulder.
I need help moving my custom g8f characters to 8.1I also use Michael/Victoria 8.1 material presets as a base and apply the diffuse/specular/normal maps of my custom figures.
For a better quality I use Map Transfer to convert G8 Torso maps into G8.1 Head maps. The figures with shaved hair are no longer suddenly blurred.
Legacy Fun!Using Genesis 1 as my actor, I'm having a lot of fun perusing any kind of clothing options from Any generation - and even other figures (like Poser, etc.,) entirely!
For stuff that doesn't work, I just run it through VWD. Some things work, others just break.
Having all of the various clones for Genesis makes it pretty foolproof, though. Most things just conform nearly as it should, and then I tweak the odd anomalies in the vertex modeler.
 During all of the sales going on, and even just the usual ones on any given day, I find myself looking at the way back legacy items and grabbing ones that used to drop my jaw back when I first saw them a decade or so ago.
 Lately this hasn't been just clothing and props, but also figures like animals, robots and creatures, etc.,
Over the Holidays, I was gifted the incredible Gold Club Membership over at PoserWorld, who are also making things for Daz 3D. Their site is filled with all kinds of cool stuff that supports these older legacy figures and has a massive collection of other props, animals, vehicles, etc.,
It's refreshing to see this stuff again - and now even own it and play with it!
Platinum Club + continues to help me out as well - giving me at least something even on the darkest of days - something that I can (and will) drop into a scene and put to use right away. Fun!
Rendo is another fun place filled with legacy stuff too, and let's not forget the amazing ShareCG!
Anyway, nowadays we have newer collision-detection algorithms built into Studio and so Shaping Morphs (and even movement morphs) are things we might not get with our new products. These legacy figures, if you recall, had to have morphs built into them to help fit them to morphed shapes of figures - and there were a lot of custom figure morphs being made, so a lot of the clothing makers included a bazillion additional morphs to help us fit the to our custom shapes.
Well when we conform these outfits to Genesis, they might fit really nicely just as they are - they might not. Yet we still have all of these extra morphs to lay with! Fun!
Further, when I Fit-To I always begin by selecting Body Suit > Loose from the compatibility dialog. It doesn't alter how the algorithm fits the item, but it does give us a "General Volume" morph slider to use. So for example, when I conform KooknFat's J-Suit for V4 to Rosie, I use that General Volume slider to shrink the outfit for massive poke-through, then run VWD and shrink wrap it. Since it's smaller that the target figure, VWD has to stretch it to fit, so the result is very similar to the actual shape of the actor. Works great for bodysuits that we want to hug the shape of the body!
In digging through all of this leagcy stuff, I'm finding myself tempted to go back in time a bit and grab up some of the excellent character presets of the day and see what I can do with them optimized for use in Carrara. I bet they'd render and animate pretty darned nice still, and are likely a lot of fun to play with!(?)!
Here are some example of the fun I had over the holidays
This one (above) is part of an animation - pretty cool having all of that motion in a single scene!
Daz 3D is part of

Connect
DAZ Productions, Inc.
7533 S Center View Ct #4664
West Jordan, UT 84084Licensing Agreement | Terms of Service | Privacy Policy | EULA
© 2026 Daz Productions Inc. All Rights Reserved.