Daz 3D is part of 
Connect
DAZ Productions, Inc.
7533 S Center View Ct #4664
West Jordan, UT 84084
Licensing Agreement | Terms of Service | Privacy Policy | EULA
© 2026 Daz Productions Inc. All Rights Reserved.
Comments
No problem... glad to you I am for the detailed explanation.
Your kewl "toon eyballs" gave me an idea for an animation, sorry OT, had a eyeballs app on the screen that followed the mouse x,y position. So I thought why not incorporate eyeballs in an animation where they are against a dark background and follow a character or other actions in a scene... just place the target helper onto what you wanted them to follow. Ok... back on topic... objects are always necessary they add life realism to your scene or animation.
Modeling in Carrara is funnnnn!
DesertDude! That's a marvelous technique! I never would have thought to try this.
Along with oval eyes, it would be great for creating animatable/poseable button shaped or flattened eyes for toon characters that wouldn't accommodate spherical eyes.
Great tip!
All the talk about pipes motivated me to try. I Wanted steel pipes with the rim (whatever it is called) at each end with holes in it for bolts, and a curved part also with two rims. This gave me a lot of practice with the spline modeler and the align functions.
The vertex modeler does not like the holes in the rim so I decided to have go at the spline modeler. I think it was the first time I have ever tried creating a spline object. After quite a bit of fiddling around, I grasped it, to a degree.
Created 3 circles: 1 large for the rim, 1 small for the open part of the pipe and 1 small for the bolt holes. Select 1 at a time click Arrange-Center Selection. That gave all three centered. Clicked on the small circle for the bolt holes and moved it to the flange while holding down Shift. BTW, I had snap to grid on and a good setting so that placings were clear. Select that circle again, copy and paste and then drag to the other side. Select the two holes and copy and paste, then click Arrange - Rotate, input 45 degrees and click OK. Repeat 2 times and the holes are in position. Then select all and click Arrange - Combine as Compound. Presto!
I haven't graduated to then making the actual pipe in the spline modeler with the hole-filled-rim, so I created the pipe in the vertex modeler. Now I have two parts that can be used as scene fillers for a factory. Aligning them was another study session for me using the Align menu.
The curved pipe was also made in the vertex modeler. Simple path sweep. Now came the tricky part: attaching the rims to the ends of the curved pipe. As the center of the object was not centered on the pipes. Back in the vertex modeler, Copy & paste the pipe then rotate 90 degrees and move so the pipe section is aligned. Repeated three times so that the final model was a 4-way star-like thing with the pipe openings centered on all sides. In the assemble room, make two duplicates of the rim and align them to the blob of curved pipes. Go back into the blob and delete three sections. Assemble room and group. Done!
Note: the pipes both have thickness added. As the outside dimmension was set, I used a minus number to add thickness to the inside. Also, the rim is a little large, but that was due to this being a practice run. My final scenes have toon characters, so this kind of oddness can actually be nice.
Thanks to all for the inspiration!
That Other Persona, Fine job!...Thanks for the explanation. I watched Modeling Pipes by cripeman on using spline modeling. In only a few steps you have two pipes each flared at the ends, not quite flared enough for bolts/nuts/etc... one is straight the other is at a 45º bend to joined with more pieces. I later thought about adding holes but then thought... why??...they will have a bolt showing the head on one side and the threaded end of the bolt with nut/washer on the other end... so the holes would be more work than I needed to to... well of course you might want empty pipes without bolts.
You have me curious now. Instead of adding thickness... I just dropped a circle into the vertex model room and chose extract around... then selected outside/only edge of the circle and while holing down moved towards the center of circle just a small amount... next clicked off of circle, unselected all of it, and selected only the center poly and deleted it. Sooo... what to I have now???... a circle with an inside and outside to use sweep/extrude or whatever with along with a path of course for some tools... and it already has an inside and outside. Cool you just taught me something else.. not hard to do. :)
Ok... back to the holes... In Vertex room under edit... choose Replicate which has plenty of options. For the holes choose the bottom choice, Center, the number of holes/circles you want and other options. This would leave your original object in the center of the array of circles for the holes... note that the center object can be selected then deleted. IMO... this is better than using snap to grid and gives you each hole circle evenly spaced from each other and the center. Note that they are separate polymeshes but are one vertex object... you can drag or lasso select to grab them all at the same time. Also note that you can do the same for any object. Thanks for bringing up the holes... it's been quite awhile ago that I used Replicate in Vertex Room... had forgotten where it was.
I'm sure there are many other ways since I seldom have a good idea. :)
Neither would I, it was a total "happy accident" while trying something else.
My first thought was to try to create a conveyer belt, but alas, my attempts at conforming the ends to a perfect cylinder yielded no results. I tried various Modifiers, Morphs and Bones...but I'm sure Carrara can do it...it's so close!
Regarding the belt and pulley... check this video out...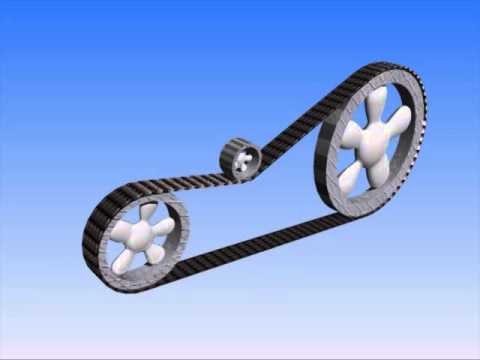 ... an animation made using The Belt Drive plug-in for Carrara ver4-8 from Sparrowhawk3D which is for flat, v, and round belts. I've not yet tried it but would think that a flat belt is much like a converyer belt and the pulleys much like rollers.
John's Crazy Objects: A Dynamic Star
I created a simple Star used for my entry, #15, in Carrara Challenge #27: “Carrara 9, Give us a Sign” Entry Thread and thought I'd share how it was made. The rendered star is a bit different but the same process was used. I also added some twinkle, objects, to the star in my entry by using replicate in the Model room.
If you find any missing steps, errors or have a question... just give me a holler.
Note that the Carrara Callenge this month has many fantastic entries and a lot of objects that were modeled in Carrara. Be sure to vote for your favorites... Entry Thread Closes/Voting Begins at 12.00 Midnight Saturday 10th September.
Modeling in Carrara is funnnnn!
If you are interrested for the settings, you can download the .car file on my site : http://mhdproductions.be/Carrarators/BeltPulleys.zip
Or in the thread about that on Carrarators: http://www.bond3d.byethost18.com/index.php?topic=169.0
..and if you need all of the wheels of a conveyor, Jermey's (Sparrowhawke) Track plugin will also do the trick!
Thanks Dudu... most generous!
Thank you DuDu, Of course I'm interested... just downloaded the .car file... will take a look at it sometime. I really must go through my downloads and continue installing things... probably even have some $paid$ content waiting to be installed... downloads is huge. :) :(
Dart thanks, Believe I already have it but will double check.
Thanks to all for pointing out conveyer belt solutions!
At the time I was simply being my usual stubbon self trying to find an "out of the box" solution to an accidental discovery. Programmers and Plugin Developers are gods!
Man, I love that eyeball thing you made! That is really sweet!
Still trying to get better at uvmapping. Here I modeled some items for a park scene. My question is about the uvmap for the lamp. The basic shape is a hexagon base extruded vertically with varying circumference. I did the uvmap with seams and unwrap. Look at the UVs for the base. Would it have been better to use a planar preset from the top and then pulled the overlaps apart where there are vertical faces? Or, is it better to have a circular seam at the top and bottom of the base with one vertical cut as I did. In the test render, I have applied a black and white checkered map to the lamp.
Suggestions most welcome.
Here is a closer view of the base of the lamp.
Note - modeling with the intent to use smoothing when rendered. Part of the issue with the base is that the model has a depressed ring around the base. Really want to focus on the uvmap.
Hi Diomede, I do lots of UV unwraping lately, not in Carrara, but system is similar...
It can be done in many different ways, but the goal is always the same: at least amount of islands with at least amount of distortions
I first make sure that I divide my mesh in different islands (not UV), having continuous meshes is almost never a good idea.
Second thing I delete all the polygons which cannot be seen and remove all unecessary loops.
I personally would not do vertical one in that particular case...
Here is how I would do it, it probably has few more seams that I would want
P.S. You could always post the mesh and se how other people would do it ...
That part should be UV unwrapped separately (at leas that is how I would do it)
Why are you planning to apply smoothing? if it's just to round off the edges, consider selecting them and applying a fillet - it gives you far more control in my opinion (you'll need to reapply shading domains afterwards though, and it'll destroy any existing UV mapping). Smoothing tends to distort texture maps too - something to bear in mind.
I recently made a floor-standing flagpole, which basically presents the same issues. (I had material changes which made things more obvious - brass cap on wooden pole in brass base). The way I mapped it was almost exactly the same as FithElement just showed. The big flat hexagonal surface *is* the base, and you really don't want to split that up if you can help it, or it'll look all kinds of rubbish. You can split it into chunks - inner ring and outer ring etc. The cap on the top of the lantern is the same - slice it off and map it separately.
Some 3D paint apps can paint over seams and make them vanish, in which case there are other mapping options available, but in general a visible seam would get your prop kicked back by QA (I know for the purposes of a render you can get away with hiding incomplete or iffy stuff from the camera, but even when building things only for personal renders, I still try to make them to store standards)
Thanks for the feedback, FifthElement and TangoAlpha. I have posted the carrara file as a freebie at sharecg.
http://www.sharecg.com/share.php?upload_section_id=1&upload_type_id=5&upload_id=86002
I appreciate the advice. I was going out of my way to make it a single mesh. I see that was a mistake. If it isn't going to be smoothed, then it definitely needs to be beveled. If the above link does not work, try this.
http://www.sharecg.com/v/86002/browse/5/3D-Model/Lamp-for-Park
PS - I think I am getting closer. Once I get the princples of uvmapping down, and when to bevel and when to smooth, I will start offering the community more freebies, and get more feedback. And then eventually...
Here is a thread that touches upon many topics related to making content for Daz. The thread is not Carrara-specific, although Carrara does get mentioned from time to time.
http://www.daz3d.com/forums/discussion/65357/the-male-content-creation-mutual-support-group-thread/p1
Looks to be some very useful material there if you are interested in making and selling clothing. I have made a number of clothing items for my own use, but I am always put off by the tedious amount of morphs that you need to do in order to make it a commercial product.
True dat.
.
Great example. I admit to have only wander into UV editor but just to take a peek.. never have gotten as far as unwrapping quite yet.
So I have a UV-illertate question... Is an "island" the same as giving individual "shading domains" to different areas/polys of the polymesh or am I waay off track?
Thanks diomede for bringing the UV question off... I'd been neglecting this until I ventured there and gathered enough info on this subject.
Yes, I often get the urge to follow one through to a 'finished' product. Would be fun to do. But darn!
Nope. Islands are the separate images laid out next to each other within the same image map - I think.
Mesh islands (that's how I call them anyways) are separated poly surfaces within the one object, UV islands are islands within UV space