

Advanced & In-Depth Product Management
Install and uninstall your products in one place
Work in 'online' or 'offline' modes
View available downloads and updates
Manage products from separate accounts
Set up multiple or custom installation paths
How Daz Install Manager Works
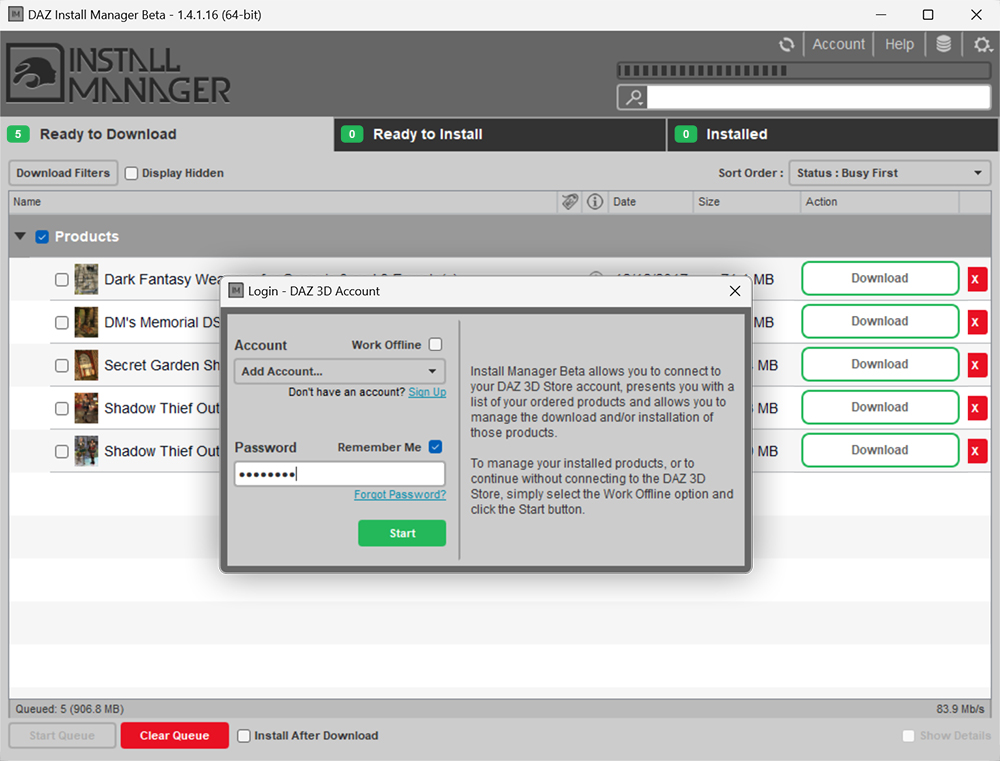
1. Login Pop-up
Once the application is open, log in using your Daz account and Password.
This pop-up gives you options for working online or offline, as well as selecting and logging in with another account.
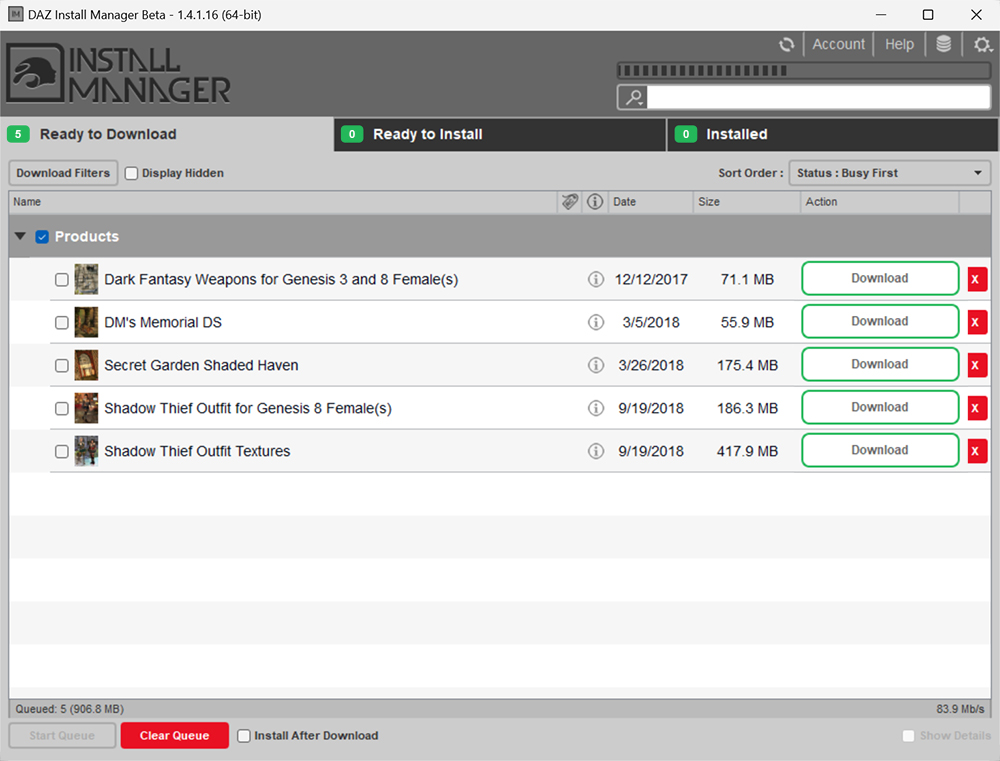
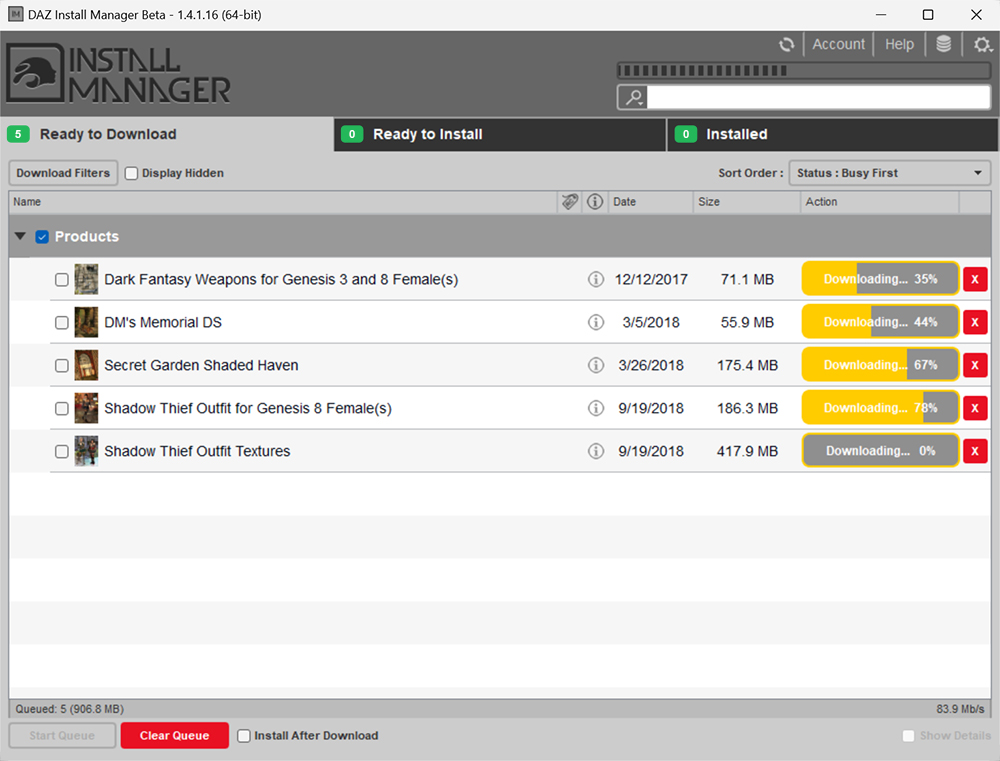
2. Ready to Download Tab
Daz Products/3D Assets will appear in this tab after purchase. Select the items that you wish to download. Those items will automatically move to the 'Install Tab' and start the installation process.
This function is available for the advanced user who wants to use packages, locations, install filters and more.
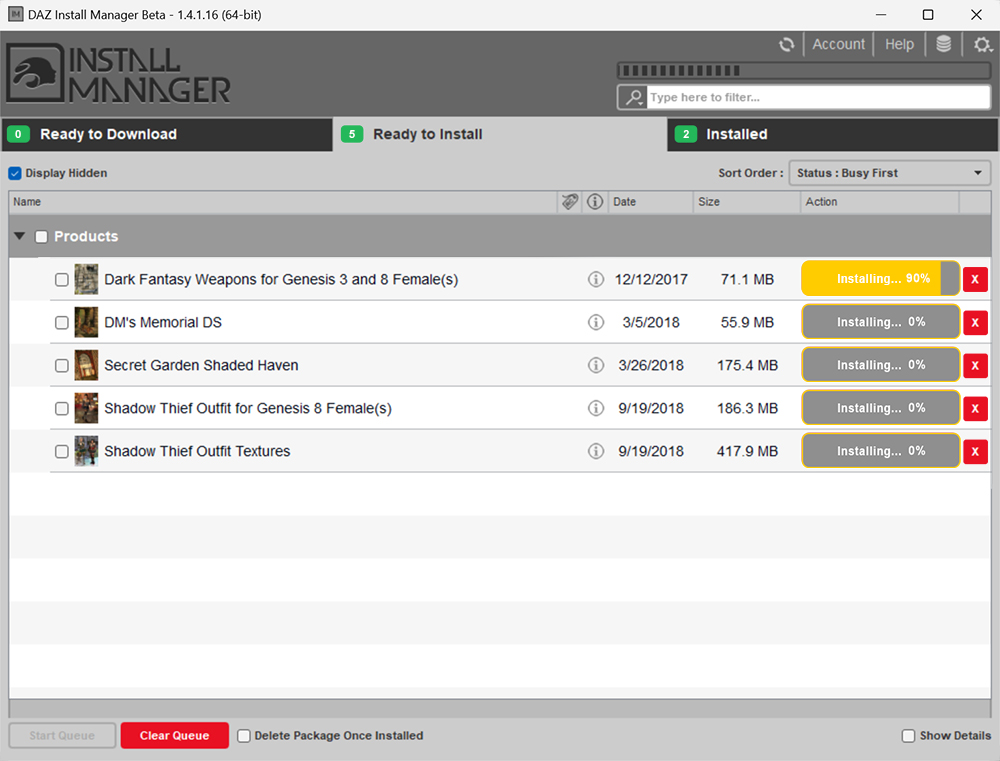
3. Ready to Install Tab
The Ready to Install Tab houses existing files that have not yet been installed, as well as those that did not auto-install. This Tab allows you install items manually, if you wish to do so.
You can also select packages to install for more advanced installation, and view files inside said packages.
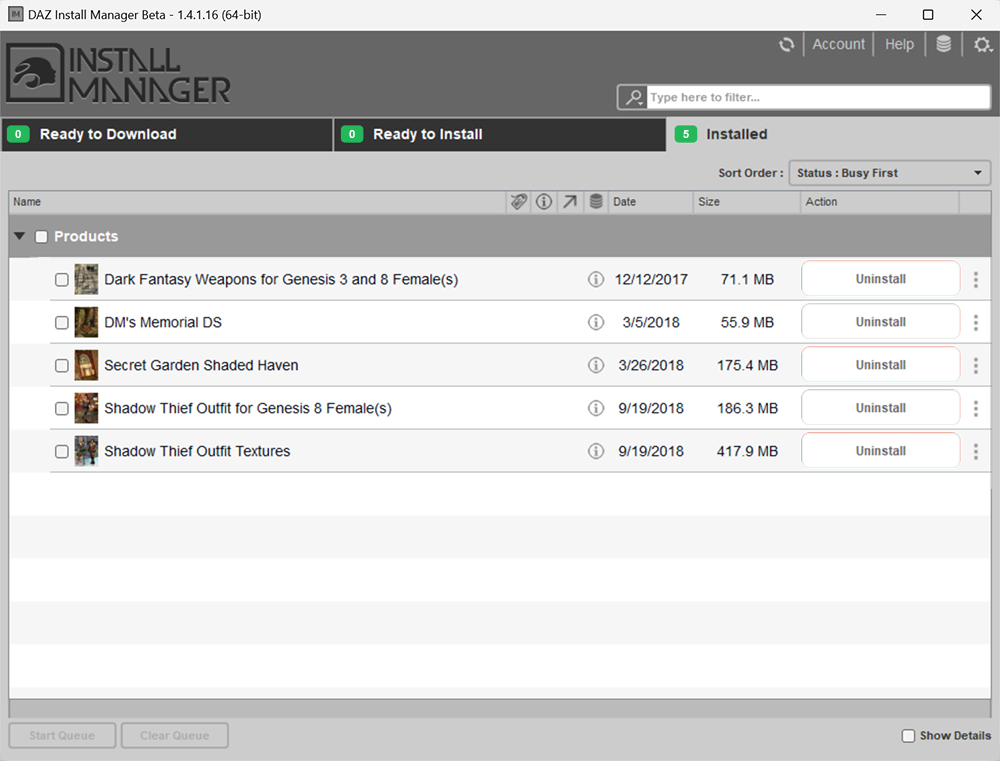
4. Installed Tab
Finally in this tab you will see all of your products for your account that are installed and ready to go. Here you can Uninstall them also.
Question about Install Manager?
Daz 3D is part of 
Connect
DAZ Productions, Inc.
7533 S Center View Ct #4664
West Jordan, UT 84084
Licensing Agreement | Terms of Service | Privacy Policy | EULA
© 2025 Daz Productions Inc. All Rights Reserved.