Novica & Forum Members Tips & Product Reviews Pt 7
This discussion has been closed.
Daz 3D is part of 
Connect
DAZ Productions, Inc.
7533 S Center View Ct #4664
West Jordan, UT 84084
Licensing Agreement | Terms of Service | Privacy Policy | EULA
© 2026 Daz Productions Inc. All Rights Reserved.
Comments
Thank you very much! its not always easy to tell if your improving or not so its nice to hear it sometimes lol. I am sure you will catch up in no time, and you know how it is around here, if you run into a problem you can just ask lol.
I actually do wish that they had a way to gift items like a certain other place does. It would be nice to occaisionally give something to someone else. I know you can give gift cards but that's not the same.
Start your own art thread, Its a good way to keep track of things, see how you have improved over time and to get lots of good advice and encouragement.
Okay, since it's January 1st, new setup for the thread(s) starts now. This will be quite fun I think. Here we go:
Starting today: please keep track of what you use this month. (see #3 below) As I suggested, perhaps a different folder for the month, to separate the current month's renders. When the new thread starts, I'll copy/paste this near the front of the thread. I will keep the links/references as the first post (I use those often, particularly to find the Zbrush thread.)
Guidelines:
1. You don't have to originally post the renders here, many of you have your own threads or use the gallery, but for the final week when we are listing our top three, the images need to be put in the thread please. No outside links. All three renders must appear in one post with the links. Please title it (NAME's) Top 3 (Month) I will tell you when to post those, it will be the last week of the month. (You can, of course, be posting the images throughout the month. It's just the summary Top 3 post that needs to be identified as such and posted the last week.)
2. The top three do not have to be in any certain order. These are Daz products only, and may include freebies. You can of course use products from other sites, they just don't count as one of the Top 3's.
3. You must USE the product for it to be a favorite, and show us a render. Getting a product and not using it means you should be rendering more and forum-ing less. (ahem, talking about me.) The product does not have to be released that month. Oldies are goodies!
4. You can NOT REPEAT a product as one of your Top 3's. (So keep track!)
5. As usual, no WIPs please. (Works in progress.)
6. Renders should clearly show the product which is featured. Edit: only one product can be selected as a favorite per render. If you use five products in a render, you can only pick ONE thing from that render.
7. The first three months- there will be a random drawing for a $5 Gift Card the last day of the month for participants who have listed their top three products used. (Mods- if this isn't okay, just let me know. I can reword it to make it a contest with a random drawing winner, same thing.)
a. Vendors can participate but can not list their own products. (If yours isn't your favorite, hmmm....)
b. Disclaimer- at least 5 people must participate for there to be a drawing
c. No person shall win twice in a row. We're obviously doing this for fun, not the vast wealth I am offering (sarcasm) but I would like multiple winners for the time period. (I will post my Top 3 but not participate in the drawing.)
d. We'll see how this goes, then I'll make a decision on continuing it.
8. The cutoff to post your Top 3 / be in the drawing for the gift certificate is Midnight Daz time, the last day of each month. Sorry, no exceptions.
9. You can list your Top 5 if you wish (no more than 5 please) but we're officially doing Top 3. Some months it may be impossible for you to narrow it down, completely understandable!
Note: I'll do one post at the end of the month with links to everyone's Top 3 posts- and when I start the thread, I'll reserve a post near the front of the thread to put the twelve links, one for each month. Easy surfing! Although this sounds time consuming, when we start doing the Top 3 at the end of each month, I'm going to start my post with the links to your top 3, then just edit and add as you contribute. (That post can get buried, because it will be linked at the front of the thread.)
The end of the year (lol, funny to say that New Year's Day) we'll do our Top 10 as usual.
Starting now, clean slate- get to rendering!
That sounds like fun, Novica! :D I'm looking forward to participating if I can! :)
This is going to be fun!
Can I just get clarification on two points tho:
Yes and yes. It's Daz products you USE during the current month. I'll go up and edit the Guidelines. Thanks for the help.
Let me try to paint the picture for you of how this would look, using some of you as an example. That post at the beginning of Thread 8 will be the second post, as the first one will be the references again and will look something like this: (and be in alphabetical order)
January 2017 Top 3 Favorites
jakiblue (this will link to your ONE post that has the three renders and links, that you do the last week of the month.)
divamakeup
Novica
etc.
February 2017 Top 3 Favorites
Ice Dragon Art
isidorn
jakiblue
Novica
So this will help you at the end of the year pick your favorites, you'll have 12 links to check if you participate each month, and your end of the month post will tell you the products you picked. Ta-dah.
Sounds good! :D
You'll probably have to post a reminder so I'll remember. :) My memory is pretty bad.
I will. I'll post each month at the start of the last week that it's the week to pick your top three and put them in one post.
BTW, Dave Berry did his year in review. Laughed out loud at some of it. You couldn't make this stuff up that he is parodies, but sadly it's all based on factual events from this past year.
Sexy Skinz Lace Bodysuits (Gen3F) (A MUST HAVE) Vacation Style Set (G3F) Collective3d Movie Sets Backyard Driveway
Anicinable (Gen3F) FWSA Liam HD (M7) Beach Vibes Outfit (Gen3M) Keegan Hair (Gen3M)
With Vacation Style, if you don't want high heels, you can use the Athletic Gear shoes.
Seriously, get those Lace Bodysuits- they are skin tight and fit under clothing in a snap. Turn sexy into family friendly easily! But how do you shader it? I can't find it / select it with the shader tool or in Scene. Can't click on it in the viewport. It's not shown in these renders, but I linked to it because I'll do a render tomorrow and put it here. It's after 2am and I am done for now.
The movie sets Backyard Driveway gives you a nice suburban setting. Nothing fancy, just daily life.
Okay, so starts my 2017 renders. In honor of Rawn's birthday, we'll start with one of his products. (RawArt)
The Basketball Lesson
I believe the product uses the Layered Image Editor. So you'd have to go under the settings tab for your character and click on the body settings and layered image editor to find the image that's overlayed on top of your character's skin. It also adds, I believe, displacement maps to the character's settings too, so that it looks like physical clothing instead of a layered image.
Looks like a great product! I've wish listed it. :)
Here's one of Anicinable. To me she was a bit too shiny so I did some skin settings adjustments and used my custom skin shader on her. Still her original skin and everything, I just made some mods to the skin settings. :)
Sexy Skinz Lace Bodysuits (Gen3F)
Thanks, I'll go look there when I get a chance. Here it is, making that shirt family friendly. The entire line of Sexy Skinz are fun to use. I've got other leggings, but picked those up too, they're sleek.
Ick. FIVE rotating tornadic cells in Pensacola right now. One is tracking toward the stables, not sure about the rest of them. The one going to the stables seems like it may be slightly south of it. None of these are confirmed, it's radar indicated, so nothing on the ground thankfully. Getting offline, but right now, nothing near us.
EDIT: cell did go south of the barn.
Glad to hear it missed the barn! Stay safe
Stay Safe, Novica! Please take care of yourself.
Please keep us posted! I hope you're ok!
Stay safe! Hope it all blows away without causing any harm. Here in the Midwest, tornado season runs from April through November. Plenty of crazy stories to tell about those.
We're now in the second (and last) line of severe. There's a dark maroon cell with purple inside it, then blue inside the purple. Temperature has dropped about twelve degrees. I did a few renders of GDN Vanessa (Gen3F) earlier before the thunderstorms got too bad. She's wearing that Fantasy Thief outfit (remember the cheap one to trigger other discounts, then while I was posting that long list, the price went up a couple bucks? It was when the New PC+ were discounting and weren't supposed to.)
She's wearing Margot Hair (Gen2F/Gen3F) and then Surprise! Yes, the Clown Wigs (Gen3M/F) with a bit of postwork. This is narrowed quite a bit, you can fluff out the sides- one thing you'll have to watch for is the cap, it really can show depending on what you're doing with the hair. I think the Clown Wigs will be fun with the cartoon characters.
Going to get off the computer for awhile (maybe the rest of tonight) as I'm reading a Zbrush book and it's hard to start/stop and keep my train of thought. Also those storms are getting close. Have a great evening!
I don't post much on forums but have been following all seven parts of this thread and wanted to say thank you to you all for the work you put into showing us these products. I look forward to another year of reading this thread :)
Looking forward to sharing with you- thanks so much for popping in!
I bought the clown wigs to create one of my supers with wildly curly, strawberry blond hair. So far, Jonas hair has been faring a bit better. But I own most of the curly hair now. I've tried out so many to get this guy's hair right! Sometimes I write myself into my own corners! LOL
It's really cool and surprising that the clown wigs actually look pretty decent as regular hair. Cool! :)
I hope you stay safe! Have a good night, Novica! :D
Thank you, you too!
Back for a few minutes, frustrated with Zbrush. I'm reading a book and it says go to (here) and open (that) And here doesn't have that. You know the feeling- like you want to put a fist through the monitor. So let me post a couple tests I did earlier, from something we chatted about previously on the thread. And LOL- I at least know how to tell you exactly where to find something, and it's THERE. Go to Render Settings>Tone Mapping> White Point. What happens is this changes your colors to the opposite primary / complimentary color. It's an easy fix for doing portraits and changing the entire scene's colors in the renders. (But if you only want to change the person's skin, you have to use Surfaces. This changes the look of everything.)
Try this on a character- I've shown you below what happens on GDN Vanessa, above. Now all this depends on the lighting you're using of course, but these colors explore the different hues by knowing that these White Points will change to the > color. Here we go: (and the numbers correspond to image 1, 2, 3, 4.
(White Point) > (Changes hue to...)
1 Purple > Yellow (slightly green) Try 218 / 203 / 255 or for more intense (as shown here) 228 / 208 / 255 It's a light lilac.
2 Yellow > Purple / Pink Try 254 / 255 / 222
3 Blue/Gray >Red / Natural Try 206 / 219 / 255
4 Pink > Blue Try 255 / 234 / 228
Now these results are with the Pro Studio HDR Lighting System, and using Light 19L. But the principle is the same. Try it on your favorite characters or scene to change it overall, and see how you like it. It was rather fun. I just activated the Iray preview in the viewport and could see changes right away, rather neat.
Purple (good for an overall sunset yellow tinge)
Yellow
Blue / Gray (good for adding ruddy / red tones)
Pink (good for changing ultra ruddy figures)
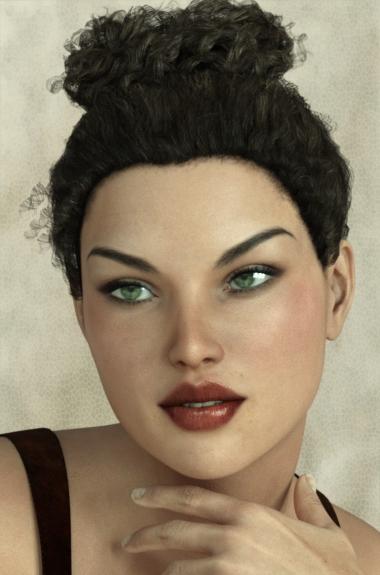
Zuri (Gen3F)
Um, need some testers. I've done hundreds of portrait showcases and never encountered this. Using the same lighting that has shown you the portraits this week, I am getting really wonky results with Zuri. The eyebrows are throwing shadows that make it appear the brows are not totally connected/embedded to the face. It is happening with all the light options in the light product I am using (and love.) Take a look. These are Save Last Draw and not renders, but clearly show the problem. Doesn't that brow on our left look floating? (BOTH are doing it, but with the side lighting, that one shows up best. But you can see both throw the weird shadows.)
This one really shows it, and up close:
It looks like one of her face maps might be the wrong map. I'd look at her face settings in the surfaces tab. Make sure that her "base color" face map is from the same figure as her translucency color map, her top coat weight map, base bump map, etc. They should all be for the same figure or from the same textures set. It looks to me like the face map isn't matching up with one of the other face maps.
This can also happen when using a product that removes or replaces the brows without changing the other face maps.
PS - I'm really glad you're doing ok! I hope the worst of the weather missed you! :D
Oh nice! Thank you! That tip is going to be a huge help. I often get my lighting set up and love the shadows and highlights but hate the hue that the lights give. Often times things are either too orange or two blue, so it's great that one can easily adjust that in Render Settings>Tone Mapping> White Point! Thank you! :)
This is probably the translucency map. If you load the base diffuse map and the translucency map into an editor like Photoshop and Gimp, copy one and place it over the other and lower the opacity on the top layer. You should see the brows don't line up if this is the case. If so, you'll need to add a ticket to get this updated.
Lucille Zombie (Gen3F) Clown Wigs (Gen3M / Gen3F) Ghost Bride Dress (Gen3F)
A lovely lady to start your day. I changed her color from a green to a blue using Surface settings, added a bit more sheen although not ultra apparent, increased the bump in several channels.
So the Clown Wigs are pretty versatile.
Fabulous tips on the white point. Between your pointers and Darwin's walk through, I'm discovering lots of things, especially in the render settings, that I didn't even know existed. Thank you!
I've been doing more renders with the new Iray Ghost Light Kit and some products I haven't used much if ever.
This one uses a combination of Aqua Subterranea, Demonaro for Genesis 3 Male, and Iray Clouds. I've tried this scene before but never completed it as it was taking forever to render. With the ghost lights, it took around 14 minutes to get to 96% convergence (image below). It takes around 50 minutes to get to 100% but there's little visible difference. (Click on images for larger versions.)
This next render uses Sacrament. Although one end of the building is open, little light reaches the front and you need to add your own. I've found this set is slow to render in Iray but with ghost lights, a 500 x 600 version was done in 6 min 17 sec and the 1000 x 1200 version below took 23 min 58 sec.
Novica, that white point is something I never tried. I added a light blue color (160/203/255) to change the image over towards orange. I like this version better than the white light. A good thing to know!