circular Texture
 Box8068_31c338ee4b
Posts: 292
Box8068_31c338ee4b
Posts: 292
Hi!
I've tried to post this question before, but I think this time I've come closer to the solution, so it may make more sense.
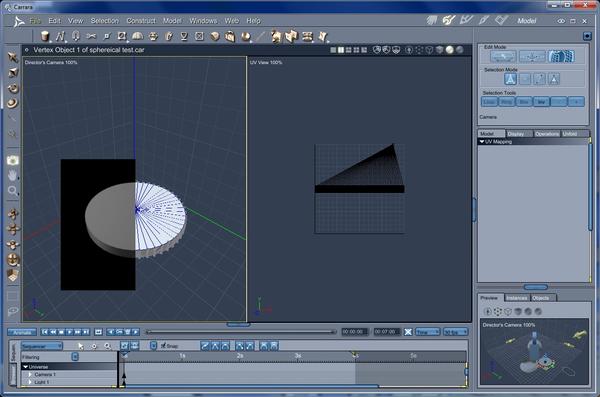
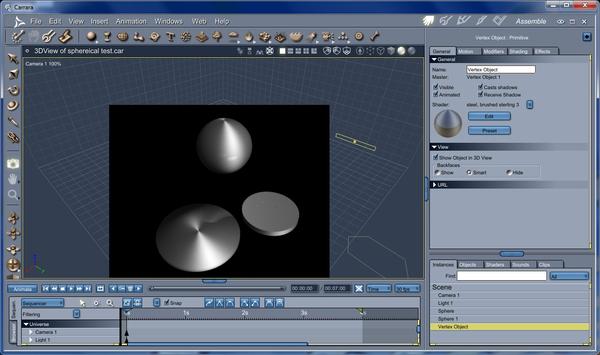
I am not great with texture maps in shaders. I am modeling objects that have brushed metal cylinders. The brushed metal has a circular pattern on the top of the cylinder. If you look at a stock brushed metal shader in carrara on a sphere the pattern is a circular swirl which is what I want. but it is a sphere not a flat circle as the top of a cylinder would be. So I tried starting with a sphere chopping off the top and bottom, Weldind all vertices on the top rim, and applied the brushed metal shader. I got exactly what I wanted. As is seem in the first picture.
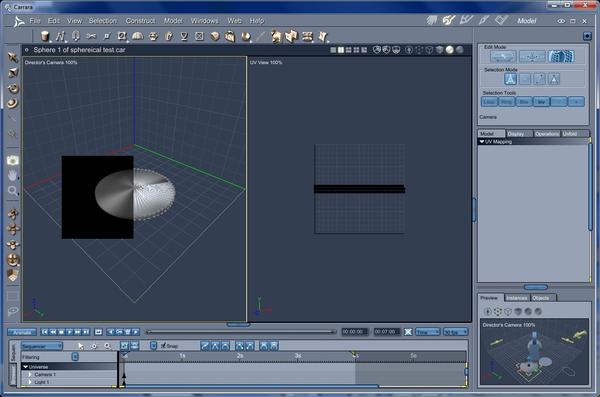
So I looked at the chopped of sphere in the model room ( I converted to a vertex from a primitive )
I then took my cylinder selected tesselate vertex to center and it now looks identical to the cut sphere and applied the brushed metal shader. but no go it just looks like a flat plane, the brushed metal doesn't have a circular pattern. Any Idea how I can map the top of the divided cylinder so it looks as nice as the chopped sphere? I hope the pictures help make sense of all of this.
Thank You
8068
Daz 3D is part of 
Connect
DAZ Productions, Inc.
7533 S Center View Ct #4664
West Jordan, UT 84084
Licensing Agreement | Terms of Service | Privacy Policy | EULA
© 2026 Daz Productions Inc. All Rights Reserved.
Comments
when you tesselate you change the uv mapping
I make each part a seperate shading domain if I want a texture to fit a certain way
then re-uv map, usually planar on the axis showing most flat surfaces
hide different domains select (detach relax uv polygons do not know if needed) and drag around, resize the uv mesh to fit
somebody a bit less hit and miss might know more.
Hello 8086,
A method I use, is to use the "Lumber Yard" procedural texture. You create the shading domains as mentioned by Wendy, then use the Carrara "Lumber Yard" with "0 perturbation" and a scale to suit. (Important: For the circles to be centered, ensure that the object is centered to 0,0,0 in the vertex room.)
I will post more info if required.
Forgot to add. For the "Color", I would normally use a "Mix" and the "Lumber Yard" as the "Blender"
Thanks! The Lumber yard is close but a little less refined the the altered sphere. I may wind up using it.
The chopped sphere I tested looks almost perfect as brushed Aluminum. I do wish I could figure out how to alter the
uv map to match though.
Thanks Again.
8068
Although it is not difficult to UV map a cylinder, it can be long winded in Carrara, due to lack of control on the UV map editing. (and probably nil-pointer errors when unwrapping with seams)
If it would help, I can post a UV mapped cylinder you could use.
Although it is not difficult to UV map a cylinder, it can be long winded in Carrara, due to lack of control on the UV map editing. (and probably nil-pointer errors when unwrapping with seams)
If it would help, I can post a UV mapped cylinder you could use.
I got pretty close by removing the top of the cylinder then choosing WELD. This seemed to make a number of polygons that all converged at the center with a number of verticies? ( See pictures below) This is quite close to what I'm looking for. Do you think your cylinder has a better UV map, if so. Yes I would love a copy, could come in handy. Thank You.
if you want to avoid all those tris on the top, extract the curve, create coons surface and weld. much easier to map
Sounds good, I'll give it a shot.
Thank You
8068
Looking at the UV map on your pic, I would say mine would be more correct, however, if the result you get from what you have is giving a result you are happy with, then use that.
I though I would post some textures you can use(if you want to), so you can just use flat/planer UV mapping. They are based on the "brushed metal" texture used in Carrara. I created these in a 3rd party application (Genetica).
I can get similar results in Carrara material room, but I was using 3rd party plugins anyway.
Steve
Thanks, these look pretty natural. I downloaded these images and I'll give them a shot.
Thank You
8068