Unlock Object Attribute?
 IceScribe
Posts: 690
IceScribe
Posts: 690
Hi fellow Brycers! I purchased a scene with preloaded objects. Many of its objects, imported objs. and V4 can be moved easily.
Rectangular Objects within the scene will not move by dragging.
Rectangular Objects loaded within the scene can be moved via the Bryce editor arrows, but in only in wide side sweeps.
X and Z are erratic and off the mark . Attibute "Locked" is not clicked.
I tried typing in the place coordinates but that doesnt work either.
I noticed in Attributes a red padlock in locked position.
Clicked on it, it greyed out and opened, but the object still cannot be moved into the place I want it to be in.
I tried click on "Align" but that didnt work. The object is not grouped either.
I tried creating a new primitive cube, it it also will not cooperate with positing neither by typing or xz editor. It cannot be dragged.
Oddly, I made a Boolean spherical object in a different Bryce and added that to the Create Menu.
Created in my scene. That object can be dragged to position.
What I want to do is shift position of boxes that are "art posters" on the walls of the scene. Y seems to work ok.
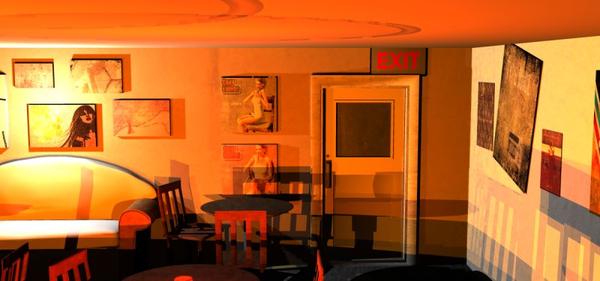
Attached is one of the views of the scene I am working on. It's very orange from "candle jars" on tables out of view.
I've been working in "view from Top" and Directors view. This has actually happened before, in other imported scenes,
but there are a lot of things I want to move in this one. The EXIT sign is the cube I made, I can't get it centered over the door.
I tried duplicating a "poster" but it wouldn't position either.
Can anyone help me with suggestions on how I can exactly position the object where I want it?
Bryce7Pro on Windows 7. The scene is "Late Night at the Cafe" from Rendo. It opened in DAZ, I exported to Bryce.
TIA
Daz 3D is part of 
Connect
DAZ Productions, Inc.
224 S 200 W, Suite #250
Salt Lake City, UT 84101
Licensing Agreement | Terms of Service | Privacy Policy | EULA
© 2024 Daz Productions Inc. All Rights Reserved.
Comments
I don't know what the cause of the problem is but here are a few (hopefully) helpful tips);
Go to Top View and make sure your scene is aligned to the Bryce floor plane grid.
In Directors view, click 'Control' at the same time you go to make your selection. This will bring up a sub menu of all the elements that are under your cursor, allowing you to select only the one you want.
Use the 'ALT/Option' key while moving items around to move them in smaller increments.
Also, you mention that you clicked the red padlock.
That locks the X,Y and X coordinates together connecting the origin to the position.
Just above the padlock is an inverted triangle, which leads to a sub-menu where you can check that the coordinates are set to 'Absolute Coordinates' (if it's set to Definition Coordinates try changing it). Though to be honest, I've no idea what the difference here is (it's not something I've ever needed), it may help.
@TheSavage64
Thank you for a speedy answer. It helped me. I clicked on the red padlock, it greyed out as before. What I did find was that by choosing Defiinitions instead of Absolute in that little dropdown menu above the padlock, that all the attribute references went blank, and I entered some easy values, ie 10 10 10 for x y and z. Next I typed in a new name instead of letting it default to a serial of the original name. This seemed to do the trick. I was able to position the new object with dragging x and z easily. Now, I'm not at all sure why that works.
I learned another valuable thing by your suggestion of that little menu. "Remove shear" made my cube right angles again after it skewed
when I was trying to move and size by handles. Very useful!
Glad to be of help.
It may also help to know that when you move and re-size an object, there are several 'modes' you can use.
If an object is out of line with the world grid at an angle, then usually resizing it will skew it.
In these cases, you can set the re-size mode to 'Object Space' (It's default is World Space).
To do this, you use the little inverted triangle button underneath the size/position/rotate icons on the top tool icon shelf.
Setting it to object space will prevent it from skewing and instead re-size it using the axis of the object and not the world grid.
Note that when you change this setting it is universal and not only applied to the object you have selected, so remember to keep switching between the two depending upon what you are trying to achieve.
@TheSavage64
Oh, I forgot completely about the Object Mode and World Mode, thank you for mentioning that. I was too tired last night to try that out, but I will today. I think that will help overall in adjusting the pre loaded objects. That may explain problems I've had in other purchased scenes.
Also using Control click to select from area because by now the Mesh Menu list is very long to scroll through and some things have unexpected names. I'm looking forward to more fun and less frustation. Thanks again!