Convert Cyberpunk for M4 Boots to Genesis without crinkles!
 Supercope
Posts: 128
Supercope
Posts: 128
1. Load the boot figure
2. Make all parts [rTHIGH, rSHIN, rFOOT] of the Right Boot Invisible.
3. Export the Left boot as an .obj [FILE - EXPORT], give the file a descriptive name.
i.e. "CP Boots Refit to Genesis Left Foot.obj" OK, it's long, but there's no mistaking what it is.
4. In the Dialogue Box Choose "DAZ Studio" in the To:
(Note that it will change back to custom in the next step)
5. Make sure the following are Checked:
Ignore Invisible Nodes
Write UV Coordinates
Write Normals
Write Object Statements
Write Groups
Use Existing Groups
Write Surfaces
Write Material Library
Collect Maps
6. Cick on Accept; Choose FILE -- NEW to clear the scene (no need to save changes)
Click in FILE -- IMPORT; Choose the OBJ file just exported; Click on OPEN
7. Choose the following in the Dialogue Box
From: DAZ Studio
Read Groups
Read UV Coordinates
Read Surfaces
Read Material Library
8. Click on Accept
9. Choose the prop in the SCENE tab
10. Click on EDIT -- OBJECT -- RIGGING -- CONVERT PROP TO FIGURE
11. Choose the following in the dialog that appears
Root Bone Name: hip (I believe these are defaults...)
TriAx Weight Mapping
Remove Source Prop
12. Click on Accept
13. Load Genesis Base Figure
14. In the Scene tab, select the Boot
15. Click on EDIT -- FIGURE -- TRANSFER UTILITY
16. Choose these options
Source
Scene Item: Genesis
Item Shape: Default
Target
Scene Item: The boot
Item Shape: Default
Projection Template: None
Show Options
Smart Left/Right Filtering
Weight Maps
Selection Map
Face Groups
Region Groups
NOTE: Deselect MORPH TARGETS, PROJECTION TEMPLATE MORPHS, and FIT TO SOURCE FIGURE
17. Click on Accept
18. Change the color of the Genesis figure to RED or some other easy to see color using the SURFACING|RENDERING activity tab
19. Enter the following values for the Parameters of the boot
Make sure that it is FIT TO: NONE
Main Figure
X Translate: 7.35
Y Translate: -1.83
Z Translate: 7.23
X Rotate: -22.22
Z Rotate: 5.85
Left Thigh
Bend: -15.61
Left Shin
Bend: 34.34
Twist: -1.04
Side-Side: -1.17
Left Foot
Bend: -19.77
Side-Side: 7.28
20. These are the parameters I used, hopefully they work for you, too. On some tries, I wasn't able to eliminate all of the poke through, so you may have to toy with it, just in case. Note that smoothing will be added later on, which should take care of any small poke through you can't eliminate. Two other important things to note are that the character's foot should not be in the "sole" of the boot and both boots (the Right one is done in steps coming up) are at the same height (Y Translate dial).
21. Delete the Genesis Figure
22. Select the boot, Choose FILE -- EXPORT
23. Give the file a descriptive name (CP Boots Refit to Genesis Left Foot modeled to Genesis)
24. In the Dialogue Box Choose "DAZ Studio" in the To:
(Note that it will change back to custom in the next step)
25. Make sure the following are Checked:
Ignore Invisible Nodes
Write UV Coordinates
Write Normals
Write Object Statements
Write Groups
Use Existing Groups
Write Surfaces
Write Material Library
Collect Maps
26. Click on Accept; Choose FILE -- NEW to clear the scene (no need to save changes)
Click in FILE -- IMPORT; Choose the OBJ file just exported; Click on OPEN
27. Choose the following in the Dialogue Box then click on Accept
From: DAZ Studio
Read Groups
Read UV Coordinates
Read Surfaces
Read Material Library
28. In the Scene tab, click on the Prop just Loaded
29. Click on EDIT -- OBJECT -- RIGGING -- CONVERT PROP TO FIGURE
30. Root Bone Name: hip (I believe these are defaults...)
TriAx Weight Mapping
Remove Source Prop
31. Click on Accept
32. Load Genesis Base Figure
33. In the Scene tab, select the Boot
34. Click on EDIT -- FIGURE -- TRANSFER UTILITY
35. Choose these options
Source
Scene Item: Genesis
Item Shape: Default
Target
Scene Item: The boot
Item Shape: Default
Projection Template: None
Show Options
Smart Left/Right Filtering
Weight Maps
Selection Map
Face Groups
Region Groups
FIT TO SOURCE FIGURE
ADD SMOOTHING MODIFIER
NOTE: Deselect MORPH TARGETS and PROJECTION TEMPLATE MORPHS only!
36. Click on Accept
37. In the Scene tab, delete the Genesis figure, then select the boot again
38. Click on FILE -- SAVE AS -- SUPPORT ASSET -- DSF FIGURE OR PROP FILE
39. Choose a Save location (Will vary if you've customized your setup, as I have)
I'm using this one that I created --
\Documents\DAZ 3D\Studio4\My Library\!Custom Content\Figures
40. Choose a File Name (CP Boots for Genesis Left Foot.dsf)
41. Click on SAVE
42. Click on ACCEPT
43. Repeat for the other boot, using these values in Step 19.
Main Figure
X Translate: -7.35
Y Translate: -1.83
Z Translate: 7.23
X Rotate: -22.22
Z Rotate: -5.85
Right Thigh
Bend: -15.61
Right Shin
Bend: 34.34
Twist: 1.04
Side-Side: 1.17
Right Foot
Bend: -19.77
Side-Side: -7.28
The boot should follow and smooth to all of the shapes in the Genesis Actor parameter. Even Freak 3 looks acceptable!
Please note that there is a simpler version of this method that worked for both pairs of footwear from Captain Runner and Captain Rebel. As soon as I get a free moment, I will list those steps here, too. Essentially you can skip the beginning part where you export each shoe as a separate obj and reimport them and make them a figure. The Captain footwear is able to be posed to match up to the Genesis feet without the extra step. Again, I'll redo it (probably after I upgrade to DS 4.5) and post the steps.
BTW,
This work is based on procedures previously presented by others in the forums and a specific comment by somebody about posing the footwear to match Genesis. When I run across those posts again, I will properly credit them.
Hopefully this works for everyone interested in trying as it did for me.
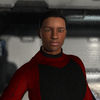
Attached is Genesis with Freak 3, Michael 5 Hero, and Hiro 3 dialed up, wearing the Cyberpunk boots.
Daz 3D is part of 
Connect
DAZ Productions, Inc.
224 S 200 W, Suite #250
Salt Lake City, UT 84101
Licensing Agreement | Terms of Service | Privacy Policy | EULA
© 2024 Daz Productions Inc. All Rights Reserved.
Comments
You can save using a lot of export/import settings by just using Hexagon.
Studio can send to Hexagon and Hexagon can send to Studio without worrying about settings.
You don't even have to learn Hexagon you just have to click one button to send to Studio.
Agreed, I've done this with several items and my Hex abilities are minimal. I'd also recommend creating a pose in which Genesis has its feet superimposed over the feet of the character you are converting from, which should save all the translation etc - just fitting the shoe to the donor puts it in the right position to export, import and have the obj sitting in the right position on Genesis.
OTOH for softer or flatter soled shoes - essentially anything that fits closely to the foot - it may just be simpler to use autofit, or convert to weight-mapped and push through the transfer tool and accept a small amount of crinkling.
If a procedure like this will work, couldn't the Transfer Utility be programmed to use it, or better yet, AutoFit?
This should work for anyone that doesn't have Hexagon.
But for those that do, which specific steps are replaced by sending to Hexagon. And what are the specific steps for doing that?
Thanks!
The whole point of doing it is I don't want ANY crinkling.
Close but no cigar. I must have missed something. I've been toying (bumbling) with a similar method and had little luck, so this is just what I'm looking for. I tend to attempt a reinvention of the wheel when it comes to these things so I haven't seen the other similar threads about.
I would love to be able to use all my old favourite boots. Ah! Just noticed the mesh goes to hell when I add the smoothing modifier. I think it has something to do with the last export into/out of Hexagon (I had to do it twice for the same figure). A damn shame that a simpler "click and done" autofit hasn't been developed for boots yet. The market for a script/plugin would be hungry indeed.
Looks as if there are unwelded vertices somehow - which boots are these?
They are the cyberpunk boots. I haven't had a chance to try from scratch again, but I'm fairly sure it won't happen again.
I didn't use Hexagon, so I don't know what's causing the problem you've pictured. At which step is this? Did you also try it without going into Hexagon?
BTW, are these steps easy to follow? I really tried to be thorough...
No, the problem isn't Hex. I didn't have trouble till I needed to export the boots a second time (I accidently exported an additional primitive the first time). Something happened to the materials - all the missing parts somehow ended up as a unique material.
I did get lost a couple of times after step 20 or so, but I got the gist of what I had to do as I have some experience from playing with the tools myself.
Thanks by the way, it is good to have a practical solution to the problem of auto fitting boots. I'll let you know if I get it worked out. Actually, I may go and try it right now.
The problem was exporting from Hexagon. I had the wrong settings (just happened again but have since changed options and got good export). I think your method would be as quick really. The import/export doesn't take as long when you know what you are doing, but can look complex to the newb.
And here it is, the sweet stench of success. Many thanks Supercope ;)
AWESOME!
I linked back to this thread from an image I posted on deviantArt. http://jim-zombie.deviantart.com/#/d5e054m Couldn't help but show my regenerated boots off.
I totally see either a really cool freebie or even a product that folks could make some dough on.... Make some super scripts for Genesis to position the feet as well as position them from the floor for various kinds of shoes. Flats, high heels, boots of various heights.
As much as we all love or loved the Gen 4 generation the feet position was a bitch to deal with then and now converting to Genesis is a real pita with varied results. Many merchants are just not ready or will NEVER make the leap and yet there are all these cool products from them that sit gathering virtual dust.
I tried converting some boots from the Freak 3 library and that was a total bust. Every pair was just a mess afterwards. Might be that his feet were just so beastly large that resizing for the Auto Fit tool was just too much. Taking them into ZBrush to smooth out didn't help one bit. There were vertices that would NOT smooth out, don't know what that was all about but I gave up after about 3 hours of frustration....
Thank you for this tutorial!
I just happened to stumble over it now ...
You're welcome, Kerya! I hope it works for you!