Daz 3D is part of 
Connect
DAZ Productions, Inc.
224 S 200 W, Suite #250
Salt Lake City, UT 84101
Licensing Agreement | Terms of Service | Privacy Policy | EULA
© 2024 Daz Productions Inc. All Rights Reserved.Daz 3D is part of
Connect
DAZ Productions, Inc.
224 S 200 W, Suite #250
Salt Lake City, UT 84101
Licensing Agreement | Terms of Service | Privacy Policy | EULA
© 2024 Daz Productions Inc. All Rights Reserved.
Comments
It "simulates" 3d with special 3d glasses, giving a 3d effect similar to the 3d movies you see at the cinema. As I already wear glasses, the 3d glasses isn't all that comfortable and they also run on batteries that they drain very fast. In theory, a cool feature, but it's more hassle than it's worth, imo.
Ah, thanks for the info. It doesn't sound like something I need in a monitor either. :) Otherwise, it looks like a great monitor.
I really liked the process I did for my last toon render, Sent to the Principal. I wanted to try and repeat the process on another render to see how it would turn out. I made a couple of slight adjustments, but I like the final result. What do you think? I actually made it the correct resolution of my monitor which is 1920 x 1080 so I can use it for a wallpaper. I'm going to replace @Isidorn's Cyber Bully render I have as my background. At least for a little bit. Sorry Isidorn, the robots are getting a break. :)
Gallery Link
Nice render, KM!
Thanks, TJ! I'm still not comfortable in 3DL. There are things that I need to figure out yet. But, it's all part of the process. :)
What an amazing render KM great job!!!
Great job on the that one KM very well done.
Thank you, Saphirewild and Sonja! It makes me happy you guys like it. :)
Seriously though, I've no words for how flattered I am that it even got considered for such an honour.
3D gives me a headache - could be the glasses too. I can also see the three planes (foreground, mid and background) and it doesn't look like true 3 dimensional so it just bugs me all around.
It's a great render. I love it and your Usual Suspects render. Super funny and cute. I'm sure they'll make it back as my background wallpaper again soon. :)
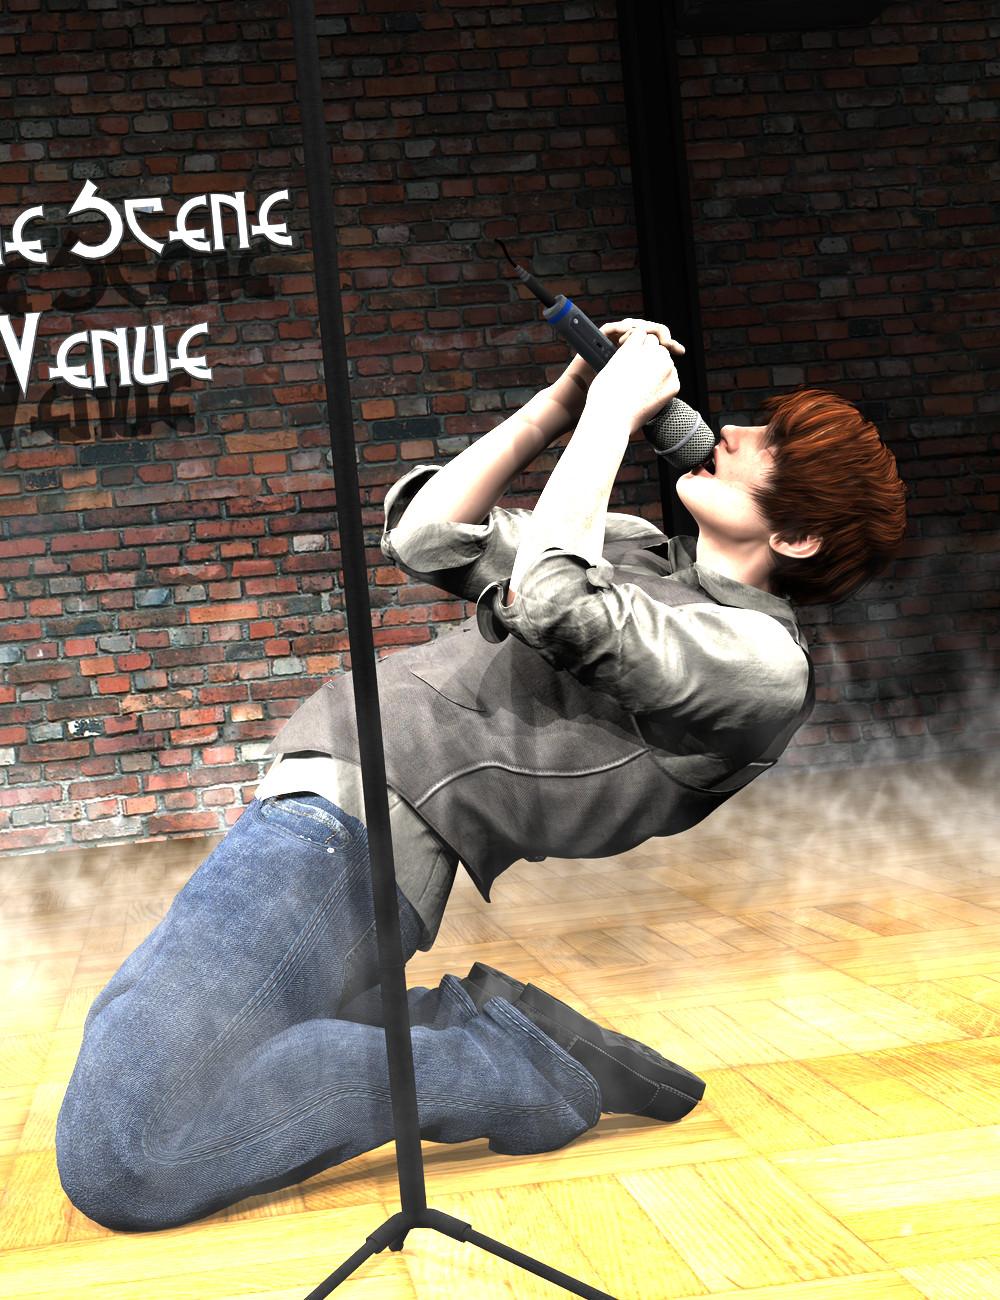
I've been playing with 3Delight again in my attempt to get better at it. Luckily, @FirstBastion makes that easy with his sets. For this one, I used his Indie Scene Venue Bar. Great set! Love that the lighting is already there for each render engine and all I have to do is tweak it a little bit for each individual situation. In this case, the spotlights were blowing out his arms a bit and I had to tone down the spotlights. Unfortunately, that also got rid of some of the great shadows and highlights so I'll have to figure out how to fine tune some of my tweaking. I'm still not comfortable in 3DL but I think I'm getting better.
Here is the original render before I started tweaking anything straight out of the box:
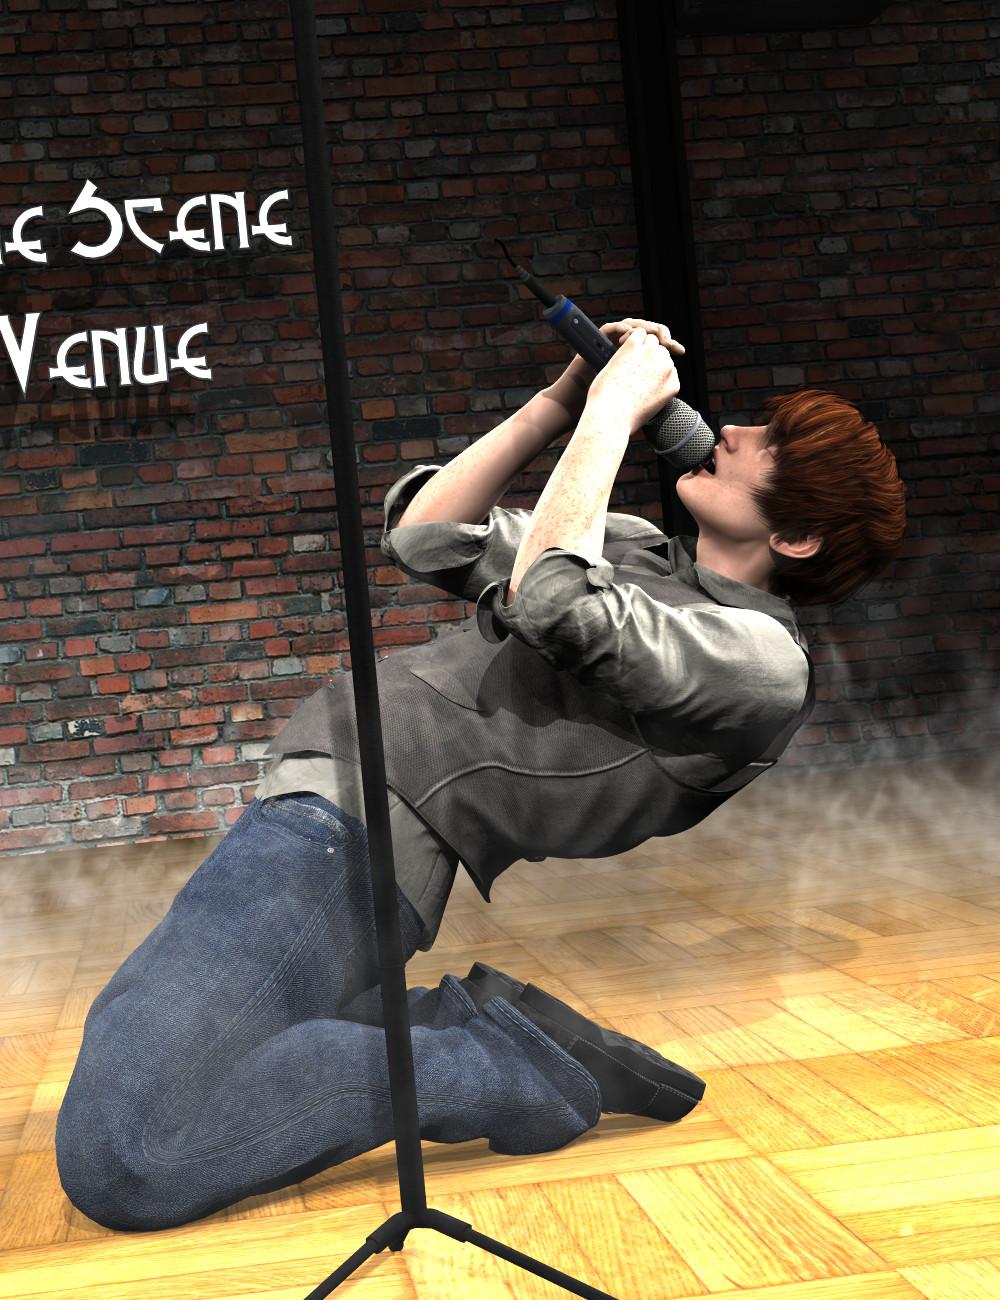
A little bit of tweaking with the spotlights:
And then, some postwork magic. Two versions because I'm not sure which version I actually like better.
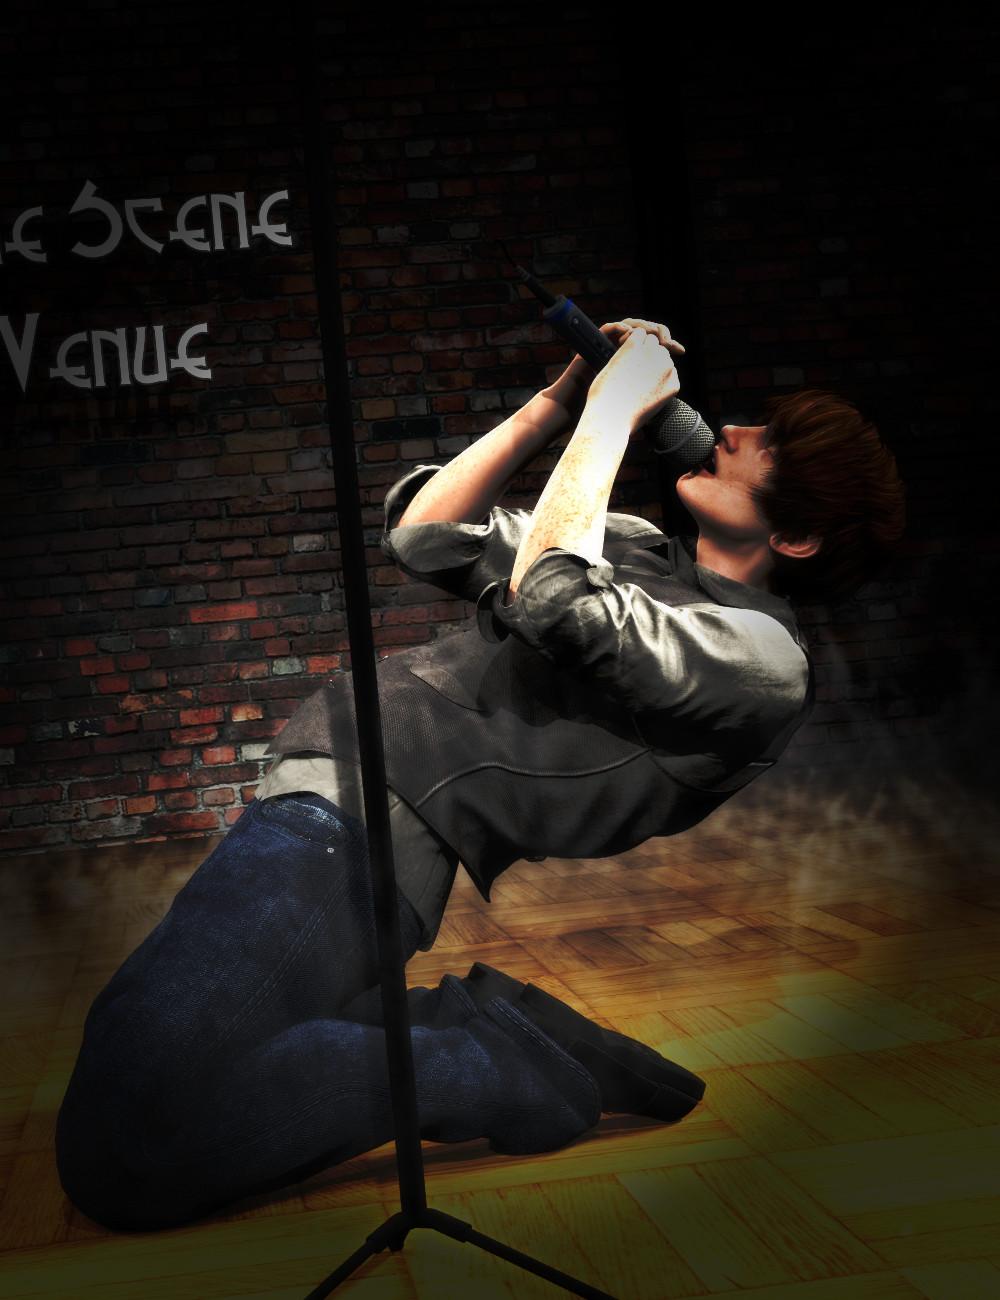
I'm still debating which should go in my gallery or if I should make some more adjustments or tone down the postwork. I'm thinking the extra smoky fog might be a bit over the top. Even with a smoke machine, I'm not sure if there would be that much smoke in a club around the singer. I admit I sometimes get a little crazy with the postwork now that I understand it more. I have lots of fun with it. Suggestions and comments always welcome.
I like the 3rd one. I agree that the fog in the last one is a little too much.
Yeah, I'm thinking of toning it down. I actually have two additional layers of fog there and I think the one lighter layer would have been more than enough. I got a suggestion in the New Users Contests and Events thread on a different cropping that looked really good. I may give that a try. I want to wait and see if anyone has any suggestions about those lights. I may have to really tone down the spotlights and add an additional light, maybe a point light?, closer to his head. I don't know. I'll have to keep playing with it.
Thanks for the input, @TabascoJack. I really appreciate the feedback. I like this image and what I've done but it just isn't where I want it to be. I think it could be so much better. 3Delight just kicks my butt sometimes.
Maybe a rim light? The top of his head blends in to the background on the third image.
I like the third one the best as well. I agree maybe a rim light. His one forearm is still a bit blown out but I kind of like it that way. There is an odd criss cross shadow on his other arm, it might be a perfectl legit shadow but it looks... slightly odd. Not sure what you can do about it though, 3Delight can be weird that way. Maybe play around with turning shadows on and off and see if something works
Hmm, maybe. I'll take a look at it tomorrow. I'm not about to start fooling with it tonight or I'll never stop. :)
I think that one shadow that you mentioned is partly from the microphone stand, the one that looks like a straight line across his forearm. It's about the right size and shape for it. I think the only way to get rid of that is to move the microphone stand and I'll have to decide if I want to do that. I kind of liked have having the stand there. I'll have to see what it looks like if I hide the stand. I don't think moving it elsewhere would be the answer because that was the best place for it. I think the straight line from the microphone stand helped with the composition but I could be wrong about that. Composition is still that big thing that I struggle with when it comes to creating pictures. I think part of the other shadow is just a shadow from his other hand but I'm not positive about that one, where his palm is darker?
I'm trying to remember if you can turn shadows off of just one object in 3Delight or if that is only in Carrara. Will check for you tomorrow I'm heading for bed, extra long work week this week.
http://www.daz3d.com/forums/discussion/comment/255812/#Comment_255812
Oh, thanks. I'll look into that tomorrow when I open the file back up.
If you take a look at the first image, but look at the hair, the jeans, the jacket, the microphone, the mike stand, nothing is really burned out. Only the actual character skin and a bit of the floor seems to be washing out. I'd suggest a different skin might resolve the issue on the character, and lower the reflection (in surfaces) on the floor.
@FirstBastion Thanks for the suggestion! I hadn't thought it might just be a skin issue. I was thinking it was more my ineptitude with 3DL. :)
I don't want to change the skin if I can avoid it as I really like it. What I might do is try out a few skins, though, and see how they do and check out their surface settings, maybe try those settings on the one I like best and see if it makes a difference. If I can't make any improvements and I find another skin is better, I'll change it out completely.
You are right, nothing else looks blown out. I think I was too frustrated with myself for not being able to figure things out that it never occured to me to step back and look at anything else. I was just focused on the flaw that I couldn't figure out. I really, REALLY love this set! I wouldn't even be trying it in 3DL if you hadn't taken the time and effort to put in all of those lights for your customers. I would have just defaulted to the Iray version because I understand that engine so much better.
KM... just sent you a PM
AWESOME!
thank you kindly for all the info.
@MatCreator Welcome to my laboratory. :)
I was trying to help someone in the new user contest and events thread figure out how to get rid of some specular noise on the lips in his/her render. @Shortcut has an amazing render happening. Here is the link to his/her post about the problem. I set up a render with the same model, Victoria 7, which I think is the first time I've rendered the new Vicky with just the defaults instead of characters based on her mesh. I was able to give some suggestions but I wasn't able to completely solve his/her problem. Hopefully, he/she will be able to play with it and get it solved.
However, I really liked my render which I think is different enough from Shortcut's that I decided to continue working on it. Shorcut's version is way better mine but I like how mine turned out. I ended up changing the skin to something different so Vicky doesn't have a default everything. I just couldn't completely get rid of the noise to my satisfaction. Admittedly, there is still some slight noise in my final image with the other skin but I can live with the end result.
Here is the image with the noise before I did anything. Maybe someone out there has some better suggestions than what I ended up doing to fix the problem.
Original:

I changed the Refraction Index to 2 and the Glossy Reflectivity to 0. I think the Glossy Reflectivity had more of an impact than the Refraction Index did. Finally, I played with the Crushed Blacks and the Burn Highlights in the Tone Mapping under the Render Settings Tab. I'm a big proponent for playing with Tone Mapping. It can really make a huge difference in the final image. I upped the Burn Highlights to .35 and the Crush Blacks to .30. I ended up with this image which showed some improvement but not really enough.
I would love to know if anyone has any better suggestions to get rid of the noise on the lips. If you do either post them here and I'll pass the info along or you can post suggestions directly to the Composition thread for this month's theme. Or at the very least, get it to the point where it blends in nicely. Anyway, I ended up changing the skin for my image and while there is some there in a slightly different place, it blends in a little better.
Here's my final render with the skin change, changes to the hair, and modified lighting:

Gallery Link
edit: added gallery link
The "noise" is reflection from the gloss and top coat from the lighting- if you copy the facial materials in the surface tab and paste it to the lips you'll have the same gloss/reflections from the skin to the lips. You can lower it further if you need by incriments using the Top Coat which is usually higher on the lips than anywhere else. Sometimes Top Coat and Gloss are both higher than the rest of the surfaces (barring eyes, teeth and mouth) to give that "She's just put on some lip gloss" look.
@DarwinsMishap Thanks! I'll forward that information on to Shortcut. I'll have to give that a try myself and see how I do when I get back this afternoon. I'm on my way out of the door here very shortly.
Yeah, we're going to be heading out today as well. Good luck, hope it works!
@DarwinsMishap I just read in the New User's Composition thread that Shortcut had some success with the tips both yours and mine. I think mostly your tips. He liked that last on on copying the other surfaces. His render shows a marked improvement with your advice. :)